More Monte Carlo Episodes

HorsePower Builds

Parts Used In This Episode

Federal-Mogul Corporation
Fel-pro performance cylinder head gaskets.
Lokar
Pedal pad covers for gas pedal, brake pedal and clutch pedal.
Nitrous Express
Conventional stage six plate system/contains jetting for 50-300 R.W.H.P. complete with 10 lb. bottle and lightning solenoids and supply line.
O'Reilly Auto Parts
Shifter boot with mounting plate.
Retrotek Speed
Smartshift system shifter with steering wheel mounted F1 paddles.
Stage 8 Locking Fasteners
Offering locking bolts for headers, oil pans, flywheels and many more applications.
Summit Racing
Crower hydraulic roller cam, comp cams roller lifters, Summit pushrods 7.90 length, Dart Pro 1 cylinder heads, Dart single plane intake, Summit 1.5 rocker arms.
Video Transcript

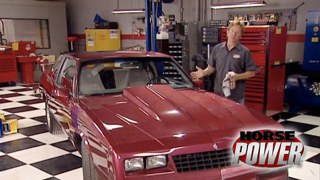
Well, are you ready to see how mighty we made the mighty Carlo? Well, today's the day, we're glad you joined us for it. Now, we had a lot of fun building this project using various performance parts on this G body. From the mid eighties,

we started the project with a nine inch rear end. We got from master power brakes.

We also upgraded the brakes all the way around

and beefed up the suspension with the Hotchkiss kit.

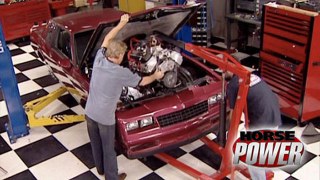
All that was to make way for a ZZ 502 crate engine

with long tube hooker headers to help it exhale.

But first we had to give it a manual clutch which we did with a set up from fed Anza

followed by a Lakewood bell housing

after a little massage and for fitment, we installed the Richmond five speed transmission

and bolted up a cross member from honest Charlie's

along with their five speed conversion pedal kit.

We also handled the exhaust thanks to flow master

and installed a GM accessory drive.

Last time we upgraded the fuel system with the Haley high flow fuel pump regulator and relay kit.

Plus to cool down that big block we attached a Hayden electric fan to a flex, a light radiator.

Finally, we decked out the dash for these MS D laser gauges. Now, before we can take the car out for a ride and throw it on the dyno Jet. Well, we got to get the carpet in the seats in

and modify this console by cutting out the center section

laying in a plate. And, well, you'll see

after securing the steel plate, we can take a measurement

then cut a hole in it for the shifter.

All right, to finish it up and dress it up a little bit. We added another plate

and this rubber boot, we got down the street at our o'reilly store. Let's see how it works.

All right, couple screws and this thing's in

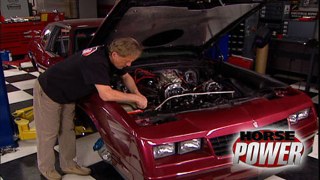
now, we swore we wouldn't do anything else to the interior, but I couldn't resist adding these cool billet pedal pads from low car for just a little dress up. We ran into a little bit of a clearance issue with the ac compressor in the hood. So, what we're gonna do is cut out a little area of this plate that'll allow the hood to shut all the way, but we're still gonna leave the plate there to protect the hood from a lot of unwanted heat.

I'm using a sharpie to mark around the compressor

before cutting out a square with a cut off wheel.

Then with the shield bolted back up. We're good to go

a good job fixing that hood. Now, I get the honor of firing this monster up.

All right, that thing sounds vicious.

All right. He got the honors of starting it up. I get the honors of driving it first. Get out. I'm taking this thing out on the streets.

Our first stop in this car was the closest alignment shop, which is a must. Anytime you make suspension upgrades

next, a sequence of stops and cool downs to bed in the new grapes.

So far so good. Now, I don't want to hammer it too much to wind up in a cow pasture, but I just got to get a little taste of that 502 S power.

I have to say this mighty Carlo handles and breaks just like we hoped it would. Now, I know it's making a lot of power at the rear tires, but I'm dying to find out exactly how much we'll have to head back to the shop to find out.

Yeah.

After securing the car on the

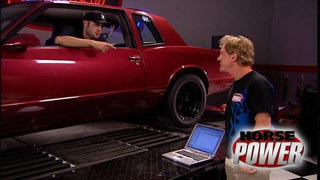
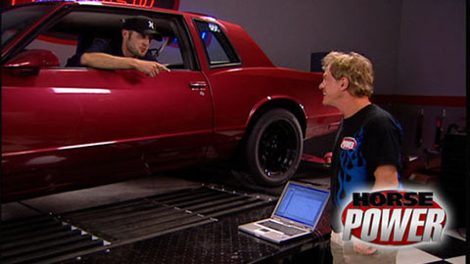
dyno Jet and a quick warm up, we'll be ready to see how much of that 502 power gets transferred to the rear wheels.

Hey, Mike, check this 513 ft pounds of torque and 421 horsepower. The rollers, man, that's really respectable. Especially considering the average power loss through the drive line using a manual transmission is 15 to 18%. Yeah, I'm no good at math, but I know that's mighty respectable. Well, next up, we put our other

dyno to work when we see how much bang for the buck, we get out of a Chevy small block top end kit.

Hey, welcome back. I guess it goes without saying that you want the most performance and power for your money, especially if you're building an engine for the street and strip. Well, a good place to start is a partial engine or a short block like this ZZ 383 from GM performance parts.

It's got a Ford steel crank and Hyper Eutectic pistons. And our goal today is to build a top end for this small block that gives us plenty of performance using parts that give us the most bang for our buck to get there. We're bolting on this parts combination from summit racing. Now, it includes these D

pro one aluminum cylinder heads with a 64 CC chamber and 2 15 CC intake runners. Now, they're equipped with stainless steel valves measuring in at 205 on the intake, 160 on the exhaust to top it off and keep the parts matching. We're using this dart single plane air gap style intake manifold.

The cam shaft in this combo comes from Crow.

It's a hydraulic roller with the duration of 236 intake 244 exhaust at 50 thousand's lift. Now, the kid also comes with these roller lifters from comp so are their push rods

and summit 15 roller rockers,

the carburetor. Well, that's your call and we'll show you what we come up with later.

You need to supply head gaskets like these we got from Fell Pro.

Now, with the heads in place, we can torque them down to 85 ft pounds. A little more than spec just in case we want to use some nitrous later.

Now with the lube on the lobes and oil in the journals, our cam shaft goes in next,

followed by a cam plate that replaced the cam button used on earlier Chevys.

Then we install a timing set straight up.

Next from the kit we can drop in the lifters,

followed by the lifter retaining plates,

then the retaining plate hold downs.

Now the push rods

then making sure the trunnion is flat side up, we can install the rocker arms.

Now, this single plane manifold we're using has a raised water crossover to insulate incoming air and extended runner dividers to equalize port lengths.

Finally, we can bolt on a set of valve covers.

By the way, buddy says the compression ratio should be about nine and a quarter to one in this motor which will run with 93 octane fuel. So what kind of car would you use to feed an engine combination like this? Well, 750 minimum,

850 might be overkill on the street. So we opted for a street of

770 with vacuum secondaries and a manual choke. Well, let's fire it up guys.

Here's what we got. 421 horsepower at 5700 RPM,

401 ft pounds of torque at 5300.

Now, in the past, we've compared those numbers to a baseline, but that's when we slopped out aftermarket parts for stock ones on a complete motor. This time, we just started with a short block

in any event. Let's see what we used, what we got and what it costs us to get there.

The combination was a pair of dart cylinder heads, dart single plane intake manifold,

rower,

hydraulic roller cam, comp lifters and summit push rides and rocker arms. Again, top horsepower was four 21 torque was 401 ft pounds price of everything.

$1969.95

earlier, Joe mentioned the possibility of putting this small block on nitrous and guess what's coming up next? That's right. We're putting this mighty mouse on the bottle and going for broke.

Hey, welcome back to the horsepower shop and a busy day here in the

dyno,

we just installed a top end kit on this ZZ 383 and made a little over 420 horsepower. Well, now it's time to take off the gloves, turn up the wick, pull out all the stops. I don't know how many more

shows I got to say we're gonna spray our way to more horsepower.

This is the very first time we've used our DTs dyno to test a nitrous motor. Ought to be pretty interesting.

And what we're using is a kit from Nitrous Express called the Hitman designed to fit most 4150 intake manifolds. Now, unlike similar setups, they have a spray bar. This one introduces nitrous and fuel through holes in this billet base plate.

Now, the solenoids are pretty interesting too with inlet outlet and even purge forts clearly marked. So there's no mistake.

Now, jets, we got them from 50 to 300 horsepower. Of course, we'll start with the 50.

Now, just like installing a nitrous kit in a car,

we can begin

with the bottle

in a car. We would install the bottle facing forward in the trunk

before attaching this nitrous line.

Next, the gasket and plate can go on the intake

before installing our 50 horse nitrous and fuel jets.

Now, we can bow down the carburetor,

ok. For wiring, we're going from the relay to this arming switch which should mount on the dash your car. Of course,

on to the activation switch

that gets mounted on the carb stud and it's activated

at full throttle.

Ok. Nitrous line is connected, our throttle plate is back in position

buddy. We're starting with a 50 horse jet. But how high can you go with a motor like this?

Well, with this motor, we have hyper uch

pistons. So we only gonna go 100 and 50. If we have force pistons, we could go higher. Ok. It's the pistons.

All right. Well, we don't want torching pistons. Let's find a switch 12 volt source and we'll be good to go. All right.

Wow. At 489.9 that 50 shot of nitrous gave us almost 69 horsepower.

Torque is now 496 which is an increase of 95. Now, bear in mind. Nitrous Express bases his jetting numbers on rear wheel horse power. So these are right on the money.

Next. We try the 100 horse jets

back the timing off one degree and make another run.

Almost 544 horse power. Still pretty much coinciding with the rear wheel numbers, torques now up to 563 ft pounds,

ok. Now the 150 horse jets

with another degree of timing out and our final run on the diamond

this time, we made 582 horse power, 603 ft pounds of torque.

That is a total increase of 100 61 horse power. 202 ft pounds of torque. Not bad for a little street strip, small block on pump gas.

And our bang for the buck combination obviously made a good foundation for all that nitrous. Well, coming up, we shamelessly reveal what happens when things don't go quite right here on horsepower.

Wherever we go, people are always asking us, when are you guys in the show some more goof

ups, you know, bloopers, the stuff that never makes it on the air. You know, I always tell people that we never mess up but, uh, nobody's buying that.

So, here's chad, our lustrous director behind all that mess who's been secretly saving some out takes in his final cut pro system. And he's got a sick sense of humor and hates being on camera too. Yeah.

So.

Oh,

that's right. You got it. We're putting the bottle to this Mighty Mouse and going for growth

care for work on the muscle car show.

Kinda looks like junk to me.

Get this. You can check them all out right here on Power block.com.

Frequent basis. You get this, you can check them all out right here on Power Block dot

Running a step header on your ride which borrows tech

they claim

you have power from idle up to 600 grand,

600 grand.

A lot of

way to feed this Ford flathead. But first

I forgot what I was gonna say.

I can't hear me. I can't hear anything.

Oh, wait a minute. There's the Beatles. Did he already have that out? If you could, you see him taking that out? I wanna see that coming out. I wanna see that looking up

here. That's where I am up here.

You don't get to see him much, but we get to see too much of him and sometimes he plays us. Oh,

no vacuums. Which vacuums? I don't like,

it's gonna make it run good. We gonna run into a little bit of a hesitation or slow climb through the RPM range.

Next we can complete the fuel small to be effective at all. Small. Huh? Tell your girlfriend that,

that does remind me that hit my mic had to have

small to be effective at all

to your girlfriend.

That does remind me of something though. I,

I remember

that right Bill

to be effective at all. Tell your girlfriend that

it

all right, got stuck in my pocket,

man. Why are we doing this? Well, speaking of things that didn't make the final edit, I remember one particular unplanned scene that will happen right here on the dyno Jet.

In fact, you might remember this historic Pontiac

Viero owned by the legendary Smokey Unu

Smokey had modified it for an experiment involving heating the fuel for more economy and horsepower.

What you didn't see was later when the new owner wanted to do a real

dyno

run.

Not knowing that Smokey Fierro was going to be a near smoky disaster.

Fortunately, only a few things like some heat shielding material and a wiring harness got damaged. Then there was a time my partner Joe, well, he got damaged with a capital D when he and Chuck Hansen had a little bar stool competition. Now they weren't drinking. They were actually drag racing, nitrous powered bar stools,

Joe who was in the left lane obviously had a little weight advantage and he took the win light on this round going for the best two out of three.

I think I caught you then

I think you did too. And when it came to the final, chuck red lighted and Joe, well, he got a little carried away celebrating.

The result was a pretty serious case of cuts and road rash, not to mention a little kneecap alteration

and taking it on the chin. Literally,

the bad news is he got a cracked helmet out of the deal. The good news is he didn't crack his head open.

The moral of the story, if you're going to fall off your bar stool, always wear a helmet.

The bolt stops here when it comes to fasteners for everything from headers to fly wheels. Stage eight lock and bolts are the ultimate insurance against damage caused by loosening bolts and fasteners. Now, their patented design uses a bolt retainer and spring clip to keep everything secure and tight.

Now they may take a little longer to install, but racers all over the place will tell you they're definitely worth the time and money.

Plus you can pick stage eight lock and fasteners and kits up at your local speed shops. A lot of formula one racers rely on paddle shifters for fine precision control of their automatic transmissions. Well, now you can enjoy the same precision performance and cool styling with this smart shift kit from retro

tech speed. You get things like this billet backlit keyboard,

main control box and this actuator that works with more than 20 automatic transmissions.

It installs in minutes with the included hardware and gives you hands free instant performance all for a price of about 1400 bucks.

Well, time to put this show in park, we'll see you next time with more horsepower.
Show Full Transcript