Engine Power Featured Projects

Engine Power Builds

Parts Used In This Episode

Summit Racing
Mahle PowerPak Piston and Ring Kit
Summit Racing
Scat Pro Comp I-Beam Connecting Rods
ARP
Head Bolts
CWT Industries
Multi-Bal 5500
Scat Crankshafts
Scat Series 9000 Cast Steel Crankshaft
Sunnen Products Company
Sunnen SV-15 Honing Machine

Episode Transcript

(Pat)>> You're watching Powernation!

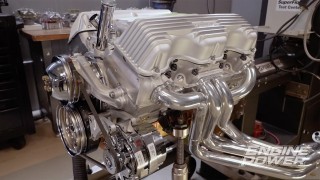
(Frankie)>> Today on Engine Power one of the least powerful small block Chevys puts up the fight of its life as we try and force it into becoming the stout hot rod engine we know it can be.

(Pat)>> We are finally doing a Chevy 305 small block build, and today we're getting this thing prepped for the high tech internals that will bring it up to modern standards. [ Music ]

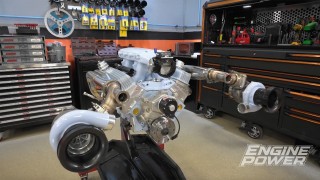
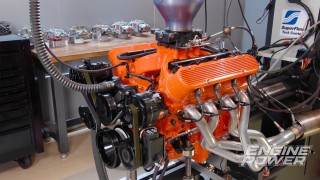
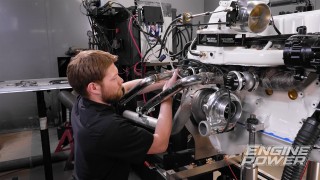
(Frankie)>> Today's episode of Engine Power is pretty special because we're doing a unique engine build that has been highly requested by you the viewers. The engine we have on the dyno has been used for some dyno testing in the past but we stuck it on the shelf for a couple of years and now it is coming back. It is a 305 cubic inch small block Chevy that we are actually going to do a build on. Now this one has a few modifications, but to see what we used this engine for in the past take a look at this. We used the engine to test several other easy but important changes to see how they affected power. Things like oil viscosity, air cleaners, hydraulic lifter adjustment, and even headers and intake manifolds. When it was all said and done the wimpy 305 produced 218 horsepower and 281-pound feet in its current configuration.

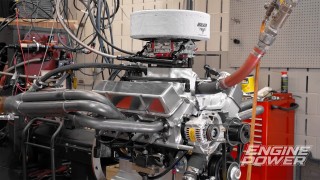
(Pat)>> Now that you're all caught up it's time for us to reestablish a baseline run for this. It's been in so many different configurations we have to start and see where we are. So with its stock exhaust manifolds, single plane intake, and an HP 750 Holley we're gonna make a few runs on pump gas just to see where we are.

(Frankie)>> So the last time we dyno'ed this engine we turned it from 2,500 to 5,000. This time we're gonna see if we can turn it even a little bit lower. So we're gonna go from 2,000 to 5,000. We've got it running, warmed up, and I think we're ready to go.

(Pat)>> Think that single plane and big carb will go down to 2,000?

(Frankie)>> I think it will. It is a little engine.

(Pat)>> We'll see what it has to offer. Hold on to something because it's gonna get spicy. [ engine revving ]

(Frankie)>> That means nothing's wrong with it.

(Pat)>> It has oil pressure. This engine has been used and abused. That's pretty okay!

(Frankie)>> 282.2-pound feet and 219 horse. That's right where it was before.

(Pat)>> It had headers on it before. That's kinda goofy. Oil pressure does go up, and how much air is going through this? 349 c-f-m at 5,000.

(Frankie)>> Not great but you know how you fix that?

(Pat)>> I know exactly how to fix it. One, you don't build a 305. Two, you have to really improve the induction. We put a little bit of new parts action in it and I think we're good.

(Frankie)>> Let's get her off and get her tore down.

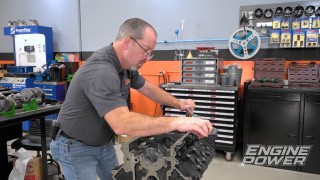
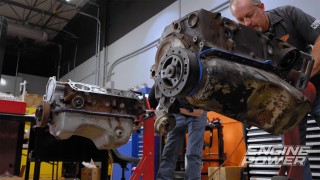
(Pat)>> Now that we've established our baseline runs it's time to get down to business, but keep in mind we really don't know what inside this engine. We've used it lots for testing intakes, carbs, oils, and whatnot, but we've never had the heads or the oil pan off of it. So we're gonna get this over in the teardown area and learn what's inside it together. After draining the oil and stripping off all of our aftermarket parts to save them for later we can really dig into this stock engine and see what we find. Even though a lot of these stock components aren't fit for our high performance build or are too wasted to be reused we'll keep everything organized and in order as it comes apart. Teardown is extremely important as it can tell you a lot about how any engine was assembled, maintenanced, and operated. This engine seemed to run just fine even though it had some increased blow-by, but sometimes you'll be surprised how bad an engine can be and still function well. It's always a gamble until you really strip it down and get into it. Now that the engine is all the way apart it's time to evaluate and see what we have, and quite honestly the more we look at it the worse it gets, starting with the crankshaft. Not only has it already been turned at 10-10, it has an excessive amount of wear and it has some damage to it. So it is beyond being polished and put back in. So we're gonna have to work on that. Also the main bearings are wasted. These have a bunch of trash that have run through them and they are very, very bad looking because they have a bunch of copper showing, and on the load side that's a bad thing. The lifters also have a bunch of wear on the bodies, which is kind of odd, but that is typical when an engine has a bunch of trash run through it or has been assembled dirty. All the way to the rod bearings themselves. The rod bearings look horrible but they have lost their crush. So you can move them around. That is a bad thing. That means this engine was running on borrowed time. The wrist pins are tight. This thing has a laundry list of problems, but that is okay because we have the parts to fix it. So we have a lot of work ahead of us. So we're gonna get cracking. Coming up, we put our 305 through the machining process, but before then we still have some teardown to do and address some things we didn't plan for.

(Pat)>> We are continuing on with the build up of our mighty small block Chevy 305, but before we stick this thing in the cleaner we noticed some disturbing things going on with the block. First off, where the top timing gear rides it is all chewed up. A groove has been worn behind the cam gear, and that is most certainly what's been putting all the material through the block, wrecking the bearings. Second off, this block has virtually no register on the main caps. These are supposed to go in with a nice snap, but these virtually have no register at all. That means this engine has been detonated, and that is a bad thing. Now both of these things are totally fixable, but to save time we have an alternative.

(Frankie)>> Another 305! Now these things are basically falling off trees here in the shop because quite frankly not a lot of people build them, but this one came out of another project, and is virtually the same as our first 305. We've already torn it down to the same position, and looking at this one it's gonna be way easier and quicker to use than our original one. Now it has its own problems, namely a broken bolt in the front of the engine that needs to be removed, a lot of oil deposits from lack of maintenance, and this engine has been overheated at some point in its life. So we're gonna need to fix all of that. The bores are 40 thousandths over just like our first one, but they are in better shape even though we found some broken top rings inside the engine. Now we've got to get this thing cleaned up and do a lot of block work before we can even put it in one of our machines. So we'll get it over out of the assembly area and get it started.

(Pat)>> Although this block is in better condition it still put up a fight when it came to stripping it down. Almost every pipe plug in the block refused to come out and had to be drilled out and extracted before we could get to work.

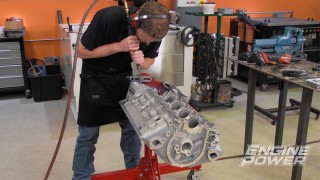
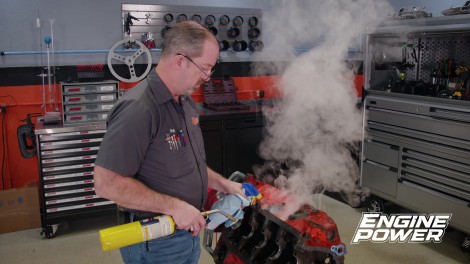
(Frankie)>> So we have all the plugs out of our block, and the first thing we're gonna do is try and clean it up a little bit. We have a wire wheel chucked into a quarter inch grinder, and this is what we found to be one of the easiest ways to break up a lot of the crud and knock off some of that loose paint. So we're gonna take it over the outside of the block and some of the inside, making sure to stay away from the precious machined surfaces like the decks and bores. So this will make it way easier when we go to clean the block, and then once we get this done we can start doing some actual block prep. Wearing protective eyewear and a shop apron is a must during this process since the tool tends to throw debris in all directions. You can use several different styles of wire wheel to get into all the nooks and crannies, and it does an excellent job of prepping the block surface. Since we will be painting this engine we aren't necessarily trying to remove all the paint since any that survives this will be stuck to the block for the long haul. We'll also take a cartridge roll and gently run it inside the core plug holes to clean up any corrosion that formed on the ceiling's surface. The next thing we're gonna tackle is that broken bolt in the front of the block. We want to get that out, and probably the least destructive way we can do that is we're gonna weld a nut to what's left of the bolt and that'll give us something to put a wrench on and put a lot of heat into the threads of the fastener. Hopefully it will break it loose and we can just spin it right out. [ welder crackling ] [ Music ] [ bleep ]

(Frankie)>> Alright so our first two attempts failed, welding the nut. [ drill humming ] [ torch hissing ]

(Frankie)>> And using the bolt extractor kit both of those did not work. So what we ended up doing was drill it out even farther to where we could just see the threads in the block but not damage them, and then we ran a three-eighths 16 tap through to dig all that broken bolt material out of the threads. So now those are good and healthy and we can move on to modification. Our first modification will be tapping the front of the oil galleries for threaded plugs that we can remove later on if we need to. Then we'll take a small hand file and deburr around the main saddle area knocking off any sharp edges. That can be followed by using a carbide burr on the rest of the surfaces of the block just to knock off those sharp edges, not removing a ton of material. Finally we'll go through and port all of the oil galleries in the block knocking off any sharp corners and smoothing them out to improve oil flow. Then with the block prep done we can throw it in the cleaner and get it washed.

(Pat)>> Coming up, we'll be honing in on making some horsepower with our 305 project.

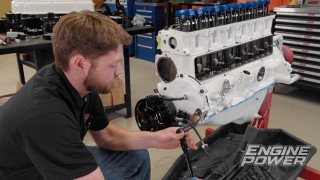
(Pat)>> The next thing on the agenda for our 305 is my favorite part of the machining process, the honing. We have it rigged up here in our Sunnen SV-15, and we're gonna take it out to a final bore size of 3.7960. That will give us the proper amount of skirt clearance on our new piston. One thing, it's important to have the piston when you can in-house when you are honing so you get an accurate result. So what we're gonna do is get our torque plate on, but first we have to put our gasket on. This is the same gasket, the same size, and the same thickness as the one we'll be using when it's final assembled. Now for those of you who are not familiar with what a torque plate is, it simulates on the block what a cylinder head does when it is bolted down. When a cylinder head is torqued down it makes a certain amount of distortion in the block, namely around the cylinders where the bolts are. What this does is it simulates that distortion because the bolts are coming out of the plate the same amount as what comes out of the back of the head. So we're gonna put this on, torque it just like we would on the block in the same sequence with the same torque spec, and we'll go from there. [ drill humming ] This is the first step at 30. The ARP head bolts are torqued in three stages to a final value of 70-pound feet just like during final assembly. The stones we're using are a 220-grit diamond. So that's gonna put our rough finish on it. We are almost, about five thousandths away from our final bore size. So this will get us out to where we need to be. Easing on. When the hone head dwells like that it detects a tight spot in the bore and it dwells there to straighten it out. Even though this block was roughed out and perfectly straight when we installed the torque plate it actually distorted the cylinder enough so it has to dwell to get the cylinder straight. Now we'll see how straight we are initially. Still have about three and a half thousandths to go, but the bore is really, really nice and straight, within a few ten thousandths of an inch. A little over two thousandths to go. [ Music ] With the cylinder straight and round we can continue to rough out the first cylinder to size, continually checking our work as we go. Three or four ten thousandths from final size but we're a little warm. So we're gonna call that one good for now, and we're gonna skip down to cylinder number five. We're staying away from the heat in this cylinder so we can have an accurate measurement on this cylinder itself. Once we set the machine to hone to this size we don't have to touch it. It'll hone each cylinder to the exact same size now. There's so much that goes into the hone process. I've been honing blocks for 30 years, and there's so many things that get taken for granted when people don't realize the precision and what goes into making an accurate cylinder. From the abrasive, this is your diamond abrasive. So they have a very specific way they fracture material off. So everything that is in this process is very important, from the oil to the abrasive, to the torque plate, to the way the block is hooked into the machine. It's all very important to get an accurate result. We're right near our final size. We are two ten thousandths away from our final bore size. So I went ahead and switched out our roughing stones to our finish stones. We're going from a 220-grit diamond to a 600-grit diamond. Not only will that take us to our final size, but it'll give us our proper surface structure for our ring finish. Before final honing each cylinder the 600 grit stones are dressed to ensure repeatable results. The hone head is set to a much lower load, and the cylinder receives 10 strokes to create our surface profile. We keep the pressure on the load meter between 10 and 12 percent so the final size and the final finish comes out where we want it. Believe it or not that's all it takes. Low amount of load and look at that. That splits the zero no matter where you are. [ Music ]

Nice and round! [ Music ] That is gorgeous! [ Music ] We are finished up. The block is on size. So now we're gonna get it cleaned up and measure our surface to see if it is proper for our ring pack. To measure the cylinder down to the millionths of an inch we'll use our Mitutoyo SJ-210 profilometer and analyze it with a digital metrology software from Total Seal. This is always the exciting part to see how well we did. Well that looks great! Now our surface structure looks great. So now all we have to do is get the torque plate off, get it in the cleaner, and get it cleaned up. It is ready for final assembly.

(Frankie)>> Up next, we take our new and improved rotating assembly and get it ready for smooth service in our CWT Balancer.

(Frankie)>> Now that we've got our block fully cleaned and ready for assembly we can start talking about some of the new parts we're gonna putting in this engine because we're not just gonna be refreshing it. We're gonna be bringing it up to today's standards, and that means incorporating some modern technology. A place where that's really important is the piston. So we went to Summit Racing and we got a Mahle Power Pack Piston and Ring Kit. This is a huge upgrade over the stock replacement ones that were in there. It's a 40-32 forging that has a flat top design with 3cc valve relief. So our compression ratio is definitely gonna be higher. It has hard anodizing over the entire surface, anti-scuff coating on the skirts, and it has a one millimeter, one millimeter, two millimeter ring pack in it, which is a huge upgrade over the bulldozer rings that were in the engine before. It's also a little bit lighter. So that will save us some reciprocating weight. It came with a set of steel rings, and precision machined 927 pins with 168 thousandths wall thickness. Those are gonna be connected to a set of Scat forged I-beam rods that are 5-700 long. Now we could have used these rods that came out of the 305 but they were pretty messed up and would take a lot of machine work to get those back to a usable condition. For just under $500 dollars you can get this set of rods, which has a few upgrades over the stock ones. Like we said, it's a forged I-beam design, which is way stronger, but it also has a bushed small end, it's precision machined, and it comes with an ARP 87-40 cap screw. So we have a great rod and a great fastener at a pretty good price. When we pulled out the two cranks out of both of our engines those were pretty wasted as well. And potentially you could have reused them, but they would have had to be cleaned, mag checked, and reground, which would probably cost you about $150 bucks. For just under $300 dollars you can get a Scat Series 9,000 cast steel crank, which is not only gonna be way stronger but is a new piece. So we're not looking for undersized bearings and we can get some performance bearings because it is a standard size. Now this one was previously used in a 350 project. So we will have to rebalance it, but the cranks are virtually the same. So it's gonna work in our 305. We'll get it laid into our CWT Multi-Bal 5,500. We already have our bob weights made. So we'll get those on, and then we can start spinning. To start we'll spin the crank at a safe 500 r-p-m to see how bad the imbalance really is. Once we get close to our tolerance we can increase the r-p-m to 750 for a more accurate reading. Alright, that's actually kind of expected because this crank was balanced before but for a 350. The imbalance is 180 degrees apart, which is good, and the imbalance is pretty high, 12.391 on the left and 13.714-ounce inch on the right. That's just because since it was balanced for a 350 our reciprocating weight is way lower now with that tiny little piston. So we'll just have to do some material removal and we can bring that in. Since we have to remove such a large amount of material from the counterweights on the crank the easiest way to do this is by turning down the counterweights in our MSC Vectrax 1660 lathe. With the crank securely mounted in the machine we can begin cutting material off, and with our tooling setup we are turning the crank at 130 r-p-m and removing 35 thousandths of an inch per cut. We'll use the automatic X-axis feed on the machine to create a uniform cut, and once we're finished we'll go over any sharp edges from the cutting process with a hand file. With several passes we'll remove 300 thousandths in total from the front and rear counterweights on the crankshaft. It is important to note that you are limited on material that you can remove since at a certain point the cutter will also intersect with the radius on the rod journal side, which we do not want to remove material from. This method is preferred for large weight removal since drilling the counterweights would require extremely large holes that potentially weaken the crankshaft. Once we remove the bulk of the material in the lathe we can tackle the imbalance on the edge of the counterweight with a grinder. We make sure to use shop towels to protect the journals and bob weights from the flying sparks. In this case we'll remove material in small increments, checking our work as we go since it is a lot easier to remove material than put it back. Something to think about is how important it is to thoroughly clean the crankshaft and its oil passageways after the balancing process when getting the crank prepped for assembly. That is actually very nice! We're gonna save that one as our last spin, just keeping it updated. We're at 0.121-ounce inch on the left and 0.138 on the right. So we're actually well under our tolerance that we were shooting for of 0.2, but also the imbalance is 184 degrees apart from each other. So almost directly opposite, which is great because when we look at forces on the center of the crank they actually cancel each other out. So on the center of the crank we're at 0.019-ounce inch. And speaking of forces, we can look at before and after for what the force was on the crank before we balanced it, which at 5,000 was 655 pounds, and now we've minimized that down at 5,000 to 7.093 pounds of force from that imbalance. So that's gonna be awesome for the life of the engine and the life of the rotating assembly as well. We're extremely happy with that. We're gonna get this off, get it cleaned, and get it ready to go in, but that's all the time we have for today. The next time you see this we're gonna be putting together our 305 and running it on the dyno.
Show Full Transcript