In This Episode
- 0:02 Introduction to Project Jungle Patrol
- 0:51 Building the Roll Cage
- 3:10 Cutting and Fitting the Doors
- 4:31 Accident and Recovery
- 4:50 Progress Update and Hatch Installation
- 5:47 Interior Paneling and Headliner Installation
- 8:06 Building and Installing Rear Seats
- 10:36 Cutting and Fitting the Rear Hatch
- 14:15 Carpet Installation and Final Touches
- 15:04 Showcasing a Custom 1946 Dodge Power Wagon
- 21:02 Conclusion and Future Plans
Video Transcript
You're watching Power Nation.
What's a little bit of a fire down there
over.
No, it's,
oh God, dude.
I was playing.
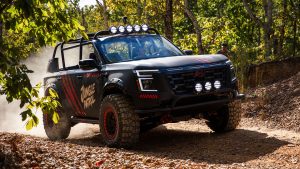
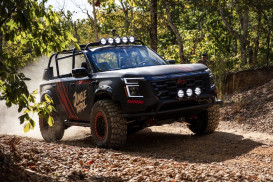
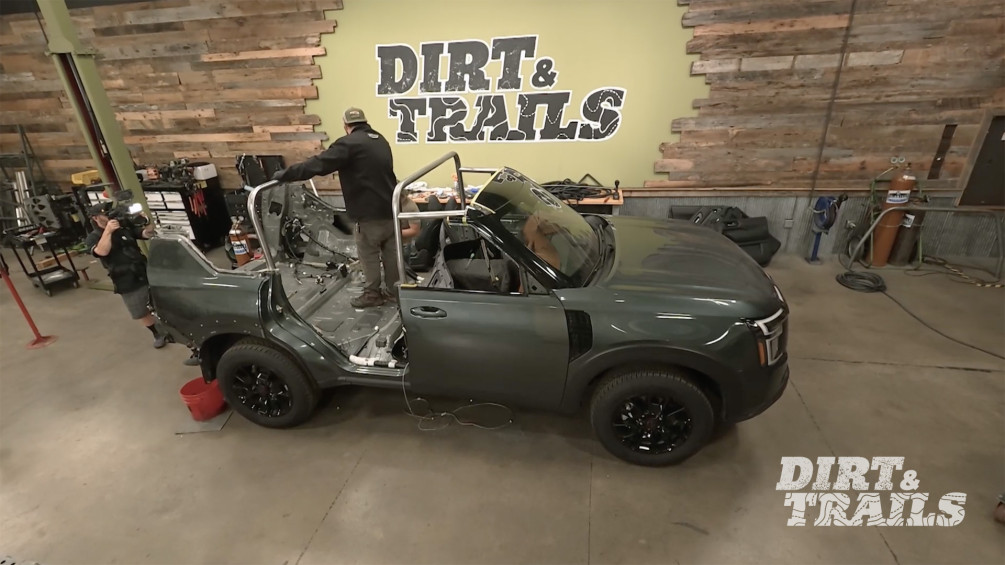
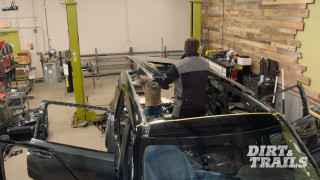
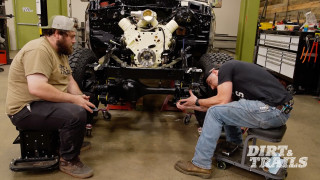
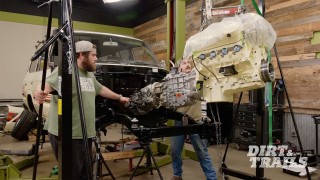
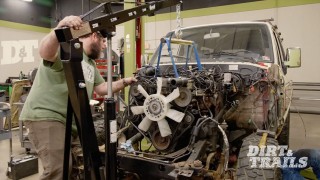
This week on Dirt and Trails we're back working on Project Jungle Patrol.
You guys have seen us tear it all down.
Now it's time to build it back up and first thing first,
start taking some measurements so we can put a cage up
and we'll start fabrication and installation of the rear seats.
And
I'll deal with the wiring and carpet,
plus we cut up the hatch.
Remember,
we took the roof off this brand new armada to turn it into a trail ready rig that's bound for seat.
You're gonna see this armada go through its biggest transformations yet
today on dirt and trails.
All right,
let's get started.
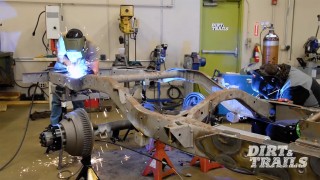
After figuring out the height and width of the first main hoop,
I cut a piece of 2-inch DOM tube to length.
Then I laid out my bend locations on the tube.
It is very important that you are precise with your measurements here as one small mistake can offset the location of a bend
and wind up ruining the entire tube.
This process is highly dependent on your measurements and precision.
After I got the hoop level and square to the body,
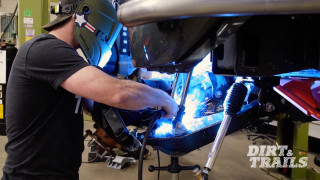
I began tacking the hoop to its base plates.
So we got the first main hoop for the B pillar section laid out, tacked in.
Everything's looking great.
Our next step from here is I'm going to cut the roof back,
cut the frame back of the window. We're going to cap everything out
so that way we can run a tube off of here to support the upper section of the windshield frame.
Once we have that tube brand tacked in, everything set up,
our next step is we're gonna come back here to the C pillar.
We're gonna start building out that hoop.
We will tie that together.
Then finally we're gonna go back to here to the D.
We're gonna tie that all in with another hoop and some straight tubing.
After leveling the windshield brace,
I tacked it in.
I bent the 2nd hoop and cleaned it up with a tube sander so everything would look uniform,
clean,
and ready for paint.
All right,
that's looking pretty good. I think we should get her tacked in now.
Hey Eric, you wanna give me a hand real quick?
Yeah, what's up?
So just
push this tube in a little bit.
Push it in,
yeah,
push where we,
where we,
and we're gonna go down,
go down
there we go.
Oh, that's it wow,
it's a, dude,
yeah,
no,
that fits beautifully, dude.
Yeah, we just gotta get her in position,
get it squared up, and
tack it up, and she'll be ready to go.
Looking good.
Thank you.
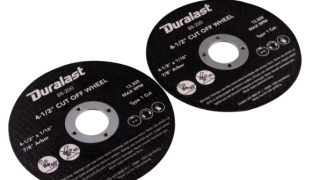
We're at a good point to start cutting everything back on these doors, and for that, we headed over to the AutoZone Pro website,
grabbed a ton of these Draast cut-off wheels.
It's a 1/16 inch mesh reinforced disc that gives you clean, efficient results.
While also maintaining precision and control for safe cutting.
And if you do wander off the line, you're not removing too much material.
Next,
Brandon plasma cut the plates for our 2nd hoop and got them polished up.
It took him a few love taps to get everything lined up.
But once it was in place,
he got that tacked in, followed by the base plates.
Now we can tie the first two hoops with a couple of straight tubes.
I cut them a bit long,
so I can lay out the notches.
That was gorgeous.
There we go.
And then tacked it on all sides.
While he was finishing boxing out that 2nd cage hoop,
Brandon accidentally caught the wheel well liner on fire on the backside of that panel.
Now,
this can happen to anybody and just like any good shop should,
we keep extinguishers handy for things like this.
With no damage done,
we're gonna get right back to work.
It's looking pretty good over here,
yeah,
man, it's coming out great. We're 2/3 of the way through, I would say we just gotta get that last hoop in and
before I do that, I really would like to get the hatch on just so we could visualize how everything's gonna go,
yeah,
because you still gotta cut it,
get it to match that,
and we gotta figure out how it's actually gonna attach without those upper mounts for the struts.
0, 100%.
So I'd say we go grab it.
Yeah,
let's do it.
All right, so I guess just kind of set it on that that latch center.
After test fitting the hatch, we decided to leave it out for the time being so we've got more access to get our seats installed.
Now the seats have to be installed so that we can get our final cage hoop in place and make sure that it's not gonna interfere with where anybody's gonna be sitting.
Coming up,
we fabricate and install our custom rear bench seats.
Moving right along on jungle patrol,
Brandon's getting our seating situation sorted out while I start getting some of our interior paneling put back together here in the front.
I've already got the door panels put back on both sides, as well as the trim and the weather stripping on the doors
and on the door frame.
Now, obviously we had to trim our weather stripping down to fit the fact that the entire door isn't there
or the door jam itself.
We've got it cut into place so that we can cap off both sides here,
keep everything looking nice and clean on our door,
and then eventually we'll do the same thing. Over here on the pillar.
Now,
moving in,
I've also got a chunk of our headliner here that's already been cut to fit in this new limited space that we've got of what's left of this roof,
and it's also gonna serve to store all the wire that ran along the roof line that no longer has a roof to live in.
You can see that this has actually got things looking pretty good. We've got the overhead console portion back together with all those electronics,
but we still have to find a way to cap this off and cover it all up so that it looks good.
What I've done.
Because I've went ahead and I made a template,
and I already had Brandon transfer that template into his CAD program and get this cut out on the plasma table,
and with a little bit of fitting,
we were left
with something that looks like this.
And you can see I've still got a little bit of fitting to do up in here to get it fitted nice and tight,
but for the most part
this is
pretty much what we're going for.
I've got just a little bit of fitting left to do on this,
and I've already made the template for the other side and passed that off to Brandon so that he can get the other one of these made up for me.
Why don't you guys go check in with him while I do this.
So we got our template over here from Eric.
What I did is I went ahead and took a picture of this template and I uploaded it into the computer,
put it into the CAD software, so I could go and take it and draw lines tracing out the physical template itself.
As you can see here, if we remove the picture,
we still have the lines.
At that point,
I measured out the width of this template on a fixed point such as this edge
and I matched everything to scale.
We wound up with this.
It's not exactly a 1 to 1 fit,
but we definitely should have enough room left over to get everything massaged, grinded, sanded, it should drop into place, no problem.
So, let's get this thing cut out.
I did some final trimming on the headliner.
And then on the plate that Brandon just made.
Did a test fit.
Followed by a little bit more trimming.
Then we got them both tacked into place to cover up our headliner.
Next we installed our rear interior panels back into place.
You know, I'm really surprised at how well these are fitting
over that cage up there.
Oh,
there's part of it.
All right,
so we got the first
base frame built out.
Now we're just gonna get it here in position. I'm using this apple box just to hold me at the height we need.
Now we're gonna go around,
start measuring for our legs so we can get those tacked onto the frame,
tacked to the floor, and we get everything welded out and locked into position.
I built a base frame for the seat out of some square tubing.
I started to measure the first leg and then cut some tubing the length.
Then I cut some base plates on the plasma table,
prep them.
And welded one out to the first leg.
I mocked up the first leg to mark out the floor to prepare for welding.
At this point, I tacked the leg to the frame.
And the floor
Next I tacked in the second leg.
Then attacked the last 3 legs into position.
Now it's on to the next bench.
With everything tacked into place, it was time to test out the benches and take a break.
Yep.
Yep.
Up next,
yep,
we're gonna cut the rear hatch up too.
We're back on Project Jungle Patrol,
we have the seats all fixed to the floor,
so the next big thing we need to do is close out the rear of the vehicle, and for that, we're gonna have to make a small little incision here along this line,
on the hatch.
The way I got this line was by putting the tail lights in
and utilizing that as an edge to mark,
so I know when I cut this and the tail lights go back in,
the taillights are gonna hide the edge,
giving it a really nice clean look.
So, let's get to cutting.
Some guys like to just go for it while others have a plan.
Here I'm doing a little of both.
At this point I flipped over the hatch to cut the backside.
Wow.
Next I mocked out the hatch.
And leveled out the top edge.
Then
I prep the top edge of the hatch for welding.
While Brandon's getting going on our hatch in the back,
I'm working on getting our carpet cut back in to keep everything looking nice and clean for when this thing gets done.
Now, you can see, I've already got this front section cut in around the front legs of our seat frames,
and it needs a little bit of fine tuning to be perfect, but it's good for right now.
So, we're ready to move on to our second section of carpet that needs to be cut in around our middle leg of each of these frames.
We've already got one side done, so we've just got one more cut to make before we can do our final test fitting.
So,
let's get to it.
All right. I've got our first cut lined up directly over top of where this cutout fits around that leg.
We're gonna make sure this is sitting even
to our other carpet.
Then we know that we're gonna cut to about the same spot on here because the legs are positioned in the same place on the floor.
We're gonna take our box knife.
Then right down the center of this tube.
Right.
Now that looks fairly even with where we're at on the other side.
So now, I'm gonna fold this up,
slip it around the legs, and then we'll figure out exactly how much of this needs to get cut out so that it can fit nice and clean to the floor.
Let's make sure we follow our cut line.
This will allow us to keep it a little bit straighter.
Now we can slip this around
just like the other side.
All right,
now that we've got that fitted around the leg,
we need to trim it up a little bit so that everything can lay flat.
All right.
We've got that fitted in pretty good on both sides, and once we get it slipped underneath the plastic panels on each side of the truck, it's gonna fit even tighter.
Now, I've still got a little bit of fine tuning left to do to make it fit perfect,
but I'm gonna go ahead and do that while you guys go check in with Brandon.
I traced the edge of the interior panel onto some sheet metal,
then I cut out the shape.
I mocked up the hatch and leveled out the top edge.
And I tacked it into place.
Not your sign in line.
Man, that is looking
good.
Mm,
well, we got the hatch on, we got the whole back end of this thing pretty much closed out. The last couple of things we need to do
is we're gonna get some plates in here to block out this section of the D pillar, as you would say,
and then we're gonna throw a plate up top,
tie all that stuff in, and that will give us a nice place to put this last main hoop so we can get the cage finished out.
Coming up,
the rear doors go back on,
plus a mean looking power wagon.
Oh yeah,
let's get this in there.
Yeah,
alright,
almost.
Alright,
that's not quite
now while Brandon's finishing up with this door,
there's a lot of different ways you can go with custom builds, and some people like to get a little bit fancier than what we're doing here, and we were lucky enough to get to check one of those out recently.
I think you guys are gonna love it just as much as we did.
Here's a double shot of diesel. Hold the phone,
sir.
Power Nation
under the hood
is brought to you by
Summit Racing Equipment.
Some builds have no intention of being subtle.
Oh my God.
James, thanks for bringing this thing in, man.
Hey brother,
man, pleasure.
Appreciate it, man.
This is
just
beautiful. I mean,
I, I gotta admit I did get a little bit of a sneak peek last week at SEMA. I saw it there on the floor, and
it
looks just as good here as it did here. I mean you,
man,
good lord,
for all our friends watching at home.
What is this thing?
So what this is, this is. 1946, uh, Dodge Power wagon. It started life as a single cab. They never made a four door.
So what we've done at Vince's Dream Machines, we have converted this truck from a single cab to a four door,
keeping the nostalgia,
the, the culture,
the look, the appearance of the truck, but making her Rusto mod, so inside she's luxury,
she's modern, she's got all the conveniences of a new car,
man.
As soon as you open the hood, you've got this chrome support bar here leading into, you know, you got the air filter with the chrome,
chrome tubing for the turbo piping, I mean,
It's,
is there anything really special done to this thing?
This motor was done by Choke Performance,
so it is a crate 5.924 valve common rail.
Um, she's got all performance parts.
It has been tuned,
so she's right out on street mode right now,
about 400 horsepower, 900 pounds of torque.
And if we decided we want to get excited,
we turn her up to performance mode.
She's around 500 horsepower and 1100 pounds of torque, man.
I think it'd be a lot easier to believe you even more
if I got to feel it.
Brother, let's do it, man.
Let's do it.
First impressions,
far smoother than I ever would have expected for something this age. Now I know
obviously everything on this truck is done
to the absolute best it can be done,
but you still wouldn't expect something this old to run,
drive and ride
even close to as well as this thing.
I mean, it's about as close as you can get to a new,
you know, Escalade,
uh, as far as comfort and feature, but yet still having the, the look of the original power wagon, the feel of the original power wagon,
but modern day performance, modern day, you know, reliability,
drive, suspension,
everything like that.
Reliability wise, it doesn't get much better than one of these things in stock form,
but you know, you get into the nitty gritty of it as far as actually
having it be a drivable vehicle in today's world.
Yeah, you're, you're running into some issues with
stuff underneath, and I think you,
you made sure to cover.
All of that with this one, I mean, it's just,
it's all around, just a great drive.
I had it out the other day, 70,
77 miles an hour,
1600 RPMs, man,
AC going,
sound system going,
and just having a blast.
I mean, it's truly a very fun
and enjoyable ride.
You, you don't have to buy a new vehicle to get all the fancy features you want.
I mean, absolutely not.
This is parts and components that anybody can get.
I mean, it's, it's not like just it's a privilege, it's
anybody can get it and we've taken their component.
And we've built,
you know, what we consider one of the baddest ass trucks you can build.
Well,
as somebody who has
put eyes on a lot of trucks, a lot of custom builds from pretty much every era you can think of,
I, I'd say you hit the nail on the head when you say that this is one of the most badass ones out there.
And now you said this pushes what,
around
400 horsepower the that we're in. She's running around 500, 1100 pounds of torque.
You can't put that kind of power under the hood of something without trying it out,
right?
Got to try it, brother.
Oh
man,
you can feel it when it kicks it in.
It wants to,
it wants to,
it's,
it wants to push down and grab. I mean,
that's almost a little scary. It is a little bit.
I mean,
the steering and suspension wasn't so good, that,
that would be a little scary in this thing.
9100 pounds,
man.
Pure muscle. It's Patriot, man. It's, it's what we were built off of.
And I mean that's, that's another thing I absolutely love about the Power wagon name,
especially the first gens. These were directly derived from a military vehicle.
Correct, yes,
and this, this action particular one,
she is the first one after the war,
so when they just released it back to civilian sale,
and they were coded as a WDX, it's the only series. That was coded 47 and up changed model codes, but this one's actually coded underneath the military code WDX.
You guys left the original VIN tag on this doorjamb over here.
Yes, the original door tag is back on this truck
just to keep her history and her legacy going forward. I mean,
we're very stoked to see the future plans for her and what she has in store and
and to be part of it.
Now that power wagon was an absolute blast to drive and obviously it represents a very different part of the spectrum of full custom builds than our armada here.
Now speaking of our armada, I think Brandon's got this door just about ready to go.
Oh yeah,
I'm stoked the way these seats wound up, so now we can just leave this door open. We don't need to weld it shut and just getting in and out is gonna be so much easier.
That, yeah,
definitely, and that's gonna save us some time, which is good because SEA's coming up quick and uh
it's about that time.
So you wanna get out of here? Let's do it.
Hey,
how are you doing up there?
Oh,
sorry,
sorry,
sorry,
I was,
I was just,
you know, it was a parade.
Aren't you
supposed to start it?
Hey, how's it going?
You know,
brother,
we're here. We got this car.
We got this cage. We got this going.
I don't even know.
I don't know where to go from there.
Alright,
I think at this point we're so quick to start taking your clothes off.
Show Full Transcript
What's a little bit of a fire down there
over.
No, it's,
oh God, dude.
I was playing.
This week on Dirt and Trails we're back working on Project Jungle Patrol.
You guys have seen us tear it all down.
Now it's time to build it back up and first thing first,
start taking some measurements so we can put a cage up
and we'll start fabrication and installation of the rear seats.
And
I'll deal with the wiring and carpet,
plus we cut up the hatch.
Remember,
we took the roof off this brand new armada to turn it into a trail ready rig that's bound for seat.
You're gonna see this armada go through its biggest transformations yet
today on dirt and trails.
All right,
let's get started.
After figuring out the height and width of the first main hoop,
I cut a piece of 2-inch DOM tube to length.
Then I laid out my bend locations on the tube.
It is very important that you are precise with your measurements here as one small mistake can offset the location of a bend
and wind up ruining the entire tube.
This process is highly dependent on your measurements and precision.
After I got the hoop level and square to the body,
I began tacking the hoop to its base plates.
So we got the first main hoop for the B pillar section laid out, tacked in.
Everything's looking great.
Our next step from here is I'm going to cut the roof back,
cut the frame back of the window. We're going to cap everything out
so that way we can run a tube off of here to support the upper section of the windshield frame.
Once we have that tube brand tacked in, everything set up,
our next step is we're gonna come back here to the C pillar.
We're gonna start building out that hoop.
We will tie that together.
Then finally we're gonna go back to here to the D.
We're gonna tie that all in with another hoop and some straight tubing.
After leveling the windshield brace,
I tacked it in.
I bent the 2nd hoop and cleaned it up with a tube sander so everything would look uniform,
clean,
and ready for paint.
All right,
that's looking pretty good. I think we should get her tacked in now.
Hey Eric, you wanna give me a hand real quick?
Yeah, what's up?
So just
push this tube in a little bit.
Push it in,
yeah,
push where we,
where we,
and we're gonna go down,
go down
there we go.
Oh, that's it wow,
it's a, dude,
yeah,
no,
that fits beautifully, dude.
Yeah, we just gotta get her in position,
get it squared up, and
tack it up, and she'll be ready to go.
Looking good.
Thank you.
We're at a good point to start cutting everything back on these doors, and for that, we headed over to the AutoZone Pro website,
grabbed a ton of these Draast cut-off wheels.
It's a 1/16 inch mesh reinforced disc that gives you clean, efficient results.
While also maintaining precision and control for safe cutting.
And if you do wander off the line, you're not removing too much material.
Next,
Brandon plasma cut the plates for our 2nd hoop and got them polished up.
It took him a few love taps to get everything lined up.
But once it was in place,
he got that tacked in, followed by the base plates.
Now we can tie the first two hoops with a couple of straight tubes.
I cut them a bit long,
so I can lay out the notches.
That was gorgeous.
There we go.
And then tacked it on all sides.
While he was finishing boxing out that 2nd cage hoop,
Brandon accidentally caught the wheel well liner on fire on the backside of that panel.
Now,
this can happen to anybody and just like any good shop should,
we keep extinguishers handy for things like this.
With no damage done,
we're gonna get right back to work.
It's looking pretty good over here,
yeah,
man, it's coming out great. We're 2/3 of the way through, I would say we just gotta get that last hoop in and
before I do that, I really would like to get the hatch on just so we could visualize how everything's gonna go,
yeah,
because you still gotta cut it,
get it to match that,
and we gotta figure out how it's actually gonna attach without those upper mounts for the struts.
0, 100%.
So I'd say we go grab it.
Yeah,
let's do it.
All right, so I guess just kind of set it on that that latch center.
After test fitting the hatch, we decided to leave it out for the time being so we've got more access to get our seats installed.
Now the seats have to be installed so that we can get our final cage hoop in place and make sure that it's not gonna interfere with where anybody's gonna be sitting.
Coming up,
we fabricate and install our custom rear bench seats.
Moving right along on jungle patrol,
Brandon's getting our seating situation sorted out while I start getting some of our interior paneling put back together here in the front.
I've already got the door panels put back on both sides, as well as the trim and the weather stripping on the doors
and on the door frame.
Now, obviously we had to trim our weather stripping down to fit the fact that the entire door isn't there
or the door jam itself.
We've got it cut into place so that we can cap off both sides here,
keep everything looking nice and clean on our door,
and then eventually we'll do the same thing. Over here on the pillar.
Now,
moving in,
I've also got a chunk of our headliner here that's already been cut to fit in this new limited space that we've got of what's left of this roof,
and it's also gonna serve to store all the wire that ran along the roof line that no longer has a roof to live in.
You can see that this has actually got things looking pretty good. We've got the overhead console portion back together with all those electronics,
but we still have to find a way to cap this off and cover it all up so that it looks good.
What I've done.
Because I've went ahead and I made a template,
and I already had Brandon transfer that template into his CAD program and get this cut out on the plasma table,
and with a little bit of fitting,
we were left
with something that looks like this.
And you can see I've still got a little bit of fitting to do up in here to get it fitted nice and tight,
but for the most part
this is
pretty much what we're going for.
I've got just a little bit of fitting left to do on this,
and I've already made the template for the other side and passed that off to Brandon so that he can get the other one of these made up for me.
Why don't you guys go check in with him while I do this.
So we got our template over here from Eric.
What I did is I went ahead and took a picture of this template and I uploaded it into the computer,
put it into the CAD software, so I could go and take it and draw lines tracing out the physical template itself.
As you can see here, if we remove the picture,
we still have the lines.
At that point,
I measured out the width of this template on a fixed point such as this edge
and I matched everything to scale.
We wound up with this.
It's not exactly a 1 to 1 fit,
but we definitely should have enough room left over to get everything massaged, grinded, sanded, it should drop into place, no problem.
So, let's get this thing cut out.
I did some final trimming on the headliner.
And then on the plate that Brandon just made.
Did a test fit.
Followed by a little bit more trimming.
Then we got them both tacked into place to cover up our headliner.
Next we installed our rear interior panels back into place.
You know, I'm really surprised at how well these are fitting
over that cage up there.
Oh,
there's part of it.
All right,
so we got the first
base frame built out.
Now we're just gonna get it here in position. I'm using this apple box just to hold me at the height we need.
Now we're gonna go around,
start measuring for our legs so we can get those tacked onto the frame,
tacked to the floor, and we get everything welded out and locked into position.
I built a base frame for the seat out of some square tubing.
I started to measure the first leg and then cut some tubing the length.
Then I cut some base plates on the plasma table,
prep them.
And welded one out to the first leg.
I mocked up the first leg to mark out the floor to prepare for welding.
At this point, I tacked the leg to the frame.
And the floor
Next I tacked in the second leg.
Then attacked the last 3 legs into position.
Now it's on to the next bench.
With everything tacked into place, it was time to test out the benches and take a break.
Yep.
Yep.
Up next,
yep,
we're gonna cut the rear hatch up too.
We're back on Project Jungle Patrol,
we have the seats all fixed to the floor,
so the next big thing we need to do is close out the rear of the vehicle, and for that, we're gonna have to make a small little incision here along this line,
on the hatch.
The way I got this line was by putting the tail lights in
and utilizing that as an edge to mark,
so I know when I cut this and the tail lights go back in,
the taillights are gonna hide the edge,
giving it a really nice clean look.
So, let's get to cutting.
Some guys like to just go for it while others have a plan.
Here I'm doing a little of both.
At this point I flipped over the hatch to cut the backside.
Wow.
Next I mocked out the hatch.
And leveled out the top edge.
Then
I prep the top edge of the hatch for welding.
While Brandon's getting going on our hatch in the back,
I'm working on getting our carpet cut back in to keep everything looking nice and clean for when this thing gets done.
Now, you can see, I've already got this front section cut in around the front legs of our seat frames,
and it needs a little bit of fine tuning to be perfect, but it's good for right now.
So, we're ready to move on to our second section of carpet that needs to be cut in around our middle leg of each of these frames.
We've already got one side done, so we've just got one more cut to make before we can do our final test fitting.
So,
let's get to it.
All right. I've got our first cut lined up directly over top of where this cutout fits around that leg.
We're gonna make sure this is sitting even
to our other carpet.
Then we know that we're gonna cut to about the same spot on here because the legs are positioned in the same place on the floor.
We're gonna take our box knife.
Then right down the center of this tube.
Right.
Now that looks fairly even with where we're at on the other side.
So now, I'm gonna fold this up,
slip it around the legs, and then we'll figure out exactly how much of this needs to get cut out so that it can fit nice and clean to the floor.
Let's make sure we follow our cut line.
This will allow us to keep it a little bit straighter.
Now we can slip this around
just like the other side.
All right,
now that we've got that fitted around the leg,
we need to trim it up a little bit so that everything can lay flat.
All right.
We've got that fitted in pretty good on both sides, and once we get it slipped underneath the plastic panels on each side of the truck, it's gonna fit even tighter.
Now, I've still got a little bit of fine tuning left to do to make it fit perfect,
but I'm gonna go ahead and do that while you guys go check in with Brandon.
I traced the edge of the interior panel onto some sheet metal,
then I cut out the shape.
I mocked up the hatch and leveled out the top edge.
And I tacked it into place.
Not your sign in line.
Man, that is looking
good.
Mm,
well, we got the hatch on, we got the whole back end of this thing pretty much closed out. The last couple of things we need to do
is we're gonna get some plates in here to block out this section of the D pillar, as you would say,
and then we're gonna throw a plate up top,
tie all that stuff in, and that will give us a nice place to put this last main hoop so we can get the cage finished out.
Coming up,
the rear doors go back on,
plus a mean looking power wagon.
Oh yeah,
let's get this in there.
Yeah,
alright,
almost.
Alright,
that's not quite
now while Brandon's finishing up with this door,
there's a lot of different ways you can go with custom builds, and some people like to get a little bit fancier than what we're doing here, and we were lucky enough to get to check one of those out recently.
I think you guys are gonna love it just as much as we did.
Here's a double shot of diesel. Hold the phone,
sir.
Power Nation
under the hood
is brought to you by
Summit Racing Equipment.
Some builds have no intention of being subtle.
Oh my God.
James, thanks for bringing this thing in, man.
Hey brother,
man, pleasure.
Appreciate it, man.
This is
just
beautiful. I mean,
I, I gotta admit I did get a little bit of a sneak peek last week at SEMA. I saw it there on the floor, and
it
looks just as good here as it did here. I mean you,
man,
good lord,
for all our friends watching at home.
What is this thing?
So what this is, this is. 1946, uh, Dodge Power wagon. It started life as a single cab. They never made a four door.
So what we've done at Vince's Dream Machines, we have converted this truck from a single cab to a four door,
keeping the nostalgia,
the, the culture,
the look, the appearance of the truck, but making her Rusto mod, so inside she's luxury,
she's modern, she's got all the conveniences of a new car,
man.
As soon as you open the hood, you've got this chrome support bar here leading into, you know, you got the air filter with the chrome,
chrome tubing for the turbo piping, I mean,
It's,
is there anything really special done to this thing?
This motor was done by Choke Performance,
so it is a crate 5.924 valve common rail.
Um, she's got all performance parts.
It has been tuned,
so she's right out on street mode right now,
about 400 horsepower, 900 pounds of torque.
And if we decided we want to get excited,
we turn her up to performance mode.
She's around 500 horsepower and 1100 pounds of torque, man.
I think it'd be a lot easier to believe you even more
if I got to feel it.
Brother, let's do it, man.
Let's do it.
First impressions,
far smoother than I ever would have expected for something this age. Now I know
obviously everything on this truck is done
to the absolute best it can be done,
but you still wouldn't expect something this old to run,
drive and ride
even close to as well as this thing.
I mean, it's about as close as you can get to a new,
you know, Escalade,
uh, as far as comfort and feature, but yet still having the, the look of the original power wagon, the feel of the original power wagon,
but modern day performance, modern day, you know, reliability,
drive, suspension,
everything like that.
Reliability wise, it doesn't get much better than one of these things in stock form,
but you know, you get into the nitty gritty of it as far as actually
having it be a drivable vehicle in today's world.
Yeah, you're, you're running into some issues with
stuff underneath, and I think you,
you made sure to cover.
All of that with this one, I mean, it's just,
it's all around, just a great drive.
I had it out the other day, 70,
77 miles an hour,
1600 RPMs, man,
AC going,
sound system going,
and just having a blast.
I mean, it's truly a very fun
and enjoyable ride.
You, you don't have to buy a new vehicle to get all the fancy features you want.
I mean, absolutely not.
This is parts and components that anybody can get.
I mean, it's, it's not like just it's a privilege, it's
anybody can get it and we've taken their component.
And we've built,
you know, what we consider one of the baddest ass trucks you can build.
Well,
as somebody who has
put eyes on a lot of trucks, a lot of custom builds from pretty much every era you can think of,
I, I'd say you hit the nail on the head when you say that this is one of the most badass ones out there.
And now you said this pushes what,
around
400 horsepower the that we're in. She's running around 500, 1100 pounds of torque.
You can't put that kind of power under the hood of something without trying it out,
right?
Got to try it, brother.
Oh
man,
you can feel it when it kicks it in.
It wants to,
it wants to,
it's,
it wants to push down and grab. I mean,
that's almost a little scary. It is a little bit.
I mean,
the steering and suspension wasn't so good, that,
that would be a little scary in this thing.
9100 pounds,
man.
Pure muscle. It's Patriot, man. It's, it's what we were built off of.
And I mean that's, that's another thing I absolutely love about the Power wagon name,
especially the first gens. These were directly derived from a military vehicle.
Correct, yes,
and this, this action particular one,
she is the first one after the war,
so when they just released it back to civilian sale,
and they were coded as a WDX, it's the only series. That was coded 47 and up changed model codes, but this one's actually coded underneath the military code WDX.
You guys left the original VIN tag on this doorjamb over here.
Yes, the original door tag is back on this truck
just to keep her history and her legacy going forward. I mean,
we're very stoked to see the future plans for her and what she has in store and
and to be part of it.
Now that power wagon was an absolute blast to drive and obviously it represents a very different part of the spectrum of full custom builds than our armada here.
Now speaking of our armada, I think Brandon's got this door just about ready to go.
Oh yeah,
I'm stoked the way these seats wound up, so now we can just leave this door open. We don't need to weld it shut and just getting in and out is gonna be so much easier.
That, yeah,
definitely, and that's gonna save us some time, which is good because SEA's coming up quick and uh
it's about that time.
So you wanna get out of here? Let's do it.
Hey,
how are you doing up there?
Oh,
sorry,
sorry,
sorry,
I was,
I was just,
you know, it was a parade.
Aren't you
supposed to start it?
Hey, how's it going?
You know,
brother,
we're here. We got this car.
We got this cage. We got this going.
I don't even know.
I don't know where to go from there.
Alright,
I think at this point we're so quick to start taking your clothes off.