In This Episode
- 0:02 Introduction to the build and tasks ahead
- 0:48 Working on the exhaust system
- 3:01 Designing and fabricating new suspension hangers
- 6:00 Mocking up springs and adjusting suspension setup
- 7:11 Preparing the frame for welding new components
- 9:00 Welding gussets onto hangers and installing spring perches
- 14:08 Weld-off competition to finish welding tasks
- 16:30 Installing wheels and tires, and testing the vehicle
- 20:46 Final assembly and body work
Video Transcript
You're watching Power Nation.
Today on Dirt and Trails, our M715G Kaiser that is known as the Spartan is back again, and we are finally ready to get this thing rolling, but we got a ton of work to do to get there.
Brandon, what's on deck for today?
So first thing first,
we're gonna tackle this exhaust,
get this whole system done,
and we got a lot of fun stuff to do on the body,
especially on that back.
Panel.
The last thing we gotta worry about is getting all the rear suspension sorted so we can get this thing rolling on all fours.
Got a lot of fabric this time around, so we might have to get you behind a torch. What do you say?
Yeah, I might be able to do that. I might know a thing or two about welding,
but
we got our work cut out for us today.
So let's get to it. Let's get to it.
All right,
so next thing we need to take care of on this build is we need to get an exhaust going.
First thing first, I'm gonna take some measurements off this flange just so we can match up a flange to it.
We're gonna check with the outlet sizes so we can get the right tubing.
I'm thinking of coming down with a couple 4-fives and coming straight through this drive shaft hole,
not utilizing anymore, so we might as well use it for something.
We're gonna come straight across here past the tea case,
and in this nice big open area we're gonna be able to put a muffler.
Got a lot of room for different support via a hanger.
So it should be pretty good in this home
and then the last thing we're gonna do is a nice little turn down right here.
No need to go straight out the back of the truck on this one we're gonna keep it nice and simple.
Let's get to it.
So we got the front section of the exhaust all welded out and fit up.
I went ahead and started building out the rear section,
so the next step is to mount all this up to make sure everything lays and lands exactly where we want it to be.
So let's go ahead and do that.
Everything's looking like it's gonna land in the right spot that we want it to.
So now we're gonna go ahead and take this off and finish welding everything out.
All right,
so now that all the fabrication and welding is done on this exhaust here,
last thing we need to do is mount a clamp up.
She'll be ready to fire up.
Dang man, you got this frame looking good, but you see what just came in?
Oh,
springs and shackles. That is perfect timing because that's some of what we need to start figuring out exactly what the suspension is gonna look like going forward.
You got a game plan or what are you thinking?
Kind of. So
mostly
we're gonna need new hangers. That's the big thing here because these old ones on the inside,
all four of them, yeah,
yeah,
that bad.
What do you think about us,
you know,
designing something up, just some hangers.
I mean, I was planning on maybe doing like a junkyard run or finding something offline that might fit,
but
I think custom would definitely be the way to go because that's gonna give us a lot more flexibility.
Plus,
it might save us some time because I think we could keep those perches on the axle side,
not have to worry about moving them at all.
I mean, that would be great. Yeah, that would be awesome. All I gotta do is grab a couple of measurements off these guys,
head over to the computer, and I'm sure we could get something figured out.
All right,
perfect. So while you do that, I'll finish up our prep work here so that once the parts are ready, we can just get to welding.
Sounds great.
All right,
so now we got the springs over here close to the computer.
We got our measurements done,
got our CAD software open,
so it's time to get everything going.
I went ahead and I made this little 1/4 inch base pad for us to start off of,
so we just gotta bring a couple flanges up at the right dimensions we need
and punch a couple holes. We'll get everything going right now.
First thing first,
let's get these fallangees going.
We know we need to come up about 3.5 inches,
so we're gonna start there.
That's looking pretty good.
The next thing we need to do
is get this hole about 1 inch down from the top edge,
so we're gonna mark that out right now.
I'm gonna go 1 inch down.
We know these holes are about 9/16.
I'm gonna give it a little bit of breathing room, so we know that the bolt's gonna go in and we're not gonna have any tight tolerance issues.
Now we need to punch the hole straight through.
Looks good.
The last thing I wanna do is go ahead and round these corners off just so they're not sharp.
No one's getting caught on them or cut up.
So we're gonna go into all four corners here.
Put a little filet on them.
It's looking pretty good.
I think the last thing I would maybe do is go ahead and put a little gusset on top,
but I think I'm gonna get these 3D printed so we can get over to the frame, mock everything up,
make sure everything's looking the way we want it and fitting the way we want it,
and we can go ahead and get these sent out to Send Cut Send so they can cut them out for us and bend them up.
We'll weld them on the frame and everything should be good to go.
Coming up,
the boys make a game plan for the rear suspension.
Oh,
what do we have here?
While Brandon was getting some design work done and getting our 3D mock-up parts printed,
well, I was over here getting started mocking up our springs to see exactly what's gonna work to get this rear suspension functional.
Now,
for our front hanger, we could actually set it in there
and we would need to drill a hole.
It's very close to the top of that rail, so it could be an issue,
but we could probably make it work if we had to.
The bigger issue comes in, in the rear
when we realized that this shackle
is not landing where we need it to.
This isn't gonna work,
but I think I've got an idea for something that will.
So,
what this is, is a spring under setup.
We've taken our leaf spring from our perch up here on the outside of the frame rail,
moved it underneath, and put it in line.
In the rear here,
it's just gonna go right in like that.
And of course, we still have to finalize our axle placement. So there's gonna be a little bit of adjustment still to be made.
But
we'll move to the front and show you how this is gonna work up here.
Get a bolt in there.
And now,
with all of that in place,
you can see that
it's actually lined up pretty good.
But now that we have a plan and we've got an idea of exactly what's gonna happen here,
I think it's time we get these plans sent off to Send Cut Send,
get some metal parts made,
and we can actually get to work on this thing.
Oh,
what do we have here?
Parts from Saint Casen just showed up.
Oh,
very nice. All right,
so
what exactly are we looking at here? That looks like our spring hangers, right?
Yep.
So you got the 4 spring hangers. We got our gusset plates for the spring hangers,
and then these are gonna be our backing plates that go on the frame side, so we have a little bit more strength.
While Brandon gets going on our leaf spring hangers,
I'm gonna do the last bit of prep work we've got back here so that we can actually get started welding everything on.
So, we've got a few different places we're gonna be working on to get this done.
It's gonna be on the bottom side of our frame rails, everywhere that we're gonna be adding our new hangers,
as well as on the inside in the same four positions where we're gonna add some boxing to help make up for the extra force being added into a different part of this frame.
So,
now that all of our cleanup is done, I've got all the rust and dirt and everything cleaned off,
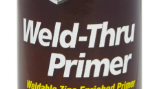
it is just about ready for us to spray this POR 15 weld-through primer.
Now, this is gonna help with heat control, distortion, splatter,
and it's gonna make sure that both of the surfaces here on the frame
and on the backside of the pieces that we're putting on are not going to be able to rust in between here,
which is what actually caused a lot of the issues we've had to fix on this frame in the first place.
So,
we're gonna take some of this,
we're gonna get it sprayed everywhere that we're gonna be welding, and then of course, a little bit past, just to keep everything well protected.
So,
let's get going.
m
All right.
So now that we've got our first coat on, we're gonna give this 10 to 15 minutes to flash off,
put a second coat on, make sure we've got complete coverage,
and once it dries,
we're ready to get welded.
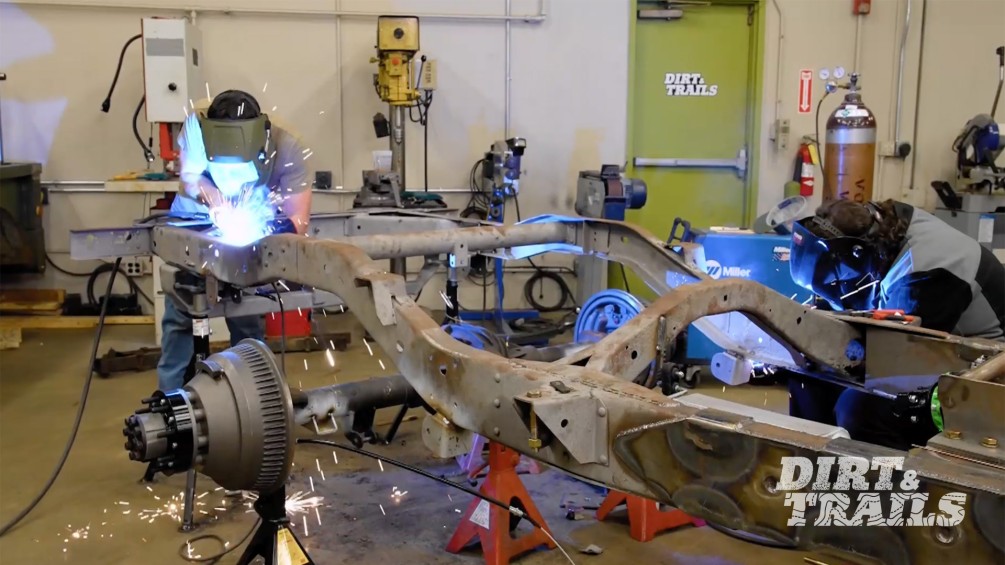
So next thing we got to do is weld these gussets onto these hangers.
And to do that,
I thought it would be a great time for a Summit Tech tip,
because we're gonna utilize a ton of stuff we got from SummitRacing.
We got these various different size clamps.
We also got a bunch of different sizes of these 90-degree stops. They come in handy for all sorts of stuff.
We even got a tungsten grinder from them, which is real handy
as you can hit 5 different angles depending on your preference.
And with these, you have 5 different size tungstens that you can use.
So
to do this,
I cut this piece of tubing up and just about the length we need a little bit more for space so we can bend this guy down
and know that we're not going too far down and we'll still be able to fit our leaf in there.
So what we're gonna do is we're gonna grab a couple of these clamps.
When you use one.
The
first one's just to hold everything in place so it doesn't need to be too tight.
Now we're gonna grab another one
and we're gonna squash this thing down to that face of the tube.
By doing that,
we know that we have the right dimension to fit the leaf spring.
So we can weld the gusset on and hold everything in place.
So since this material is 1/4 inch,
we need about 1/8 inch offset to leave us a good space for welding.
So to do that,
I cut a piece of 18-inch wire up.
It's gonna sit right there.
That gives us our space up and down that we need
to hold this in position.
I'm gonna take one of these 90 degree stops that we got.
We're gonna take some of these fixture bolts that we got from Summit as well,
tighten that guy up to hold everything in position.
That's looking pretty good and ready to tack well,
but first we're gonna get some wire.
So we got some of these containers from Summit.
Not only do they help block out moisture,
but we have a nice label at the top so you know you're grabbing the right wire.
And last thing we're gonna do before we start is we're gonna make sure the tungsten's nice and sharp.
Let's get our tungsten from our torch.
Let's grind it up real quick.
Awesome.
Having a nice sharp tungsten helps in getting a clean weld,
having good contact with the surface,
so you don't have any funky things with the arc wanting to wander around or do anything weird.
Plus, you don't have to burn anything off.
So all the heat you're using can go right into the material,
so make sure you get a nice weld,
not too hot.
Up next,
the boys tackle the rear suspension
with a little weld off.
Did you get a good view of that? I did.
I like it.
Well, that one's got a little gangster lean on it,
but
it's alright.
There we go.
Like a glove.
No, if you're gonna,
if you are gonna reference Ace Ventura, you gotta do it right.
Lakers.
Y'all ready
for this
bam bam bam.
Is that how you tack?
You really think that's gonna hang on there?
You good?
I can't work under these conditions.
All right,
I think I got an attack on that other one.
Yeah, what do you mean you think
it sounded like it.
Did you or did you not?
I only time will tell.
Yeah, it's stacked.
I wasn't even looking.
That's why there's a welder and a fitter.
Lower bolt should still be good.
You tell me when.
Just a second.
No rush.
All right,
good enough.
That's good.
Did that hurt you?
Nope.
Now that Brandon's got our hangers welded out,
we're back on the frame and we're ready to start getting them stuck into place.
Now, we already began that back here
by getting the hangers themselves and the reinforcement plates that we're using for our boxing tacked in.
Now before Brandon did that,
I went ahead and sprayed the inside of all of those, plus our spring perches on the axle with that same POR primer that we put on the frame.
Now,
with the rear tacked in and just about ready to be finished welded,
we're moving on to the front to do the same thing.
You'll see Brandon's getting,
Brandon's getting.
Going back there,
and we're gonna get these tacked in,
move to the axle, and get the perches tacked in.
And once those are done, we'll go ahead and remove the springs and the hardware,
weld everything out fully,
reinstall, and finally get this thing back on the ground for the first time in over a full year. So
Brandon, how's everything looking over here?
I mean,
everything's looking snug as a bug on a rug,
man.
It's all tacked down ready to weld.
Awesome.
Well,
we do have a lot of actual welding to do and we're starting to run a little short on time today.
So should I go grab my stuff?
You mean like a weld off,
a weld off.
Is it tacking all right?
Oh yeah,
that's actually doing quite well.
Weak tech
amateur.
Warm.
Come on down.
Uh
man, it definitely looks like you know your way around a torch.
It's not too bad. I mean,
I might have welded a time or two,
you know. I wouldn't call myself a welder,
but
I can weld.
It definitely looks like it. I could see that.
Yeah, these ones are a little rough. Don't,
don't show those guys.
They sagged a little bit.
Yeah, I mean you're looking pretty good yourself over there,
but of course that is your job, so I'd hope so.
I mean I'd say that's far better than anything else we've seen on this frame that was from the factory or from its time in service so
I think from here I mean
we're ready to get those springs back on and
make it back on the ground, yeah,
throw some tires on this thing,
yeah, let's do it.
Coming up,
the boys add strength to the body to get it ready to fit on the frame.
It's been a long time since this was on here.
There it is.
There we go,
yeah,
you, you bolts are nice and straight,
man.
Looks like we know what we're doing.
I know it's almost like the frame was actually straight enough to measure.
It wasn't.
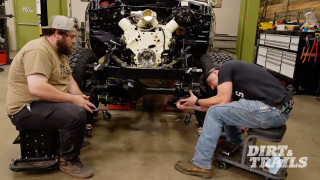
With all that welding done and the springs reinstalled, this axle is finally actually a part of this truck,
and we are ready to move on and get our wheels and tires installed.
Now,
I know you guys have probably been wondering what these things are because you've seen them on the front and they look awesome.
These are Dirty Life Race wheels, 9303 DT-1s.
Now we got these ones in a satin gold color,
17 by 9 for the size,
and we've got it in a simulated beadlock set up for right now.
But if we ever felt. Like taking this rash ring off,
we could put a functional bead lock ring on there and convert this into a true beadlock wheel.
Now,
this is a great looking dual purpose wheel that can follow this truck for its entire life, no matter how extreme we decide to get with it.
Now,
we've got it wrapped up also in some 37 by 125017 Nitto Trail Grappler MTs.
We got them from SummitRacing.
So without further ado,
let's get these installed and get this back on the ground.
Oh yeah.
Love these Kjacks.
And because this is just for mock-up, we're only doing a few lug nuts,
that's fine.
All right, let's do this.
Looks pretty good, right?
Yeah.
I guess this will tell us how good our welds are.
It will hold.
You see the springs compressing.
OK,
alright.
OK,
moment of truth is this thing gonna fall all the way to the ground or is it actually gonna hold?
It'll be fine. I'm just gonna stand not in line with it.
She's off.
I mean, it's looking good. It's on the ground finally.
Oh
man, that feels good.
And it's not falling apart.
Everything seems to move the way it's supposed to. Our pinion dropped exactly like we planned.
Looks like the ride height might be a little off,
but we can swap out these parts nice and easy.
So man, it's.
That's not bad.
I love it.
So the last big piece we needed to take care of before we can get this body over on the frame
is capping off this floor right here.
Bring me a cab.
Oh, you want me to bring it over to you?
Well, I mean, no, I figured it'd probably be a little easier to go straight in,
you know.
I figured if you had to do all the turning, it adds to the experience.
Yeah, I'm good.
There's circus music here
da da da da.
Mhm
let's go straight back.
A little rubbing on the front.
Little rubbing on the back.
Hey, if you ain't rubbing, you ain't racing.
That's what they're saying.
Oh yeah.
Bolton that stuff there.
Dude.
That's,
that's looking good.
Should I throw this on?
I think so.
I have been
dying to see
how this piece looks on here.
OK.
Well y'all,
we have made a ton of progress here today, and I cannot emphasize enough how good it feels to see 4 wheels on this thing
and finally have some body panels back on the frame.
Now,
you're probably wondering
why does this thing look a little different than it did when we first saw it? Well,
that's because our cameraman Greg went through and he cleaned every panel of this body except for the hood that Brandon's working on now and.
I mean, Brandon, I think it's pretty obvious what the difference is. It's insane.
Oh yeah, dude, it's a night and day difference. I mean,
all with just a scuff pad and some water, it's pretty impressive what you can do.
You can't argue with that.
Unfortunately though,
we're just about out of time for today.
So let's say we finish this up and head home.
Let's do it.
Show Full Transcript
Today on Dirt and Trails, our M715G Kaiser that is known as the Spartan is back again, and we are finally ready to get this thing rolling, but we got a ton of work to do to get there.
Brandon, what's on deck for today?
So first thing first,
we're gonna tackle this exhaust,
get this whole system done,
and we got a lot of fun stuff to do on the body,
especially on that back.
Panel.
The last thing we gotta worry about is getting all the rear suspension sorted so we can get this thing rolling on all fours.
Got a lot of fabric this time around, so we might have to get you behind a torch. What do you say?
Yeah, I might be able to do that. I might know a thing or two about welding,
but
we got our work cut out for us today.
So let's get to it. Let's get to it.
All right,
so next thing we need to take care of on this build is we need to get an exhaust going.
First thing first, I'm gonna take some measurements off this flange just so we can match up a flange to it.
We're gonna check with the outlet sizes so we can get the right tubing.
I'm thinking of coming down with a couple 4-fives and coming straight through this drive shaft hole,
not utilizing anymore, so we might as well use it for something.
We're gonna come straight across here past the tea case,
and in this nice big open area we're gonna be able to put a muffler.
Got a lot of room for different support via a hanger.
So it should be pretty good in this home
and then the last thing we're gonna do is a nice little turn down right here.
No need to go straight out the back of the truck on this one we're gonna keep it nice and simple.
Let's get to it.
So we got the front section of the exhaust all welded out and fit up.
I went ahead and started building out the rear section,
so the next step is to mount all this up to make sure everything lays and lands exactly where we want it to be.
So let's go ahead and do that.
Everything's looking like it's gonna land in the right spot that we want it to.
So now we're gonna go ahead and take this off and finish welding everything out.
All right,
so now that all the fabrication and welding is done on this exhaust here,
last thing we need to do is mount a clamp up.
She'll be ready to fire up.
Dang man, you got this frame looking good, but you see what just came in?
Oh,
springs and shackles. That is perfect timing because that's some of what we need to start figuring out exactly what the suspension is gonna look like going forward.
You got a game plan or what are you thinking?
Kind of. So
mostly
we're gonna need new hangers. That's the big thing here because these old ones on the inside,
all four of them, yeah,
yeah,
that bad.
What do you think about us,
you know,
designing something up, just some hangers.
I mean, I was planning on maybe doing like a junkyard run or finding something offline that might fit,
but
I think custom would definitely be the way to go because that's gonna give us a lot more flexibility.
Plus,
it might save us some time because I think we could keep those perches on the axle side,
not have to worry about moving them at all.
I mean, that would be great. Yeah, that would be awesome. All I gotta do is grab a couple of measurements off these guys,
head over to the computer, and I'm sure we could get something figured out.
All right,
perfect. So while you do that, I'll finish up our prep work here so that once the parts are ready, we can just get to welding.
Sounds great.
All right,
so now we got the springs over here close to the computer.
We got our measurements done,
got our CAD software open,
so it's time to get everything going.
I went ahead and I made this little 1/4 inch base pad for us to start off of,
so we just gotta bring a couple flanges up at the right dimensions we need
and punch a couple holes. We'll get everything going right now.
First thing first,
let's get these fallangees going.
We know we need to come up about 3.5 inches,
so we're gonna start there.
That's looking pretty good.
The next thing we need to do
is get this hole about 1 inch down from the top edge,
so we're gonna mark that out right now.
I'm gonna go 1 inch down.
We know these holes are about 9/16.
I'm gonna give it a little bit of breathing room, so we know that the bolt's gonna go in and we're not gonna have any tight tolerance issues.
Now we need to punch the hole straight through.
Looks good.
The last thing I wanna do is go ahead and round these corners off just so they're not sharp.
No one's getting caught on them or cut up.
So we're gonna go into all four corners here.
Put a little filet on them.
It's looking pretty good.
I think the last thing I would maybe do is go ahead and put a little gusset on top,
but I think I'm gonna get these 3D printed so we can get over to the frame, mock everything up,
make sure everything's looking the way we want it and fitting the way we want it,
and we can go ahead and get these sent out to Send Cut Send so they can cut them out for us and bend them up.
We'll weld them on the frame and everything should be good to go.
Coming up,
the boys make a game plan for the rear suspension.
Oh,
what do we have here?
While Brandon was getting some design work done and getting our 3D mock-up parts printed,
well, I was over here getting started mocking up our springs to see exactly what's gonna work to get this rear suspension functional.
Now,
for our front hanger, we could actually set it in there
and we would need to drill a hole.
It's very close to the top of that rail, so it could be an issue,
but we could probably make it work if we had to.
The bigger issue comes in, in the rear
when we realized that this shackle
is not landing where we need it to.
This isn't gonna work,
but I think I've got an idea for something that will.
So,
what this is, is a spring under setup.
We've taken our leaf spring from our perch up here on the outside of the frame rail,
moved it underneath, and put it in line.
In the rear here,
it's just gonna go right in like that.
And of course, we still have to finalize our axle placement. So there's gonna be a little bit of adjustment still to be made.
But
we'll move to the front and show you how this is gonna work up here.
Get a bolt in there.
And now,
with all of that in place,
you can see that
it's actually lined up pretty good.
But now that we have a plan and we've got an idea of exactly what's gonna happen here,
I think it's time we get these plans sent off to Send Cut Send,
get some metal parts made,
and we can actually get to work on this thing.
Oh,
what do we have here?
Parts from Saint Casen just showed up.
Oh,
very nice. All right,
so
what exactly are we looking at here? That looks like our spring hangers, right?
Yep.
So you got the 4 spring hangers. We got our gusset plates for the spring hangers,
and then these are gonna be our backing plates that go on the frame side, so we have a little bit more strength.
While Brandon gets going on our leaf spring hangers,
I'm gonna do the last bit of prep work we've got back here so that we can actually get started welding everything on.
So, we've got a few different places we're gonna be working on to get this done.
It's gonna be on the bottom side of our frame rails, everywhere that we're gonna be adding our new hangers,
as well as on the inside in the same four positions where we're gonna add some boxing to help make up for the extra force being added into a different part of this frame.
So,
now that all of our cleanup is done, I've got all the rust and dirt and everything cleaned off,
it is just about ready for us to spray this POR 15 weld-through primer.
Now, this is gonna help with heat control, distortion, splatter,
and it's gonna make sure that both of the surfaces here on the frame
and on the backside of the pieces that we're putting on are not going to be able to rust in between here,
which is what actually caused a lot of the issues we've had to fix on this frame in the first place.
So,
we're gonna take some of this,
we're gonna get it sprayed everywhere that we're gonna be welding, and then of course, a little bit past, just to keep everything well protected.
So,
let's get going.
m
All right.
So now that we've got our first coat on, we're gonna give this 10 to 15 minutes to flash off,
put a second coat on, make sure we've got complete coverage,
and once it dries,
we're ready to get welded.
So next thing we got to do is weld these gussets onto these hangers.
And to do that,
I thought it would be a great time for a Summit Tech tip,
because we're gonna utilize a ton of stuff we got from SummitRacing.
We got these various different size clamps.
We also got a bunch of different sizes of these 90-degree stops. They come in handy for all sorts of stuff.
We even got a tungsten grinder from them, which is real handy
as you can hit 5 different angles depending on your preference.
And with these, you have 5 different size tungstens that you can use.
So
to do this,
I cut this piece of tubing up and just about the length we need a little bit more for space so we can bend this guy down
and know that we're not going too far down and we'll still be able to fit our leaf in there.
So what we're gonna do is we're gonna grab a couple of these clamps.
When you use one.
The
first one's just to hold everything in place so it doesn't need to be too tight.
Now we're gonna grab another one
and we're gonna squash this thing down to that face of the tube.
By doing that,
we know that we have the right dimension to fit the leaf spring.
So we can weld the gusset on and hold everything in place.
So since this material is 1/4 inch,
we need about 1/8 inch offset to leave us a good space for welding.
So to do that,
I cut a piece of 18-inch wire up.
It's gonna sit right there.
That gives us our space up and down that we need
to hold this in position.
I'm gonna take one of these 90 degree stops that we got.
We're gonna take some of these fixture bolts that we got from Summit as well,
tighten that guy up to hold everything in position.
That's looking pretty good and ready to tack well,
but first we're gonna get some wire.
So we got some of these containers from Summit.
Not only do they help block out moisture,
but we have a nice label at the top so you know you're grabbing the right wire.
And last thing we're gonna do before we start is we're gonna make sure the tungsten's nice and sharp.
Let's get our tungsten from our torch.
Let's grind it up real quick.
Awesome.
Having a nice sharp tungsten helps in getting a clean weld,
having good contact with the surface,
so you don't have any funky things with the arc wanting to wander around or do anything weird.
Plus, you don't have to burn anything off.
So all the heat you're using can go right into the material,
so make sure you get a nice weld,
not too hot.
Up next,
the boys tackle the rear suspension
with a little weld off.
Did you get a good view of that? I did.
I like it.
Well, that one's got a little gangster lean on it,
but
it's alright.
There we go.
Like a glove.
No, if you're gonna,
if you are gonna reference Ace Ventura, you gotta do it right.
Lakers.
Y'all ready
for this
bam bam bam.
Is that how you tack?
You really think that's gonna hang on there?
You good?
I can't work under these conditions.
All right,
I think I got an attack on that other one.
Yeah, what do you mean you think
it sounded like it.
Did you or did you not?
I only time will tell.
Yeah, it's stacked.
I wasn't even looking.
That's why there's a welder and a fitter.
Lower bolt should still be good.
You tell me when.
Just a second.
No rush.
All right,
good enough.
That's good.
Did that hurt you?
Nope.
Now that Brandon's got our hangers welded out,
we're back on the frame and we're ready to start getting them stuck into place.
Now, we already began that back here
by getting the hangers themselves and the reinforcement plates that we're using for our boxing tacked in.
Now before Brandon did that,
I went ahead and sprayed the inside of all of those, plus our spring perches on the axle with that same POR primer that we put on the frame.
Now,
with the rear tacked in and just about ready to be finished welded,
we're moving on to the front to do the same thing.
You'll see Brandon's getting,
Brandon's getting.
Going back there,
and we're gonna get these tacked in,
move to the axle, and get the perches tacked in.
And once those are done, we'll go ahead and remove the springs and the hardware,
weld everything out fully,
reinstall, and finally get this thing back on the ground for the first time in over a full year. So
Brandon, how's everything looking over here?
I mean,
everything's looking snug as a bug on a rug,
man.
It's all tacked down ready to weld.
Awesome.
Well,
we do have a lot of actual welding to do and we're starting to run a little short on time today.
So should I go grab my stuff?
You mean like a weld off,
a weld off.
Is it tacking all right?
Oh yeah,
that's actually doing quite well.
Weak tech
amateur.
Warm.
Come on down.
Uh
man, it definitely looks like you know your way around a torch.
It's not too bad. I mean,
I might have welded a time or two,
you know. I wouldn't call myself a welder,
but
I can weld.
It definitely looks like it. I could see that.
Yeah, these ones are a little rough. Don't,
don't show those guys.
They sagged a little bit.
Yeah, I mean you're looking pretty good yourself over there,
but of course that is your job, so I'd hope so.
I mean I'd say that's far better than anything else we've seen on this frame that was from the factory or from its time in service so
I think from here I mean
we're ready to get those springs back on and
make it back on the ground, yeah,
throw some tires on this thing,
yeah, let's do it.
Coming up,
the boys add strength to the body to get it ready to fit on the frame.
It's been a long time since this was on here.
There it is.
There we go,
yeah,
you, you bolts are nice and straight,
man.
Looks like we know what we're doing.
I know it's almost like the frame was actually straight enough to measure.
It wasn't.
With all that welding done and the springs reinstalled, this axle is finally actually a part of this truck,
and we are ready to move on and get our wheels and tires installed.
Now,
I know you guys have probably been wondering what these things are because you've seen them on the front and they look awesome.
These are Dirty Life Race wheels, 9303 DT-1s.
Now we got these ones in a satin gold color,
17 by 9 for the size,
and we've got it in a simulated beadlock set up for right now.
But if we ever felt. Like taking this rash ring off,
we could put a functional bead lock ring on there and convert this into a true beadlock wheel.
Now,
this is a great looking dual purpose wheel that can follow this truck for its entire life, no matter how extreme we decide to get with it.
Now,
we've got it wrapped up also in some 37 by 125017 Nitto Trail Grappler MTs.
We got them from SummitRacing.
So without further ado,
let's get these installed and get this back on the ground.
Oh yeah.
Love these Kjacks.
And because this is just for mock-up, we're only doing a few lug nuts,
that's fine.
All right, let's do this.
Looks pretty good, right?
Yeah.
I guess this will tell us how good our welds are.
It will hold.
You see the springs compressing.
OK,
alright.
OK,
moment of truth is this thing gonna fall all the way to the ground or is it actually gonna hold?
It'll be fine. I'm just gonna stand not in line with it.
She's off.
I mean, it's looking good. It's on the ground finally.
Oh
man, that feels good.
And it's not falling apart.
Everything seems to move the way it's supposed to. Our pinion dropped exactly like we planned.
Looks like the ride height might be a little off,
but we can swap out these parts nice and easy.
So man, it's.
That's not bad.
I love it.
So the last big piece we needed to take care of before we can get this body over on the frame
is capping off this floor right here.
Bring me a cab.
Oh, you want me to bring it over to you?
Well, I mean, no, I figured it'd probably be a little easier to go straight in,
you know.
I figured if you had to do all the turning, it adds to the experience.
Yeah, I'm good.
There's circus music here
da da da da.
Mhm
let's go straight back.
A little rubbing on the front.
Little rubbing on the back.
Hey, if you ain't rubbing, you ain't racing.
That's what they're saying.
Oh yeah.
Bolton that stuff there.
Dude.
That's,
that's looking good.
Should I throw this on?
I think so.
I have been
dying to see
how this piece looks on here.
OK.
Well y'all,
we have made a ton of progress here today, and I cannot emphasize enough how good it feels to see 4 wheels on this thing
and finally have some body panels back on the frame.
Now,
you're probably wondering
why does this thing look a little different than it did when we first saw it? Well,
that's because our cameraman Greg went through and he cleaned every panel of this body except for the hood that Brandon's working on now and.
I mean, Brandon, I think it's pretty obvious what the difference is. It's insane.
Oh yeah, dude, it's a night and day difference. I mean,
all with just a scuff pad and some water, it's pretty impressive what you can do.
You can't argue with that.
Unfortunately though,
we're just about out of time for today.
So let's say we finish this up and head home.
Let's do it.