Video Transcript
[Eric] You're watching Powernation.
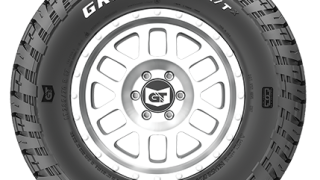
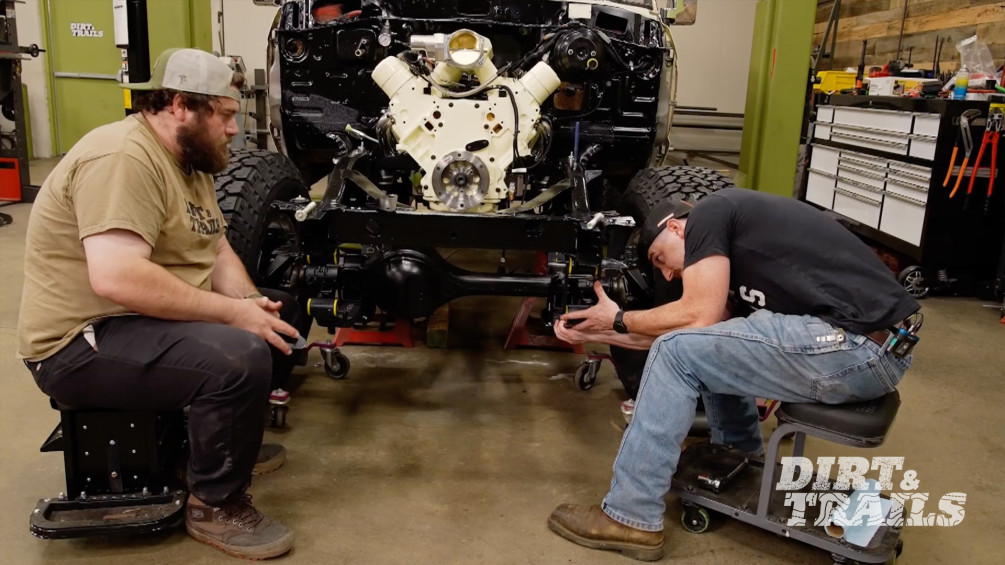
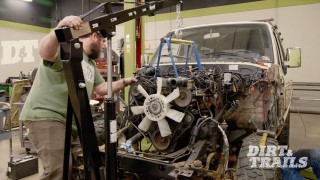
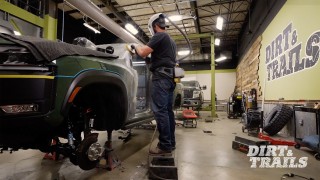
[Eric] Today on Dirt and Trails we are back with our 1987 Land Cruiser FJ-60, and today I'm gonna be spending my time getting some wheels, tires, and suspension on these axles so we can get this thing back down on the ground. [Brandon] I'm gonna hang some headers off of this motor. Start building out an exhaust. We really got to get that transmission located. It's just floating right now. So I'm gonna put a crossmember together to lock everything down. I think we got a lot of work ahead of us. What do you say we get to work. [Eric] Welcome to Dirt and Trails. [ Music ] Before we can get our suspension installed we've got to get some wheels and tires on these axles. We had to go bigger and better than the set of 15s and 33s that this thing had before. So we called up some friends and we've got a set of Ion Alloys style 171 in 16 x 10 that's gonna be that classic bullet hole look. You know we love that stuff around here. So we thought it was gonna fit this thing perfectly. To wrap those up we've got a set of General Grabber ATXs in 315/75-16. These tires themselves are just great. They provide a ton of on road performance and off road capability without sacrificing road noise and stuff like that. These tires, obviously they're a little bit bigger than stock. So we're gonna have to make some suspension adjustments to account for that but we'll talk about that in a little bit. For right now I am stoked to actually get these things installed. Without further ado, let's get it on this axle so we can get this thing down. [ Music ]
That should be pretty close right there. [ Music ]
For right now we'll start these on here to hold this. Once we get the other one on we'll pick it up off the ground so we can get it on evenly. [ Music ]
Now that we've got both of these rough on there I'm gonna pick this up just a little bit. [ Music ]
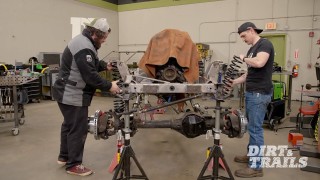
Just like that we've got a rear axle on the ground. Which means our next step is to get the suspension installed. So I'm gonna grab those parts and we'll get started. [Brandon] Man you got this all looking real nice. Check these out. Got the spring plates fresh out of the paint booth. -That's perfect because now that I've got the wheels and tires on this thing the next step is to get it under there, and to do that we've got to get some springs installed. You want to give me a hand and we'll get this done? -Yeah, let's go for it. -Get this stuff on here. Get that shim dropped on there we should be able to pop this up here. Beautiful, next! [ Music ]
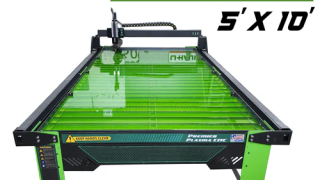
-Now let's get the bolts in first. You want to hold your U-bolt down? -I got you. That's probably good right there. -I think at this point we're at a good spot so I can start getting those shackles cut out. -Then while you're doing that this is pretty much a one man job to get the bushings and stuff in and get it over to the truck. I'm gonna go grab some tools and you go get to work? -Yeah -We're over here at our Premier plasma table getting ready to get these shackles all cut out. The reason we're having to go with a custom shackle is because on the front suspension we went with a little softer spring pack for a better ride quality but it's also the same ride height and we're gonna with a little bit bigger tire. So we wanted to make sure we had a good amount of tire clearance. We're gonna add about a half inch to each one of these shackles. We got everything pathed out right now. Ready to go to cut this three-eighths plate. Last thing we gotta do is start this machine up and let her cut. [ torch hissing ] [ Music ]
-Brandon you got them shackles? -Yes sir, fresh out the booth. -You want to give me a hand getting this installed? Gotta love a steer axle, right? There she goes. You just pull up on the back of that spring just a little bit. -Pull up? -Yeah, there we go. [ Music ]
This is actually going together pretty easy. I don't know if I should be concerned about that or not. -Don't jinx it. [ Music ]
-Might need a little twist there. Yeah, she's going now. -Don't even need a nut. -I still gotta gather up the rest of the hardware but this is looking pretty good and I can handle the rear on my own if you've got something else to do. -Yeah, I've got to lay out all the stuff for the exhaust and the crossmember and make sure we have everything to build that out. -Sounds like you've got plenty to do. So let's split up and get some work done. [Greg] Coming up, the boys cut, fit, and weld the crossmember to lock in the drivetrain.
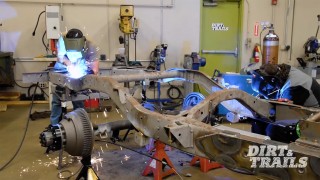
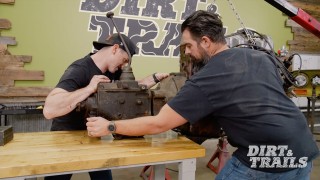
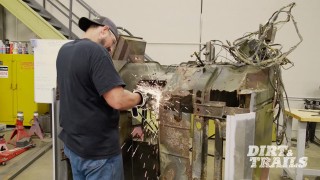
[Brandon] Now that we have the suspension all mounted on the truck it's time to get under here and start getting the crossmember figured out. I came down here to measure everything out so we can start designing some plates for the sides. Then we can get over to the plasma table, cut everything out, start bending everything up, fit it under here, weld it all together. That way we can get this transmission and transfer case supported and located, and we can go on with building out the rest of the driveline. Let's start with some measurements. [ Music ] We got all of our measurements taken care of over at the truck. So now we're over here with our plates laid out in cam. We're going to cut them on our Premier plasma table. Should save us a tone of time. So let's get everything going. [ Music ] [ torch hissing ] [ Music ]
Look, perfect! It's great to have a plasma table like this in the shop just because of the amount of time it can save. Cutting out these parts by hand could take at lease a day but doing it on this table even with cad work is only an hour. [ Music ]
Now that the plates are cut it's time to cut the crossmember tube and prepare it for welding. [ Music ]
Before we can test fitment we need to tack our plates to the ends of the crossmember tube and build the baseplate for our transmission mount. [ Music ]
Next we mock-up the crossmember and get measurements for our transmission mount. Then we cut our material and build our transmission mount. [ Music ]
We test the crossmember, mark the frame, and prep it for welding.
Now we weld the end plates to the crossmember while leaving the frame side brackets bolted on to minimize warping.
Then we head back under the truck to lock it down in its final position. [ Music ] [ welder crackling ] [ Music ]
So now that we got the crossmember 90 percent welded out the only things left to finish are a little gusset plate on the back of this mounting box. We've got to wrap a couple of welds around it, and I know we're gonna be running exhaust through this section somewhere. So I'm leaving it unpainted for now so we can figure out the hanger mounting and get that welded out. No reason to paint it and grind everything back down. So let's get into that exhaust. [Greg] Up next, the boys fabricate and install a dual exhaust.
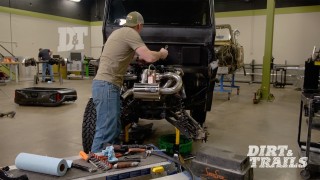
[Brandon] We went ahead under the truck and measured everything out so we could get over to Summit Racing and get all of our exhaust components ordered. I took all the exhaust components, unboxed them, and laid them out on the floor so we could walk through everything together and explain what we've got going on. First thing we have a set of block hugger headers to keep us nice and tight to the engine block cause there's not a ton of space in that engine bay. Coming from an inline six it's a lot slimmer engine. We just don't have that space, that luxury. So from that header we're gonna go into two 45s to get us down and straight and level with the frame rail. Once we come down the frame rail we're gonna go into a catalytic converter. From the catalytic converter we're going into a two and a half inch turn down. This vehicle's gonna be used on the street as well as off road. So we wanted to have a nice tone on the street that wasn't overwhelming but wanted to be able to flip the switch and get nice and rowdy off road. From that cutout we're gonna incorporate a straight tube to get us back to the muffler. Somewhere within that straight tube we're gonna land this V-band to make it easier to remove the whole system so it doesn't have to come off all in one heavy part. After the muffler we're gonna cut right out of it, do a nice turn down right at the axle. Probably a little bit before it just to stay safe and get away from the fuel tank and everything. All these parts are ordered in 304 stainless as that is the baseline material that we prefer to use. Aside from the cat and the muffler being a 409 and that's all they're offered in. We're really busy over here at the shop today. So I actually grabbed one of these two and a half inch Summit Racing exhaust clamps as well. So we can utilize this to hold the piping together while I'm fabricating everything up. We have these three big windows on here that we can use to get some tacks. So I don't need a screw jack, bottle jack, or any extra hands to get this done. Let's get on to it. [ Music ]
We got the first part of the driver's side all tacked up. Just about ready for welding, but I wanted to throw it back up there one more time to check final fitment to make sure everything was AOK before we welded it out and made it permanent. [ Music ]
So that's looking pretty good. We got the O2 kicked over a little bit here so we're not in the way of any clutch hydraulics. I'm liking how that's all looking. I think it's time to pull it off and get to welding. [ Music ]
At this point we're ready to weld everything out. Since it is 16 gauge tubing it was fairly thin. So we're gonna purge it. When purging you want to start at the bottom and allow the argon to push the oxygen out of the tube as argon is quite a bit heavier than oxygen. We're also purging it because the tube is fairly thin and we want to make sure we get a clean weld on the outside as well as on the inside. So let's get it going. We just need to let this sit for a few minutes and purge down. Then we can come back and weld it. [ Music ]
Just need to let this guy cool for a little bit. Then I can pop this plate off. Gotta get a couple more welds behind where the bolts were and then she'll be ready to go back on. We'll get ready to finish up the rest of the exhaust. [ Music ]
We're gonna get all this clocked up and set up so we can get it mocked underneath the truck. [ Music ]
The last thing we need to get mounted here is this tip. It's always nice practice with a V-band to throw a little bit of anti-seize on these threads. These jamb nuts like to jamb up sometimes. You don't want to deal with that after all the heat cycles. That's looking good. Now we've got to take it over to the truck and make sure everything fits. [ Music ]
We got the exhaust all welded out and hung back up here looking awesome. We're going into these Gesi cats. From the Gesi cat we're gonna be wrapping around this T-case and over the subframe that we built, coming up into these sweet Summit Racing cutouts. They're gonna sound wild. When we're not using the cutout we'll be running into these mufflers, into this nice turn down right before the axle. We didn't want to do anything crazy. We wanted to keep it simple and out of the way. Last thing we're gonna do is get ready to weld out all the hangers mounted to the truck side and this thing's gonna be ready to go. [Greg] Coming up, the boys plumb the fuel system for some long distance off roading.
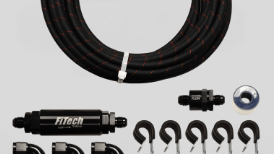
[Eric] Before I got our rear axle put in I installed the Manafre long range fuel tank you see behind me. It's available in 38 or 42 gallons depending on how much fuel you want for your cruiser. As you can see, it's a little bit big. So it's hard to access everything up top to get the wires and lines connected. So before I bolted it in I hooked up everything to the top side that needs to run elsewhere on the vehicle, meaning wires and fuel lines. Now as far as the fuel lines there's only one left to make to get our FiTech system connected to our tank and ready to be fed fuel to run that LS engine. The first step to getting that done is getting a hose end put on here so we can connect to that filter and figure out how long our run needs to be up to the engine bay. I've got our hose mounted up in the vice with a set of soft jaws to make sure the steel jaws aren't going to bite into it and cause damage, and I've got a straight hose end here that's gonna connect to our fuel filter. Now it's important to note that every bit of this system, the hose, the fittings, the filter, all of it came as part of an all inclusive plumbing kit from FiTech. The one we got came with 40 feet of hose and plenty of fittings to get our entire fuel system done and have some leftover for later on down the road. Now the first step to getting this done is straighten our cut and make sure we've got a clean end to start with. [ Music ]
Now that we've got our hose cut we know the end is straight and clean. I took the tape off. We're gonna disassemble our hose end. Get this back half pushed on right here. Something I like to do to help out with this. It can be tricky to get them on. Take a socket that's the correct size and slide on nice and easy, and just a very slight twist making sure you don't push the liner back or anything like that. Next we'll take this ferrule and we're gonna push it in between the PTFE liner and the braided hose. Before we finish assembling this hose end there's one more thing I'm gonna do and that's take some air and blow through here. Make sure we get all that dust and stuff from cutting our hose out before we go to put the fitting in. We go ahead, take the front half of our fitting, and throw just a little bit of assembly lube on here. Not a lot. Just enough to help it slide into place. [ Music ]
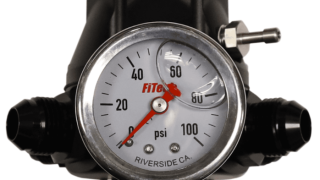
There we go. Now that's popped in we're ready to start getting these things screwed together. Now that this fitting is assembled I'll go ahead and remove it from the vice. Give it a tug and make sure it's not coming out of there. I think it's safe to say we're good. We're back under the truck. We've got our line with our first fitting on and a plug to protect it while I run it through the frame to match the other line. That way we can make our run to the front and figure out how long it needs to be. I'll just hang this up here. Right next to our other line, run this in here. Now having this plug in here made sure that we didn't get any dirt from inside this bracket in our line. So we can pull it the rest of the way through and get it hooked up. A quick little cinch right there. Now that we've got that connected I'm gonna make our run up to the engine bay, drop this thing down, and we'll catch up up there. We made it up to our engine bay and I've got our fuel pressure line run over to this side where it's gonna connect to our fuel rail. We've got to get it cut and add another fitting. Once that fuel goes into this fuel rail in bank one it's gonna cross over through here into our second fuel rail on bank two and then connect to this FiTech four port fuel pressure regulator. You can see with the four ports you've got a ton of different options for all of your fuel fittings to go in or out. Plus a nice gauge on the front. And if you're getting rowdy with a boosted setup you've got a boost reference port right here. We've got this line run back to the tank. So the last thing to get this entire plumbing system done is get that last fitting put on, get everything hooked up, and call it a day. So let's get to it. [ Music ]
[Brandon] This thing is looking killer now that you got it down on all four wheels. -I'm loving the stance so far. Everything's fitting really nice. We got suspension, exhaust. The fuel system's finished up once I get this line hooked up. We made some good progress today. -Looks like we've got a couple more wires to get it all hooked up and we can hear it fire up. We're all out of time for today. So for that you're gonna have to tune in next time.
Show Full Transcript
[Eric] Today on Dirt and Trails we are back with our 1987 Land Cruiser FJ-60, and today I'm gonna be spending my time getting some wheels, tires, and suspension on these axles so we can get this thing back down on the ground. [Brandon] I'm gonna hang some headers off of this motor. Start building out an exhaust. We really got to get that transmission located. It's just floating right now. So I'm gonna put a crossmember together to lock everything down. I think we got a lot of work ahead of us. What do you say we get to work. [Eric] Welcome to Dirt and Trails. [ Music ] Before we can get our suspension installed we've got to get some wheels and tires on these axles. We had to go bigger and better than the set of 15s and 33s that this thing had before. So we called up some friends and we've got a set of Ion Alloys style 171 in 16 x 10 that's gonna be that classic bullet hole look. You know we love that stuff around here. So we thought it was gonna fit this thing perfectly. To wrap those up we've got a set of General Grabber ATXs in 315/75-16. These tires themselves are just great. They provide a ton of on road performance and off road capability without sacrificing road noise and stuff like that. These tires, obviously they're a little bit bigger than stock. So we're gonna have to make some suspension adjustments to account for that but we'll talk about that in a little bit. For right now I am stoked to actually get these things installed. Without further ado, let's get it on this axle so we can get this thing down. [ Music ]
That should be pretty close right there. [ Music ]
For right now we'll start these on here to hold this. Once we get the other one on we'll pick it up off the ground so we can get it on evenly. [ Music ]
Now that we've got both of these rough on there I'm gonna pick this up just a little bit. [ Music ]
Just like that we've got a rear axle on the ground. Which means our next step is to get the suspension installed. So I'm gonna grab those parts and we'll get started. [Brandon] Man you got this all looking real nice. Check these out. Got the spring plates fresh out of the paint booth. -That's perfect because now that I've got the wheels and tires on this thing the next step is to get it under there, and to do that we've got to get some springs installed. You want to give me a hand and we'll get this done? -Yeah, let's go for it. -Get this stuff on here. Get that shim dropped on there we should be able to pop this up here. Beautiful, next! [ Music ]
-Now let's get the bolts in first. You want to hold your U-bolt down? -I got you. That's probably good right there. -I think at this point we're at a good spot so I can start getting those shackles cut out. -Then while you're doing that this is pretty much a one man job to get the bushings and stuff in and get it over to the truck. I'm gonna go grab some tools and you go get to work? -Yeah -We're over here at our Premier plasma table getting ready to get these shackles all cut out. The reason we're having to go with a custom shackle is because on the front suspension we went with a little softer spring pack for a better ride quality but it's also the same ride height and we're gonna with a little bit bigger tire. So we wanted to make sure we had a good amount of tire clearance. We're gonna add about a half inch to each one of these shackles. We got everything pathed out right now. Ready to go to cut this three-eighths plate. Last thing we gotta do is start this machine up and let her cut. [ torch hissing ] [ Music ]
-Brandon you got them shackles? -Yes sir, fresh out the booth. -You want to give me a hand getting this installed? Gotta love a steer axle, right? There she goes. You just pull up on the back of that spring just a little bit. -Pull up? -Yeah, there we go. [ Music ]
This is actually going together pretty easy. I don't know if I should be concerned about that or not. -Don't jinx it. [ Music ]
-Might need a little twist there. Yeah, she's going now. -Don't even need a nut. -I still gotta gather up the rest of the hardware but this is looking pretty good and I can handle the rear on my own if you've got something else to do. -Yeah, I've got to lay out all the stuff for the exhaust and the crossmember and make sure we have everything to build that out. -Sounds like you've got plenty to do. So let's split up and get some work done. [Greg] Coming up, the boys cut, fit, and weld the crossmember to lock in the drivetrain.
[Brandon] Now that we have the suspension all mounted on the truck it's time to get under here and start getting the crossmember figured out. I came down here to measure everything out so we can start designing some plates for the sides. Then we can get over to the plasma table, cut everything out, start bending everything up, fit it under here, weld it all together. That way we can get this transmission and transfer case supported and located, and we can go on with building out the rest of the driveline. Let's start with some measurements. [ Music ] We got all of our measurements taken care of over at the truck. So now we're over here with our plates laid out in cam. We're going to cut them on our Premier plasma table. Should save us a tone of time. So let's get everything going. [ Music ] [ torch hissing ] [ Music ]
Look, perfect! It's great to have a plasma table like this in the shop just because of the amount of time it can save. Cutting out these parts by hand could take at lease a day but doing it on this table even with cad work is only an hour. [ Music ]
Now that the plates are cut it's time to cut the crossmember tube and prepare it for welding. [ Music ]
Before we can test fitment we need to tack our plates to the ends of the crossmember tube and build the baseplate for our transmission mount. [ Music ]
Next we mock-up the crossmember and get measurements for our transmission mount. Then we cut our material and build our transmission mount. [ Music ]
We test the crossmember, mark the frame, and prep it for welding.
Now we weld the end plates to the crossmember while leaving the frame side brackets bolted on to minimize warping.
Then we head back under the truck to lock it down in its final position. [ Music ] [ welder crackling ] [ Music ]
So now that we got the crossmember 90 percent welded out the only things left to finish are a little gusset plate on the back of this mounting box. We've got to wrap a couple of welds around it, and I know we're gonna be running exhaust through this section somewhere. So I'm leaving it unpainted for now so we can figure out the hanger mounting and get that welded out. No reason to paint it and grind everything back down. So let's get into that exhaust. [Greg] Up next, the boys fabricate and install a dual exhaust.
[Brandon] We went ahead under the truck and measured everything out so we could get over to Summit Racing and get all of our exhaust components ordered. I took all the exhaust components, unboxed them, and laid them out on the floor so we could walk through everything together and explain what we've got going on. First thing we have a set of block hugger headers to keep us nice and tight to the engine block cause there's not a ton of space in that engine bay. Coming from an inline six it's a lot slimmer engine. We just don't have that space, that luxury. So from that header we're gonna go into two 45s to get us down and straight and level with the frame rail. Once we come down the frame rail we're gonna go into a catalytic converter. From the catalytic converter we're going into a two and a half inch turn down. This vehicle's gonna be used on the street as well as off road. So we wanted to have a nice tone on the street that wasn't overwhelming but wanted to be able to flip the switch and get nice and rowdy off road. From that cutout we're gonna incorporate a straight tube to get us back to the muffler. Somewhere within that straight tube we're gonna land this V-band to make it easier to remove the whole system so it doesn't have to come off all in one heavy part. After the muffler we're gonna cut right out of it, do a nice turn down right at the axle. Probably a little bit before it just to stay safe and get away from the fuel tank and everything. All these parts are ordered in 304 stainless as that is the baseline material that we prefer to use. Aside from the cat and the muffler being a 409 and that's all they're offered in. We're really busy over here at the shop today. So I actually grabbed one of these two and a half inch Summit Racing exhaust clamps as well. So we can utilize this to hold the piping together while I'm fabricating everything up. We have these three big windows on here that we can use to get some tacks. So I don't need a screw jack, bottle jack, or any extra hands to get this done. Let's get on to it. [ Music ]
We got the first part of the driver's side all tacked up. Just about ready for welding, but I wanted to throw it back up there one more time to check final fitment to make sure everything was AOK before we welded it out and made it permanent. [ Music ]
So that's looking pretty good. We got the O2 kicked over a little bit here so we're not in the way of any clutch hydraulics. I'm liking how that's all looking. I think it's time to pull it off and get to welding. [ Music ]
At this point we're ready to weld everything out. Since it is 16 gauge tubing it was fairly thin. So we're gonna purge it. When purging you want to start at the bottom and allow the argon to push the oxygen out of the tube as argon is quite a bit heavier than oxygen. We're also purging it because the tube is fairly thin and we want to make sure we get a clean weld on the outside as well as on the inside. So let's get it going. We just need to let this sit for a few minutes and purge down. Then we can come back and weld it. [ Music ]
Just need to let this guy cool for a little bit. Then I can pop this plate off. Gotta get a couple more welds behind where the bolts were and then she'll be ready to go back on. We'll get ready to finish up the rest of the exhaust. [ Music ]
We're gonna get all this clocked up and set up so we can get it mocked underneath the truck. [ Music ]
The last thing we need to get mounted here is this tip. It's always nice practice with a V-band to throw a little bit of anti-seize on these threads. These jamb nuts like to jamb up sometimes. You don't want to deal with that after all the heat cycles. That's looking good. Now we've got to take it over to the truck and make sure everything fits. [ Music ]
We got the exhaust all welded out and hung back up here looking awesome. We're going into these Gesi cats. From the Gesi cat we're gonna be wrapping around this T-case and over the subframe that we built, coming up into these sweet Summit Racing cutouts. They're gonna sound wild. When we're not using the cutout we'll be running into these mufflers, into this nice turn down right before the axle. We didn't want to do anything crazy. We wanted to keep it simple and out of the way. Last thing we're gonna do is get ready to weld out all the hangers mounted to the truck side and this thing's gonna be ready to go. [Greg] Coming up, the boys plumb the fuel system for some long distance off roading.
[Eric] Before I got our rear axle put in I installed the Manafre long range fuel tank you see behind me. It's available in 38 or 42 gallons depending on how much fuel you want for your cruiser. As you can see, it's a little bit big. So it's hard to access everything up top to get the wires and lines connected. So before I bolted it in I hooked up everything to the top side that needs to run elsewhere on the vehicle, meaning wires and fuel lines. Now as far as the fuel lines there's only one left to make to get our FiTech system connected to our tank and ready to be fed fuel to run that LS engine. The first step to getting that done is getting a hose end put on here so we can connect to that filter and figure out how long our run needs to be up to the engine bay. I've got our hose mounted up in the vice with a set of soft jaws to make sure the steel jaws aren't going to bite into it and cause damage, and I've got a straight hose end here that's gonna connect to our fuel filter. Now it's important to note that every bit of this system, the hose, the fittings, the filter, all of it came as part of an all inclusive plumbing kit from FiTech. The one we got came with 40 feet of hose and plenty of fittings to get our entire fuel system done and have some leftover for later on down the road. Now the first step to getting this done is straighten our cut and make sure we've got a clean end to start with. [ Music ]
Now that we've got our hose cut we know the end is straight and clean. I took the tape off. We're gonna disassemble our hose end. Get this back half pushed on right here. Something I like to do to help out with this. It can be tricky to get them on. Take a socket that's the correct size and slide on nice and easy, and just a very slight twist making sure you don't push the liner back or anything like that. Next we'll take this ferrule and we're gonna push it in between the PTFE liner and the braided hose. Before we finish assembling this hose end there's one more thing I'm gonna do and that's take some air and blow through here. Make sure we get all that dust and stuff from cutting our hose out before we go to put the fitting in. We go ahead, take the front half of our fitting, and throw just a little bit of assembly lube on here. Not a lot. Just enough to help it slide into place. [ Music ]
There we go. Now that's popped in we're ready to start getting these things screwed together. Now that this fitting is assembled I'll go ahead and remove it from the vice. Give it a tug and make sure it's not coming out of there. I think it's safe to say we're good. We're back under the truck. We've got our line with our first fitting on and a plug to protect it while I run it through the frame to match the other line. That way we can make our run to the front and figure out how long it needs to be. I'll just hang this up here. Right next to our other line, run this in here. Now having this plug in here made sure that we didn't get any dirt from inside this bracket in our line. So we can pull it the rest of the way through and get it hooked up. A quick little cinch right there. Now that we've got that connected I'm gonna make our run up to the engine bay, drop this thing down, and we'll catch up up there. We made it up to our engine bay and I've got our fuel pressure line run over to this side where it's gonna connect to our fuel rail. We've got to get it cut and add another fitting. Once that fuel goes into this fuel rail in bank one it's gonna cross over through here into our second fuel rail on bank two and then connect to this FiTech four port fuel pressure regulator. You can see with the four ports you've got a ton of different options for all of your fuel fittings to go in or out. Plus a nice gauge on the front. And if you're getting rowdy with a boosted setup you've got a boost reference port right here. We've got this line run back to the tank. So the last thing to get this entire plumbing system done is get that last fitting put on, get everything hooked up, and call it a day. So let's get to it. [ Music ]
[Brandon] This thing is looking killer now that you got it down on all four wheels. -I'm loving the stance so far. Everything's fitting really nice. We got suspension, exhaust. The fuel system's finished up once I get this line hooked up. We made some good progress today. -Looks like we've got a couple more wires to get it all hooked up and we can hear it fire up. We're all out of time for today. So for that you're gonna have to tune in next time.