In This Episode
Video Transcript
You're watching Power Nation.
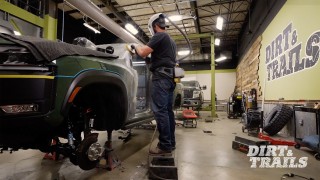
Today on Dirt and Trails, we've got a fresh face here in the shop, and it is gonna be the base for our next project.
Now, a lot of y'all at home probably recognize it from season one,
but Brandon here has not had the pleasure of getting his hands on it yet.
So Brandon, so far,
what do you think of this thing?
It's an awesome truck, man. I love Land Cruisers. I think there's a lot of opportunity for some really cool stuff.
You have a game plan or what are you thinking?
I've got a plan, and it's gonna be a lot of fun,
but it's gonna take a lot of work to get it done. And as we all know,
a lot of work takes a lot of time,
so we need to get to it.
Welcome to Dirt and Trails.
A little bit more.
It's probably about good there,
yeah, I think we'll be all right there.
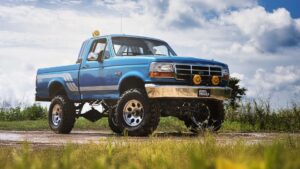
So this is our 1987 Toyota Land Cruiser FJ 60.
Pretty much stock as it would have rolled off the production floor.
Definitely from the outside though, I could see we got some 33s,
got a no name lift kit on it,
little interesting paint job, but I'd really like to know how it drives. Have you had a chance yet?
Yes,
so
on the road we're just not gonna talk about that because it's, it's just terrible.
But
off-road this thing performs exactly how you would have expected.
lifted Land Cruiser to do,
but we still ran into some issues with,
you know,
ground clearance,
low power from the stock engine,
the usual stuff you're gonna run into if you're running something like this with
original stuff under the hood.
Yeah,
sounds like we have a lot of room for improvement. You wanna run me through?
Yeah,
so the idea is I wanna take this thing and I wanna turn it into something that can be daily driven
and beat up on the trail.
Now
that comes with needing to be reliable and.
Capable and able to keep up with all the new stuff out there
because it'd be great to do that
while looking this cool.
Oh yeah,
I mean, that sounds awesome to me. I,
I like that plan. I definitely agree with it.
Yeah,
so,
first, we're gonna yank the original 4.2 L 2F inline six and the 4-speed manual transmission and get it replaced with an engine power built 6 L LS
backed up by a modern 5-speed manual with overdrive.
Then we're on to rebuild the original transfer case,
upgrade the factory axles with new gears and lockers,
and add a custom suspension setup
to finish up underneath,
aftermarket wheels and all terrain tires will be installed for true daily driver to weekend trail versatility.
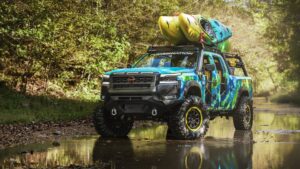
On the outside, we're adding off-road bumpers to the front and rear,
protective side steps,
fender flares,
auxiliary lighting,
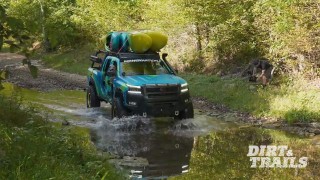
and a roof rack that'll carry anything from kayaks.
To a camping tent,
finally,
the transformation completes when we update the interior with modern amenities like a touch screen head unit with upgraded audio,
rearview camera,
custom gauges,
and heated seats.
When it's all said and done,
we'll be left with a daily drivable off-road capable rest Omond.
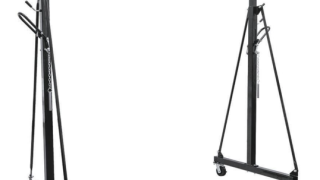
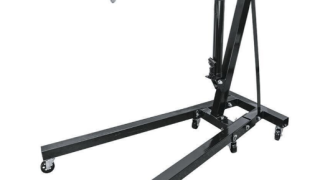
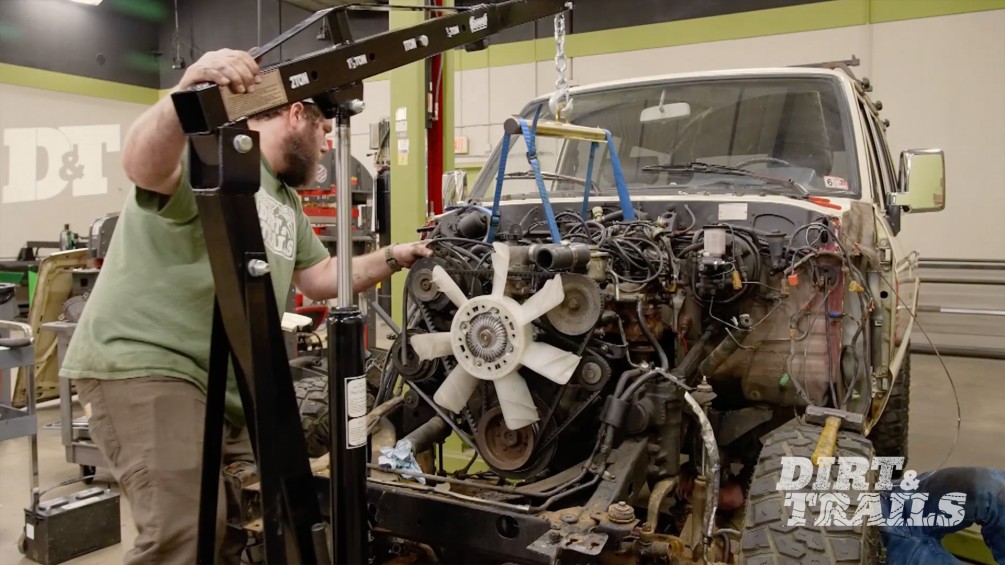
Whether you call this a cherry picker,
an engine hoist,
or a shop crane,
it doesn't really change the fact that it is necessary and extremely important to have a good one in your garage.
So,
when our old ones started having issues,
well,
Summit Racing was our natural first choice to look for a new one.
Now, this one's got a couple of features, the old one didn't.
Biggest thing, probably these folding legs.
Now,
this design,
obviously, as you saw from me pulling it off the wall there,
helps out a lot with
saving some room in your garage or your shop.
And
it's super easy to set it up, because all you do is just pull a pin on either side.
Get in here,
give it just a little
lift.
Put your pen back in.
And you're done.
Come over to the other side, do the same thing.
And you can see just like that, even with me talking to you guys and you watching me do this,
took all of maybe 30 seconds to get this thing off the wall and set up, ready to rock and roll.
Now,
another thing I really like about this compared to our old one.
It's got casters on all corners.
We can spin it around,
look at this.
You could even dance with it.
So, now that we've got a cherry picker that's not taking up quite as much space and it moves around better,
let's get it over to the truck,
get this engine pulled.
Probably should have shortened those up before we got up here, huh?
Yeah.
Here, give me just a second.
All right,
this side is letting down.
Yeah, this side of the mount's not unbolted all the way.
Will both of us pick it up?
Can't win.
There we go.
Wash your hands.
There we go.
Yeah,
see, this, this is what it's supposed to look like when I took that side out
this and this and this are all separate pieces yeah.
All right,
so I'm gonna crawl under there, um,
if you wanna just give this thing a shake once I'm there so I can see if we're separating where we need to be.
There we go.
Whew.
That's a much longer bolt than I expected.
All right, uh,
I don't think it's gonna shift at all, but just in case,
make sure you're not in the way of nothing,
yeah.
Free,
yep,
looks like all 4 of them.
There she is.
Well that got real easy real fast.
You
still got that ratchet,
electric one,
yeah.
Oh,
it's it's already got 14 on there.
Oh wow,
that's service.
I'll guide you in
Jess.
All right,
you are clear of the stabilizer.
Yeah, I'm just trying to get the pan clear of the.
Frame.
Yeah,
there you go.
I mean, I think all in all this thing really wasn't all that bad. I think it was mostly just tired,
you know, I mean it, it still got down the road
slowly,
but it did.
I mean, I don't think these things ever went too fast to begin with,
yeah, and I don't think anyone cares enough about these engines for us to really worry about it. So let's go toss this in the scrap heap and make some room for that LS.
I'm gonna make some Twitter guys angry with that comment.
Up next,
the tear down continues
as the boys pull the axles.
There it goes,
yeah,
get that thing out of here.
All right, let's get these axles pulled.
Man, this thing's leaking so bad I can smell the gear oil from out here.
Hey, at least we know there's oil in it.
True.
Something in here is
stiff.
Good thing we're rebuilding it.
I say, I bet you.
Sounds like this brake is locked up.
Well, the hand brakes on.
Oh well
yeah that'll do it. What'd you do that for?
You put it on.
OK,
well, in that case we don't have locked up brakes. We just have a bad parking brake.
You can spin through it.
Yeah, I should not be able to overpower the parking brake with this little pry bar.
OK,
so, uh,
add parking brake repairs to the list.
You
got a lot of dancing going on up here.
This thing almost just fell out on us.
Yeah.
Won't be needing that anymore.
So yeah let's,
OK,
let's be careful
we're in a little bit more comfortable of a spot woo,
I was pushing
OK cool a little more.
I'm glad that was you because I'm like is this thing just going.
There you go.
I'm taking this off for
a hope and a prayer that it will actually slide backwards.
I highly doubt that's gonna happen.
I do too, but sometimes you gotta just try,
you know what I mean?
Where's the hammer
in the toolbox.
Just
give it a love tap or two.
Some deep cream should come right out,
yeah,
you
get in there, smack away.
Watch yourself, Greg.
All right, we're gonna try a different technique.
Right.
There you go.
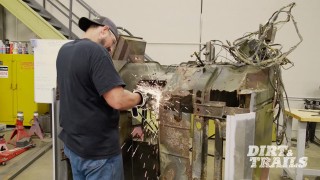
Well, I still gotta cut this wire real quick.
Jeez,
I'm surprised I cut the wire.
Oh man, those bolt cutters are great.
I wonder why the exhaust just folded in half like that.
Must be real rusty.
No, it's the modular system.
It's for storage.
You can fold it up.
Then
it doesn't take up as much room on your shelf, and then when you're done you just fold it back and put it back on.
Yes the
Mother Nature already disconnected that sway bar link.
It's actually for more articulation.
Is that what it is?
That's what they tell you.
It's a,
it's an eco-friendly quick disconnect.
That's what big off-road wants you to think.
Here we go.
You needed this to do some love tap
just a little bit.
There we go. There we go.
Just need a little bit more convincing.
Good thing we're not reusing any of this stuff.
Yeah,
there we go.
There it goes,
yeah,
get that thing out of here.
Look at this
beautiful.
So let's roll this out and grab that other one.
Go ahead and knock these out.
Dirt falling everywhere.
There we go,
we got a little separation.
Just like that,
that should be it right there,
good,
yep.
Let's get this thing set up for a long term stay and get these up on some stances.
Coming up,
the boys blow apart the axles
and prep them to be rebuilt.
Oh man
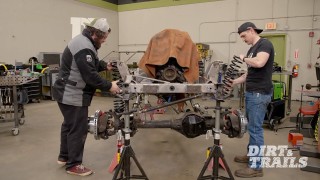
Now that we've got the axles removed from our Land Cruiser, we've got them up on some stands. I've got the rear pretty much fully disassembled and ready for final cleaning,
but
we've got another axle we still need to get torn apart. That's gonna be our front here.
So,
what we're gonna do is we're gonna get this axle to the same state as that one back there, so that we can move on and get some of those nice new parts over on the table installed in here.
It's gonna include some gears,
lockers,
new axle shafts in the back,
new brakes up front.
I mean, really, anything that we might need to do to make sure these axles are the perfect foundation for this project. So,
let's crack into this thing and get going.
And we're starting here by getting our lockouts removed because that's gonna give us access to everything we need
to fully disassemble the outers of this axle.
Beautiful.
Thanks,
now those are all cracked loose,
we move on and
use our electric ratchet.
Speed things up just a little bit.
Oh yeah.
All right,
these ones are a little stiffer. So what I'm gonna need to do here is I'm gonna grab a pry bar or a big screwdriver.
I'm gonna put it in between these wheel studs. It's gonna allow me to hold this so that
it stops trying to turn.
So now that we've got those nuts out of the way we need to get all of these cone washers removed.
What we're gonna do
is we're gonna throw just a little bit of heat at this with some penetrating oil and that should help us get those out of there.
Now we do have grease and bearings and all that in here but every single bit of it's getting replaced,
so we're not super concerned with any issues that might arise from
heating or hitting any of this stuff.
There we go.
Now that we have all of those out, we're gonna go ahead and pop the snap ring in here and we'll pull the rest of this hub housing off.
Right in like that.
Nice gentle squeeze.
And remove
the rest of our hub housing.
All right, so our next step, we need to get our axle nut removed.
There we go,
we're gonna go ahead and get our brake removed.
So what I'm gonna do is I'm gonna take a flathead screwdriver
and in this case a pry bar because
this thing is loose.
I'm just gonna pry
ever so slightly
and because this is set up with pistons on either side,
we'll go ahead and do it both directions.
What this is gonna do
is gonna push our caliper pistons in
just a little bit,
and that's gonna ensure
that it's not gonna give us any problems
with getting this caliper off.
There we go.
All right, so the bolts are broken loose,
but before I actually take it off, I need to get our brake hose disconnected.
And now that that's out of the way
without dropping it, we can
remove our rotor
along with our wheel bearings and our hub.
There we go.
Rotate
All right. I've got the spindle cleaned up on this side and I went ahead and removed this and the axle shaft from the other side already. So we're gonna do it over here.
Keep pushing forward.
Oh,
a little bit of gear oil there,
not too bad.
And we can see that we didn't have any gear oil intrusion from the center section
into the outer,
so that's good.
That means our seals are good. We don't really have much to worry about.
However,
we are gonna replace these with Chromolly shafts because even though they're in good shape,
Chromolly is gonna be a lot stronger, and that's gonna help out a lot when we put 500 horsepower up under that hood.
We're gonna start getting everything else removed
so that we can get our knuckles off.
There we go.
Now we've got more cone washers in here,
so we're gonna hit it with a little bit more penetrating oil all the way around.
This should help loosen up the cone washers.
See,
already starting to pop up there.
Let's make sure all those cone washers stay in place.
Never mind.
So we'll move on down here.
Do the same thing
There we go.
Alright,
so with all of that popped loose,
we should
have our first knuckle right here and as you can tell
it's gonna take a ton of cleaning before we're ready to actually rebuild this thing,
but I'm gonna set it aside for now,
move back to the other end of this axle to get us caught up once again,
then we're ready to get to our third member and well we're just about done with getting it pulled apart.
Everything's a hammer.
Now I can use a pry bar
and make sure it's separated all the way around.
There we go.
It's a little spin.
Up next,
the boys build a fixture to make the diff rebuilds easier.
I got some hardware. Let's see how we do.
So Eric went ahead and pulled this 3rd member out of the rear cruiser axle,
and we're gonna go ahead and take some measurements off of this guy
and get into CAD. We're gonna design a little fixture plate to index off of this mating surface,
and I'm thinking we're gonna hold it off the edge of the table so we have space to pull everything out the bottom,
pull everything out the top.
I went ahead and found this guy.
Looks like something they whipped up for the front diff on lead foot.
I mean, it's a solid design.
It definitely did the job. It's a little thin,
but
now that we got the plasma table, I think it's time to make something a little beefier,
a little fancier.
So we're gonna go ahead and grab some measurements for the bolt spacing,
the overall size,
get some off the table,
and then we're gonna get into the CAD,
get to work,
get it over to the plasma table.
So now that we have all of our measurements taken care of,
I went ahead and went over to the computer and got everything drawn up in CAD.
We have this top plate here that's gonna locate the third member across these 4 holes along the arc.
These 4 straight holes are gonna mount to the top of the table,
and we're gonna use this front plate as a gusset just to make sure everything is nice and sturdy while Eric's trying to work on it.
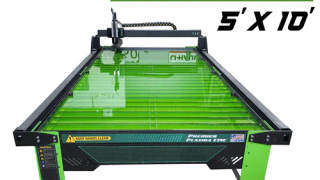
We're gonna cut it all out on this awesome 5 by 10 table that Premiere Plasma has given to us.
It's packed with features.
We got a water bed so we can keep the smoke and the noise down.
We also have this awesome floating head
that works as keeping the Z axis consistent throughout the whole cut,
so we can get clean, reliable cuts out of this thing time and time again.
They even provided us with this Hypertherm 65S, which is an awesome machine
can cut very heavy duty material, so we'll be able to handle anything we need to do.
So let's go ahead and get this thing cutting.
So now we have everything cut off of the plasma table. I showed you guys the base plates, but what I didn't show you guys is these little spacer plates we cut as well.
The reason for these
is so when we stick the bolts through them into the table,
they can actually grab on.
These bolts don't usually like to grab on until you're about 3/8 off the table's surface,
so that's why we had to make this little 1/8 inch spacer plate, so we can get up to that 3/8.
So
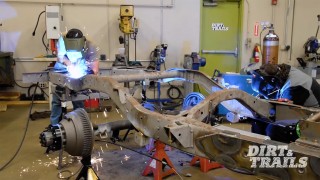
what I'm gonna do now is I'm gonna tack this guy in a couple of spots to make sure it doesn't move around.
I'll get in here and I'll start doing some stitch welds around it to hold it down nice and tight,
then we're gonna repeat the same process on the other one.
Here we go.
Cool,
just gotta let this guy cool and we can flip it over and get the rest of the backside, and it should be all ready for Eric to go to town.
All right,
Brandon, what you got cooking up over here?
Well, we got this little fixture all said and done.
Just gonna tighten it up a little bit,
but, uh, I think it's ready for us to test fit the diff,
see how it fits on there, man, that looks great. Yeah,
let's, uh,
let's do that. That's gonna make this a lot easier.
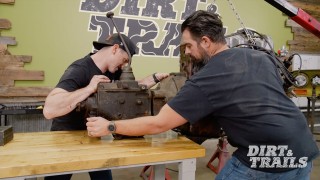
I got some hardware. Let's see how we do.
Almost there, yeah.
Man, that looks good.
I mean, I've got access everywhere I need. I could still turn it all over,
check for everything.
Yeah, this is awesome. This is gonna make this way easier and that's actually a really good working hike too.
All right awesome well I'm gonna start grabbing parts and
get into this thing
sounds good.
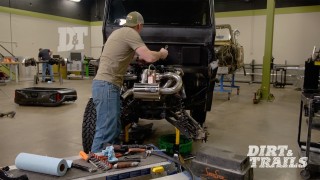
We have made a ton of progress getting this Land Cruiser torn apart today. We've got the engine,
transmission, and transfer case out.
Axles and suspension are all removed,
which means that this is basically stripped down to the ground and ready to start being rebuilt. So next time you see us,
we're gonna get right back on those axles,
get the gears and lockers figured out in our differentials,
and maybe if we're all lucky,
we might even get to start fitting this engine in here.
But that's all the time we've got for today,
so we'll see you next time.
Show Full Transcript
Today on Dirt and Trails, we've got a fresh face here in the shop, and it is gonna be the base for our next project.
Now, a lot of y'all at home probably recognize it from season one,
but Brandon here has not had the pleasure of getting his hands on it yet.
So Brandon, so far,
what do you think of this thing?
It's an awesome truck, man. I love Land Cruisers. I think there's a lot of opportunity for some really cool stuff.
You have a game plan or what are you thinking?
I've got a plan, and it's gonna be a lot of fun,
but it's gonna take a lot of work to get it done. And as we all know,
a lot of work takes a lot of time,
so we need to get to it.
Welcome to Dirt and Trails.
A little bit more.
It's probably about good there,
yeah, I think we'll be all right there.
So this is our 1987 Toyota Land Cruiser FJ 60.
Pretty much stock as it would have rolled off the production floor.
Definitely from the outside though, I could see we got some 33s,
got a no name lift kit on it,
little interesting paint job, but I'd really like to know how it drives. Have you had a chance yet?
Yes,
so
on the road we're just not gonna talk about that because it's, it's just terrible.
But
off-road this thing performs exactly how you would have expected.
lifted Land Cruiser to do,
but we still ran into some issues with,
you know,
ground clearance,
low power from the stock engine,
the usual stuff you're gonna run into if you're running something like this with
original stuff under the hood.
Yeah,
sounds like we have a lot of room for improvement. You wanna run me through?
Yeah,
so the idea is I wanna take this thing and I wanna turn it into something that can be daily driven
and beat up on the trail.
Now
that comes with needing to be reliable and.
Capable and able to keep up with all the new stuff out there
because it'd be great to do that
while looking this cool.
Oh yeah,
I mean, that sounds awesome to me. I,
I like that plan. I definitely agree with it.
Yeah,
so,
first, we're gonna yank the original 4.2 L 2F inline six and the 4-speed manual transmission and get it replaced with an engine power built 6 L LS
backed up by a modern 5-speed manual with overdrive.
Then we're on to rebuild the original transfer case,
upgrade the factory axles with new gears and lockers,
and add a custom suspension setup
to finish up underneath,
aftermarket wheels and all terrain tires will be installed for true daily driver to weekend trail versatility.
On the outside, we're adding off-road bumpers to the front and rear,
protective side steps,
fender flares,
auxiliary lighting,
and a roof rack that'll carry anything from kayaks.
To a camping tent,
finally,
the transformation completes when we update the interior with modern amenities like a touch screen head unit with upgraded audio,
rearview camera,
custom gauges,
and heated seats.
When it's all said and done,
we'll be left with a daily drivable off-road capable rest Omond.
Whether you call this a cherry picker,
an engine hoist,
or a shop crane,
it doesn't really change the fact that it is necessary and extremely important to have a good one in your garage.
So,
when our old ones started having issues,
well,
Summit Racing was our natural first choice to look for a new one.
Now, this one's got a couple of features, the old one didn't.
Biggest thing, probably these folding legs.
Now,
this design,
obviously, as you saw from me pulling it off the wall there,
helps out a lot with
saving some room in your garage or your shop.
And
it's super easy to set it up, because all you do is just pull a pin on either side.
Get in here,
give it just a little
lift.
Put your pen back in.
And you're done.
Come over to the other side, do the same thing.
And you can see just like that, even with me talking to you guys and you watching me do this,
took all of maybe 30 seconds to get this thing off the wall and set up, ready to rock and roll.
Now,
another thing I really like about this compared to our old one.
It's got casters on all corners.
We can spin it around,
look at this.
You could even dance with it.
So, now that we've got a cherry picker that's not taking up quite as much space and it moves around better,
let's get it over to the truck,
get this engine pulled.
Probably should have shortened those up before we got up here, huh?
Yeah.
Here, give me just a second.
All right,
this side is letting down.
Yeah, this side of the mount's not unbolted all the way.
Will both of us pick it up?
Can't win.
There we go.
Wash your hands.
There we go.
Yeah,
see, this, this is what it's supposed to look like when I took that side out
this and this and this are all separate pieces yeah.
All right,
so I'm gonna crawl under there, um,
if you wanna just give this thing a shake once I'm there so I can see if we're separating where we need to be.
There we go.
Whew.
That's a much longer bolt than I expected.
All right, uh,
I don't think it's gonna shift at all, but just in case,
make sure you're not in the way of nothing,
yeah.
Free,
yep,
looks like all 4 of them.
There she is.
Well that got real easy real fast.
You
still got that ratchet,
electric one,
yeah.
Oh,
it's it's already got 14 on there.
Oh wow,
that's service.
I'll guide you in
Jess.
All right,
you are clear of the stabilizer.
Yeah, I'm just trying to get the pan clear of the.
Frame.
Yeah,
there you go.
I mean, I think all in all this thing really wasn't all that bad. I think it was mostly just tired,
you know, I mean it, it still got down the road
slowly,
but it did.
I mean, I don't think these things ever went too fast to begin with,
yeah, and I don't think anyone cares enough about these engines for us to really worry about it. So let's go toss this in the scrap heap and make some room for that LS.
I'm gonna make some Twitter guys angry with that comment.
Up next,
the tear down continues
as the boys pull the axles.
There it goes,
yeah,
get that thing out of here.
All right, let's get these axles pulled.
Man, this thing's leaking so bad I can smell the gear oil from out here.
Hey, at least we know there's oil in it.
True.
Something in here is
stiff.
Good thing we're rebuilding it.
I say, I bet you.
Sounds like this brake is locked up.
Well, the hand brakes on.
Oh well
yeah that'll do it. What'd you do that for?
You put it on.
OK,
well, in that case we don't have locked up brakes. We just have a bad parking brake.
You can spin through it.
Yeah, I should not be able to overpower the parking brake with this little pry bar.
OK,
so, uh,
add parking brake repairs to the list.
You
got a lot of dancing going on up here.
This thing almost just fell out on us.
Yeah.
Won't be needing that anymore.
So yeah let's,
OK,
let's be careful
we're in a little bit more comfortable of a spot woo,
I was pushing
OK cool a little more.
I'm glad that was you because I'm like is this thing just going.
There you go.
I'm taking this off for
a hope and a prayer that it will actually slide backwards.
I highly doubt that's gonna happen.
I do too, but sometimes you gotta just try,
you know what I mean?
Where's the hammer
in the toolbox.
Just
give it a love tap or two.
Some deep cream should come right out,
yeah,
you
get in there, smack away.
Watch yourself, Greg.
All right, we're gonna try a different technique.
Right.
There you go.
Well, I still gotta cut this wire real quick.
Jeez,
I'm surprised I cut the wire.
Oh man, those bolt cutters are great.
I wonder why the exhaust just folded in half like that.
Must be real rusty.
No, it's the modular system.
It's for storage.
You can fold it up.
Then
it doesn't take up as much room on your shelf, and then when you're done you just fold it back and put it back on.
Yes the
Mother Nature already disconnected that sway bar link.
It's actually for more articulation.
Is that what it is?
That's what they tell you.
It's a,
it's an eco-friendly quick disconnect.
That's what big off-road wants you to think.
Here we go.
You needed this to do some love tap
just a little bit.
There we go. There we go.
Just need a little bit more convincing.
Good thing we're not reusing any of this stuff.
Yeah,
there we go.
There it goes,
yeah,
get that thing out of here.
Look at this
beautiful.
So let's roll this out and grab that other one.
Go ahead and knock these out.
Dirt falling everywhere.
There we go,
we got a little separation.
Just like that,
that should be it right there,
good,
yep.
Let's get this thing set up for a long term stay and get these up on some stances.
Coming up,
the boys blow apart the axles
and prep them to be rebuilt.
Oh man
Now that we've got the axles removed from our Land Cruiser, we've got them up on some stands. I've got the rear pretty much fully disassembled and ready for final cleaning,
but
we've got another axle we still need to get torn apart. That's gonna be our front here.
So,
what we're gonna do is we're gonna get this axle to the same state as that one back there, so that we can move on and get some of those nice new parts over on the table installed in here.
It's gonna include some gears,
lockers,
new axle shafts in the back,
new brakes up front.
I mean, really, anything that we might need to do to make sure these axles are the perfect foundation for this project. So,
let's crack into this thing and get going.
And we're starting here by getting our lockouts removed because that's gonna give us access to everything we need
to fully disassemble the outers of this axle.
Beautiful.
Thanks,
now those are all cracked loose,
we move on and
use our electric ratchet.
Speed things up just a little bit.
Oh yeah.
All right,
these ones are a little stiffer. So what I'm gonna need to do here is I'm gonna grab a pry bar or a big screwdriver.
I'm gonna put it in between these wheel studs. It's gonna allow me to hold this so that
it stops trying to turn.
So now that we've got those nuts out of the way we need to get all of these cone washers removed.
What we're gonna do
is we're gonna throw just a little bit of heat at this with some penetrating oil and that should help us get those out of there.
Now we do have grease and bearings and all that in here but every single bit of it's getting replaced,
so we're not super concerned with any issues that might arise from
heating or hitting any of this stuff.
There we go.
Now that we have all of those out, we're gonna go ahead and pop the snap ring in here and we'll pull the rest of this hub housing off.
Right in like that.
Nice gentle squeeze.
And remove
the rest of our hub housing.
All right, so our next step, we need to get our axle nut removed.
There we go,
we're gonna go ahead and get our brake removed.
So what I'm gonna do is I'm gonna take a flathead screwdriver
and in this case a pry bar because
this thing is loose.
I'm just gonna pry
ever so slightly
and because this is set up with pistons on either side,
we'll go ahead and do it both directions.
What this is gonna do
is gonna push our caliper pistons in
just a little bit,
and that's gonna ensure
that it's not gonna give us any problems
with getting this caliper off.
There we go.
All right, so the bolts are broken loose,
but before I actually take it off, I need to get our brake hose disconnected.
And now that that's out of the way
without dropping it, we can
remove our rotor
along with our wheel bearings and our hub.
There we go.
Rotate
All right. I've got the spindle cleaned up on this side and I went ahead and removed this and the axle shaft from the other side already. So we're gonna do it over here.
Keep pushing forward.
Oh,
a little bit of gear oil there,
not too bad.
And we can see that we didn't have any gear oil intrusion from the center section
into the outer,
so that's good.
That means our seals are good. We don't really have much to worry about.
However,
we are gonna replace these with Chromolly shafts because even though they're in good shape,
Chromolly is gonna be a lot stronger, and that's gonna help out a lot when we put 500 horsepower up under that hood.
We're gonna start getting everything else removed
so that we can get our knuckles off.
There we go.
Now we've got more cone washers in here,
so we're gonna hit it with a little bit more penetrating oil all the way around.
This should help loosen up the cone washers.
See,
already starting to pop up there.
Let's make sure all those cone washers stay in place.
Never mind.
So we'll move on down here.
Do the same thing
There we go.
Alright,
so with all of that popped loose,
we should
have our first knuckle right here and as you can tell
it's gonna take a ton of cleaning before we're ready to actually rebuild this thing,
but I'm gonna set it aside for now,
move back to the other end of this axle to get us caught up once again,
then we're ready to get to our third member and well we're just about done with getting it pulled apart.
Everything's a hammer.
Now I can use a pry bar
and make sure it's separated all the way around.
There we go.
It's a little spin.
Up next,
the boys build a fixture to make the diff rebuilds easier.
I got some hardware. Let's see how we do.
So Eric went ahead and pulled this 3rd member out of the rear cruiser axle,
and we're gonna go ahead and take some measurements off of this guy
and get into CAD. We're gonna design a little fixture plate to index off of this mating surface,
and I'm thinking we're gonna hold it off the edge of the table so we have space to pull everything out the bottom,
pull everything out the top.
I went ahead and found this guy.
Looks like something they whipped up for the front diff on lead foot.
I mean, it's a solid design.
It definitely did the job. It's a little thin,
but
now that we got the plasma table, I think it's time to make something a little beefier,
a little fancier.
So we're gonna go ahead and grab some measurements for the bolt spacing,
the overall size,
get some off the table,
and then we're gonna get into the CAD,
get to work,
get it over to the plasma table.
So now that we have all of our measurements taken care of,
I went ahead and went over to the computer and got everything drawn up in CAD.
We have this top plate here that's gonna locate the third member across these 4 holes along the arc.
These 4 straight holes are gonna mount to the top of the table,
and we're gonna use this front plate as a gusset just to make sure everything is nice and sturdy while Eric's trying to work on it.
We're gonna cut it all out on this awesome 5 by 10 table that Premiere Plasma has given to us.
It's packed with features.
We got a water bed so we can keep the smoke and the noise down.
We also have this awesome floating head
that works as keeping the Z axis consistent throughout the whole cut,
so we can get clean, reliable cuts out of this thing time and time again.
They even provided us with this Hypertherm 65S, which is an awesome machine
can cut very heavy duty material, so we'll be able to handle anything we need to do.
So let's go ahead and get this thing cutting.
So now we have everything cut off of the plasma table. I showed you guys the base plates, but what I didn't show you guys is these little spacer plates we cut as well.
The reason for these
is so when we stick the bolts through them into the table,
they can actually grab on.
These bolts don't usually like to grab on until you're about 3/8 off the table's surface,
so that's why we had to make this little 1/8 inch spacer plate, so we can get up to that 3/8.
So
what I'm gonna do now is I'm gonna tack this guy in a couple of spots to make sure it doesn't move around.
I'll get in here and I'll start doing some stitch welds around it to hold it down nice and tight,
then we're gonna repeat the same process on the other one.
Here we go.
Cool,
just gotta let this guy cool and we can flip it over and get the rest of the backside, and it should be all ready for Eric to go to town.
All right,
Brandon, what you got cooking up over here?
Well, we got this little fixture all said and done.
Just gonna tighten it up a little bit,
but, uh, I think it's ready for us to test fit the diff,
see how it fits on there, man, that looks great. Yeah,
let's, uh,
let's do that. That's gonna make this a lot easier.
I got some hardware. Let's see how we do.
Almost there, yeah.
Man, that looks good.
I mean, I've got access everywhere I need. I could still turn it all over,
check for everything.
Yeah, this is awesome. This is gonna make this way easier and that's actually a really good working hike too.
All right awesome well I'm gonna start grabbing parts and
get into this thing
sounds good.
We have made a ton of progress getting this Land Cruiser torn apart today. We've got the engine,
transmission, and transfer case out.
Axles and suspension are all removed,
which means that this is basically stripped down to the ground and ready to start being rebuilt. So next time you see us,
we're gonna get right back on those axles,
get the gears and lockers figured out in our differentials,
and maybe if we're all lucky,
we might even get to start fitting this engine in here.
But that's all the time we've got for today,
so we'll see you next time.