Video Transcript
You're watching Power Nation.
Going on today, Eric?
Well,
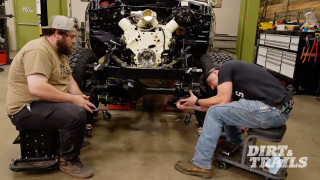
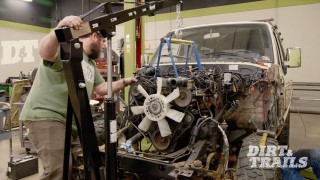
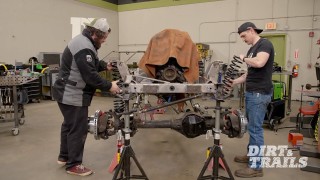
last time you guys saw this thing, we got everything pulled out from underneath.
There it goes.
Today we gotta start putting it back together. So we're gonna get started with our differentials,
get some new gears and lockers installed before we take them back to the axles and start getting those done up as well.
Welcome to Dirt and Trails.
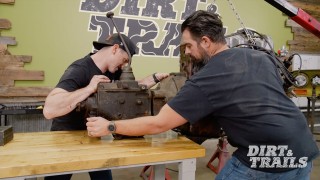
We've got our differential set up in our fixture.
We've got all the tools laid out,
and all of our new parts here on the table.
Now, the new parts are gonna include this ring and pinion set that we're gonna use to lower our gear ratio for bigger tires,
all of the bearings and everything we need to make the adjustments inside the differential to get it set up right,
plus,
a locker that is gonna replace the open Spider gears to help with traction both on and off the road when we need it.
Now,
more importantly than anything else though,
I hopped online and I found a copy of the factory service manual that's gonna include all of our specs and everything we need to make sure that our setup is good and this differential is actually gonna last.
But,
first things first,
we gotta get it blown apart.
Go ahead and move on
to our bearing caps.
There we go.
Go ahead and remove
these bearing races we can pull our differential out.
That is
concerningly loose.
Couple like taps.
We're ready to flip this over so that we can remove the oil seal,
get the pinion out.
Well, at least with the
differential out this thing is
quite a bit lighter.
Normally, you would wanna be a little bit more careful than this,
but we know we're not reusing any of this,
including the pinion,
so I'm gonna go ahead and just get it out of there.
And get our seal pulled out.
One of the pieces we will be reusing our oil slinger.
That is dirty.
Now we're ready to start installing all this new stuff that we got from SummitRacing.
And we're gonna begin with our ring gear.
Now,
this might look identical to this old one we've pulled out,
but there's actually 4 more teeth on this one.
So,
that's gonna change our gear ratio from a 373 to a 411, and that's gonna help us manage larger tires
and better bottom end off-road.
And for right now, I'm just starting all of our nuts.
I'm gonna take the torque wrench and we're gonna go around, we're gonna tighten these almost like it was a wheel in an alternating star pattern.
Now we're going to the factory torque spec
of 81 foot-pounds.
All right, with all of these torque down,
we're ready to move on and start installing this locker.
So first,
a little bit of gear oil is actually gonna help these things
stick on there.
I'm gonna go ahead and drop it
right
in like so,
make sure it's spinning good, no catches or anything like that.
Drop that guy right in there like that.
And keep adding lube as we go.
We gotta get our other two shear pins installed.
Now this is where everything starts to get fun
because the last thing you wanna do
is have these tiny little springs go flying across your shop.
We get our last spring installed.
And we'll get our spacer
pulled up out of the way.
So now I'm gonna take this out to the press. We're gonna get our new side bearings installed,
then we're gonna continue with our reassembly.
Now we will temporarily adjust the preload without our spacer in there.
Now that we've confirmed our backlash,
next step is gonna be to check our gear contact pattern, and that means
getting a little artsy.
All we're gonna do is we're gonna take just a little bit of this stuff and paint it
on both sides of a few of our gear teeth, and we're gonna cycle this through a few times
and see where our pinion is contacting our reindeer.
All right.
So, our contact pattern looks pretty good.
Now, we get to move on.
We'll get the companion flange pulled off,
remove our setup bearing,
get our permanent bearing and our crush sleeve installed,
start getting this preload set, and this thing is just about ready.
All right, now right there,
I felt that start to get tight,
which is where we need to switch to our torque wrench, because with using a crushed sleeve,
you wanna be really careful about not over tightening, cause over-tightening
means you have to start over with a new crushed sleeve.
Come on.
We've got our pinion nut torque.
We've got our preload set right within our range of 16 to 22 inch pounds,
which means all that's left is I gotta pull this flange off,
get this seal installed,
then we're ready to get it put back together one last time,
take it over and install it on our axle.
The boys give the frame and firewall new life with a fresh coat of paint.
As Eric's finishing getting the axles all put together,
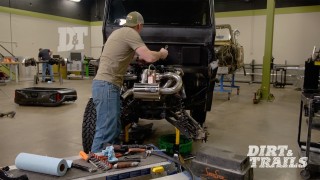
we're getting everything prepped here so we can get that ATK engine loaded in.
So as you guys saw,
I've been spending some time masking the firewall off, and I even went over the frame with the DA,
some scuffing pads, some sandpaper,
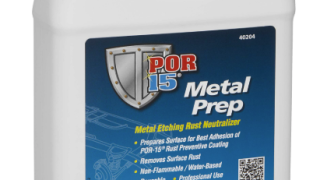
and then we hit it with a little bit of this POR 15 metal prep.
After that,
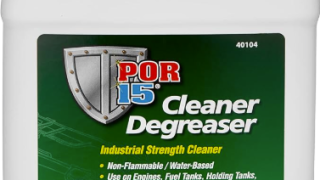
We came in and we degreased and cleaned everything to get us ready
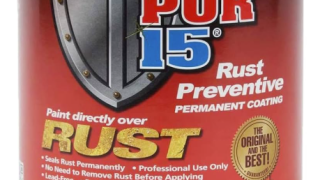
for this rust preventative. This rust preventative is an awesome coat.
Works well as a top coat as long as you don't have a lot of UV on it.
The main thing it does is just help keep that rust out of those little crannies and nooks on the frame.
So once we get the frame all squared away,
we're gonna go in and hit the firewall with some of the.
Self-etch primer. This stuff works great anytime you have any bare metal exposed,
just gets a real good hold on it.
Plus, it's gonna give us a great surface.
Just go ahead and spray this topcoat on.
Awesome color,
great UV protection. This is just a nice durable topcoat,
exactly what you're gonna want under the hood.
So,
let's get to it.
First we're going to take some rust preventative paint and brush it on the frame.
We can get all the crayons and nuckies.
What?
Where's the little biscuit tunes out?
Now that the paint is dry,
we're going to mask the frame to protect it while we paint the firewall.
Now we can apply a primer to the firewall.
Now that we have POR 15 self etch primer laid out here on the firewall, we give it about 30 minutes in between each coat so we can make sure everything was ready to go.
So next, we're gonna get this top coat on there.
We gotta give it about an hour in between each,
so it should take a little bit more,
but let's get to it.
We're giving it a little bit of a misting here so we can get a good stick on it.
Otherwise, if we start to put too much paint on here, you risk the chance of getting runs and it not biting into that primer the way we want it to.
Excellent advice, he claims to not be a painter, but seems to be doing just fine.
Still displaying excellent form,
demonstrating great can control.
I'm gonna switch the eyes.
Just look at that fingering technique.
Amazing work from Mr.
Romeo.
So now that we have a nice orientation coat on here, we're gonna give her about 5 to 10 minutes to flash.
We're gonna come back in and put a nice heavy coat on there, and that will take about 1 hour to get fully flashed and ready for another one.
We're gonna give it about 1 hour for it to fully flash. We're gonna come back in, put another coat on, so we got a nice thick, durable paint on there,
and we're gonna give that final coat about 24 hours to fully cure.
We're gonna come in,
get all this plastic off, and we should be able to get that engine in.
The boys rebuild the axles and had bigger brakes to match.
Well this is looking pretty good, but I think you might need this to uh mask up that hole there.
Yeah, it definitely make it a little bit easier, you know.
And this thing cleaned up good and the rest of the parts are looking good back there too.
Yeah,
everything's coming out pretty good. We're getting it all nice and shiny.
Well, I think at this point all I've got left to do here is I just gotta get some RTV on here. We drop this in and then
this thing's all yours to get painted.
Sounds good to me, man.
Oh, this is the good stuff. I can smell it.
Oh yeah
I'll just spin this.
All right.
Now that we've got this axle back from paint, I've been moving right along, getting everything put back together.
Now, the best way to make sure that you do this right when you're doing jobs like this is to have something like a service manual just like we did for our differential rebuilds.
Now,
one great function of the service manual
is you get things like exploded views that are gonna show you where all the tiny little parts go.
Now, this one's a little small for you guys to see.
So we've rebuilt it here on the bench as best we can with the actual parts that we're using.
Starting from the inside out, we've already got a new seal installed inside of our axle tube,
along with new races for both of our kingpin bearings.
Moving forward from there,
a new wiper seal set that's gonna be all of these pieces you see here,
the felt ring,
the rubber,
and the metal ring.
After that,
we've got the knuckle itself.
Now, on the knuckle itself, we've got obviously our steering arm and our lower kingpin cap.
Those are in place with the original shims so that we've got a good starting point to get our preload correct
after the rebuild.
So now we'll check our preload.
Inside of the knuckle,
you can see we've got our brand new Chromly axle shaft.
It's gonna help everything hold up to the new power level of that LS under the hood.
So much grease.
We're gonna be bolting our spindle and dust shield back onto our knuckle.
From there,
we're gonna have our dust shield attached to our spindle,
and we've got all new hardware that's gonna keep the dust and dirt out of here, so the new bearings we're installing are gonna stay safe.
Past that, we've got our new brake rotor,
caliper,
and pads ready to go, and that's somewhere else we're gonna be making a little bit of an improvement,
but we'll talk about that some more later on.
A little bit to the high side,
but
that's OK.
Inside of our hub itself, we've got new races for those new bearings,
and
of course,
we've got to have a brand new lockout hub to cap it all off.
Now, going forward, we've just got a few more pieces left to put back on here before we can go ahead and finally call this finished up.
The last few pieces are gonna be our brakes.
We have the option here to make some common sense OEM level upgrades using a caliper.
from something else,
and these nice pads and rotors that we got from EBC brakes.
Now, starting with the caliper,
you'll see that it itself is physically larger than our old one.
It's gonna give us more fluid capacity and help with heat dissipation.
But
the bigger upgrade here
is in the size of these pistons,
cause you'll see
that in our old one,
we've got one big and one small piston on either side of the caliper.
In the new one,
we've got 2 equal sized.
larger pistons
on either side.
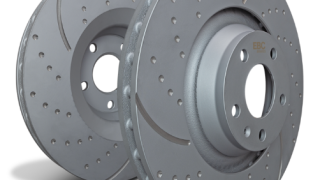
It's gonna provide much better clamping force against these nice GD sport dimpled and slotted rotors that came from EBC.
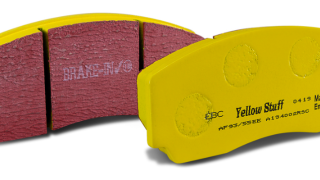
And what's actually gonna provide that clamping force is gonna be a nice set of these classic yellow stuff EBC brake pads.
Now, these are a long-lasting,
high-friction compound that is great for handling stuff like off-roading and towing heavy loads, which
obviously we're gonna be doing once we start throwing some gear in this thing.
Let's get this stuff installed.
There's a little bit of grease on the back here.
Take and slide this guy.
S.
All right,
now that we've got our brakes installed,
the very last thing we've got to do is pop the cap off of our lockout hub and install this snap ring.
With this finished up,
I think it's time we take a little field trip down the hall and we're gonna see what we're putting under the hood for this thing.
The boys install a new power plant to bring our cruiser to life.
Hey y'all.
Hey, hello.
What is that?
This is for our next project.
It is a 6 L LQ4 from ATK.
OK,
so cool.
long block. It's already got some of the hard work done,
so I figure if you guys are willing to finish it for us, it should save you a little bit of time.
Project. I love it. Oh, OK,
yeah, like wrap it up and
I, I assume dyno tune in.
Yep,
yep.
I mean,
we're,
we're not going for anything ridiculous,
right?
No,
no specific power number,
nothing crazy, but
we need it to be reliable, obviously.
That's number one priority because this one our goal is a dual purpose daily driver and off-roadable resto mode. So it's got to have power, it's gotta have style,
and it's got to be reliable and it's got to be able to do all three of those things anywhere that we feel like taking it.
OK, well,
power and reliability, you're already 3 steps ahead because LS base. So,
uh, 6 L,
right?
Yep,
this is a really, really solid foundation.
ATK makes a great product
and, uh, so from going from here,
I think we have a lot of this stuff probably in-house that we could finish. This out and have something that that's a rock and roller.
Yeah, I think that'd be awesome.
So, uh,
carbureted or fuel injected fuel injected,
yeah,
I think with what we're doing just for the fact that we are trying to make this something that anybody could get in and enjoy,
I think fuel injection is gonna be the way to go. Hit the key and go. I like that. OK,
uh, yeah, swap pan, timing cover stuff's easy, all that,
I guess. The last question is, uh,
color.
I mean, the, the truck itself is what, a kind of a tan, like a light tan, so I think maybe like a Cummins beige might look good.
I was thinking maybe we could. Do something with the uh like the livery or the vinyl scheme that's on it or maybe on the valve covers because we match that retro theme.
Yeah, there's that retro stripe package on there.
You think you guys might be able to color match some stripes on the valve cover?
Oh yeah,
we'll do like a nice smooth valve cover so you can really,
you know, have it laid out in there.
We'll jump right on it. We can kind of put this on hold and,
and we'll get right after this thing. I mean, we got tons of work to do too,
so I think we go our separate ways and we'll see you guys when this thing's done.
All right,
we'll let you know when we have it on the dyno and it's ready to go.
We'll take one here.
We'll see you when it's guys.
OK,
time to mix up some colorer for our LS.
All right,
I think that's pretty close.
So now that the paint's sat for about 24 hours and cured on the firewall, it's time to get all the plastic off and take a look.
It's like opening Christmas presents over here.
Look at this.
Looking pretty good, man.
All right, you wanna grab the other side of the plastic? We'll just get this whole sheet off at once.
All right.
Wow,
that is quite the difference.
Dude, this stuff is looking great.
I mean, the offset from this fresh black to the body color,
it's,
that's perfect.
Oh yeah,
it's looking awesome. I cannot wait to see the engine in here.
Yeah. And actually, speaking of that,
I think the guys down in Engine Power are about done. So should we go see if we can pick that up?
Let's go for it.
All right,
we're all programmed in. Everything's looking good.
We got the guys down here from Dirt and Trails. Yeah, I see a whole bunch of numbers and I'm assuming they're all good because I hear and see that thing running.
So I guess the big question mark is how much power is it gonna make?
Well, that's what we're gonna find out.
You're all ready to go.
We programmed in. Yep.
All right, here we go.
It's like it was made for it.
It's like
it's absolutely beautiful.
It's 499.2 and made within 6/10 of a horsepower and 449.6 for torque.
This engine looks great. It sounds great. Obviously the numbers are great. I mean,
I am super excited to get it off of here and get it down to our shop,
so.
Whatever you guys got to do to get it ready,
we'll be waiting for you.
Yeah,
yeah, we got a few final checks basically, and then, uh,
then we'll get it off and get it down. We want to see this thing in the vehicle as soon as possible. Yeah, don't worry. So do we.
All right, man,
we're on it.
Good job. Thanks guys.
Thank you guys.
While you're here,
I'm,
I'm just gonna make another run.
Why not?
Yeah.
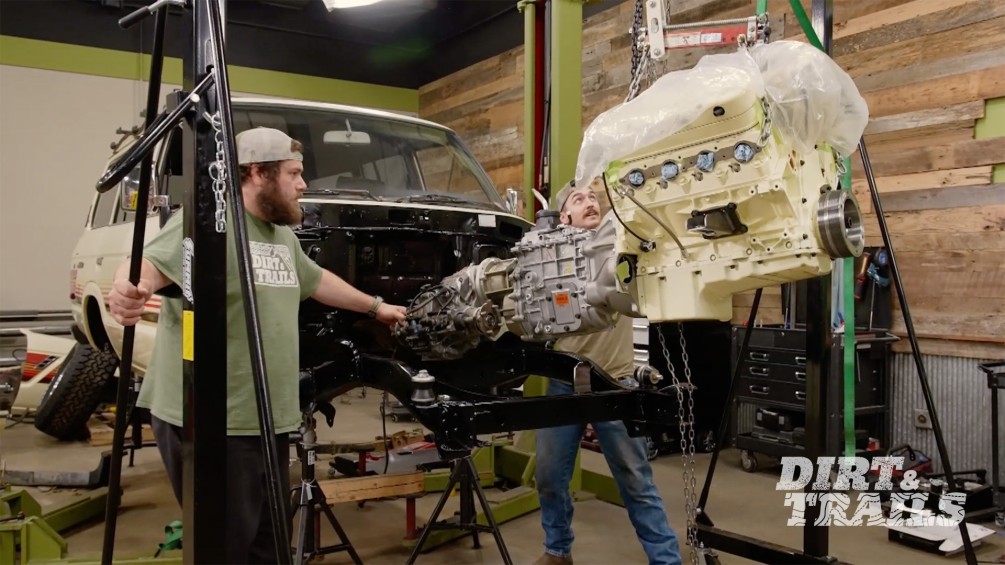
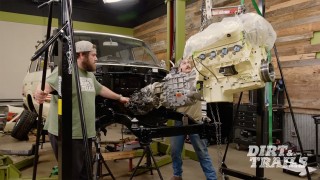
So we got the engine from Engine Power made into the transmission in TC.
It's ready to go in,
so let's get it all mounted up.
Man.
There we go,
yeah.
All right, right
right there,
start coming down a little, yeah.
All right,
moment of truth. Is this really gonna look as good as we think?
Just shove it back behind. We just gotta see how this thing looks for now.
There you go.
That looks good,
man. This thing's looking killer.
Yeah, it really is.
I mean,
I still can't get over these stripes that Frankie put on here because they match what's on this truck almost exactly.
Yeah,
it, it looks awesome. I mean, I just really, I'm really digging that contrast between the frame,
the back,
the engine,
everything. It just pops.
It does,
especially once we get the fenders on here and we've really finished closing it in,
dude.
I can't wait, but unfortunately, getting this thing in here
took up all the time we've got for today.
So, if you wanna see it get plumbed, wired and fired up,
you're gonna have to come back next time.
Show Full Transcript
Going on today, Eric?
Well,
last time you guys saw this thing, we got everything pulled out from underneath.
There it goes.
Today we gotta start putting it back together. So we're gonna get started with our differentials,
get some new gears and lockers installed before we take them back to the axles and start getting those done up as well.
Welcome to Dirt and Trails.
We've got our differential set up in our fixture.
We've got all the tools laid out,
and all of our new parts here on the table.
Now, the new parts are gonna include this ring and pinion set that we're gonna use to lower our gear ratio for bigger tires,
all of the bearings and everything we need to make the adjustments inside the differential to get it set up right,
plus,
a locker that is gonna replace the open Spider gears to help with traction both on and off the road when we need it.
Now,
more importantly than anything else though,
I hopped online and I found a copy of the factory service manual that's gonna include all of our specs and everything we need to make sure that our setup is good and this differential is actually gonna last.
But,
first things first,
we gotta get it blown apart.
Go ahead and move on
to our bearing caps.
There we go.
Go ahead and remove
these bearing races we can pull our differential out.
That is
concerningly loose.
Couple like taps.
We're ready to flip this over so that we can remove the oil seal,
get the pinion out.
Well, at least with the
differential out this thing is
quite a bit lighter.
Normally, you would wanna be a little bit more careful than this,
but we know we're not reusing any of this,
including the pinion,
so I'm gonna go ahead and just get it out of there.
And get our seal pulled out.
One of the pieces we will be reusing our oil slinger.
That is dirty.
Now we're ready to start installing all this new stuff that we got from SummitRacing.
And we're gonna begin with our ring gear.
Now,
this might look identical to this old one we've pulled out,
but there's actually 4 more teeth on this one.
So,
that's gonna change our gear ratio from a 373 to a 411, and that's gonna help us manage larger tires
and better bottom end off-road.
And for right now, I'm just starting all of our nuts.
I'm gonna take the torque wrench and we're gonna go around, we're gonna tighten these almost like it was a wheel in an alternating star pattern.
Now we're going to the factory torque spec
of 81 foot-pounds.
All right, with all of these torque down,
we're ready to move on and start installing this locker.
So first,
a little bit of gear oil is actually gonna help these things
stick on there.
I'm gonna go ahead and drop it
right
in like so,
make sure it's spinning good, no catches or anything like that.
Drop that guy right in there like that.
And keep adding lube as we go.
We gotta get our other two shear pins installed.
Now this is where everything starts to get fun
because the last thing you wanna do
is have these tiny little springs go flying across your shop.
We get our last spring installed.
And we'll get our spacer
pulled up out of the way.
So now I'm gonna take this out to the press. We're gonna get our new side bearings installed,
then we're gonna continue with our reassembly.
Now we will temporarily adjust the preload without our spacer in there.
Now that we've confirmed our backlash,
next step is gonna be to check our gear contact pattern, and that means
getting a little artsy.
All we're gonna do is we're gonna take just a little bit of this stuff and paint it
on both sides of a few of our gear teeth, and we're gonna cycle this through a few times
and see where our pinion is contacting our reindeer.
All right.
So, our contact pattern looks pretty good.
Now, we get to move on.
We'll get the companion flange pulled off,
remove our setup bearing,
get our permanent bearing and our crush sleeve installed,
start getting this preload set, and this thing is just about ready.
All right, now right there,
I felt that start to get tight,
which is where we need to switch to our torque wrench, because with using a crushed sleeve,
you wanna be really careful about not over tightening, cause over-tightening
means you have to start over with a new crushed sleeve.
Come on.
We've got our pinion nut torque.
We've got our preload set right within our range of 16 to 22 inch pounds,
which means all that's left is I gotta pull this flange off,
get this seal installed,
then we're ready to get it put back together one last time,
take it over and install it on our axle.
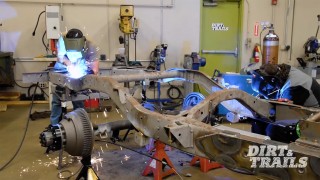
The boys give the frame and firewall new life with a fresh coat of paint.
As Eric's finishing getting the axles all put together,
we're getting everything prepped here so we can get that ATK engine loaded in.
So as you guys saw,
I've been spending some time masking the firewall off, and I even went over the frame with the DA,
some scuffing pads, some sandpaper,
and then we hit it with a little bit of this POR 15 metal prep.
After that,
We came in and we degreased and cleaned everything to get us ready
for this rust preventative. This rust preventative is an awesome coat.
Works well as a top coat as long as you don't have a lot of UV on it.
The main thing it does is just help keep that rust out of those little crannies and nooks on the frame.
So once we get the frame all squared away,
we're gonna go in and hit the firewall with some of the.
Self-etch primer. This stuff works great anytime you have any bare metal exposed,
just gets a real good hold on it.
Plus, it's gonna give us a great surface.
Just go ahead and spray this topcoat on.
Awesome color,
great UV protection. This is just a nice durable topcoat,
exactly what you're gonna want under the hood.
So,
let's get to it.
First we're going to take some rust preventative paint and brush it on the frame.
We can get all the crayons and nuckies.
What?
Where's the little biscuit tunes out?
Now that the paint is dry,
we're going to mask the frame to protect it while we paint the firewall.
Now we can apply a primer to the firewall.
Now that we have POR 15 self etch primer laid out here on the firewall, we give it about 30 minutes in between each coat so we can make sure everything was ready to go.
So next, we're gonna get this top coat on there.
We gotta give it about an hour in between each,
so it should take a little bit more,
but let's get to it.
We're giving it a little bit of a misting here so we can get a good stick on it.
Otherwise, if we start to put too much paint on here, you risk the chance of getting runs and it not biting into that primer the way we want it to.
Excellent advice, he claims to not be a painter, but seems to be doing just fine.
Still displaying excellent form,
demonstrating great can control.
I'm gonna switch the eyes.
Just look at that fingering technique.
Amazing work from Mr.
Romeo.
So now that we have a nice orientation coat on here, we're gonna give her about 5 to 10 minutes to flash.
We're gonna come back in and put a nice heavy coat on there, and that will take about 1 hour to get fully flashed and ready for another one.
We're gonna give it about 1 hour for it to fully flash. We're gonna come back in, put another coat on, so we got a nice thick, durable paint on there,
and we're gonna give that final coat about 24 hours to fully cure.
We're gonna come in,
get all this plastic off, and we should be able to get that engine in.
The boys rebuild the axles and had bigger brakes to match.
Well this is looking pretty good, but I think you might need this to uh mask up that hole there.
Yeah, it definitely make it a little bit easier, you know.
And this thing cleaned up good and the rest of the parts are looking good back there too.
Yeah,
everything's coming out pretty good. We're getting it all nice and shiny.
Well, I think at this point all I've got left to do here is I just gotta get some RTV on here. We drop this in and then
this thing's all yours to get painted.
Sounds good to me, man.
Oh, this is the good stuff. I can smell it.
Oh yeah
I'll just spin this.
All right.
Now that we've got this axle back from paint, I've been moving right along, getting everything put back together.
Now, the best way to make sure that you do this right when you're doing jobs like this is to have something like a service manual just like we did for our differential rebuilds.
Now,
one great function of the service manual
is you get things like exploded views that are gonna show you where all the tiny little parts go.
Now, this one's a little small for you guys to see.
So we've rebuilt it here on the bench as best we can with the actual parts that we're using.
Starting from the inside out, we've already got a new seal installed inside of our axle tube,
along with new races for both of our kingpin bearings.
Moving forward from there,
a new wiper seal set that's gonna be all of these pieces you see here,
the felt ring,
the rubber,
and the metal ring.
After that,
we've got the knuckle itself.
Now, on the knuckle itself, we've got obviously our steering arm and our lower kingpin cap.
Those are in place with the original shims so that we've got a good starting point to get our preload correct
after the rebuild.
So now we'll check our preload.
Inside of the knuckle,
you can see we've got our brand new Chromly axle shaft.
It's gonna help everything hold up to the new power level of that LS under the hood.
So much grease.
We're gonna be bolting our spindle and dust shield back onto our knuckle.
From there,
we're gonna have our dust shield attached to our spindle,
and we've got all new hardware that's gonna keep the dust and dirt out of here, so the new bearings we're installing are gonna stay safe.
Past that, we've got our new brake rotor,
caliper,
and pads ready to go, and that's somewhere else we're gonna be making a little bit of an improvement,
but we'll talk about that some more later on.
A little bit to the high side,
but
that's OK.
Inside of our hub itself, we've got new races for those new bearings,
and
of course,
we've got to have a brand new lockout hub to cap it all off.
Now, going forward, we've just got a few more pieces left to put back on here before we can go ahead and finally call this finished up.
The last few pieces are gonna be our brakes.
We have the option here to make some common sense OEM level upgrades using a caliper.
from something else,
and these nice pads and rotors that we got from EBC brakes.
Now, starting with the caliper,
you'll see that it itself is physically larger than our old one.
It's gonna give us more fluid capacity and help with heat dissipation.
But
the bigger upgrade here
is in the size of these pistons,
cause you'll see
that in our old one,
we've got one big and one small piston on either side of the caliper.
In the new one,
we've got 2 equal sized.
larger pistons
on either side.
It's gonna provide much better clamping force against these nice GD sport dimpled and slotted rotors that came from EBC.
And what's actually gonna provide that clamping force is gonna be a nice set of these classic yellow stuff EBC brake pads.
Now, these are a long-lasting,
high-friction compound that is great for handling stuff like off-roading and towing heavy loads, which
obviously we're gonna be doing once we start throwing some gear in this thing.
Let's get this stuff installed.
There's a little bit of grease on the back here.
Take and slide this guy.
S.
All right,
now that we've got our brakes installed,
the very last thing we've got to do is pop the cap off of our lockout hub and install this snap ring.
With this finished up,
I think it's time we take a little field trip down the hall and we're gonna see what we're putting under the hood for this thing.
The boys install a new power plant to bring our cruiser to life.
Hey y'all.
Hey, hello.
What is that?
This is for our next project.
It is a 6 L LQ4 from ATK.
OK,
so cool.
long block. It's already got some of the hard work done,
so I figure if you guys are willing to finish it for us, it should save you a little bit of time.
Project. I love it. Oh, OK,
yeah, like wrap it up and
I, I assume dyno tune in.
Yep,
yep.
I mean,
we're,
we're not going for anything ridiculous,
right?
No,
no specific power number,
nothing crazy, but
we need it to be reliable, obviously.
That's number one priority because this one our goal is a dual purpose daily driver and off-roadable resto mode. So it's got to have power, it's gotta have style,
and it's got to be reliable and it's got to be able to do all three of those things anywhere that we feel like taking it.
OK, well,
power and reliability, you're already 3 steps ahead because LS base. So,
uh, 6 L,
right?
Yep,
this is a really, really solid foundation.
ATK makes a great product
and, uh, so from going from here,
I think we have a lot of this stuff probably in-house that we could finish. This out and have something that that's a rock and roller.
Yeah, I think that'd be awesome.
So, uh,
carbureted or fuel injected fuel injected,
yeah,
I think with what we're doing just for the fact that we are trying to make this something that anybody could get in and enjoy,
I think fuel injection is gonna be the way to go. Hit the key and go. I like that. OK,
uh, yeah, swap pan, timing cover stuff's easy, all that,
I guess. The last question is, uh,
color.
I mean, the, the truck itself is what, a kind of a tan, like a light tan, so I think maybe like a Cummins beige might look good.
I was thinking maybe we could. Do something with the uh like the livery or the vinyl scheme that's on it or maybe on the valve covers because we match that retro theme.
Yeah, there's that retro stripe package on there.
You think you guys might be able to color match some stripes on the valve cover?
Oh yeah,
we'll do like a nice smooth valve cover so you can really,
you know, have it laid out in there.
We'll jump right on it. We can kind of put this on hold and,
and we'll get right after this thing. I mean, we got tons of work to do too,
so I think we go our separate ways and we'll see you guys when this thing's done.
All right,
we'll let you know when we have it on the dyno and it's ready to go.
We'll take one here.
We'll see you when it's guys.
OK,
time to mix up some colorer for our LS.
All right,
I think that's pretty close.
So now that the paint's sat for about 24 hours and cured on the firewall, it's time to get all the plastic off and take a look.
It's like opening Christmas presents over here.
Look at this.
Looking pretty good, man.
All right, you wanna grab the other side of the plastic? We'll just get this whole sheet off at once.
All right.
Wow,
that is quite the difference.
Dude, this stuff is looking great.
I mean, the offset from this fresh black to the body color,
it's,
that's perfect.
Oh yeah,
it's looking awesome. I cannot wait to see the engine in here.
Yeah. And actually, speaking of that,
I think the guys down in Engine Power are about done. So should we go see if we can pick that up?
Let's go for it.
All right,
we're all programmed in. Everything's looking good.
We got the guys down here from Dirt and Trails. Yeah, I see a whole bunch of numbers and I'm assuming they're all good because I hear and see that thing running.
So I guess the big question mark is how much power is it gonna make?
Well, that's what we're gonna find out.
You're all ready to go.
We programmed in. Yep.
All right, here we go.
It's like it was made for it.
It's like
it's absolutely beautiful.
It's 499.2 and made within 6/10 of a horsepower and 449.6 for torque.
This engine looks great. It sounds great. Obviously the numbers are great. I mean,
I am super excited to get it off of here and get it down to our shop,
so.
Whatever you guys got to do to get it ready,
we'll be waiting for you.
Yeah,
yeah, we got a few final checks basically, and then, uh,
then we'll get it off and get it down. We want to see this thing in the vehicle as soon as possible. Yeah, don't worry. So do we.
All right, man,
we're on it.
Good job. Thanks guys.
Thank you guys.
While you're here,
I'm,
I'm just gonna make another run.
Why not?
Yeah.
So we got the engine from Engine Power made into the transmission in TC.
It's ready to go in,
so let's get it all mounted up.
Man.
There we go,
yeah.
All right, right
right there,
start coming down a little, yeah.
All right,
moment of truth. Is this really gonna look as good as we think?
Just shove it back behind. We just gotta see how this thing looks for now.
There you go.
That looks good,
man. This thing's looking killer.
Yeah, it really is.
I mean,
I still can't get over these stripes that Frankie put on here because they match what's on this truck almost exactly.
Yeah,
it, it looks awesome. I mean, I just really, I'm really digging that contrast between the frame,
the back,
the engine,
everything. It just pops.
It does,
especially once we get the fenders on here and we've really finished closing it in,
dude.
I can't wait, but unfortunately, getting this thing in here
took up all the time we've got for today.
So, if you wanna see it get plumbed, wired and fired up,
you're gonna have to come back next time.