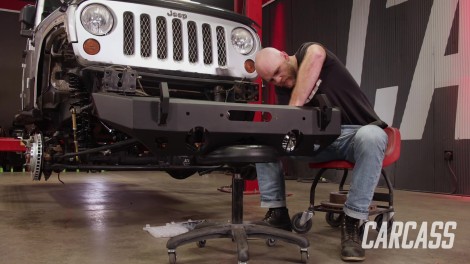
Carcass Featured Projects

Carcass Builds

Parts Used In This Episode

Summit Racing
Jeep Wrangler Headlight Assembly
Summit Racing
Rock Krawler X-Factor Mid Arm Suspension Lift Kit
Summit Racing
Rugged RIdge HD Series Stubby Front Bumper
Summit Racing
Rugged Ridge Steel Tube Fender Flares
Optima
YellowTop High Performance AGM Battery
Summit Racing
Exhaust Spacers
Warn Industries
Zeon 12-S Platinum Winch

Episode Transcript

(Jeremy)>> You're watching Powernation!

(Jimmy)>> Today on Carcass we put on the last few pieces of our dual purpose Jeep JK. We'll install a new bumper and winch, as well as add some new recovery gear for the trails. We address some ways to fix poorly installed fender flares. Plus fix a clearance issue with our driveshaft. [ Music ] [ engine revving ] [ Music ]

(Jimmy)>> Hey everybody, welcome to Carcass. Jeremy and I are back on our 2012 Jeep JK, and when we got this thing it was noticeably pretty beat up and we just don't know any history on it, but we are getting this thing back together to go hit some trails and there's a ton of stuff that we've already done.

(Jeremy)>> And where we started with this thing is we first removed the suspension, which was a lift kit. And again, we didn't know anything about it. So we added a three and a half inch rock crawler lift kit that we got from Summit Racing. We upgraded the front and rear diff covers. Plus we did a diff service. Jimmy also did a brake upgrade using Powerstop pads and rotors, and we kinda wrapped the hole bottom side up with a set of extended brake lines. So that brings us to where we are today and the condition that the Jeep is in. Today's plan is to tackle everything on the exterior, and that includes some recovery items.

(Jimmy)>> So we're gonna start up front here to get a winch and a bumper on this thing. Now when it came time for Jeremy and I to choose what bumper we wanted on our Jeep as you can imagine the aftermarket for Jeeps is absolutely massive and there are a ton of options out there, but we ended up going with t this Rugged Ride HD stubby bumper that we got from Summit Racing. It's really nice, powder coated black, all steel construction, and it features an integrated winch plate and a place to mount our fairlead. It has integrated toe hooks that will accept D-rings, and it can even mount the o-e fog lights. We didn't want anything that was too outrageous looking. just needed to keep it nice and simple, and probably the best part is this bumper bolts directly to the chassis. Now before I go ahead and just bolt this on here I do have to address one thing, which is the lighting situation. Like I said, we have lights to go in the bumper but they did come with pigtails and we have to wire them up, and there is some wiring here that's looking a little bit sketchy. So I'm just gonna cut these off, and then I'll get the new ones wired in. [ Music ]

[ Music ] I've got the wires all stripped here on the chassis and also the pigtail stripped on these lights. I am going to be using the bear crimps with the accompanying piece of heat shrink. I like these a little bit better than the ones you get that have insulation on them. I feel like you can crimp these down a little bit harder, and obviously you need a torch to heat these up and shrink them. Of course I've used the insulated ones in a pinch when I've needed it. Sometimes that's just the route you have to go, but these are a little bit better for a more permanent solution. [ Music ]

[ Music ] Heat shrink is a good idea just to make sure you don't short circuit your wires, and also protect them from the elements. [ Music ] [ metal clanging ] [ Music ] [ metal clanging ] [ Music ]

(Jeremy)>> Jimmy's cruising right along on the bumper install on the JK, and per the instructions it's time to install the winch. Now the winch that we chose to go with is a Warn Zeon-12-S Platinum, and this winch is packed with a bunch of goodies. One of those being a complete wireless remote. Now with this remote you can stand in any position around your rig and fire up your winch. It can control the winch plus two accessories, and it can even show you the battery voltage of your vehicle and the winch motor temperature. So for you guys doing a lot of pulls you can really watch how your winch is doing. The winch itself is a 12,000-pound winch, which is plenty for our JK. It's got an all new high speed motor, stronger gears, and a hardened ring gear, and that translates into the fact that it'll give you 20 percent faster line speeds so you guys can get out of sticky situations a little bit quicker. It comes with everything you need to install it. One of the big things is it comes with really long power cables. So you guys can run this right up to your battery. Now it installs pretty simple. Just bolts right to the bumper that Jimmy's putting on. So all we've got to do is get this thing picked up, set it on, and we'll bolt it down. [ Music ] Alright, the winch fits in the bumper pretty nicely. We're gonna go ahead and bolt this thing down. We do have a couple more things we have to do underneath the hood before we can wire this up, but once we get that tackled then we'll come back, get the fairlead on here, put the synthetic cable in. But for now we're just gonna keep moving forward. Coming up, we replace some old, faded out headlights. Plus clean up an electrical nightmare under the hood.

(Jeremy)>> So we've got the front bumper installed and the winch is sitting in place, and now it's time to move back and up just a little bit. We're gonna tackle these worn out headlights. Looks like somebody's already tried to buff these. There's some pretty bad sand scratches in it. So we're not even going to attempt to do that again. We're just gonna go ahead and replace them. We picked up an OE set from Summit Racing, and they install right into the factory locations. So I have to get this grille/shroud out of the way here and get those installed. We use a screwdriver to remove the body clips, and then pull the grille out of the way. [ Music ] Alright guys, look at the difference between the two of them here. This is a giant upgrade, not necessarily for off road use, but even just driving down the road. [ Music ]

Cool, there's one! [ Music ] Okay, get this in here and line it up. Put a little bit of dielectric grease on the connectors here. Kinda helps everything go together a little bit quicker. Plus it will give us a little more protection from water. There we go! [ Music ] Alright, with the front of the Jeep pretty much buttoned up our checklist is getting smaller and smaller. Now we're gonna jump under the hood here. We have this mess of wires that we assume must have went to some off road lights at one point, and over here on this side we have one, two, three, four, five different connections that are made with wire nuts, and that's completely wrong. We're gonna ditch all of this aftermarket wiring, get this all out of the Jeep. Then we're gonna go over and do a battery upgrade. [ Music ]

Don't be alarmed. I know this does look like a factory wiring harness, it's not. This must run in through the firewall and go into the gauge pod. So we're gonna go ahead and ditch all of this on this side, and then we'll go to the other side and get all the rest out of the way. [ Music ] This should wrap up the mess of wires. Get all this out of here. Throw that on the ground with the trash. Get this battery out of the way. [ Music ] So the battery that we're gonna be installing in the Jeep is an Optima YellowTop battery. This is an a-g-m battery, or absorbent glass mat battery, and it's a true dual purpose battery, which means it has great cranking power with cycling capabilities. It's perfect for accessory loaded vehicles like our Jeep with our winch. [ Music ] With the battery hooked up now we've got two quick connections and we can finish the install on the winch. [ Music ]

[ winch humming ]

(Jeremy)>> And with that we'll call the winch installed.

(Jimmy)>> Along with our winch we have Warn's Medium Duty Epic Recovery Kit. This thing's gonna do great for us out on the trails in case we get into a tight spot. It comes with straps, tree protector, gloves, and some shackles. It's everything you need in case you get yourself stuck out on the trail.

(Jeremy)>> Alright guys, let's talk about when you're getting ready to take your rig out for a fun weekend. What's one thing that you always seem to take with you is a set of tools. If you're like us you usually have a plastic toolbox like this with a mess of tools on the inside. You have no idea what you have or what you don't have. Well Boxo USA has a solution for this messy toolbox. This is their offroad roll, and this comes with the basic tools you're gonna need to do your repairs when you're in the middle of the trails and at least get you back to the parking lot so you can assess the damage a little bit and then do your major repairs from there. Now this roll contains their metric tools. Got wrenches ranging from eight millimeter all the way up to twenty-one. You've got your half inch and your three-eighths ratchets. Got a couple of screwdrivers, breaker bar and some extensions, and you've got your sockets. Now also included in this kit you've got your wire cutters, set of pliers. You've got two different styles of hammers and a breaker bar. You even have your tire repair kit and some gloves to keep your hands clean. Also included in this kit is your s-a-e roll. So you have your wrenches ranging from quarter inch all the way up to one inch, and on this end you have your standard size sockets. Now a giant advantage to having your tools spread out like this versus in a plastic toolbox like this one is when you're done with your repair all you have to do is scan over everything and make sure you have all your tools with you. Then you just roll them up, set them in the carrying case, and this goes right in the back of your trail rig. Now this stuff is definitely gonna come with us when we head out with our Jeep. As far as this plastic toolbox, this is gonna go on the shelf and collect some dust. We want to add some new fender flares, but first we have to fix some issues before we install them.

(Jeremy)>> The time has come to start installing some fender flares on our JK. Now from our best guesses there's already been a set of aftermarket flares on this Jeep but we're running into a little bit of an issue. Let me show you what we're dealing with. The way that you install aftermarket fender flares are with a set of nut-serts. The way that you install a nut-sert is when you insert this into the hole that you have drilled into the body you're supposed to use a special tool that collapses this down and creates a shoulder. The issue we have going on is whoever put these in here did not collapse them down all the way and you can pull them clean out of the body. The second thing that's an issue is the hardware that came with the fender flares that we have currently, the nuts-inserts they sent are entirely too small. They fall right inside the holes that are already drilled in here. So the solution to this is we're gonna have to come in here and pull all of these nut-serts out. We're just gonna replace them with some bigger ones. These are an M-8 style nut insert. We're gonna be using a five-sixteenths style nut insert that fits in the hole already. So once we get these inserted here we're gonna come back and clean all of this up cause there's some rust around these holes. Then we'll come in and clean the rest of the whole flange up, install our fender flare, and then we should be able to move right along. [ Music ] [ drill humming ] [ Music ]

(Jeremy)>> After removing the nut-serts I'll use a wire wheel on a drill to clean up the rust and prep the area for paint. [ drill humming ] [ Music ] [ spray bottle spritzing ] [ Music ] [ scratching ] [ Music ]

(Jeremy)>> So with everything cleaned up now we're gonna go ahead and start touching up the areas where the rust was, but what if you don't have a paint brush. You can also use a Q-tip, but what if you don't either one of those? So here's a little tech tip. If you've got some newspaper laying around or just some of this masking paper if you tear it where the edge is really rough you kinda have the fibers of the paper showing. Then you can fold this paper over and make yourself a makeshift paint brush here, and the more you fold it the stronger it gets with all the layers, and those fibers will end soaking up the paint. So then you grab your handy dandy paint here and your cover, which turns into your mixing cup. Spray a little bit in there, pick up your makeshift paint brush, dab it in there so it starts soaking it up. Then go ahead and just start laying it on there. This works really good if you have pinpoint spots. So if you need to have a spot where it's super small you can keep folding them, and then they can get really small like that. For us since we're covering such a big area this is working just fine. [ Music ]

[ Music ]

So for the riv-nuts we're gonna be installing five-sixteenths riv-nuts cause that's what fits in the hole that's already in the Jeep here. We're gonna be using the big riv-nut tool cause it takes quite a bit of force to do this. So we'll set that down tight, get these close, and put a bunch of pressure on it. Then we also need to adjust the thread setting part here a little more. I'll pull down even more, until it really doesn't give us any movement. Then we know we're set tight. That's good! Should be able to get these off of here. Then we'll install the rest of them. [ Music ] So you guys might notice when you look at these closely that the inserts are going in a little crooked. I'm assuming that's because of the damage that's around the holes in here from the previous owner's installation, but they are tightening up and I think we'll able to get the flare on. It's really more of a visual thing at this point. So we'll get the rest of them in here and put the flare on. So now it's time to install the fender flare. Now the flares that we went with are from Rugged Ridge and we got these from Summit Racing. These are their five inch wide ones. They do make seven inch wide flares but we just choose to go with the five inch wide ones because we think it'll be enough to cover up the tires that we're gonna be putting on here. Now this goes with the theme we've got going for the Jeep. So these are matte black, and they've got the little tube here, and it kinda just matches everything else that's on the Jeep already. So a couple of bolts and we'll have these install. [ ratchet clicking ]

(Jeremy)>> Alright, that fits pretty good. It did come with this rubber seal here. So that prevents water from running down past the fender flare, and it gives it a nice finished look on the edge here. So we're gonna call this one down, three to go. With the new suspension installed you may run into some driveshaft issues. So we'll show you a new way to solve this on your trail rig.

(Jeremy)>> We are in the home stretch of our Jeep JK build, and before we put on the wheels and tires we have one thing that we need to address. Now when we installed the front suspension lift kit here it allowed the axle to drop out further than stock, and now we cannot hook up our front driveshaft. Reason why we can't do that is because it's resting up against the crossover exhaust pipe here, but we do have a solution. We went to Summit Racing and picked up these exhaust spacers. What these are gonna allow us to do is drop the exhaust down and move it backwards, and that should give us the clearance on our driveshaft so we can hook this thing up. Now with this being an exhaust system and the fact that it's had a bunch of heat cycles in it we're not even gonna try to unbolt this without using a little bit of heat. [ torch hissing ] [ Music ] [ bolt squeaking ]

(Jeremy)>> Makes it so much easier when you don't break the bolt off!

[ ratchet clicking ] [ Music ] [ metal clanging ]

(Jeremy)>> Now that we have the exhaust slid back we can install the spacers. There's two different length spacers. The short one goes on the driver's side, long one goes on the passenger side. [ Music ] [ drill humming ] [ ratchet clicking ] [ Music ] [ drill humming ]

(Jeremy)>> Alright, that fits perfectly and it wraps up everything underneath the JK. Let's get some wheels and tires on this thing.

(Jimmy)>> And we're going with some 37 inch tall General Grabber X-3s, which are an all season mud terrain tire. These have an aggressive enough tread that will give us some good bite on the trails but are also quiet enough to get us there and get us back home. [ Music ]

These X-3s provide extreme off road traction in mud, dirt, and rock covered terrain with impressive wet and winter performance. With their bold styling these tires come complete with Duragen technology, which provides race proven strength and durability. These tires are gonna perform for us out on the trails and look awesome wrapped around these KMC bead locks that we got from Summit Racing. Quick and dirty Jeep build. I think this thing will serve us pretty well out on the trails.

(Jeremy)>> All we have left to do is check over all the nuts and bolts for the suspension. We'll take this thing out and hammer on it!
Show Full Transcript