Carcass Featured Projects

Carcass Builds

Parts Used In This Episode

Summit Racing
B&M Stealth Pro Ratchet Shifters, part number: bmm-81120
Holley
Engine Accessories: Carburetor, Fuel Pump, Radiator
Holley
MSD LS Series Ignition Controller
Holley
Quick Fuel Carburetor
Holley
Quick Fuel Fuel Pump
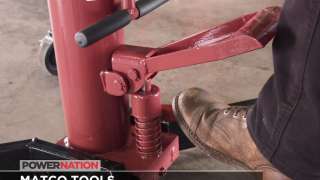
Matco Tools
MATCO Tools are the Official Tool Supplier to PowerNation
The Industrial Depot
Tools, Hardware, Shop Supplies

Episode Transcript

(Jimmy)>> You're watching Powernation!

(Jeremy)>> Today on Carcass.

(Jimmy)>> This thing runs like absolute junk.

(Jeremy)>> We take a 25th anniversary Camaro auto crossing. [ tires squealing ]

(Jimmy)>> And there's a lot to improve on.

(Jeremy)>> This thing pretty much handled like a bulldozer.

(Narrator)>> When you want to build something different you turn to Carcass. They transform cars and trucks into one of a kind builds. From street to mud if you dream it they can build it. This is Carcass, a non-traditional speed shop. [ MUSIC ]

(Jimmy)>> Sporty, stylish, when you're sitting in the driver's seat you're only 14 inches off the ground. It thumps, it bumps, and it's fast-ish. This is our 1992 Chevy Camaro but this isn't any ordinary Camaro. This is the 25th anniversary edition with 16 inch alloy aluminum wheels and a whopping 170 horses under the hood.

(Jeremy)>> Now 1992 was a big year for this car but just 10 years prior in 1982 GM released the third gen Camaro, and it sold somewhere in the neighborhood of 173,000 units that year. Well 10 years later GM had sold a total of 3.7 million of these Camaros, and that's a whole lot of third gens on the road.

(Jimmy)>> Now our third gen Camaro sports the F-body platform, which has more room under the hood and it had quite a few engine options. Ours has a 5.0 liter V-8 backed by a four speed automatic transmission which made this puppy reach a top speed of 129 miles an hour and a slow 16.5 seconds in the quarter mile.

(Jeremy)>> With a 170 horsepower putting out 255 pound feet of torque this planted the Camaro right in the mix of sports cars for this era.

(Jimmy)>> Coolness aside the 25th anniversary edition came with some novelty perks known as the heritage package. This came with a color matched grille, racing stripes that stretch from front to back, and special 25th anniversary badging.

(Jeremy)>> And since we're in the looks department check out this body style. In the front you'll find this aggressive body kit and as it sweeps down the side you'll notice horizontal lines that span the length of the door panels. Around back a large glass panel encompasses the rear hatch and the brake lights, well they scream '90's era.

(Jimmy)>> Now the inside is much of the same. You'll find all the '90's amenities down to the cigarette lighter and ash tray. We have power windows and locks, a/c controls on the dash, and the classic instrument panel that many of us remember from those days. [ MUSIC ]

(Jeremy)>> Our 5.0 liter in our '92 Camaro shows about 193,000 miles and we're about to put this thing through the ringer. So for a little added insurance we're gonna be running SeaFoam High Mileage Motor Treatment in the crankcase and in the fuel system. Now on the fuel side it's gonna help clean the injectors and on the crankcase side it's gonna clean and reduce the residue that can build up in your crankcase, and as a bonus the stuff acts as a lubricant in those critical upper engine areas, and if used regularly SeaFoam will reduce rough engine performance in high mileage vehicles like our Camaro.

(Jimmy)>> We're back at NCM Motorsports Park here in Bowling Green, Kentucky, and they have an awesome road course where someone can have a once in a lifetime experience and take a ride in a Corvette, but that's not why we're here. We're here to utilize the paddock area to test out our stock Camaro on an auto cross course. Ready?

(Jeremy)>> Yes sir.

(Jimmy)>> Set, go! [ tires squealing ]

(Jimmy)>> Sounds okay for a 305. [ tires squealing ] [ MUSIC ] [ tires squealing ] [ MUSIC ]

(Jimmy)>> Nice job buddy. [ MUSIC ]

(Jeremy)>> Alright how fast was I?

(Jimmy)>> 49:59.

(Jeremy)>> Well this thing pretty much handled like a bulldozer. So like when you get into a corner you've got to make a hard left it's pretty much gonna go straight like a bulldozer would. Tires are terrible.

(Jimmy)>> Makes sense.

(Jeremy)>> One last thing, I'm pretty sure it runs on 7 cylinders half the time. I wish you the best of luck. We'll see how well you do.

(Jimmy)>> That's awesome, great! Get me in here.

(Jeremy)>> Ready, set, go! [ engine revving ]

(Jeremy)>> Let's see how many cylinders can make it to the finish line. [ MUSIC ] [ engine revving ]

(Jeremy)>> 32, 33, 34, he's actually not doing terrible. [ tires squealing ] [ MUSIC ]

(Jeremy)>> Wow, wow, got a little race going on here. Son of a... He actually beat me. How's that possible. Two seconds faster, 47:78.

(Jimmy)>> What's my time?

(Jeremy)>> It's barely running.

(Jimmy)>> What's my time?

(Jeremy)>> 47:78.

(Jimmy)>> Winner, winner chicken dinner! That's on like 5 cylinders. That's on like 5 cylinders, yes! Woo yes!

(Jeremy)>> You don't need to gloat I'm standing right here.

(Jimmy)>> This thing runs like absolute junk and I still beat you.

(Jeremy)>> I can't understand it because I don't know how many cylinders you ran on.

(Jimmy)>> I think it's like an ignition issue or something because throughout the whole track it kept going in and out. And like I'd pick up speed, lose speed, but like you said the suspension just needs to go away.

(Jeremy)>> I think so, and now that we have an issue underneath the hood I think everything under here needs to go away too.

(Jimmy)>> And now we can pick up every single one of these cones and go home cause it's hot.

(Jeremy)>> I don't want to.

(Jimmy)>> Up next, what's in store for our 1992 Camaro? Perhaps some engine power?

(Jeremy)>> You're watching Carcass.

[ MUSIC ]

(Jimmy)>> Okay so here's what I learned from yesterday. With the ignition issues and everything this motor probably needs to come out and it's super underpowered anyway, but Pat and Mike have that Low Buck Vortec, the 5-3 LS based engine, that I think would be a perfect fit for this.

(Jeremy)>> I can think of a really good thing to back up this Low Buck Vortec which is a great idea to put in it cause guys put LS' in everything. We'll get rid of the 700-R-4 that's behind here. The guys from Gearstar built us a turbo 400 that is specifically designed for auto crossing, and obviously that's what this car's gonna do. So I think we can probably just get on to getting the stuff out of this car, get it on the hoist, and make some room for all this new stuff going underneath it.

(Jimmy)>> Get the old stuff out, new stuff in.

(Jeremy)>> Here's the grand idea for this build. We're gonna take our '92 25th anniversary Camaro and turn it into an auto cross car. We're gonna get rid of the 170 ponies, go all the way up to 406 ponies. We're gonna back that up with a turbo 400 transmission specifically built for auto crossing. Then we're gonna move underneath the car, ditch all of that old tired suspension, and replace it with a bunch of good parts that's gonna make this car hug and handle on the course. We're gonna wrap a wide set of wheels with a wide set of tires, and then put some fender flares on the side of the car to give it a nasty stance. When we're done with that Jimmy and I are gonna design our own mild aero package but we're gonna do all of that right here in house.

(Jimmy)>> We'll make life easier for us by removing the hood. It'll get set aside for some attention later. Then with the vehicle in the air we'll need to do a bunch of odds and ends to get this drivetrain out, like draining the oil.

(Jeremy)>> So this has got to be a first. I've been working on cars for like 20 years now. Somebody left the harmonic balancer installer in the balancer without the crank bolt in there. It's literally the installer is what's holding the balancer on. That's a free tool right there is what that is. Dirtiest part of any job, fluids. [ MUSIC ]

(Jimmy)>> Look at that, injector cleaner.

(Jeremy)>> That didn't help. In addition to draining all the fluids we'll need to cut out the old exhaust and make room for us to remove this old transmission. Up top we'll make some room so we can pull out the engine. The best way to do that is to get rid of the radiator. [ MUSIC ] Dude that's a new radiator. That's a new fan, look at that. Let's take a break from our 305 tear out and take a look at what's gonna be replacing this thing. This is a 406 horsepower 5.3 liter LS from the guys down in engine power. Now this thing came out of a wrecked Silverado. So Pat and Mike tore it completely down to the engine block, cleaned it all up, and threw it back together. Now when they were done with it it ran like a watch. [ engine revving ]

(Jeremy)>> And the big thing for us is man it's gonna double the horsepower underneath the hood of our Camaro.

(Jimmy)>> With the added horsepower we're gonna need a transmission that won't grenade into a million pieces, and this is where Gearstar comes in. They custom built this level four turbo 400 transmission, but Zack, the owner of Gearstar, wouldn't call this a transmission. At this level he calls it a horsepower transferring system. This transmission can handle up to 1,000 pound feet of torque, and all the transmissions that come out of his shop are custom built by a single expert from start to finish, and they're dyno tested for 100 miles, and Gearstar backs all this up with a 36 month warranty and dedicated tech support.

(Jeremy)>> Now that we know what engine and transmission are going in this thing let's get rid of the 305 and make way for the new drivetrain. [ MUSIC ] Coming up we drop in our LS and find a plug and play way to use our existing gauges next on Carcass.

[ engine revving ]

(Jeremy)>> This is the 406 horsepower LS that we got from the guys down in Engine Power. Now Pat and Mike got this out of a wrecked Silverado and gave this thing a thorough inspection, and the EP guys really dialed this thing in for us to use in our Camaro.

(Jimmy)>> With it getting its final run on the dyno they sent it down to us and we were able to add up all the accessories and pieces that'll suit our needs. Holley has a lot of support for these LS engines. So we picked up everything we'll need for the install.

(Jeremy)>> We're not the first guys to put an LS inside of a Camaro, and there's some people out there that are helping out with this. This is bracket we got from Holley Performance. Now what we're gonna do is take the stock clam shell off of the crossmember where the 5.0 liter used to sit. The upside to this is that these four bolts holes are actually gonna go into four holes that are already on the crossmember, and then the flip side of that is we're gonna take a stock clam shell for a newer series LS and we're gonna bolt this directly to our LS. [ drill buzzing ] [ MUSIC ]

(Jeremy)>> Alright go ahead and go down. [ MUSIC ] Man it's like this thing fits in here, keep going.

(Jimmy)>> Our engine fits easily into our motor mounts, and a couple of taps of the hammer get the bolts all the way through.

(Jeremy)>> There's a lot of you guys out there putting LS' in anything and everything, and there's some vital signs we need to keep track of like the oil pressure and the coolant temp. Now we know that the stock sensors on our LS aren't gonna work with our gauges inside of our Camaro. What we could do is switch out the dash but we want to leave it the same and look stock appearing. We could also come out here in the engine bay, find our stock sensors, look for our wiring to match, see if the connections match, and if they don't get into the harness, cut and splice new connectors in it. Now that's all fine and dandy if that's something you guys want to do but we're looking for something a little more plug and play ready. So we're gonna be adding a brand new set of stock 305 sensors. We're gonna start with the coolant temp sensor. Now the coolant temp sensor for our LS we need to keep that because it's gonna run our MSD ignition box to run our coils. So we're gonna go ahead and add a stock 305 coolant temp sensor back here on the passenger side cylinder head. Now that's a pretty tight fit and we knew we weren't gonna be able to do it when the engine was installed. So went ahead, took care of that when it was sitting out on the engine stand. This port didn't match the thread pitch of our new sensor. So to remedy that we used a nine-sixteenths drill bit with some grease on the end of it to drill out the hole. The grease will now help collect the metal shavings and prevent it from falling into the places where we don't want them. We'll follow that up with a three-eighths n-p-t tap to match the pitch of our new coolant temperature sensor. [ MUSIC ] On the oil pressure side of things the stock oil pressure sensor is on top of our LS, and that's not gonna work for us because it doesn't plug into our harness, but the cool thing is that every LS oil pan has an oil passage cover and they're removable. So we're just gonna take that cover off of our pan. We'll drill and tap it so it matches the stock 305 pressure sensor. We're using a seven-sixteenths drill bit to go along with our n-p-t tap. When cutting threads with any tap it's smart to drive it in a couple of turns and then just back it out a little bit. This allows the metal chips to clear the cutting edge. I'm gonna use an adapter because we're gonna get close to the headers. [ MUSIC ] Put the sensor in. [ MUSIC ] Back at the car we'll put the oil passage cover back on the oil pan. Now all there's left to do is just plug in the sensor.

(Jimmy)>> Next on our to-do list we squeeze our turbo 400 transmission into its new home and hear the roar of our new powertrain.

(Jeremy)>> You're watching Carcass!

[ MUSIC ]

(Jeremy)>> We had a lot to do to finish up the engine install on our Camaro, and a carburetor's gonna be our choice for fuel delivery cause that's what the guys down in Engine Power set this engine up for. Now our stock fuel pump's gonna deliver way too much pressure for our carburetor. So we're gonna switch that out with a fuel pump that's gonna deliver 7 to 10 p-s-i to run our Quick Fuel carb.

(Jimmy)>> We opted for a Quick Fuel fuel pump from Holley Performance, which we plumbed up with dash-6 fittings and hoses. [ drill buzzing ]

(Jeremy)>> During the break we went ahead and took care of a couple of things on the Camaro. We finished up the fuel system. We threw the headers in cause we knew that was gonna be a bear. Jimmy put the radiator underneath the hood, and we're getting ready to finish up the install on the drivetrain.

(Jimmy)>> To help with that we got our brand new Matco Tools two stage transmission jack that can hold up to 1,000 pounds, and this thing has a foot pump with a foot activator release to really give us control over what we're doing, and this saddle has four ratcheting arms to fit pretty much any transmission pan you could put on it, and the best feature of this I think is that it has a safety overload valve, which doesn't allow the jack to work if it's loaded over its rated capacity, which makes it safe and convenient for us and it's gonna get this up there.

(Jeremy)>> Now prior to jacking up the transmission we need to install this adapter. It'll allow the crankshaft on our LS to match up with the torque converter on our turbo 400 transmission. On top of that we installed an LS flex plate we picked up from Summit Racing. It gets six bolts that we carefully snugged up with an impact. When then torqued them down to 35 pound feet in a crisscross pattern, and followed that up with a final round at 74 pound feet. Let me give you a hand with this thing.

(Jimmy)>> So a little trick to this. Since we have the headers in and it's a really tight squeeze, we actually loosen the header bolts so that the engine can tilt back a little bit more so it'll clear the ears on this bell housing.

(Jeremy)>> We also pulled the torque converter cause we didn't want to chance it falling out and dropping it, and once we get the transmission back up and in here and straight we'll put the converter right back in it. [ MUSIC ] So what I'm looking for is a solid engagement with the converter and to make sure that the face of the converter is behind the face of the bell housing. I just need to get this lined up. [ MUSIC ] [ ratchet clicking ]

(Jimmy)>> Before we connect the flex plate to the torque converter we need to install the cross member. The turbo 400 cross member comes with an additional mounting hole, which we will drill a hole for and add an additional bolt.

(Jeremy)>> Finally we can marry our engine and our transmission together. To do that we'll have to work in a really tight space using three bolts to connect the flex plate to the torque converter. [ MUSIC ]

(Jimmy)>> To finish up the transmission we have to install the shifter that we got from Summit Racing dot com. Our stock shifter won't work with our manual valve body transmission. So it needs to go but we want to make every effort to make sure our new shifter looks like it belongs here. So carefully disassembling the old shifter will allow us to see where we'll need to make any mods to the center console, and prevent our new shifter from sticking out like a sore thumb. I think that'll work.

(Jeremy)>> With Jimmy finishing up the interior of our Camaro I'm gonna go ahead and get started on the exterior of our Camaro because we want this thing to look as good as it's gonna perform, and to do that we're gonna be using Sonax's polymer net shield and their Brilliant Shine detailer. Now their polymer net shield is actually a sealant. So it's gonna help protect the finish of our paint on our Camaro, and it's pretty simple to apply. We'll just spray a little bit onto our applicator sponge and we'll work it into the panel in small areas, and when we're done before it dries we'll buff it off with a clean microfiber towel. The polymer net shield will give us up to 6 months of protection but when we're ready to bring the Camaro out and just dust it off before we hit the track we can go ahead and use their brilliant shine detailer. Now this stuff can be used as a waterless wash, and when you combine the detailer and their polymer net shield together it will give our Camaro up to 9 months of protection. [ engine starting & revving ]

(Jeremy)>> This thing started right up. Easiest swap we've done all year.

(Jimmy)>> It sounds super good too! Rev it up a couple more times. [ engine revving ]

(Jeremy)>> For more builds like this find us on Powernation TV dot com.
Show Full Transcript