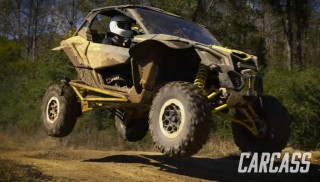
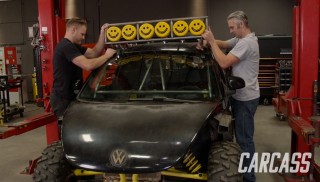
More BajAwesome Beetle Episodes

Carcass Featured Projects

Carcass Builds

Parts Used In This Episode

Summit Racing
Urethane Clearcoat Paint
Adrenaline Cycles
Can-Am Maverick X3 Axles
General Tire
Grabber X3 Tires
HCR Suspension
HCR Racing Can-Am Maverick X3 Long Arm Travel Kit
Matco Tools
MATCO Tools are the Official Tool Supplier to PowerNation
The Industrial Depot
Tools, Hardware, Shop Supplies

Episode Transcript

(Jeremy)>> You're watching Powernation!

(Jeremy)>> Today on Carcass we take simple and transform it into incredible.

(Jimmy)>> And this colorful masterpiece finally hits the short course it was made for.

(Jimmy)>> This is Carcass.

(Narrator)>> When you want to build something different you turn to these guys, Jeremy Weckman and Jimmy King. Jeremy was raised in Minnesota building street rods. He's a builder, fabricator, and welder. Jimmy grew up in Nevada working in his dad's garage building cars. He's a mechanical engineer, builder, and fabricator. They take left for dead rides and transform them into one of a kind builds. If you can dream it they can build it. This is Carcass, a non-traditional speed shop.

(Jimmy)>> Let's take a look back and see how we transformed this Volkswagen Beetle and this CanAm X-3 into BajAwesome.

(Jeremy)>> We picked this bug up in Lewisburg, Tennessee, without a care in the world on what kind of shape it was in. Running or not we were just looking for a decent body.

(Jimmy)>> As for our CanAm we picked it up in Kentucky with a little cosmetic damage, but that's nothing compared to what we did to it on our first test drive.

(Jeremy)>> We drove this puppy hard, sliding it through some corners, catching some air, and heck we even rolled the thing over.

(Jimmy)>> When we were don having our fun we got straight to work tearing out the bug's interior and cutting the uni-body chassis to lift the shell clean off.

(Jeremy)>> We then started cutting into our relatively new CanAm, making room for the bug body to slip right on top.

(Jimmy)>> Knowing how it fits we were able to fabricate a killer roll cage that follows the contour of the bug body. Then we slapped a better sounding exhaust out back.

(Jeremy)>> We then followed that up with some window deletes, a roof rack, a whole mess of lights, and some custom louvres that gave this u-t-v bug combo its Baja style look. [ MUSIC ]

(Jimmy)>> Hey man we just got our HDR Racing long travel kit back from the powder coater and it's gonna make this thing look a whole lot more aggressive, and it should handle way better.

(Jeremy)>> I am completely digging the orange. Did you pick that out?

(Jimmy)>> Well I figured this color kinda pays homage to classic Baja style.

(Jeremy)>> Well that's a great start. I can't wait to see those things on this rig.

(Jimmy)>> Our CanAm is the XMR model, which has a stock track width of 64 inches. The HDR long travel kit will bump that out to 72 inches, and hopefully keep us, well me, from flipping this thing over again.

(Jeremy)>> We'll need to pull out the old suspension, which means we'll make the stock wheels and tires disappear.

(Jimmy)>> This is followed by the coil over, hub assembly, and the upper control arm.

(Jeremy)>> The axle shaft can then be pulled out, and the lower control arm can be unbolted, which hold the front bumper and winch assembly in place. Woo that's heavy.

(Jimmy)>> We can then remove the last piece of the puzzle, the lower control arms.

(Jeremy)>> Out with the old. [ metal clanging ]

(Jimmy)>> And in with the new.

(Jeremy)>> That thing looks cool! Our new HDR control arms go on in the same order but in reverse. We'll start with the lower control arms. Then we'll install our stock bumper and winch.

(Jimmy)>> The upper control arms go on next, connecting the sway bar with some links from Summit Racing.

(Jeremy)>> Hey Jimmy, is this helping you hook up the sway bar?

(Jimmy)>> We'll slip in the axles after that. These didn't come with the kit but our friends at Adrenaline Cycles were really excited about this build. So they offered to send us a set. With these lined up in the hub assembly the lower control arm can be raised into position and snugged up. The upper control arm is secured in a similar fashion.

(Jeremy)>> The tie rods are next. We'll install these at a base measurement and come back and adjust the toe later.

(Jimmy)>> This long travel kit comes with a coil over relocation bracket and it bolts into the original shock mount. [ drill humming ]

(Jeremy)>> With the brackets in place we can drop in our original coil overs, connect them to the suspension, and snug everything down. [ drill humming ]

(Jimmy)>> We'll torque the axle nuts down to 184 pound feet. Then finish it off with a cotter pin.

(Jeremy)>> Now that the front long travel is installed we can move on to the rear of the vehicle. The design of the suspension out back is different than what we're dealing with in the front. Instead of having an upper and lower control arm we have a huge swing arm, and attached to that are three radius rods. That controls the wheels movement as the suspension travels.

(Jimmy)>> Like the kit in the front all we're keeping from the stock setup are the hub assemblies, sway bar, and the coil overs.

(Jeremy)>> That's right. We'll remove the huge swing arm and the axles. Then we'll disassemble the retaining plate out back that holds the radius rods in place. [ MUSIC ]

(Jimmy)>> With all of the stock components out of the way it's time to get some of these new fancy parts installed. We'll bring in the new swing arm, which attaches to the stock location.

(Jeremy)>> Then the axles can be installed. This is where all the parts and pieces merge. The new radius rods from Summit Racing are set into place and secured with a retaining plate. The spindle assembly is slipped onto the axle and the three radius rods are added to the mix.

(Jimmy)>> We started with the bottom and top radius rods, securing them first, followed by lining up the center rod and snugging it up tight.

(Jeremy)>> The second to last item is the shock, which is relocated with the provided bracket and held in place with a couple of bolts. [ drill humming ]

(Jimmy)>> Finally we just have to add the provided sway bar linkage.

(Jeremy)>> Before we can see the new stance of our Baja Bug we're gonna do a quick brake upgrade with some SXR brake pads and precision rotors from EBC Brakes. These pads are specifically formulated for our side by side. They're resistant to mud, sand, and any trail abrasives that we can throw at it. The SXR pad and UTVX rotor are a direct replacement for our CanAm. We'll slap the pads in the calipers and then just bolt everything back together.

(Jimmy)>> Then we'll slap on a set of General Grabber X-3's and finally see the new stance of BajAwesome. Coming up our Baja Bug earns its name with a new paint job.

(Jeremy)>> Next on Carcass!

[ MUSIC ] [ mechanical humming ] [ MUSIC ]

(Jimmy)>> Hey Jeremy, what is this?

(Jeremy)>> Oh hey, I'm just prepping for our paint job.

(Jimmy)>> So this is a paint booth?

(Jeremy)>> This is a paint booth.

(Jimmy)>> It kinda just looks like a big bouncy house. Did you bring your kids to work today?

(Jeremy)>> Nope, we called up our friends at Mobile Environmental Solutions so we could try out one of these mobile paint booths. This took absolutely no time to setup. Roughly enough time for me to grab a magazine and just flip through the pages. We're using their 23 by 15 version, which fits our u-t-v bug perfectly, but if we were doing a short bed truck or an s-u-v we would still have plenty of room to walk around.

(Jimmy)>> Dude I just finished scuffing this thing. I think I deserve a little break.

(Jeremy)>> Sometimes you've just got to work smarter rather than harder. We did a ton of prep work on the bug. We disassembled the lights up top and out front, we removed the roof rack, and we got rid of the l-e-d whip in the back, and then we got on to scuff sanding the clear, and man did we do a lot of sanding.

(Jimmy)>> To be fair Jeremy did help me in the beginning but he left me during one of the tougher parts of the prep so he could setup the paint booth. Something tells me we should have drawn straws. [ MUSIC ] We have some special plans for the paint job of our u-t-v bug. We're going '80's retro with the design. We picked out some bright and loud colors in a stripe pattern that will pair well with our baja style bug, and Jeremy's gonna do the paint because I don't know how to paint yet.

(Jeremy)>> The patented design for this booth allows for positive pressure. That is provided by the two industrial fans that not only inflate the booth but provide the air flow.

(Jimmy)>> The positive pressure forces air and any particulates in the air through these two filters, which have a 99.3 percent capture capability, and that exceeds EPA requirements.

(Jeremy)>> The first coat we put down isn't a color at all. It's actually a sealer that's gonna act like a glue for the other color coats. Now since our Volkswagen was clear coated we scuff sanded that and that's gonna help in our mechanical bond, and for the sealer that's gonna provide a uniform coverage and it's also gonna help with the chemical bond.

(Jimmy)>> Alright dude I need a lesson in paint. What are you using for this paint job?

(Jeremy)>> Alright so you know we're gonna be painting BajAwesome in this like retro style '80's paint theme right? So we're gonna be using four different colors to do that. We're gonna start with the milk white. Then we're gonna be moving on to what I consider to be my favorite color, that's a gold rush metallic. Then we're gonna follow that up with a hugging orange, and the last color we're gonna put down is a blue sky metallic.

(Jimmy)>> But you don't just put the color into the paint gun. You have to mix it with a few things. How do you do that?

(Jeremy)>> So you know that Summit Racing has a two stage base/clear paint. Now we're gonna be mixing that in a 2:1:1 ratio. So that's two parts of their color to one part of their reducer. Then we're gonna be adding one ounce of hardener per sprayable quarter of their paint. [ spray gun hissing ] [ MUSIC ]

(Jimmy)>> This thing is looking smooth already. [ spray gun hissing ]

(Jeremy)>> Looks good!

(Jimmy)>> After waiting a little over 50 minutes for the first color to flash Jeremy recruited me to help mask off the areas that will get our first retro color, gold rush metallic. [ spray gun hissing ]

(Jimmy)>> Dude this thing is looking awesome.

(Jeremy)>> Right you know with the gold and the white already laid down this thing is looking amazing.

(Jimmy)>> So what do you say I do a little bit of spraying?

(Jeremy)>> Yeah, go grab your gear. Let's lay down some color. [ MUSIC ] While Jimmy gets his protective gear on I went ahead and masked off for the next color. The color that he's gonna spray is hugging orange.

(Jimmy)>> Alright man what do I do?

(Jeremy)>> Alright so your gun's got two pulls of the trigger. The first pull's gonna be air and then the second pull is actually gonna be paint. What you're gonna want to do is keep the gun about 8 or 12 inches away from the panel, keeping it perfectly flat with what you're working at. Then just make sure you've got a nice, consistent overlap and good things will happen.

(Jimmy)>> Alright I'll give it a shot.

(Jeremy)>> By no way, shape, or form is this gonna be a polished product. It's gonna be run through the woods, hit by rocks, and just plain beat up. Now with that said I've got no problem giving Jimmy a little bit of gun time.

(Jimmy)>> This was intimidating at the first squeeze of the trigger, but with Jeremy's advice I think I did a bang up job. So how'd I do?

(Jeremy)>> You know you did pretty good, and the next color's got some metallic in it. Are you up for it?

(Jimmy)>> I don't think I'm ready for metallic quite yet.

(Jeremy)>> Alright I'll take care of it. The last color we're gonna spray is blue sky metallic. Now that's gonna cover the whole rear of the car and wrap up this paint job.

(Jimmy)>> The second stage of this two stage process is applying a clear coat to protect our colors. When Jeremy lays down this clear coat the colors will just pop and give it that glass like appearance.

(Jeremy)>> After the clear dried overnight we were able to take it out of the booth, bring it back in the shop, and get a good look at our finished paint job.

(Jimmy)>> This thing is so rad!

(Jeremy)>> Would you say it's BajAwesome? [ MUSIC ] What do you do with a brand new paint job?

(Jimmy)>> You hit the trails!

(Jeremy)>> And flex out BajAwesome at Dirty Turtle Off Road Park.

(Jimmy)>> This is Carcass.

[ MUSIC ]

(Jimmy)>> We're heading to Dirty Turtle in Bedford, Kentucky. They've got a u-t-v short course that will blow your socks off, and believe me when I tell you we're gonna thrash on our Baja bug.

(Jeremy)>> Hey you ready to go?

(Jimmy)>> Are those Chicharrones?

(Jeremy)>> Yes they are! [ MUSIC ] [ crunching ] [ MUSIC ]

(Jeremy)>> Here we are! [ MUSIC ] Now Dirty Turtle has a whole lot more to offer than just a u-t-v short course.

(Jimmy)>> That's right, they gave us full access to 286 acres of prime off road trails.

(Jeremy)>> Which means we can do pretty much whatever we want. So what do you say we go flex this thing out?

(Jimmy)>> Let's do it! The first obstacle we found was a wash out that was one and a half, maybe two feet deep, and we also found some rock ledges, other bigger rocks, and even a tree stump right in the middle of the trail. So we had to check our ground clearance.

(Jeremy)>> We had plenty of traction, plenty of articulation, and plenty of power, and all that weight we added to it didn't seem to make a difference. [ engine revving ]

(Jeremy)>> The next thing we're gonna do with BajAwesome is stretch its legs and run this thing down some trails.

(Jimmy)>> I gunned the pedal and the first thing we hit was a giant puddle. So BajAwesome got its first taste of turtle mud here at Dirty Turtle Off Road Park. We went up the hill and I couldn't really see over the hood but once we hit the crest I throttle out of it, squatted the suspension, and floored it to the next turn. After a few more hills and turns we hit a straightaway and I could really feel the suspension soaking up the rocks and bumps underneath us. [ MUSIC ]

(Jeremy)>> Holy cow man, this thing flies!

(Jimmy)>> And we're really working the suspension going over those hills.

(Jeremy)>> BajAwesome really soaked it up on the trails and now we're ready to go wide open on the track.

(Jimmy)>> We didn't really build this thing with the purpose of trail riding. We intended it to go fast and hit some curves hard. So Jeremy and I are gonna have a little friendly competition. To do that we're gonna go lap for lap on this epic one mile short course.

(Jeremy)>> Okay so we're gonna lay some simple ground rules down. We're gonna start here, and we're gonna stop here, and whoever gets here the fastest is the winner.

(Jimmy)>> So who goes first?

(Jeremy)>> Well let's rock, paper, and scissors it then. Ready, rock, paper.

(Jimmy)>> Are you going rock, paper, scissors shoot, the weird way, or are we gonna do the normal way, rock, paper, scissors?

(Jeremy)>> No it's not the weird way. It's rock, paper, scissors, and then shoot. So it's the fourth one.

(Jimmy)>> So you're just a little weird?

(Jeremy)>> I'm not weird. You ready? Rock, paper, scissors, shoot!

(Jimmy)>> Got ya! [ MUSIC ] [ engine starting ]

(Jeremy)>> Ready, set, go! [ engine revving ]

(Jimmy)>> Next on Carcass find out who gets a better time in our friendly competition, and the jump you won't want to miss.

(Jeremy)>> So we're gonna lay some simple ground rules down. We're gonna start here, we're gonna stop here. Whoever gets here the fastest is the winner! Ready, set, go!

(Jimmy)>> I had a strong start in this friendly competition between Jeremy and I. Smashing the pedal to the floor I hit the turn at roughly 30 miles an hour and I made sure to gun it as I pulled out of the corner because I was excited to hit the table top for the first time. Now I didn't land perfectly straight but a quick recovery kept me on track as I hit the second curve. I hit the throttle out of this one hard because this is where I knew I could make up any lost time. [ engine revving ]

(Jimmy)>> With hitting turns three, four, and five back to back it opened to a straight. [ engine revving ]

(Jimmy)>> You can throttle it into turn six but a downhill approach leads you to turn seven that requires some heavy braking, which was no problem for our EBC Brakes, followed by a hill climb into to turn eight, and from here you can pin the throttle all the way through the finish line. [ engine revving ] [ MUSIC ]

(Jeremy)>> Man that wasn't that bad.

(Jimmy)>> What's my time?

(Jeremy)>> One minute, 39.2 seconds.

(Jimmy)>> Alright not bad. I want to see if you can beat me.

(Jeremy)>> Jimmy laid down a great time but the competitor in me hopes I can do it a little bit quicker. Now here's the best part. I got to watch exactly what he did. So I know exactly where to go.

(Jimmy)>> Ready, set, go!

(Jeremy)>> Right off the line I gunned it because these General Grabber X-3 tires grip the ground so well. That's one thing I picked up from Jimmy's run. Coming through the first turn I felt confident that the table top wasn't gonna be a problem. [ engine revving ]

(Jeremy)>> I rounded the second turn gassing it but this is where I realized that I wasn't doing quite as well as Jimmy did. Something about my line just didn't feel right, and it didn't feel like I was traveling through this part of the course as fast as Jimmy. As I rounded turn five I came to the straightaway that leads to the whoops. I was super excited to hit these things hard. Just watch the long travel suspension as it soaks up these large whoops. The bug body hardly moved, and from the driver's seat I could hardly feel a thing. I made a mad dash for the finish line, rounding turn eight as fast as I could, hitting the downhill straight leading to the final turn before the checkered flag. I gunned it hoping this little patch of time would help me catch up to Jimmy. [ engine revving ] [ MUSIC ]

(Jimmy)>> My time was 1:39 and Jeremy's was 1:43 but that all doesn't matter because I came here for one reason. To see how far that we can jump BajAwesome. [ engine revving ] [ MUSIC ] [ engine revving ]

(Jeremy)>> Are you ready for this?

(Jimmy)>> Give her the berries man!

(Jeremy)>> Let's go!

(Jimmy)>> Now this table top is nothing new. Both Jeremy and I have jumped it once already in our timed runs but this go around we're gonna hit it at nearly 55 miles an hour. [ engine revving ] [ MUSIC ] [ engine revving ] [ MUSIC ]

(Jimmy)>> That was the most fun I've had in a long time.

(Jeremy)>> Yeah it was but you know what? This was a race and you won. So that means you've got to load up.

(Jimmy)>> Just means I get to drive it again. [ engine revving ]

(Jimmy)>> Awesome!
Show Full Transcript