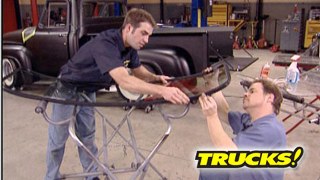
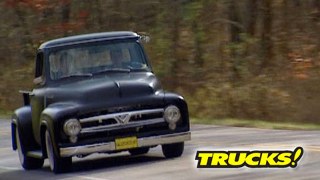
More '53 Ford F-100 "Old Skool" Episodes

More Project Old Skool Episodes

Trucks! Builds

Parts Used In This Episode

Auburn
High Performance Limited Slip Differentials.
Be Bops Glassworks
Custom Fiberglass Front and Rear Body Panels and Running Boards.
Coker Tire
Vintage Wheels and Tires.
Edelbrock
Endurashine Dual Quad Intake.
Edelbrock
Top End Kit which includes Performer R-P-M Aluminum heads, cam. Lifters, R-P-M air gap single carburetor aluminum intake manifold, pushrods, hardware and gaskets.
Matco Tools
Electronic Torque Wrench Available in three eighths inch 100 foot -pound model and a one half inch 250 foot-pound model.
Pros-Pick
Bed Kit wih rolled sides and Epoxy primed.
Pros-Pick
Flat Gate with Hidden Latches and Straps.
Pros-Pick
L-E-D Lights (Tail Lights)
Sanderson
Ceramic Coated Cast Iron Exhaust Headers.
Shur Trax
All Weather Traction Super Strong Heavey Duty Bladder.
Superior Axle and Gear
3.73 Ring Gear and Pinion Set.
Superior Axle and Gear
Rebuild Kit includes gaskets, bearings, spacers, shims, ring gear bolts and crush sleeve.
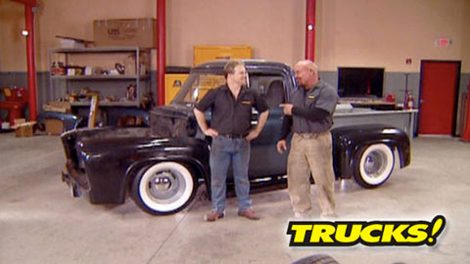
Video Transcript

Today, it's more project, old school, big, new power up front means it's time to upgrade the rear end gears. Then

we're making our own custom exhaust and test fitting our new bed and body panels. Finally, we'll pick the perfect wheel and tire combo.

It's all here today on trucks.

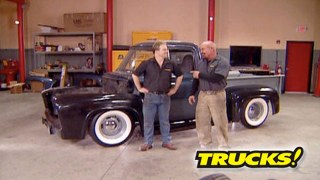
Hey, welcome to trucks and the rejuvenation of our 53 F 100. We're keeping the classic look of the truck but throwing some old school hot rod style at it.

When we started, we found someone in the past that welded on a 69 Nova front clip.

Now they did a really good job. So we decided to keep it

and add in their suspension that'll ride great and handle even better.

Besides, this is not gonna be a nut and bolt restoration.

This is gonna be more of a street ride

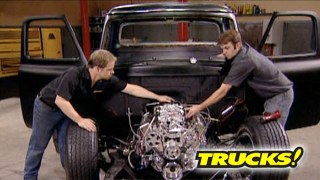
for power. We bolted a cool looking at bro top end kit on an o'reilly small block bottom end.

This should be good for an easy 440 workers.

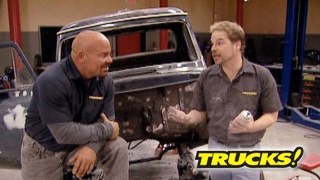
Now, with all that new muscle up front, a stock rear end can be a weak link, but the good news is that under the bed, we found a GM 10 bolt rear end with an 8.5 inch ring gear. Now, this is a good start, but we can't leave it alone. It's an open differential, which means power only gets to one wheel at a time. Plus it's a 308 gear, which is better for the highway than hot rodding.

Not only that,

we told Boulder, we wanted to match their

granny with a 373 gear ratio for better acceleration.

So we went to superior excellent gear and picked up their 373 ring gear and pinion set. We also picked up a rebuild kit that comes with gaskets, bearings, spacers, shims,

ring gear bolts, a new crush sleeve, everything you need to rebuild your rear end.

Then we put in a call to Auburn and got one of their high performance limited slip differentials.

Now, you know, when you go around a corner, your wheels need to turn at different speeds. That's because the outside wheel covers more ground and has to turn faster.

A limited slip uses clutches on the inside to allow one wheel to slip for really smooth cornering. But at the same time is allowing big power to both rear wheels under acceleration on a straight road.

Now, after you get the cover off the rear end, be sure and check for water or metal shavings in your gear loop because if you got those, you got bigger problems

first unbolt the main cap,

then extract the cross shaft, bolt

the cross shaft

and then the spider gears

and with the spider gears out, the sea cliffs come out next with a little bit of help from an extra set of hands. Hit it. Paul

ready. Yeah.

Ready. Go,

pull it.

There you go.

Nice

after you get the carrier out, keep track of where your SIMS go.

These will need to go back in the same location.

You may have to use a little force to get the opinion out. But after that, you're ready to move on.

The first thing we're going to do is press a new bearing onto our new pinion

slide, the shim into place

and then the bearing and here's a trick. Take your old bearing, cut the cage off, turn it upside down and it automatically becomes a perfect seat to press your new bearing in place without damaging the cage or the rolls.

Then we'll press the new bearings on our differential.

And if you don't have a press, you can go to a machine shop and they'll do it for you

back of the truck,

we'll add a new race, a new bearing and a new seal to the rear end housing

and be sure to slip the crushed, leave on the pin before it goes in and the yoke goes on

as you tighten P net, you'll collapse the crushed lead.

So stop and check for play as you tighten.

Stop when you feel almost no play on the o.

Now, the crushed sleeve we put in our opinion, acts like a spring. It pre loads the bearing. You don't want it too tight, you don't want it too loose. So we're going to measure it with an inch pound torque wrench

zeroed out

and we'll give it one rotation to measure the correct drag of the bearing or the preload of the bearing.

And right there 25 inch pounds, that's just about perfect

slide, the ring gear onto the differential and torque, the ring gear bolts to 70 ft pounds

with the new differential in place.

Don't forget to replace the original shins,

then vote your main caps back in place and torque them down.

We'll use a dial indicator to check the free play between the pinion and the ring gear.

You want to see between eight and 12 thousands clearance to allow for gear expansion and lubrication.

Some gear paint on the t will help you make sure the pinion gear meshes in the center of the ring gear.

There it is

finally reinstall your axles,

clips

and your cross shaft

with our new gears and posse in place. We can button this rear end up, but our old dry shaft is not gonna fit with a new longer bowler transmission. So we're gonna take measurements for a new one while we're on the break.

And when we get back,

we're gonna make a custom exhaust just for our F 100 old school. Don't go anywhere.

Hi, welcome back to trucks

and our clips slamming, jamming 53 F 100. And we've nicknamed old school.

We've just converted our 10 bolt rear end from a peg leg burnout king

to a fully automatic limited slip setup.

Now, we're at one of the easiest steps

bolton on the exhaust.

But what do you do when you got a truck like ours? It's got a nova clip full GM running gear under the facade of a Ford F 100.

There is no bolt on kit. Well, that's when you got to rely on good old fashioned hot rodding and your own ingenuity.

So we decided to go with Magna Flow's stainless steel universal hot rod system. It comes with these manual ben sections that allow you to create pretty much any angle that you want. Collectors, sections of straight pipe and all the mounting hardware that you need.

Now, Magna Flow also offers accessories like these stainless tips to cap off your system. And these high flow mufflers that with stainless steel finish are going to look as good as they sound.

And we're getting the best of both worlds of Sanderson's ceramic coated cast iron exhaust headers for great airflow and good heat dissipation.

There's several things you need to be aware of when you're routing a custom exhaust system. The first thing is ground clearance. So if we route our pipes here above the lowest point of this cross member. We're gonna be fine.

Now, you also wanna be aware of your steering linkage. You wanna make sure you can go peak to peak or lock to lock turns without any interference to your drag link or your tie rod ends.

And as you can see, it's a pretty tight squeeze in here

from the header. We'll make a down tube and work our way back and this 90 degree bend from the kid is a perfect place to start.

We've tacked our whole right bank section in place with a mig welder right up until here where the muffler connects. Now, I could go ahead and finish this seam with the mig. But the problem with that is that it's a regular steel wire and it'll eventually rust. This is stainless steel tubing. So what we're gonna do is take a tig

and go ahead and do a nice fusion weld on this seam and make it one continuous piece.

Now, this is the finished pipe section. It's gonna look great sitting up underneath the truck and one thing's for sure that this joint looks better than this big old pipe clamp sitting on top of it.

Now, obviously, this represents a significant investment in time smoothing out these welds, but

we're gonna show you just exactly how we got there.

I'm gonna start out with the D A san set to spin using 220 grit paper. Now, all I'm trying to do is level out this fusion weld, which is already pretty level to start with.

Now, I use another piece of 220

I'll sand this way in a back and forth or linear fashion.

Next, we switch to a red scuffing pad which is equal to about 600 grit.

Look at that

with three steps, you can make a huge difference. Makes a beautiful satin, stainless steel finish.

All right, we've got our mufflers installed now, we could install these really nice tips,

but there's only one problem. It's blowing the hot exhaust right into our air bags and that's not good.

So what we decided to do was take some extra pipe from our kit and make our own special turn downs. This avoids all that hot exhaust blowing into our air bags

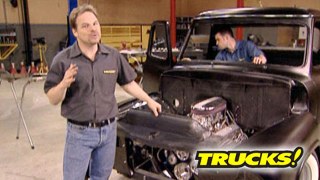
with our exhaust system. Finish up our drive train pretty much in place. Now, we can finally pay attention to this 50 year old body work starting with what's missing here. The bed, maybe even make a few improvements. So stick around

up next. We're adding a brand new bed and some big fat fenders worthy of project old school.

Hi, welcome back. We are so close to reaching our goal of making old school a really cool daily driver

and it's gonna turn a lot of heads.

Now we finished the exhaust and the drive line. Now it's time to work on the old body

like this bed, for instance, from 10 ft away. It looks pretty good, but you get a little closer. It gets a little rougher.

So we decided to wipe the slate clean and get a brand new bed kit from pro's pick. It's almost an identical version of the original Ford bed with the rolled sides. It's epoxy primes ready for paint

and very straight

Pros pick also has original looking tailgates, but we wanted a custom look. So we got their flat gate with the cool hidden latches and straps.

We're also going to use their led lights that fit into the bed rolls and really clean up the look of the back of this truck.

We want to put some serious tires under the back of this truck and tuck them up underneath the fenders while we got it laid out.

Yet, you can widen the stock steel fenders, but you're setting yourself up for a ton of work. Well, Bebops has been making quality replacement parts for these trucks for a long time and they've come up with these cool three inch wider

f 100 fenders that'll fit your stock truck as well as our pros pick bed.

But here's problem. Where do you start? I mean, there's no holes drilled. This is not the original bed. We don't even have brackets to help us even get close to where we're supposed to be,

but you gotta start somewhere.

So you want to find a common point of reference, something that ties the new panels to the old panels. And on this truck it's this paint line we know for certain that the old fender went right up against there. So we'll take our new panel

laid up in place

right up where the other one was. We'll clap this guy in place and work our way back

next. We're gonna snug our new running boards up against our fenders where we know they're gonna fit.

But with those running boards in place, now come the rear fenders, Bebops makes both panels and they've done a real nice job of helping us out here with this relief cutter. This notch that's molded into the fender and it sits right on the running board.

It shows us exactly where that rear fender goes on the front.

Well, as you can see, the new body work looks great, but it just shows us how bad we need some new wheels and tires.

Now, that's an understatement.

Well, we'll take care of that when we get back from the break.

So don't go anywhere.

Let's take this one right here.

Fat fenders need fat tires.

That's fat spelled

phat.

Yeah.

Hey, welcome back to trucks. Today, we've turned a major corner on project old school with new rear gears, stainless steel exhaust and some brand new body panels. Now we can finally start to pay attention to details like attitude and stance and the major part of that is a new set of wheels and tires, no matter what size tire we decide to go with, we still wanna get that retro vibe. So we decided to go with Coker tires.

As you can see, not only do they remanufacture vintage wheels and tires for antique vehicles,

but they make tires with the latest technology that still have a retro style.

But before you pick one out, you need to know what your back space in your offset is.

So why is back space and offset important? Well, you don't want your tires to rub the inside of the wheelhouse or the inside of your fender lip and back space is what helps determine where that wheel sits inside your wheelhouse. Here's how you measure back spacing,

take a straight edge and lay it across the beat of your wheel, preferably without a tire on it. So you get a true and accurate measurement,

then you take a tape measure measure from the back of the wheel flange to the bottom of the straight edge. And you can see we've got a five and a quarter inch back space on this rim.

Now, offset

is the relationship of the back of this flange

to the center of the wheel.

We've got a nine inch wheel. So our center point

is 4.5 inches. Now, we already know we've got a five and a quarter inch back space,

which is right here. So our offset is three quarters of an inch

positive offset. Means the hub is kicked to the outside,

negative offset is the hub is kicked to the inside. This is obviously kicked to the outside. So we've got a three quarter inch positive offset. Now, you're gonna need to know this when you're figuring out just how much wheel and tire you can fit under your fender, and I'll show you an easy way to do that

start by taping a plumb line to the inside edge of the wheelhouse and another one to the outside edge. Now, we can take a measurement

and that shows us that we've got 13 inches of clearance to play with. If you subtract a half inch off either side for side wall clearance, we could fit a 12 inch wide tread up in there. I've also attached the straight edge to the hub flange and with our half inch of clearance that tells us so we can have a maximum of five inches of back space with our new wheels.

Uh

Yeah,

you're right.

The thing is butt ugly.

I better

not enough back space.

Palm

Moon.

Yeah, we're getting close.

Now, I'm getting really psyched because you can see what this truck's gonna look like.

Super cool.

So we can start massaging some life back into the body and then focus on some style.

Now, that's a great idea.

Wow. Nowadays, it seems like everything's going digital and that includes your torque wrench.

This is mat

o'toole's new electronic torque wrench all you do is just set the torque level you want. We'll pick about, uh, 30 pounds. In our case,

the digital display shows you the torque

and a yellow led. Lets you know when you're close, the green led and beep tells you you're on target.

And if you go over,

well, it'll tell you that too. It's available in a 38 inch, 100 ft pound model and a one half inch 250 ft pound model. You can own your own Macco

electronic torque crunch by going to Matco tools.com

and it's only gonna run you about 360 bucks

as much as we love our trucks. Sometimes traction can be a problem, especially with an empty bed. There's just not enough weight over the rear axle so you can throw a bunch of stuff in the back like sandbags or cinder blocks. But under hard breaking or cornering your load can shift around and bang the heck out of the sides, beat it all up. Well, here's

a

solution to that. This is the sure tracks. It's a super strong, heavy duty bladder that you fill with water and it lays in the bed of your truck. Adding about 350 pounds of evenly distributed weight over the rear tires.

Baffling, keeps the water from sloshing around and you can still use the bed to haul stuff

because you could throw over 500 pounds on top of this thing and not damage it.

The full size version of the she tracks goes for about 100 and 50 bucks and if you need to add weight to the back of your truck, this is a great way to go. Hey, thanks for watching trucks. See you next week.
Show Full Transcript