MuscleCar Builds
Want more content like this?
Join the PowerNation Email NewsletterParts Used In This Episode
2020 Software Solutions, Inc.
Bend-Tech PRO software.
Dake
Cold saw, safety glasses, band saw.
Matco Tools
Matco Tools Tech series gloves.
Miller Electric Manufacturing Co.
Miller Electric welders and welding equipment.
Tube Shark
Tubing bender and tubing notcher equipment.
WD-40
WD-40 Big Blast penetrating lubricant.
Video Transcript
Today on muscle car tubes, tubs and rails altered egos getting stronger by the minute with custom fab frame rails and a roll cage plus a devilish dodge that packs real performance in a small package.
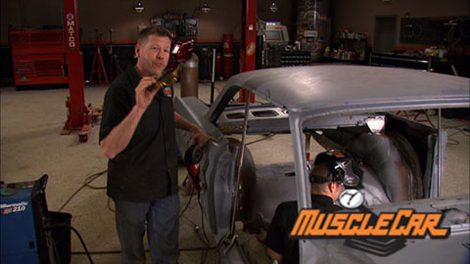
Hey guys, welcome to the shop. Today. We're working on our 64 comma a FX car. I just got the side trim holes here filled in and Brent's finishing up the tubs. Uh
When it's done, this car will be the first car ever on the entire power block to hang the wheels out on the track and on the street. But there's a lot of stuff that's got to happen between now and then
last time we got it blown apart
and got right to business. Moving the rear end up 16 inches.
The rear section was taken back out narrowed four inches to make room for the tubs
with the rear section back under the car, two inch strips are being added to each side to make room for the massive drag tires.
But once the tubs are welded in, some braces are ready to keep it all in place.
Now, the factory frame rails ended up here which was fine for the 220 horse that this thing originally came with.
But to stand up the abuse that we're gonna be dishing out, we need to tie the entire chass together. Now, of course, it's gonna be getting a full roll cage, but we're also gonna take two by four box tubing, lay them into this front frame rail and tie them into the back. But before we can do that, we gotta get some of the sheet metal out of the way.
And the plasma cutter is a great tool. But you got to remember it basically liquefies metal
and everything else in its way.
Yeah, including hidden sea sealer
that was hot.
Get in clubs
safety first
one more time.
Now I feel indestructible.
Once the old rails are cleaned up, I'll cut off the end so we can lay the new rails in
before we start making anything. Some plannings in overnight where it comes back here because we got the two by four.
We can take the tubing right there
about two inches in there.
This one here is shallow
on this end here. We can slice this
and pinch that in and match it down. We just basically just have to figure out the angle
and put a little bit of A Z in it.
Yeah, once you get the Z, then we can probably cut it,
take that piece and raise it up and slide it into that one.
Give it a shot.
Now, since the front and the rear frame rails aren't in alignment, we're going to have to see our new center section here and we've laid the whole thing out on cardboard so we can see exactly where our cuts are going to be. Now, the key to getting this thing to line back up is going to be the distance between those cuts. So before I do anything, I'm going to lay it out on the steel,
whatever your total angle is, the cuts will be half of that.
So since our total angle is 45 degrees, I'm setting a saw to 22.5,
this one is ready. So while I'm cutting the pieces for the other side, Brent's going to start getting this one put together,
he's beveling the edges with a grinder to give the welds more area to fill.
Since the old front rails are shallower than the back, I'm going to have to modify the new ones to match. Now, I could just notch it and weld it.
But a right angle cut would leave a weak spot. I'm going to create a gradual taper by using a pipe cut along the side, reattaching the top.
And after a little bit of clean up, they drop right into place,
the factory rails were only about an eighth of an inch wider. So sea clamps pulled it all together
and once we got them fit, we melted them into place
and now that we got the center part of our frame here tied together, we can start designing a roll cage. Now, first thing we're gonna do is come in here with some eight inch plate on each side. Then from there, we'll come across with some two by four box tubing. Now, that'll give us a good strong place to attach the front part of a roll cage to.
Now in the back here, we're gonna do the same thing, some eight inch plate
with some two by four box tubing. And that'll give us a good strong anchoring point to come in with our main hoop.
There's a few different ways you could strengthen the attaching points,
but this car probably won't be the fastest thing on the track. So, rather than use quarter inch plate or maybe some box tubing, we're going to keep the weight down by reinforcing the rockers with an eight inch plate.
The important thing is that you don't, but we the braces directly to the rockers because if you ever flip it on its lid, the body could tear right off the cage
to make the front braces. I'm using the same technique as I did for the center rails slicing out a Pyot
and using clamps in a welder to give it that gradual taper
to keep the frame as strong as possible. I'm cutting a notch in the original rail for the new one to slide into
and when you're building a one off car. You're going to end up with a lot of one off parts. Now, since our factory frame rails are actually sitting lower than our rockers, our new braces ended up with a pretty mean contour. And once we got these welded in, we're going to start laying out a roll cage to stick around
up. Next Ian from Xtreme 4x4 drops by to show how a roll cage is designed.
Hey, welcome back, Ian here had some pity on us and he came down to help us lay out the roll cage in our comet.
So it looks like a pretty cool uh program you got going here. Yeah, it's, it's, I've got hooked on it. You all times. Ben Tech Pro. Once you got the di locations programmed in which we just did on this piece of engine three quarter tubing,
this will be real simple to use with some easy measurements.
We be hooped up in no time.
What's step one here? All right, we'll start, we're just gonna make a simple hoop main hoop start with
uh, we'll just be coming off the floor over across the roof and down. So the first thing we need to know is how wide we need that hoop to be, how wide it has to be at the top and how tall it has to be. And the program will just give us bend locations for the tubing.
Ok. What if we want to come in because we want to come up on the quarter panels and kick it in.
We'll just pick an offset hoop,
double, double hoop like that.
And we're going to work on outside dimensions only on here
you
makes life simpler.
Uh We've got the tooling already programmed in. I need to know height from the floor to where you want it to go in
the height from where you want to go into the roof, wid that the roof of the narrowed version and then the width of the floor.
All right, the number one question we need to know right away is
you're not,
we're not building like for an N hr actual spec class, right? We're just building just a cool cage. We don't have to worry about rule, but we gotta worry about
it being safe. So the nice thing about this, we'll, we'll try to tuck the cage up nice and high into here
and keep it up there.
So the first measurement we got to do is we got to go all the way across the bottom on the floor here. Did you go outside to outside? Well, that see fifth where the computer program set up to take an outside dimensions. That would be 55 inches.
I would go 54. That'll give you half an inch in your side to get a welder around on the inside.
So we'll call the bottom measurement 54.
Now, Rick, you wanted to go up and then in right here. Right?
Ok.
So just go up and measure to the point where you start, want to start going in.
So
it's 24 inches to the bend and then measure straight up to the ceiling,
put 39 to the roof front
and then let's just go across the top 47
47 inches.
That'd be pretty good. Start across the floor,
bro. Would be 54 inches.
Ok. Across the roof, 47 inches
height from, uh, to the first bend,
24 inches
and the total height to the roof,
the 39 inches. All right. So we're gonna cut it at 93 and the 16th.
And I'll just give you those bend. Those are the locations of the bends
and those are the angles.
We'll cut it, throw it in bend it
sweet. Oh,
then we'll see if it worked.
We either have a hoop
or a piece of scrap
with all our measurements taken
and fence figured out
it's time to start making the hoop.
We're using one and three quarter inch tubing and cut it, the length of a gold saw.
All right. What do we do? Put an X on that end up there because that's the end that all your bends have to be pulled from.
So, so remember it.
Ok. Mark that thing at seven and three eights.
Ok. Next mark is at 17 and seven eights, 61 and three quarters.
And then the last one is 78 and three quarters.
We need to bend to 13 degrees here, but Ian suggested taking it up to 17.
So it's gonna spring back some
looking for the second mark.
Ok?
Stand back
and make sure that it's like in line
picked up.
That's gonna be 4555
7070.
Ideally what you want is you want this piece right now and this piece to be almost at a 90
come all the way out to the next mark.
Ok. There's an X mark.
Ok. So don't release it.
And what we'll do is we'll measure across.
Yeah, so we're gonna throw a couple more degrees on that. We're gonna take that a little bit further.
Ok. Stop.
Yeah, we're good.
We're good on that.
Go right in front of the floor one you got there.
That one we're gonna have to trim down.
What you'll have to do is
it's still a little sprung,
just throw a ratchet strap on it
and suck it a little bit. So pull it out, trim it, get it in tack it and then uh I'll get loan you my computer and you can start on the door bars
and if you got any problems come get me next door.
Cool beauty gu
We'll probably
a
little bit. All right, man.
Once we get the excess trimmed off,
it fits just right
now, like Ian said, it sprung out a little wider than we want. But the ratchet strap will suck it in just enough for us to tack it in place.
We've got a numbers running a tubing marked. We're gonna make our first attempt here at Bennison door bars. So stick around. We'll see how many pieces of scrap we end up with before we get it right
after the break. Find out why this little Dodge is hell on wheels.
Today's flashback. A 1971 Dodge demon 340.
If you were a young guy or gal in the seventies and were itching for a performance car that wouldn't burn a hole in your wallet. The 71 Dodge demon 340 was one hell of a bargain
at a base price of around 2700 bucks. The demon packed a lot of power and a small package with the standard 340 V8 under the hood. This little imp was officially rated at 275 horsepower. The 315 horse was closer to the truth.
The secret to its strength was its compact size at
just 3250 pounds. It was a good 3 to 400 pounds lighter than the more powerful muscle cars of its day.
This gave it roughly one horsepower for every 10 pounds of car weight. A
stock demon like this one could hit 60 mile an hour in less than eight seconds and do the full quarter mile in under 15.
This car is really a blast to drive. It's a lightweight car with a lot of motor in it
and that's what made those cars fun. The late sixties saw a 50% increase in the compact market
had great success dropping a big engine in the small car with its 70 duster.
So Dodge decided to copy this idea in 71 and transformed its own darts swinger 340 into a coup and branded it the demon 340
at 108 inches. This was the first true compact wheelbase for the dart since it debuted in 1963.
The Dodge Boys
out the demon 340 with a fast back roof, blacked out grill rally wheels and performance stripes down the side with the black stripe across the tail light panel.
Oh and don't forget those hot demon badges with the smiling devil and Pitchfork M
So what makes this demon stand out?
This little demon has a unique color. A lot of the
were a B five blue. This one is a little lighter color on this car.
Uh This car is a highly optioned car. It has a factory tack in it.
Other factory options included air conditioning,
a black vinyl roof, chrome hood pins and dual hood scoops. Now all demon three forties came with a rally suspension package. When combined with that 340 wedge
uh made this car a real hell on wheels.
You pull out on the road, you nail a throttle on this thing
and it ropes the tires and the hit second gear. It's a good feeling to have.
Sadly all that good feeling, it wasn't enough to drive up sales and only about 10,000 were built in 71. The demon name
was frowned on by a lot of people. Maybe church goers who knows
it may have been a controversial name, but not compared to what the Dodge Boys wanted to call it originally.
the beaver
in the history of muscle cars. The Dodge Demon 340 is a true rarity like a lot of muscle cars. Many of them have been lost forever
with all that could have happened to this car. We're really lucky that this little demon got saved.
Well, we did pretty good on these door bars. The first one is in and looking killer and the second one is bent and ready to go. It's gotta go down to the dash. So Brent's gonna get the whole cut and then we can get it set in there and see how it looks.
If I followed Ian's directions, this thing should slide right in place.
Cool, perfect.
I'm going to notch to fit the main hoop. So I'm marking the length of the bar and the angle of the cut.
Then trimming off the excess.
The tubing
option makes it pretty easy. Just clamp the tubing in,
check your angle
and you're set,
I'll clean up the eighties with a grinder. Then we'll see how it fits,
the notch was right on. We can tack it in place and move on to building the rest of the cage
there. Perfect.
Hey, not bad for a couple of guys that never done this kind of thing before. All right, we did get some help, but sometimes you need to know when they ask for advice and we're out of time for it today, but we're gonna keep rolling on this cage, taking it one piece at a time. So for now we're out of here.
Got it.
Show Full Transcript
Hey guys, welcome to the shop. Today. We're working on our 64 comma a FX car. I just got the side trim holes here filled in and Brent's finishing up the tubs. Uh
When it's done, this car will be the first car ever on the entire power block to hang the wheels out on the track and on the street. But there's a lot of stuff that's got to happen between now and then
last time we got it blown apart
and got right to business. Moving the rear end up 16 inches.
The rear section was taken back out narrowed four inches to make room for the tubs
with the rear section back under the car, two inch strips are being added to each side to make room for the massive drag tires.
But once the tubs are welded in, some braces are ready to keep it all in place.
Now, the factory frame rails ended up here which was fine for the 220 horse that this thing originally came with.
But to stand up the abuse that we're gonna be dishing out, we need to tie the entire chass together. Now, of course, it's gonna be getting a full roll cage, but we're also gonna take two by four box tubing, lay them into this front frame rail and tie them into the back. But before we can do that, we gotta get some of the sheet metal out of the way.
And the plasma cutter is a great tool. But you got to remember it basically liquefies metal
and everything else in its way.
Yeah, including hidden sea sealer
that was hot.
Get in clubs
safety first
one more time.
Now I feel indestructible.
Once the old rails are cleaned up, I'll cut off the end so we can lay the new rails in
before we start making anything. Some plannings in overnight where it comes back here because we got the two by four.
We can take the tubing right there
about two inches in there.
This one here is shallow
on this end here. We can slice this
and pinch that in and match it down. We just basically just have to figure out the angle
and put a little bit of A Z in it.
Yeah, once you get the Z, then we can probably cut it,
take that piece and raise it up and slide it into that one.
Give it a shot.
Now, since the front and the rear frame rails aren't in alignment, we're going to have to see our new center section here and we've laid the whole thing out on cardboard so we can see exactly where our cuts are going to be. Now, the key to getting this thing to line back up is going to be the distance between those cuts. So before I do anything, I'm going to lay it out on the steel,
whatever your total angle is, the cuts will be half of that.
So since our total angle is 45 degrees, I'm setting a saw to 22.5,
this one is ready. So while I'm cutting the pieces for the other side, Brent's going to start getting this one put together,
he's beveling the edges with a grinder to give the welds more area to fill.
Since the old front rails are shallower than the back, I'm going to have to modify the new ones to match. Now, I could just notch it and weld it.
But a right angle cut would leave a weak spot. I'm going to create a gradual taper by using a pipe cut along the side, reattaching the top.
And after a little bit of clean up, they drop right into place,
the factory rails were only about an eighth of an inch wider. So sea clamps pulled it all together
and once we got them fit, we melted them into place
and now that we got the center part of our frame here tied together, we can start designing a roll cage. Now, first thing we're gonna do is come in here with some eight inch plate on each side. Then from there, we'll come across with some two by four box tubing. Now, that'll give us a good strong place to attach the front part of a roll cage to.
Now in the back here, we're gonna do the same thing, some eight inch plate
with some two by four box tubing. And that'll give us a good strong anchoring point to come in with our main hoop.
There's a few different ways you could strengthen the attaching points,
but this car probably won't be the fastest thing on the track. So, rather than use quarter inch plate or maybe some box tubing, we're going to keep the weight down by reinforcing the rockers with an eight inch plate.
The important thing is that you don't, but we the braces directly to the rockers because if you ever flip it on its lid, the body could tear right off the cage
to make the front braces. I'm using the same technique as I did for the center rails slicing out a Pyot
and using clamps in a welder to give it that gradual taper
to keep the frame as strong as possible. I'm cutting a notch in the original rail for the new one to slide into
and when you're building a one off car. You're going to end up with a lot of one off parts. Now, since our factory frame rails are actually sitting lower than our rockers, our new braces ended up with a pretty mean contour. And once we got these welded in, we're going to start laying out a roll cage to stick around
up. Next Ian from Xtreme 4x4 drops by to show how a roll cage is designed.
Hey, welcome back, Ian here had some pity on us and he came down to help us lay out the roll cage in our comet.
So it looks like a pretty cool uh program you got going here. Yeah, it's, it's, I've got hooked on it. You all times. Ben Tech Pro. Once you got the di locations programmed in which we just did on this piece of engine three quarter tubing,
this will be real simple to use with some easy measurements.
We be hooped up in no time.
What's step one here? All right, we'll start, we're just gonna make a simple hoop main hoop start with
uh, we'll just be coming off the floor over across the roof and down. So the first thing we need to know is how wide we need that hoop to be, how wide it has to be at the top and how tall it has to be. And the program will just give us bend locations for the tubing.
Ok. What if we want to come in because we want to come up on the quarter panels and kick it in.
We'll just pick an offset hoop,
double, double hoop like that.
And we're going to work on outside dimensions only on here
you
makes life simpler.
Uh We've got the tooling already programmed in. I need to know height from the floor to where you want it to go in
the height from where you want to go into the roof, wid that the roof of the narrowed version and then the width of the floor.
All right, the number one question we need to know right away is
you're not,
we're not building like for an N hr actual spec class, right? We're just building just a cool cage. We don't have to worry about rule, but we gotta worry about
it being safe. So the nice thing about this, we'll, we'll try to tuck the cage up nice and high into here
and keep it up there.
So the first measurement we got to do is we got to go all the way across the bottom on the floor here. Did you go outside to outside? Well, that see fifth where the computer program set up to take an outside dimensions. That would be 55 inches.
I would go 54. That'll give you half an inch in your side to get a welder around on the inside.
So we'll call the bottom measurement 54.
Now, Rick, you wanted to go up and then in right here. Right?
Ok.
So just go up and measure to the point where you start, want to start going in.
So
it's 24 inches to the bend and then measure straight up to the ceiling,
put 39 to the roof front
and then let's just go across the top 47
47 inches.
That'd be pretty good. Start across the floor,
bro. Would be 54 inches.
Ok. Across the roof, 47 inches
height from, uh, to the first bend,
24 inches
and the total height to the roof,
the 39 inches. All right. So we're gonna cut it at 93 and the 16th.
And I'll just give you those bend. Those are the locations of the bends
and those are the angles.
We'll cut it, throw it in bend it
sweet. Oh,
then we'll see if it worked.
We either have a hoop
or a piece of scrap
with all our measurements taken
and fence figured out
it's time to start making the hoop.
We're using one and three quarter inch tubing and cut it, the length of a gold saw.
All right. What do we do? Put an X on that end up there because that's the end that all your bends have to be pulled from.
So, so remember it.
Ok. Mark that thing at seven and three eights.
Ok. Next mark is at 17 and seven eights, 61 and three quarters.
And then the last one is 78 and three quarters.
We need to bend to 13 degrees here, but Ian suggested taking it up to 17.
So it's gonna spring back some
looking for the second mark.
Ok?
Stand back
and make sure that it's like in line
picked up.
That's gonna be 4555
7070.
Ideally what you want is you want this piece right now and this piece to be almost at a 90
come all the way out to the next mark.
Ok. There's an X mark.
Ok. So don't release it.
And what we'll do is we'll measure across.
Yeah, so we're gonna throw a couple more degrees on that. We're gonna take that a little bit further.
Ok. Stop.
Yeah, we're good.
We're good on that.
Go right in front of the floor one you got there.
That one we're gonna have to trim down.
What you'll have to do is
it's still a little sprung,
just throw a ratchet strap on it
and suck it a little bit. So pull it out, trim it, get it in tack it and then uh I'll get loan you my computer and you can start on the door bars
and if you got any problems come get me next door.
Cool beauty gu
We'll probably
a
little bit. All right, man.
Once we get the excess trimmed off,
it fits just right
now, like Ian said, it sprung out a little wider than we want. But the ratchet strap will suck it in just enough for us to tack it in place.
We've got a numbers running a tubing marked. We're gonna make our first attempt here at Bennison door bars. So stick around. We'll see how many pieces of scrap we end up with before we get it right
after the break. Find out why this little Dodge is hell on wheels.
Today's flashback. A 1971 Dodge demon 340.
If you were a young guy or gal in the seventies and were itching for a performance car that wouldn't burn a hole in your wallet. The 71 Dodge demon 340 was one hell of a bargain
at a base price of around 2700 bucks. The demon packed a lot of power and a small package with the standard 340 V8 under the hood. This little imp was officially rated at 275 horsepower. The 315 horse was closer to the truth.
The secret to its strength was its compact size at
just 3250 pounds. It was a good 3 to 400 pounds lighter than the more powerful muscle cars of its day.
This gave it roughly one horsepower for every 10 pounds of car weight. A
stock demon like this one could hit 60 mile an hour in less than eight seconds and do the full quarter mile in under 15.
This car is really a blast to drive. It's a lightweight car with a lot of motor in it
and that's what made those cars fun. The late sixties saw a 50% increase in the compact market
had great success dropping a big engine in the small car with its 70 duster.
So Dodge decided to copy this idea in 71 and transformed its own darts swinger 340 into a coup and branded it the demon 340
at 108 inches. This was the first true compact wheelbase for the dart since it debuted in 1963.
The Dodge Boys
out the demon 340 with a fast back roof, blacked out grill rally wheels and performance stripes down the side with the black stripe across the tail light panel.
Oh and don't forget those hot demon badges with the smiling devil and Pitchfork M
So what makes this demon stand out?
This little demon has a unique color. A lot of the
were a B five blue. This one is a little lighter color on this car.
Uh This car is a highly optioned car. It has a factory tack in it.
Other factory options included air conditioning,
a black vinyl roof, chrome hood pins and dual hood scoops. Now all demon three forties came with a rally suspension package. When combined with that 340 wedge
uh made this car a real hell on wheels.
You pull out on the road, you nail a throttle on this thing
and it ropes the tires and the hit second gear. It's a good feeling to have.
Sadly all that good feeling, it wasn't enough to drive up sales and only about 10,000 were built in 71. The demon name
was frowned on by a lot of people. Maybe church goers who knows
it may have been a controversial name, but not compared to what the Dodge Boys wanted to call it originally.
the beaver
in the history of muscle cars. The Dodge Demon 340 is a true rarity like a lot of muscle cars. Many of them have been lost forever
with all that could have happened to this car. We're really lucky that this little demon got saved.
Well, we did pretty good on these door bars. The first one is in and looking killer and the second one is bent and ready to go. It's gotta go down to the dash. So Brent's gonna get the whole cut and then we can get it set in there and see how it looks.
If I followed Ian's directions, this thing should slide right in place.
Cool, perfect.
I'm going to notch to fit the main hoop. So I'm marking the length of the bar and the angle of the cut.
Then trimming off the excess.
The tubing
option makes it pretty easy. Just clamp the tubing in,
check your angle
and you're set,
I'll clean up the eighties with a grinder. Then we'll see how it fits,
the notch was right on. We can tack it in place and move on to building the rest of the cage
there. Perfect.
Hey, not bad for a couple of guys that never done this kind of thing before. All right, we did get some help, but sometimes you need to know when they ask for advice and we're out of time for it today, but we're gonna keep rolling on this cage, taking it one piece at a time. So for now we're out of here.
Got it.