MuscleCar Builds

Parts Used In This Episode

Auto Meter
5 " tach, Utralite series, volts, oil and water
Borgeson
Steering U-joint double joint.
Chris Alstons Chassisworks
Mandrel bent drive shaft hoop.
Fuel Safe
Bolt in replacement fuel cell with bladder.
Holley
Cushion clamps, 5/8" and 3/4".
Kentucky Mustang
Drivers side door.
Made For You Products
Plumbing line clamps.
Moroso
Steering column and mount kit.
Mustangs Plus
3'' fiberglass cowl hood.
Mustangs Plus
Flared front fiberglass fender.
Mustangs Plus
Front fiberglass bumper.
Mustangs Plus
Rear fiberglass bumper.
Russell Performance
8 an fuel line, fittings, and line clamps.
Weldon Pumps
EFI fuel pumps.
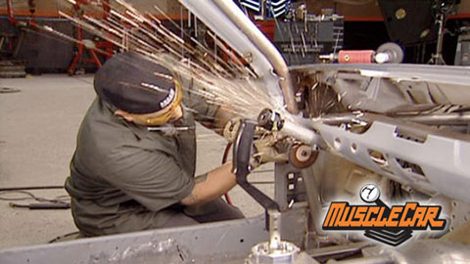
Video Transcript

Today's muscle car is a puzzler.

Why does Lou put exhaust in the dash?

Who is man enough to handle this

or the shifter?

Why is Lou Lou?

Are you ready?

Today? Is gonna be a great day in the shop? Because all the parts for our Mustang road racer are finally here. We still got a long way to go before we get this baby on the track. But if you've missed what we've already done,

check this out.

Our outlaw road races started life as a 289 fast back stang

once in the shop, we stripped it down and sent it off for media blasting,

removing years of rust and body fill up. Once we got it back, we cut out the floor leaving nothing but the shell primed it.

Then we built a full tube frame, set the body on it. Then we put in a tiger quick change, built a roll cage followed up by a 401. The guys in horsepower built a G force five speed with a new set of wheels. We put her on the ground just to see how it was gonna look.

We've got to put this thing completely together. The drive train, the electrical, the body panels have to fit everything has to be perfect just so we can blow it apart to paint. And it all starts right here with the fuel system. Fuels safe, hooked us up with this tank. It's approved by most sanctioning bodies and this foam will keep the gas from flying all over the place in case the cell is ruptured. It also comes with this rollover valve just in case the car turns up on its roof. But before I install it,

I've got to make a frame to hold it.

The measurements have to be exact. So it fits nice and tight around the tank.

Some old steel was lying around the shop. A little media blasting and the metal looks like new,

a few welds and we'll see how the tank fits.

I'm gonna use the roll cage as the mounting point. It's the strongest part of the car.

It'll keep the front of the tank secure as well as making it easy to remove

these connectors will support the back of the tank, keeping it stable all the way around.

Quarter 20 screws will connect the tank to the frame,

making it a one piece unit,

remove these four bolts

and the entire fuel cell comes right out.

We're going to install this bar across the back to protect the fuel cell from any rear impacts

with the fuel cell back in place.

I'll connect the lines to the tank,

then plumb the whole system.

I'm running this dash eight fuel line to this pump and filter supplied by welding.

You always want to run your pump as close to the tank as possible and as low as possible because it's easier for the gas to be pushed rather than pulled.

I want to be able to remove the pump and fill them when needed.

This plate will hold both of them making it easy to take it on and off. If I have to,

you could wait till the frame and body are painted before doing the mounting points with the fuel and the brake lines.

But this way, you don't risk chipping the paint.

I'm securing my brake lines and my battery cable with this plumb kit from made for you. These tea clamps come in a variety of sizes from 316 to 58.

That'll cover just about any application you may come across

with my whole already prep.

This two piece design is not only easy to install, but it's easy to remove

everything I've installed so far was designed to be torn off fast.

If something goes wrong at the track, I can access just about everything quickly.

I'm gonna mock up my steering column so I can mount my pedals. The last thing you wanna have happen is to not be able to mount your column because of a lack of space. This kit comes with everything you need it's just gonna take some modifications,

competition engineering design this column so you can modify it to fit any car.

A little fabrication is all that's needed.

I'll temporarily tag it to the dash so I can set up the steering.

I've got to cut apart the dash around the steering

comb to make the clutch and brake pedal, set up work.

I'm gonna need a little more room, so I'll cut the top of the dash off and weld it back in. Later,

Afco sent us this brake and clutch set up from will wood and Tilton. This slave still is for the clutch. The other two allow the brakes to work as a fail safe. If one goes out, you got back up making it a definite for our road racer being that we've got so much engine setback, we're gonna have to move the pedals back, so everything fits.

I'll still need to remove some more of the dash around the column for room.

Since the pedals, a reverse mount,

I'll make my mounting brackets so I can connect them directly under the dash

and then welded to the roll cage.

The pedals are right where we want them, but we've still got a lot of work to do and it all starts with the steering and you're gonna see that after the break.

I've been steering this thing around the shop by its wheels now for a while and it's no big deal, but I can't do that at the track. So this time we're gonna mount the steering column for real

with the column where I want it to sit.

I'll take a few measurements. So I know where it's gonna connect,

cut some stock tack it in from the frame rail to the column.

Then I can make another mount for under the dash.

But this three eights nut will do the trash.

We need a place where the rack can go.

So this plate will make a great mounting point. Sweet manufacturing centers, close ratio rack, you'll find it on a lot of late model dirt and open wheel, modified cars and trucks.

We ordered their servo, which is three pounds lighter than the last.

You can buy the rack with the servo mounted on it if you've got the room. But since we don't, we're gonna run their remote servo.

I needed a good midway point to attach to that's between the column and the rack.

So the engine mount is the perfect place to put it.

Now, I can connect the U joints and the steering stock. Then we'll see how well my setup works. If I was running circle track, all I'd have to worry about is making lefts, but both ways is definitely better for a road course. Plus it just makes good common sense.

The dash could be taxed back in place for now

and hold that

once all the modifications and instruments are in place, I can tweak all the unpleasantries later,

the defrost and speaker holes have got to go.

This old calendar works well as a template. A

few cuts

and the patch panel is done.

Now, our dash is aesthetically pleasing to the eye.

The only music you're gonna hear coming from this car is from the engine, so we don't need a radio. What better place to mount our gauges than right here

hot tub,

Brent made this plate to work as a mount for the gages.

I've cut up the dash a lot,

but I want to stay as close to the original shape as possible

once it looks just right

bore out the hole.

A lot of you guys mount the tack on the dash.

I prefer using four inch exhaust to mount mine.

I'll use this template to mark where it's gonna go

and cut out. What I don't need

the goal here is to make it look like it's part of the dash.

Just some minor trimming.

I'll line it up, see what we've got.

I'm gonna need it in a bracket to hold the tack in place.

Most gauges come with them

but not for modified exhaust pipe.

If you're gonna go this route,

do da da da.

That was hot.

Be prepared to be creative.

Now, this looks cool.

Once I have it securely mounted, I can start mocking up the gauges.

It's time to test fit our gauges. These are auto means pro comp, ultra lights. And their aluminum face makes it real easy to read and they fit in most cars. But this is what they were made for.

We needed an easily accessible place for the clutch and brake reservoir

and the glove box has space available.

So that's where they're going,

Tommy, from. The power block crew happened to be hanging out.

So I put him to work.

I needed a cover plate that follows the contour of the dash and he's pretty mean with the sheet metal

and I've got some more front end work to do

this bracket I made will be the reservoir mounting point. The whole unit needs to sit higher than the slave cylinders. This will prevent bleed back in the lines.

Brent's been prepping our stock door hinges with these in place. We can start hanging the doors. Kentucky Mustang sent us this OEM replacement for the driver's side

with the little finesse slides right in

the original passenger door was fine. A couple of adjustments and it lined up perfect.

This thing is finally starting to look like a Mustang again. Well, sort of

later on in the show, we're gonna throw some fenders on this baby so we can build a radiator support.

1970 was the peak of the muscle car years just about everything. Screen performance. You had mid size cars and pony cars. But Chrysler and hers got together and built the biggest muscle car ever. The 300 H

this week's muscle car flashback. The 70 Chrysler 300 H

in 1955 Chrysler debuted a car that at the time would be considered the most powerful production car in the world retaining the Chrysler New Yorker body of the day. Simple alterations were made giving the coup 300 its own look. The rear quarters were off the Windsor and the grill from the Imperial were added to give it a unique look under the hood. One fuel hungry 331 firepower.

Hemi,

the 300 was big and bad, so bad stock car drivers like Lee Petty and Tim Flock were tearing up the track with him. In

57 Chrysler was stuffed in the 300 C engine compartment with a nasty 375 horse 392

hemi

maintaining Chrysler's most powerful production car image.

The 300 kept the performance options into the mid sixties.

Eventually the

440 became the standard V8

and the 300 began to lean more towards style and luxury than a stealth. Stock car.

1970 was the year for an all new 300

Chrysler was looking for a way to reintroduce this well known car to a new generation.

The answer was simple. Team up with her performance to build a new 300 that came with some serious muscle under the hood.

The 1970 Chrysler 300 Hersch

Battleship Land yacht or ghetto sled. Maybe some of the phrases that come to mind but be careful what you think because this ain't exactly your grandfather's town car. It's a barge on steroids

like all the Hearst white and gold schemes. It was simple spinnaker white with satin tan accents marked with Hearst badges and even the wheels were pinstriped to match the body

for extra intimidation. It was outfitted with a fiberglass power bulge hood with functional air scoops

and depressed rotary hood latches. The rear spoiler is also fiberglass plus it helps this whale shed a few pounds

with a grill like the mouth of a shark

and a tail light pattern that could double his runway life. This beast definitely stands out

exactly one inch longer than a Ford excursion. It takes a lot of force to move this thing. 440 cubic inch TNT V8 under the hood makes it happen.

375 horse, 460 ft pounds of torque pass through a torque flight transmission

and a posi rear end make this 4100 pound monster run a surprising

0, 60 time in 7.1 seconds,

taking a hard curve or coming to a quick stop.

Well, that's a whole another issue.

The interior was nothing short of luxury for the day, saddle tan leather, power seat, power windows, power locks, automatic climate control, cruise control and even a scan button for the radio that you can control with your foot.

If you were looking for a muscle car back in 1970 but wanted luxury at the same time. Then this was the car for you.

The only problem

there were just a few of these ever built.

This is a 1970 Chrysler 300

s 441 of only 485 ever produced

486. If you count this one,

Chrysler and Hurst wrote to win the hearts and minds with this 300. And who better than to do that than Miss HST Shifter herself, Linda Vaughan.

This car is part of the Dudley collection

and Karen is one of the few drivers that's allowed to really open this thing up.

Her Dragon road course racing experience comes in pretty handy when making this aircraft carrier fly.

If you see this thing coming, it may be a good idea to get out of the way.

Not only is it fast, but it takes up the whole road.

We'll be right back.

All of our fiberglass parts came from mustang, plus everything we need to take the unnecessary weight off of our front end, the fenders, the hood, the bumpers because for what we're building, we don't wanna be on the heavy side

with the fenders back off. I can drill out the rest of the mounting holes. Then we hang them and take measurements for the radiator support

in order to get the exact measurements for the core support we'll bring in the hood. So we can mock it up

and these spaces will help. Give us a good idea how it's all gonna line up.

I'll tack in the braces to hold them in place.

Now, we can install the front air dam

since space is a concern.

This gives me a really good idea of the area that I have to work with.

We're gonna fab up an entire radiator support because the factory one isn't gonna work and there's no as the market one available.

First, these mounting brackets will bolt to the fender. Then I'll cap off the front of the frame rails and use them as another mounting point.

I'll need to cut some flat stock

and some round star,

then weld them together.

This is what will connect our frame to the core support

with these in place. We can start on the main support structure.

I'll need another measurement for the core support

some half inch and three quarter tubing will be used to make the other anchor points.

Then we'll tack it in top and bottom

and mount it to the fenders.

These are braces for both sides of the fenders.

Their purpose is to give a little extra support between the front side impact bars and the middle, upper fenders.

Ok. We've gone as far as we can go without our radiator. Now, this support was designed with a couple of different things in mind

to hold the front of the fenders, the lower balance and the grill. Now, when we mount the radiator, we're going to put it in at about a 35 degree angle. That way you get more air over the front of the radiator, which means better cooling, which means

a happier engine. When you're whipping around the track,

our Mustang road racers come a long way today. We put in our reservoirs so we can stop and shift. We cut the dash out and threw it back in. We mounted our gauges, we finished up our steering. We even gave this baby a nose job and that all means one thing, we're one day closer to the track next week. More fab work until then later.
Show Full Transcript