MuscleCar Builds

Parts Used In This Episode

B&M Racing
The B&M Hole Shot torque converter has a stall speed of 3200 rpm, right in the new powerband of the 350 crate engine. Before mounting it, fill it about 1 qt of transmission fluid.
B&M Racing
The rear seal of the trans output shaft can be a major source of fluid leakage. They are inexpensive, so replace it while you have the chance now.
Chevrolet Performance
Many accessories from the stock V-6 with transfer to the V-8, but the flex plate isn't one one of them. So, you'll have to buy a new one and use new bolts to secure it.
Chevrolet Performance
GM Performance 350CID crate engine. Not remanufactured, but new with 4-bolt mains, steel rods,76cc heads, 0.460-inch intake/exhaust lift camshaft, 8.5:1 compression ratio = 290HP and 326 lg-ft torque. All for $1500 new!
Chevrolet Performance
The wider and deeper 350 is going to be a tight fit in the stock engine bay. It will require headers, and for them to clear, a smaller, higher torque starter is required. Plus, it will resist the extra heat the headers will produce. Kevin bolts it in.
Edge Products
Edge Products has these new higher flow electronic fuel injectors that mate directly to stock GM or Bosch wiring harnesses. They can flow up to 83-lb/hr!
Holley
Holley 2-barrel ProJection electronic fuel injection uses specifically optimized manifold (shown). Its two-injector throttle body hooks up to stock wiring harness, but mixture is user-controlled.
JTR
Steath Conversions is the parts portion of Jaguars That Run (JTR). Its full swap kit uses new 2.8 liter motor mounts along w/their laser cut engine mounts (shown), transmission spacer, suppport bearing spacer, pinion angle shim, axle set-back kit, oil filter relocation brackets spacers, and two complete manuals that cover both 2- and 4WD drive S-10 V-8 conversions.
JTR
When you slam a truck the pinion angle changes, and the relationship between the tail shaft and yoke changes, too. Stealth Conversions has all the parts to re-align the driveshaft. Show here is the support bearing spacer, but they have the correct pinion angle shims, too.
Kelderman Mfg.
Oh boy, with Kelderman's 10--12-inch air lift kit you wil be the biggest and baddest on your block. Fully computerized it has all the parts for you to lift your truck high enough where extra oxygen will be needed. Smaller cars will scurry out of your path!
O'Reilly Auto Parts
Be sure to confirm you are using a correct V-8 water pump for the stock V-6 serpentine belt drive. Ours from O'Reilly's Auto uses a 1988 and newer reverse-rotation water pump for a V-8. Your new engine will overheat is the pump runs the wrong direction. Paul gave this cast iron pump a quick spray of aluminum to dress it up and match the other components.
Pertronix
Pertronix also makes Patriot headers for this swap. These are coated inside and out for increased durability for the finish and prevent rusting.
Pertronix
This is why you install the distributor indexed to cylinder #1 BEFORE you bolt in the engine. That's all the clearance the Pertronix small-cap distributor has. It uses a separate coil you can mount remote to it.
Video Transcript

It's frame fab time. Now, this will challenge the twist in our challenger

and it's prime time as our great Camaro heads to the booth for a coat of velvet.

This is muscle car and our 70 hemi

challengers making a whopping 610 horse. So we gotta stiffen up our unibody. But in order to do that,

we gotta build some frame connectors and replace a rotted out frame rail.

And we've almost got our year one, Craig Camaro completely dialed in. Now, we're building a show quality car here. So we've really taken the time to con

trade on things like the gaps, the panel to panel alignment and our laser straight body lines. So I'm gonna jump on the trunk of this thing, get it finished so we can get it in our paint booth today.

This muscle car is 36 years old and it's got something that all muscle cars have got rot.

So you know what this floor pan is out of there.

The

plasma cutter is my favorite tool

that 36 year old rod is gone.

You want to cut the floor pan out in small sections and remember to leave a short lip about two or three inches on the car edges. So you have a place to support the new pan when you're ready to weld it in

here. I got a present for you.

Woo,

I

better get a Tetanus shot.

The one with square two being nice. Yes, I am.

That's cool. I mean, there's really no structural advantage over round or anything else. Plus the underside of the car is all square. I think it'll actually match a little bit better. I like it because it gives you a nice flat surface to mount your lines to and everything, you know. Cool, man. I dig it.

Why don't you stand for a while? I can do that?

Subra

connectors help eliminate flexible.

If you're adding performance to a unibody car, they're a must.

We'll use eight inch plates on both sides of the floor to anchor the connections.

Our 700 pound rate

hemi puts out 650 pounds of sword

without frame connector.

It twists his car apart.

These babies are gonna stiffen this thing up big time.

You know, we were talking about bracing that wheelhouse with an inch and a half tube.

I love seeing this because we could drill like a perfect inch and a half hole and then, you know, come

through

and we can access it right and then,

and then we'll just weld around that hole on the other side. So it'll be like a perfect

the tube will just disappear inside the frame basically.

And then when this is removed, we can put that plate on the back like we were talking about

weld it to it, put the floor back on it and be like,

oh my God, what happened to that tube? It just disappears.

It'll be awesome

what I'm talking about

now, this will challenge the twist in our challenger.

I'm so funny at times

the

you can shut off the camera because I'm going to the cold. So right now

she's a good, she's a good

now. It's time to replace the rotted out frame rail that we've got mo parts are notorious for. This is what happens is you get dirt and moisture in there. It sits and bam you've got rot. So year one supplies this baby because they saw a need for it. This is what I did

is I made a template. I'll transfer it onto there. Trim it up. Nice and neat. Oh,

done.

You can slip the new rail over the rusted section, but it's always good to clean out that old rod.

This is part of the frame and it needs to be fixed. Right.

Let's see what prices we've got.

I'll take what's behind door. Number two week.

Adding angles gives you more surface area to well known, which gives you a stronger joint.

We'll just plasma out the section we need.

Oh, yeah,

I'm almost done, dude.

We'll gus it the new section for extra strength.

Ha.

Well, ha,

that my friends is how you fix an E body frame rail

paint prep tips coming up.

Hey, who, what? Give it a rest for a second. All right, busy. That's enough welding and grinding for one day. All right,

guys, we're gonna get back on our Craig Camaro and break in our new muscle car paint booth because today we're gonna prime and block this bad boy. So let's take a look back at how we got to this point.

We took the time to hang and adjust all the panels

and then to go ahead and make the gaps perfect.

We added metal and ground them to make all the gaps uniform.

We use dual action Sanders to create a mechanical adhesion on the whole car for a skin coat of body filler that bridge the gaps for show quality panel alignment.

Then we finish the body work off with a final pass of glaze to fill in any sort of ferocity.

After that, we use a cut off wheel and sanding block to finish off the precise gaps that really complement these perfectly aligned panels.

All right, we got a lot of time in this thing, but it's gotta be right. I mean, this car is a showpiece. Year one is gonna take it on the power tour. It's gonna be a

Sima and it's eventually gonna end up in somebody's garage when we give it away on our sweepstakes

So Lou

give me a hand giving this thing prepped.

Let's roll.

Come to Nashville. They said

work with Lou.

He's not crazy though, sir.

Hey, they told me I wouldn't have to do body work.

I wanna know in my contract. Who told me that lie?

We're wiping the car down with wax and grease remover. We're using this pressurized sprayer from Matco.

It's great. You just apply it with this

and wipe it off with your rag. But if you don't have a pressurized sprayer, just get a can of pre cleaner

or wax and grease remover, dump it on one rag, wipe it on, make sure you wipe it off with the other rag and continually flip the rag to keep a clean surface on the paint. So you're not smearing the stuff you just wiped off into another part of the panel.

I read somewhere that this stuff may cause birth ca uh, birth defects only in the state of California.

So my question would be, what about the other 49 states?

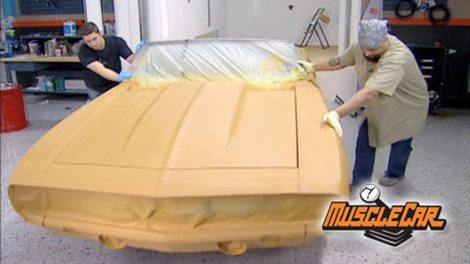
We're gonna tape and paper this car out before it goes in the booth because there's some areas we don't want primer on. Now, take your time when you do this, think your way through it so that you can still do things like open the doors and the hood

and keep the primer off the areas you wanna keep clean

teamwork.

We're using this green tape and paper from three M. This stuff's great because the paper won't let paint bleed through and the tape

has a high adhesion and it doesn't leave a fuzzy edge when paint blows by it.

All right. Hang on. Hang on. All right. Let's do this.

That's where you got a little bit of edge to work with.

Here we go.

Just however, yeah, tightened up. So it's not whipping around with the

sprayers.

You know, I used the calibrated eyeball once again

to get the angle of the dangle.

Let's get the car in, man. Open the doors for the first time.

You are so manly

later our crate. Camaro gets a coat of crime.

Welcome back guys. It's time to start mixing up some primer. Whenever you're messing around with these paint chemicals, always follow the manufacturer's instructions for safety. Yeah, one time I had a really nasty reaction and it put me in the hospital. So you gotta be careful.

Primer surfaces usually needs to be thinned out a little.

Then you want a stern in a figure eight pattern to make sure all the material is suspended,

poured in through a filter,

stirring a few drops of hardener. It's ready for the gun

and Elvis makes a gun for each step of the painting process. You got your primer gun,

your paint gun and your clear gun. Now these are all HV LP guns which stands for high volume, low pressure. And pretty soon we're gonna be putting one of these bad boys to the test.

Well,

before I step into the booth, I'm gonna step into something really high tech

three MS fresh air system. When I'm wearing this thing,

I won't even know I'm around paint fumes.

I

feel like I'm in chemistry class.

Well, I,

we're getting ready to bust open the spray boot that we've got. It's a coal man.

So it pulls air down from the top and it actually goes under the car and goes out at the base and it keeps the dust off the car because it actually sucks everything down on the floor. So it's pretty high tech stuff.

Cute suit. Be quiet. I'm closing the door.

I like to start by laying down a number of thin coats on all the edges like the hood

trunk

doors and the jams.

The nice thing about primer is that it gives you a consistent color that lets you read all the surfaces

as you spray, overlap the coats for consistent coverage.

HB LP guns are more efficient and they use less primer which helps on material costs.

You want to lay on several thin coats building up the primer. So it fills in minute imperfections.

You're going to need a good base of primer in order to block the car

low ride.

And this is just like unwrapping a Christmas present.

What do you think about that? I never got a 69 Camaro for Christmas.

Oh, wow. I'm on paper.

Oh,

for leaving this thing. Mustard yellow, raise your hand.

OK.

The

journal is a place to rock.

You've seen it using a lot of different types of sandpaper on this car. And that's because sanding is a course defined process. We'll start by shaping the filler with 36 grit. Then get rid of the 36 grit, scratches with 80 grit and so on and so on. And basically what we'll end up doing is finishing this primer with 320. We start with 36 grit, which is here and this is just a rough in our shapes.

Then we get rid of the 36 grit scratch with 80

so on and so on with 180. And now with primer, we're gonna be standing it with 320

the primer is going to help you see all the details before blocking use, finish glazes to fill in any small pinholes or stretches

kitchen like this has sandpaper on it. It's the same principles that we were using when we blocked it with filler

only on a much instead of now instead of working an area, we're gonna work the whole side of the car.

So if you make a move like this, go all the way down.

You know what I mean?

Dude, I hope you ate your Wheaties. It's time for Mo Sanon. You have no clue what Wheaties are to slick.

All right. That's all I'm gonna

show you how to do it's on. We'll just see if Tucker's out first

synchronized masks

and these are all the uneven surfaces that would show up if we went ahead and painted this car without blocking it everywhere. That was shiny, believe it or not.

And areas like this chuckle didn't even show up before I started seeing it.

This is really showing me what I need to see.

That's what primer's main function is.

Aside from the fact that it builds is to show you

the imperfections in the car

when you're blocking, keep your body lines sharp by protecting them with tape.

Well, we're out of time and I think

los out of gas. So don't blame me. The reality of it is we've got hours of work sending this thing. So, you know what, we're out of here later?

Adios.
Show Full Transcript