Engine Power Featured Projects

Engine Power Builds

Parts Used In This Episode

Summit Racing
Cast Aluminum Timing Cover
Summit Racing
Cometic MLS Head Gaskets
Summit Racing
Trick Flow Chromoly Pushrods
Summit Racing
Trick Flow Rocker Stud Girdles for Chevy
ARP
ARP Fasteners
ARP
Rocker Arm Studs
Callies
Compstar Connecting Rods
Callies
Compstar Crankshaft
Comp Cams
Conical Valve Springs
Comp Cams
Endure-X Solid Roller Lifters
Comp Cams
Keyway Adjustable Billet Timing Set
Comp Cams
Ultra Pro Magnum XD Roller Rocker Arms
CWT Industries
Multi-Bal 5500
DSS Racing
Piston Rings
DSS Racing
Small Block Chevy FXK2 Series Piston Set
Edelbrock
Victor E 23 Degree Intake Manifold
Fluidampr
Harmonic Balancer
Holley
MSD Pro-Billet Distributor
Holley
Quick Fuel Q-Series Carburetor 950CFM
Lubrication Specialties
Hot Shot's Secret Adrenaline Assembly Lubricant
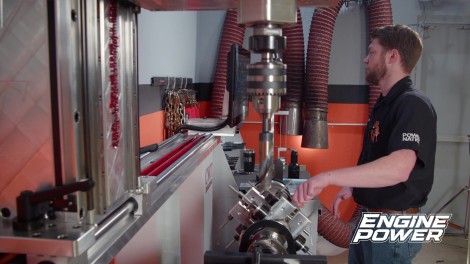
MSC
Vectrax Milling Machine

Episode Transcript

(Pat)>> You're watching Powernation!

(Frankie)>> Today on Engine Power we see if a stroker 305 can make enough power to satisfy even the biggest skeptics.

(Frankie)>> Out of a 305! [ Music ]

(Pat)>> Hey everyone and welcome to Engine Power, where today we're gonna be doing another fun, educational but this time somewhat controversial build. If you have been following along it is gonna be on an engine that you will instantly recognize.

(Frankie)>> What he means by controversial is this was a build that polarized our viewers. Either you thought it was really awesome and you've been waiting for it for a long time or you didn't really see the point in putting all that time and money into this engine. This engine is a 305 small block Chevy. Kinda the black sheep of the small block Chevy family. But the first iteration was awesome. It was easy to click together for you guys at home. It was a relatively mild build but it made great power on the dyno for a 305. All the parts look awesome now that we have it torn apart. The cylinder walls look great, the pistons look great, the bearings look great. So we know it had a great life on the dyno being thrashed by us. So you're probably wondering if everything looked so great why do we have it all torn apart? That's because like Pat said, we're gonna take this build to the next level. A stage two if you're into that sort of thing. What that means is new parts, bigger induction, and a more aggressive valvetrain. So definitely means we're gonna make more power, but before we get to any of that here is a look at everything we did in the first iteration to make sure you are up to date on the power potential of this 305.

(Pat)>> After tearing down two blocks in order to find one in good condition we prepped the 305 by deburring the block and making several oiling modifications. Then it was placed in our Sunnen SV-15 to hone the bores to 3.796 inches with the proper surface finish, and a new 305 rotating assembly including a Scat cast steel crank and forged I-beam rods with Mahle 40-32 pistons was balanced on our CWT Multi-Bal 5500.

(Frankie)>> A Summit Pro SBC camshaft actuated the valvetrain, and a set of Trick Flow 175 heads provided flow up top. An Edelbrock Victor Junior intake manifold and QFT 750 Black Diamond topped it off. We were able to get 414.9 horsepower and 390-pound feet of torque out of our little 305.

(Pat)>> We mentioned a bunch of new parts are going in our 305 and that's the reason we had to tear it down for a little bit more machining. What I am carrying here is one of the stars of that operation. This is a brand spanking new Callies Comp Star crankshaft. This is a 43-40 forging and it is packed with features. It has been nitrited. It's got a large radius for strength, but the most important part it is 3-750 stroke, and that means?

(Frankie)>> 339.5 cubic inch stroker!

(Pat)>> You might as well call it 340. To compliment our crank we also picked up a set of Callies' Comp Star connecting rods. Six-inch center to center length with a bushed end, and those will go with our brand spanking new stroker pistons from DSS. These are specially made for this application. What we have to do, like any other stroker small block Chevy. We have to get this mocked up to see if there's going to be any interference with the rod bolt on the block. When that happens we have to mark where it is and we're gonna have to grind it out. You could do this by hand, but since we have our handy dandy Vectrax mill we're gonna do it in there. Let's get this thing in there.

(Frankie)>> Make some clearance Clarence. We can lay in a set of mockup main bearings with a bit of oil on them. You don't need all the main bearings. Just a few to support the crank and the thrust bearing must be installed to keep the crank located. After dropping the stroker piece in we can install the matching main caps and torque them to spec. Some mocked up piston and rod combos are slid into the number one and two cylinders so we can check both sides of the block for interference. As is common with stroker small block Chevys, the rod bolt contacts the inside of the block. So we'll grab a permanent marker and place a mark in line with the center of the bolt.

(Pat)>> We'll mark both sides and any interference at the bottoms of the cylinders before we can take it all back apart, tape off the oil passageways that feed the cam bearings, and gently load the block into our MSC Vectrax mill. With our block clamped down to the table we have indicated "n" on X-axis. So we know we're nice and straight. The next thing we'll do is take our indicator out, get a tool in. We can zero out our digital readout and make our first cut. Our mark is not only for location but a reference on how far we need to cut into the block, which is about 125 thousandths. Once we have made our notch in that cylinder we can move the X-axis down the table four inches, 400 thousandths, which is the bore spacing of our block and repeat the process. All the machining is done and we've re-mocked it back up on the machine in case we've got to make some more cuts but I think we are good. Here is before, and here is after. See how nicely that bolt clears? It clears on the top and on the bottom.

(Frankie)>> So the bottom of our block is clearanced for our stroker crank, and now we need to clearance the top of the cylinders. Why do we need to do that? That's because in this iteration we're gonna be stepping up the induction. Instead of those Trick Flow 175s we ran in the first iteration we're gonna be moving those up to a set of Trick Flow 195s that we have from a previous project. We had them sitting on the shelf, and they're gonna work awesome for this build because they have some improved mid lift flow numbers and overall are gonna give us the flow we need to make some bigger power. That's because they have a 2-020 intake valve over that 1-940 that was in the 175s. That means these were designed to work on a four inch bore or larger. So to make them fit we're actually gonna need to notch the top of the cylinders for valve clearance. We'll put the head on our block, flip it over, and gently open every single valve until they contact the cylinder. Then we'll take a marker, mark where the valve intersects the cylinder, flip the block back over, take the head off, and gently clearance every single cylinder for the valve. We want to make sure we're not getting into where the rings ride inside the cylinder and not into where our fire ring is gonna seal on the head. So to check our valve clearance now we'll install one of our head gaskets, the cylinder, and then we'll press the valve all the way down until it touches the cylinder wall, zero out this indicator, and then we'll lift the valve until it hits the seat, and that will tell us how much valve lift we can have safely. Over 721 thousandths of valve lift that we can achieve without hitting the cylinder wall. We know the rest are gonna be very similar. That is gonna be plenty for our application. So we'll get the head off, get the gasket off, get the block in the cleaner and get it washed up. Up next, we get our 305 stroker rotating assembly ready to go and installed.

(Pat)>> I am egg-static about this build.

(Frankie)>> I would be if I had some eggs.

(Frankie)>> One of the last machining processes we need to do on our 305 small block Chevy is balance this Callies Comp Star crankshaft. So we're gonna get it loaded up into the stanchions of our CWT Multi-Bal 5,500. We have all the parts from our rotating assembly that we're gonna need laid out on this table. What we're gonna do is weigh each component individually. We'll get those weights entered into the CWT software, and it will automatically build a target bob weight for us. Then we can build each bob weight to that specific. Get them involved, get our first spin going, and see where we are. Okay, that's kinda to be expected because this crank is an off the shelf for a 350. They have a target bob weight that they set it at, and ours is definitely gonna be under that because it's for a 305. Definitely gonna be some material removal, but no big deal. The best way to remove large amounts of material like we need to here is turning down the crankshaft counterweights in our MSC Vectrax lathe. We'll remove 200 thousandths worth of material on the inch and an eighth wide outer counterweights, and this reduces the number of large holes that we have to drill. Once we get the balance closer however, we will use the drill head on our balancing machine to fine tune our imbalance down to our tolerance, maybe even a bit lower. [ Music ] That is spectacular. It's actually way better than what this would need to be, but since we have this machine we usually go a little overkill. We're at .089-ounce inch on the left and .079-ounce inch on the right. They are directly 180 degrees apart from each other. So they're canceling each other out on the center of the crank. That is perfect. We're gonna get this off, get it cleaned, and get ready for final assembly.

(Pat)>> With our crankshaft all tuned up now it is time to get assembling, and we've ran all the parts through the cleaner and they're looking great, but just like in our first iteration we are starting essentially from scratch because we have all new parts. So with that we're gonna have to measure our main bearing clearance and our rod bearing clearance again. So what we're gonna do is get our mains in the block, get the caps on and torqued to spec, and see if the clearance is what we need for our application. We'll set all the main bearing clearances between 27 and 30 ten thousandths. That looks like about two-eight, two-nine!

(Frankie)>> Since we're using all new components we're also going to re-measure our rod bearing oil clearance. With the rod bearings loaded up into the rods we can torque the ARP fasteners to achieve the proper stretch, which is between five and six thousandths of an inch. With a dial bore gauge zeroed to the size of the rod journal we can measure our oil clearance. For this application we're gonna set all of them between two-four and two-seven. To install the crank we'll generously lubricate the main bearings with Hot Shot's Secret's new assembly lube and gently lay our stroker crank into place. The main caps are installed with the reused ARP fasteners and tapped into their registers. The thrust bearing is aligned, pre-loaded in the forward position, and the ARP bolts are torqued to 70-pound feet. Next we'll file fit our DSS piston rings to 23 thousandths on the top ring and 26 thousandths on the second ring. We can assemble these DSS Racing forged 26-18 pistons with our Callies Comp Star rods. These are from their FX-2 line and feature and 4cc effective dome and 1.2mm, 1.2mm, 3mm ring packs. They are built completely in-house and feature a ton of patented technology. With the piston rings installed and everything lubed up we can slip them into the bores one by one. Once all the rod and piston assemblies are in the block we'll flip it over and we can torque each rod bolt individually to 80-pound feet, which is where we verified our stretch specification at. Our new solid roller cam is one that we had sitting on the shelf from a previous project. It has durations at 50 thousandths life of 257 on the intake and 267 on the exhaust. The lobes are set on a 108-degree lobe separation angle, and lobe lift on each of them is four hundred thousandths. We'll reuse our nine keyway adjustable Comp Cams timing set and set our intake centerline at 102.75 degrees.

(Pat)>> Coming up we uncover some more horsepower on our stroker 305.

(Frankie)>> And then we get rocking in the dyno cell.

(Pat)>> We are coming along nicely on our stroker 305 small block Chevy project, which remember is now 339.5 cubic inches. Since you've last seen it we've gone ahead and advanced it a bunch. We've added a cast aluminum timing cover from Summit Racing Equipment. It gets rid of that flexy tin one that we had before. Also we've reinstalled our fluid damper. We've also gone ahead and sealed up the entire oiling system with the pan on it so it's ready to go.

(Frankie)>> For this build we're gonna be stepping up the induction with this set of Trick Flow 195 Fast As Cast Super-23-degree heads from Summit Racing Equipment. They feature a cast 195cc intake port that flows 249 c-f-m at 600 lift, and as far as low and mid lift numbers go they are as much as 10 percent higher than the 175 heads. It all goes through a 2-020 intake valve and it all goes out through a 1-600 exhaust valve. Those are set in a tight chamber, 64cc, but is a very nicely shaped cast chamber. It's gonna keep our compression ratio up. To control our valvetrain we're gonna be using a set of Comp single conical springs. These are a piece of modern technology, and at our installed height they'll have 200 pounds on the seat and 565 pounds open at our lift. These have a smaller retainer than a conventional spring, and the diameter of the spring that oscillates the most is also smaller to reduce the amount of mass that it needs to control. So these are gonna work great for our application and fit our Trick Flow heads perfectly. With our m-l-s gaskets and that tight combustion chamber we have a measured static compression ratio of 11.04 to one. We are reusing the ARP head bolts, and they are torqued in three steps to 70-pound feet. These lifters are making funny noises.

(Pat)>> Yeah I heard that too! The lifters we are using are Comp Cams' Endurex solid roller lifters specifically designed for small base circle camshafts, and they are actuating a set of Trick Flow 8-200 long three-eighths diameter push rods.

(Frankie)>> To go with our new solid roller setup we are using a set of steel Comp Pro Magnum XD 1.6 ratio rocker arms with a set of ARP seven-sixteenths rocker studs. These will hold up to the higher spring pressures and r-p-m we are going to be running and we'll install them in the firing order.

(Pat)>> This cam has a four-seven swap. So the firing order is one-eight-seven-three- six-five-four-two. A set of Trick Flow stud girdles will help provide support for the rocker studs and must be installed and torqued when checking lash for accurate settings. This cam calls for 22 thousandths hot lash, but since lash will grow as the engine heats up we will set it cold to 14 thousandths for now.

(Frankie)>> With some r-t-v and new intake gaskets laid down we can drop on this Edelbrock Victor-E e-f-i intake manifold that has the correct cross-sectional area and plenum volume for this application. We will be running this engine carbureted for now, but this is a great manifold that is similar to the Victor Junior, and allows us to convert to e-f-i later if we choose. It's cinched down with some ARP fasteners, and then this engine can head to the dyno.

(Pat)>> To complete this combo we set it up with the MSD Pro Billet distributor with its wires setup for our firing order, our one and seven-eighths primary dyno headers, and a dyno proven QFT 950 c-f-m Black Diamond carburetor. Up next, it's dyno time, and we're gonna make you think twice about getting rid of that old 305.

(Pat)>> Our stroker 305 is alive. 339.5 cubic inches of pump gas fury. We're gonna be dynoing in the same range basically on the first pull. We have to see if it can keep its guts pulling. We're gonna see what it does in a range of 3,000 to 6,000 to start out with. Then because this engine is set up as more than just a pump gas street engine we are gonna step on this thing a little bit harder. First we've got to see where we are.

(Frankie)>> It's a rowdy 305. This thing's not gonna make peak power below 6,000. We know that, but we're just gonna do a short, low r-p-m pull, see where we are, and then we'll step it up from there.

(Pat)>> We've taken the street manners and say, it'll still run on the street but we want something geared more towards high r-p-m. Without further ado!

(Frankie)>> Here we go!

(Pat)>> Don't blow it up!

(Frankie)>> Why do you always say that! [ engine revving ] [ Music ]

(Frankie)>> That's pretty good. Notice how that 950 didn't really care it was 340 inches!

(Pat)>> Does not care it's on pump gas.

(Frankie)>> 417.8-pound feet and 464 horse. Obviously horsepower is still trending up.

(Pat)>> We have a 257 at 50 cam, solid roller. It's interesting right because the way these heads flow and on this type of cubic inches and bore size this is like an old school five-three if you think about it.

(Frankie)>> Engines are all about math. This, even though it's a 305, and some people think that because it's a 305 it's gonna be limited by all these weird feelings that they have. This is basically the version of a 347 but in a small block Chevy. There's no reason that it shouldn't act pretty similar. We're still low on timing, at 32 right?

(Pat)>> I think we are going to put this in the operating range that we have designed it to do. We're gonna step up, let's say 4,500 and let's go ahead and turn it 7,000.

(Frankie)>> It should make peak power pretty close to that. If we have to go a little higher we can. There's no point in ragging this thing out any longer than we need to. [ engine revving ]

(Pat)>> Sounds like a real engine right there.

(Frankie)>> What a screamer! [ engine revving ]

(Pat)>> Oh my goodness! That makes me very happy right there.

(Frankie)>> Nice curve too! 418.2-pound feet, 486.8 horsepower.

(Pat)>> It's gonna like some timing!

(Frankie)>> Peak horsepower 6,800.

(Pat)>> This is very similar to the old Grenada engine.

(Frankie)>> This is what I love right here, the numbers. Once you get past 4,900 it's just stacking over 100 percent. Over 100 all the way to 7,000.

(Pat)>> Put some timing in it!

(Frankie)>> Go stick a few degrees in this thing. Our carburetor tune-up looks great for the pump gas that we're using. So we will incrementally increase timing over a few runs, landing on 36 degrees for maximum power.

(Pat)>> Let's see a printed number. I know a number that I'd like to see. We're damn close right now.

(Frankie)>> I know a number that will probably make a lot of people upset.

(Pat)>> Is this engine a waste of money? I don't think so because when you're doing it you build what you want. I don't care if it's Ford, Chevy, Mitsubishi, Dodge. If people want to build something that's the same great. If not, you can put all the same parts on a bigger engine. Will it make more power, of course it will. If you look at that block and it says 305 and it cranks out a big number, that to me is a lot of fun. Let's see what she'll do. [ engine revving ]

(Pat)>> Definitely did it! Are we ready! Woo! 511!

(Frankie)>> 511.4 horsepower out of a 305.

(Pat)>> Well 339.5.

(Frankie)>> 432-pound feet!

(Pat)>> So we are 1.51 per cube at 6,900.

(Frankie)>> 1.27-pound feet per cubic inch.

(Pat)>> So we've got peak torque and peak power nicely separated. We have a 511-horse small block Chevy. People would say yeah, that's pretty cool. By the way it's a 305. We just proved that a 305 is a viable hot rod engine.

(Frankie)>> Great success! To see more sweet builds like this one you can check out Engine Power on Powernation TV, and for more behind the scenes content check out Engine Power on social media.
Show Full Transcript