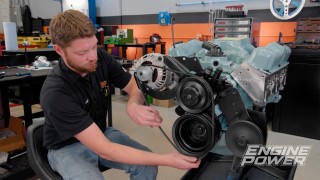
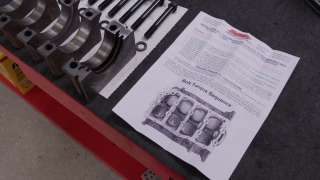
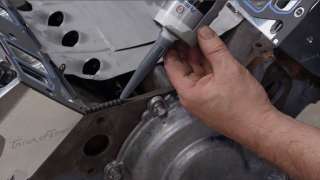
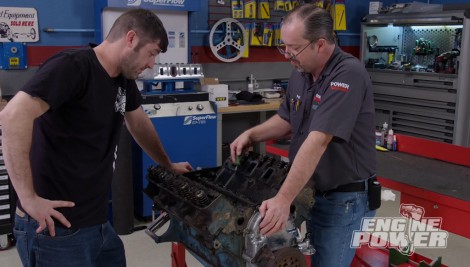
Engine Power Featured Projects

Engine Power Builds

Parts Used In This Episode

Summit Racing
Ford Performance Flywheel - FMS-M-6375-N427
Summit Racing
Meziere 100 Series Electric Water Pumps
Summit Racing
Scott Drake 390 FE components
Eagle Specialty Products
Eagle Forged Crank and Rods for Ford 390 FE
Matco Tools
MATCO Tools are the Official Tool Supplier to PowerNation
Sunnen Products Company
Sunnen Maching Equipment
The Industrial Depot
Tools, Hardware, Shop Supplies

Episode Transcript

(Pat)>> Our stroker FE is gonna make big power on the dyno, but first we've got to take care of a serious problem. [ Music ]

(Mike)>> Welcome to Engine Power. Today we're back on our 390 cubic inch Ford FE. It's an engine we're gonna stroke to 445 cubic inches and add an awesome induction package. Our goal is to have a great street engine with awesome drivability.

(Pat)>> When we picked the engine up a little while ago we thought it would be fun to see if we could get it running in its current condition because it had been setting for 20 years. Well we actually succeeded but it didn't run well enough to make a dyno pull. Here's what that looked like. [ Music ] [ engine starting ]

(Pat)>> Yeah! [ Music ] [ engine revving ]

(Mike)>> Now the reason we couldn't dyno it wasn't just because of all the smoke in the dyno room. It was actually spitting oil out of the headers and only running on five cylinders. So now it's time to tear this apart for its true purpose. All the parts we used to get it running on the dyno are being repurposed for the big inch build. [ drill buzzing ]

(Mike)>> The rocker assemblies are going away for good. With the push rods removed we can manhandle the cast iron manifold. Break that dude loose.

(Pat)>> Not much cork holding on there. Alright! Alright, here we go.

(Mike)>> Remember, lift with your legs not your back. Does it weigh more than 50, less than 50, or close to 100?

(Pat)>> That intake is 75, 76 pounds.

(Mike)>> Wow, when you lift that off I'm coming in with this one. This is Trick Flow's manifold that will take its place. So much prettier. [ Music ] 25 pounds. The deeper we get the nastiness is not getting any better.

(Pat)>> Quite the aroma coming off of this. [ Music ] It looks like a bunch of burnt caramelized onions. If there's such a thing as smell-o-vision you could smell that burnt oil.

(Mike)>> It's got it for sure.

(Pat)>> Well let's see if we can pull these lifters out. Yeah!

(Mike)>> There it is.

(Pat)>> Not wiped out. There's one, 15 to go. Holy smokes! Oh yeah, yeah, that has a little bit of cupping in it. You can tell if something's working because the lifter has to spin for that to do that. When it digs a big hole that means the lifter is not rotating. [ Music ] Woo, that's nice!

(Pat)>> Actually not bad. With the heads off we can see that the bore's and the pistons look pretty decent.

(Mike)>> This is the moment all of us have been waiting for. Just how bad is it inside the pan? [ Music ]

(Pat)>> I think she's just gonna jump off here.

(Mike)>> Lack of oil changes, years behind the old barn, or just an engine that did a lot of work. We'll never know. This is what variable timing looked like back in the '70's, just kidding. This is the loosest timing chain we have seen in a long, long time.

(Pat)>> You're almost there.

(Mike)>> The cam spun but would not move forward. The cam bearings were so wore out they had a slight ridge that the cam's journals caught on. Eventually we got it out.

(Pat)>> What I expected to see was severely wore or a flat lobe. None on this.

(Mike)>> Here's a little tip. We tried getting this lifter out from the top, and obviously it wouldn't come. Now you never want to try to force a lifter out of its bore cause you can actually hurt the finish of the actual bore. Now this lifter may be mushroomed at the bottom, and we're gonna go ahead and tap it through to get it out. [ tapping metal ] [ drill buzzing ]

(Mike)>> At some point the rod bearings were replaced, and they need to be again. [ tapping metal ]

(Pat)>> The main bearings are being replaced as well, but they are decent shape for being the originals from the late '70's. That's pretty bad when the crank is lighter than the manifold. Look at that. That's the original bearing from Ford. So when someone rebuilt this they didn't take the crank out of it.

(Mike)>> More proof of the crank not being out of this engine is the original rope seal still under the rear main cap. This block was full of surprises.

(Pat)>> Now why in the hell would that be in the water jacket? That is a bumper bolt. Up next the FE gets built up from the ground up, and then. [ engine revving ]

(Mike)>> Let's turn our attention to piston installation. Here's this week's tech tip.

(Tim)>> Piston rings need to be handled with care. If they're a file fit design this starts with a careful process of setting your ring gap. If they are a direct fit design it's a good idea to deburr the ring ends and check their ring gaps to ensure there is a enough clearance. Larger rings are more difficult to get into the ring lands due to their stiffness. This type of ring is installed using a ring expander. They all work the same way but be very careful not to over expand the ring. You want just enough to get it over the top of the piston. Too much expansion will break the ring or deform it, and it will not seal. A thin set of rings is a little more forgiving but still needs care when installing. We put the expander tool to the side and use a roll on method. This requires one end of the ring to be placed in the ring land and gently rotated around the crown of the piston. When in place rotate the ring to make sure it spins freely and does not bind. [ Music ]

(Pat)>> When we got it the 390 FE was filthy. We're using our JRI jet washer to remove grease, dirt, and decades of neglect from the engine block. [ Music ] The next thing we're gonna do is get the main caps bolted up to the block because we need to recreate the lower cylinder distortion with the mains torqued up, and we're gonna be using a main bolt kit from ARP. Now no matter what kit you get from them it comes with a set of detailed instructions, and you need to follow them to the "T" because they are not stock fasteners. They are made out of a different material and we're using different lube. So we've got to do it like they said. They're the engineers. ARP Ultra Torque Assembly Lube is applied to the bolts. It's what ARP uses to establish their torque values. So we'll use it too. [ drill humming ]

(Pat)>> The bolts are made from high grade 87-40 alloy will rolled threads and they are rated to 180,000 p-s-i tensile strength. They are torqued in three equal steps to 100 pound feet. [ torque wrench clicking ] [ Music ]

(Pat)>> The Sunnen SV-15 is used to hone the cylinders to finished size. In this case we are removing almost 30 thousandths of material, which is easily accomplished with the DH honing head and diamond abrasives. The first step is to hone the block within five thousandths of finished bore size with 220 grit diamond stones. For this process we do not need a torque plaque installed. To remove such a relatively large amount of material it takes about 24 minutes per cylinder. The diamond abrasives are much harder than the cylinder, and can easily remove plenty of material while keeping bore geometry round and straight. Because the machine will auto dwell when it senses taper I don't have to be as vigilant as I would be if I was running a manual machine. It does it automatically for me. So it makes it really super simple to use. Now we are ready for finish honing. With a head gasket in place we can bolt on an ICT aluminum torque plate that we got from Summit Racing Equipment. It simulates distortion in the engine block caused by torqueing the cylinder head to the block. When we actually torque down the cylinder head for good the cylinder will have the correct size and geometry, leading to better ring seal, horsepower, and engine performance. We'll hone the cylinder within 5 ten-thousandths of final size with our 220 grit diamond stone. The final half thousandths will be taken out with a 600 grit diamond stone.

(Mike)>> We put the block back in the jet washer to remove the honing oil and any remaining material. We discovered something suspicious while cleaning the block with a wire wheel and knew we had to check the engine's integrity with the magnaflux system. It uses iron particles, which are magnetized and attracted to any brakes in the magnetic field, indicating cracks in the block. [ Music ]

(Pat)>> Ohh!

(Mike)>> Look at that. How far does it go? Check over here.

(Pat)>> This is great.

(Mike)>> That's like way more than one.

(Pat)>> Wow!

(Mike)>> Does it go all the way to the back of the block?

(Pat)>> Guess what? There's another one right there.

(Mike)>> Yep, all along the water jacket.

(Pat)>> Water is right there. Ah dang it!

(Mike)>> That's no bueno.

(Pat)>> No that sucks. And the thing is though there's no water in the pan on this thing. So that means when it was taken out it sat with water, and that's why the plugs were popped out. This thing is cracked enormously.

(Mike)>> Man such a bad spot too. There's no repairing it.

(Pat)>> No there's no repairing that. Guess what? We need another block. Because we did this ourselves we can chalk this up to learning because when you take this to a machine shop it's imperative that they thermally clean it and mag it before any machine work gets worked on.

(Mike)>> This is one of those things too. They clean the block and they get to this point and they check it, and it doesn't matter if it's bad you're still out the money for it.

(Pat)>> You are out the money for it. We paid a whole $200 dollars for this thing, and I guarantee you we had $200 dollars of fun on it on the dyno. Well you could put it in your yard and tie a goat to it. Until we get a replacement block we might as well stay busy with other work. We'll use our Goodson balancing equipment to weigh the rotating assembly components and fill out a bob weight sheet. This lets us compute a bob weight total allowing the machine shop to balance the crankshaft. Up next everything, and we mean everything, gets refreshed on the FE.

(Pat)>> We're back on Engine Power with a new and more importantly damaged free block for the 390 FE build. Unfortunately we had to redo hours' worth of work that you've already seen. So let's just skip past that. Before we got started we examined this block inside and out, and it looks good. Now we can make forward progress on the build, starting with new cam bearings. Next are a set of Speed Pro main bearings with the clearance set up between .0030 and .0033. With a fresh rear main seal in place the bearings are lubed with Permatex Ultra Slick. Then the crankshaft is carefully placed into the block. This is a cast steel piece from Eagle Specialty Products, and has a 4.250 stroke. The ARP fasteners are torqued to 100 pound feet. The camshaft is a custom ground billet hydraulic roller from Comp Cams. The lobes are from their extreme marine high lift series, which increases durability with extended run times. They work great in big blocks and engines with heavier valvetrain components. Comp also provided the billet double row timing set. The pistons are Mahle's Power Pack series with a 16cc dish. They are mated to a set of Eagle 43-40 forged I-beam connecting rods that are 6.700 in length. The included ring package is a modern 1 millimeter, 1 millimeter, 2 millimeter thick set. The rod journal is the same size as a big block Chevy, and the rod bearing clearance is between .0023 and .0027. The rod bolts are torqued to 90 pound feet to achieve the correct bolt stretch of .0059 to .0063. We confirm this with our ARP digital rod bolt stretch gauge. A Melling high volume oil pump will keep the engine well lubricated. We chose Milodon for the windage tray, oil pickup, and eight quart oil pan. [ Music ] With the ATI balancer in place true t-d-c is set, and the timing pointer is modified to indicate zero.

(Mike)>> It's time for this old iron to meet modern air flow and performance thanks to the guys at Trick Flow for designing and bringing to market these FE cylinder heads. They're designed for 390 through 428 engines and are dubbed the Power Port 175's. Now that's because of the 175cc intake runner. The combustion chamber is heart shaped and measures in at 70cc. The intake valve is 2.190 and the exhaust valve is a 1.625 diameter. Flow at 600 inch lift is 332 c-f-m, and these heads are a direct bolt on for all '61 through '76 FE engines.

(Pat)>> We're restricting the oil to the top end of the engine using a three-eighths set screw with a .0075 hole drilled into it. This ensures more oil goes to the main and rod bearings instead of flooding the valvetrain. .003 thick Cometic MLS gaskets drop into place followed by the cylinder heads, which are torqued to 100 pound feet. Comp Retro Fit hydraulic roller lifters will move the valvetrain. Our freshly sand blasted intake splash guard goes in, followed by some beads of Permatex Right Stuff 90 Minute gasket maker. The Trick Flow Track Heat intake manifold is a single plane design that has a basic operating range from 4,000 to 7,000 r-p-m. Perfect for our application. Our engine combination requires custom length push rods, and Trent Performance made it happen with a set of 8.900 long, .0080 walled, 3/8th diameter pieces. No matter what you need they can handle it. The heavy duty shaft rocker assembly is from Harlan Sharp. It has a 1.76 ratio with a 7/8th inch shaft and full needle bearing construction for high horsepower and endurance builds. Valve lash is set and this engine is heading to the dyno. [ engine revving ]

(Mike)>> We all know when you add performance parts to your vehicle to go faster you need more power in the braking department as well. EBC Brakes is the go-to for upgraded brakes that take the place of your stock setup. They'll decrease your stopping distance drastically and do so with less brake dust to protect those nice wheels. These are Stage 10 Super Sport dimpled and slotted rotors. The angled slots allow superior expulsion of heat, brake dust, water, and friction gases. The little small indents allow the rotor to increase cooling without the risk of cracking that drill through holes are common for. The rotors are also anodized to resist corrosion. The pads are perfectly matched to the style of kits you order. Now from daily driver to race pads EBC has you covered. You can purchase pads and rotors separately but buying them in a front or rear kit will improve the braking capabilities of your vehicle. Log onto EBC Brakes dot com to find out what brake kit best suits your ride.

(Pat)>> Up next, it all comes down to this.

(Mike)>> Wow!

(Pat)>> I got all tingly on that one.

(Mike)>> Okay we've got the 445 cubic inch on the dyno. It's running and we're ready to make some pulls. This thing is gonna be a beast. How are you doing the pulls?

(Pat)>> We're gonna go 3,500 to 6,500 to start out, 30 degrees of timing. You like that?

(Mike)>> Love it! [ engine revving ]

(Mike)>> Hello sir!

(Pat)>> Look at that! How you feeling now? Woo, 550 pound feet of torque and 562 the first pull. I got all tingly on that one. Now we've got to step on some timing. We started with 30 degrees of ignition timing, and we'll add two more for a total of 32 degrees.

(Mike)>> And the only reason we're doing timing increases right now is the carburetor's so good, the engine has a hydraulic roller valvetrain, and there's really nothing to do. Pat you ready?

(Pat)>> Yep I think we've got her. [ engine revving ]

(Pat)>> That was nice and clean.

(Mike)>> 573 on power, 555 on torque.

(Pat)>> Very nice, and keep in mind I'm loading the engine at 600 r-p-m per second. So when you knock that down to 300 torque will go up a little bit. We've got to keep going on timing cause you time for torque and jet for horsepower. We really don't need to jet for horsepower because this thing's in a nice range. So I'm gonna stab two more degrees in it.

(Mike)>> Actually why don't you make another pull at 300 and let's show the difference of the torque?

(Pat)>> Yeah okay, we can do that as well, and this is more indicative of like a top gear pull on a drag strip. [ engine revving ]

(Pat)>> That looked straight up pretty well right there. 558, 575. See a little more torque loads the engine. At this point we'll just make all of our pulls at 300 per second but first, two more degrees of timing. [ engine revving ]

(Pat)>> 583 for power, 564. Notice how the graph keeps looking better and better. We're getting it closer and closer to its sweet spot. We're not exactly straight street engine, we're not exactly straight race engine. It's a hot rod.

(Mike)>> Where you dialed the cam in too. Brought it back in r-p-m range.

(Pat)>> I've got the cam advanced. If we back the cam up to like straight this would carry that power on the top side, but I don't want to turn something with a 4.250 stroke a bunch of r-p-m because you get excessive piston speed. We'll add two more degrees of ignition timing for a total of 36 degrees. Give her the gusto.

(Mike)>> Pretty healthy FE.

(Pat)>> Absolutely! [ engine revving ]

(Pat)>> Nice super clean pull.

(Mike)>> 583, 562.

(Pat)>> Alright we're gonna start to get in a threshold here. Yep 560. Now notice what it did for torque from there to there. Not gonna do much for it at this point.

(Mike)>> Our percentage increase has dwindled.

(Pat)>> I'm completely fine with stopping here.

(Mike)>> This is a stump pulling, heavy car, heavy truck, anything. I would like to see this go in a truck.

(Pat)>> Me too, I really like it.

(Mike)>> Test Sled?

(Pat)>> Test Sled, wouldn't that be cool to put in the Test Sled?

(Mike)>> That'd be a good n/a engine for the Test Sled.

(Pat)>> That'd be super fun. Nice hustle! For more information on anything that you've seen today visit Powernation TV dot com.
Show Full Transcript