
In This Episode
- 0:01 Welcome and Introduction to Jeep Kaiser Build
- 0:48 Inspection of Drivetrain Parts
- 1:47 Fabrication and Repair of Frame
- 2:40 Cleaning and Preparation of Frame
- 4:00 Installation of Roll Cage and Light Bar
- 6:00 Welding and Fitting Tubing
- 9:51 Removal and Inspection of Transmission
- 14:09 Removal and Inspection of Engine Components
- 18:06 Installation of New Ignition Coil and Spark Plug Wires
- 20:06 Installation of Fuel Pump Block Off Plate and Alternator
- 20:51 Final Preparations and Fresh Oil Installation
Video Transcript
[Chris] You're watching Powernation.
[Chris] Hey everybody. Welcome back to Dirt and Trials. Today we are busy working on our Jeep Kaiser build we have dubbed The Spartan. I have been busy pouring coal getting the bed ready for its bed case while Eric has been busy stripping the frame, getting the motor out, all that good stuff so we can inspect it for cracks, rust, and all that other good stuff. How's it looking? [Eric] Like you said, today's the day we're gonna go through and inspect all of our drivetrain parts, engine, trans, transfer case and both of these axles. Once these come off of here we've got a little bit more stripping to do and we can get this frame sent out for sand blasting. All that and then some today on Dirt and Trails. [ Music ]
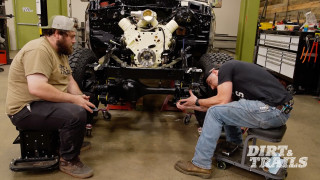
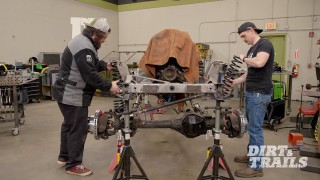
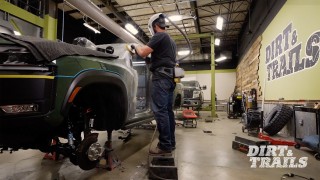
So what we've got to do now that we've got the engine, transmission, and transfer case out of this thing is check a few more things out before we remove these axles just to make sure we've got a complete list of parts for what's gonna need to be replaced on here. Our steering linkage, for something this old you're always gonna be looking for every kind of issue in the book. You can hear that tie rod just flopping around in there. [Chris] This hole right here and same over. [ Music ] [Eric] You mean like that? [Chris] Yep, just like that. [Eric] Chiefest issue number one right there. We're gonna have to fix this frame. [Chris] The bottom of this crossmember is rotted out completely. I have a ton of fabrication I'm gonna have to do to get this back up and running. [Eric] We know the engine runs. We're off to a pretty good start mechanically. [Chris] Springs, I think we can reuse the same spring pack as long as when you take them apart there's no broken leaves. [Eric] As long as it all stays together I think we'll be alright. I guess all that's left now is to get to work. You want to start cutting that up while I get these axles pulled? [Chris] Might as well. This is gonna get hot. Make sure you watch out. [ impact driver humming ]
[Chris] Do we need this crossmember or can I just get rid of that completely? [Eric] That's for the transfer case. That's up to you. Do you want to have to build a new one? [Chris] I'll build a new one. This is like the never-ending story of vehicles. You think you've solved the riddle and then all of a sudden surprise! The reason that I'm cleaning out the frame before I cut off the bottom section and get this whole plate right out is because it was so full of rust and debris that if I was to cut with the torch all that slag would blow back into the torch and clog up the tip. It would be a pain in the butt. [ torch hissing ] [ Music ]
Can you pass me that knockometer please? [ Music ]
[ saw buzzing ] [ Music ] [Eric] There we go. [ lift – mechanical humming ] [Eric] So the only thing holding that spring pack together right now is what's left of this guy.
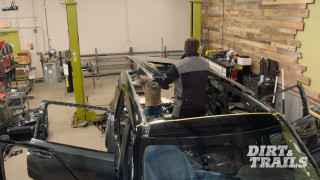
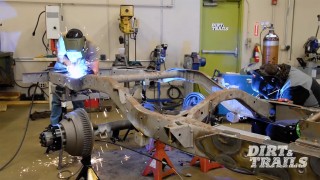
I think we're looking at a similar problem here in the front. Honestly I think new leaf springs all around to be safe. [Chris] I was set on pushing you to be like no. Let's just rebuild these ones. [Eric] I was hoping so. [Chris] You can't reuse that. This is one of the tubes that's gonna go from the back of the truck to the front. Now you can start to see how this is all coming together. What I'm gonna do is put that up there like that. I'm going to grab a level. Now I'm gonna confirm that the tube is level, which it is. So I'm done bending. I want to show you guys how I like tacking this stuff together and laying it out. We are going to have a piece of tube that comes up and then goes into the back of the cab. Then we're gonna do some cross bracing. We're gonna put our light bar in. What this is gonna do is make the frame a lot more rigid. It is also going to act as a second roll cage because you've got to remember. We're gonna be doing a cage in the cab as well, and once those two are tied together it's gonna make everything a lot stronger. Coming up. [ welder crackling ]
There we go! That is now tacked in place.
[Chris] So as we continue on with our roll cage for the bed here there's a few things that you need to stop and keep in mind when you're fabricating stuff like this. Sometimes the big picture that you want to build is not what you need to do right off the hop. I don't want it to be just some plain jane light bar. What I am gonna do is build everything off of this inch and three quarter 120-wall DOM. Then I'm gonna bend up this inch and a half 120-wall DOM and it is gonna form a hoop that comes down like this. We're using two LP-9s and two LP-6s that we got from Baja Design. If you want to light up a grid square you go with these guys here. So let's go and put this in the bender. Let's bend it up. Now this is a tool that allows you to measure your CLR or center line reference, and it gives you degrees on one side and how many inches it is consuming in quarter inch increments before the bend itself. So this is telling me that if I want to get right up to the edge of this tube I need to go with 67, 68 degrees. I'm gonna go with 68 and then call her a day there and it'll wrap around nicely to there. [ tubing bender humming ] Now that we have our tube bent it is on the money and exactly what I'm looking for. My next step is start cutting the tubes off. Then once that's done I'm gonna take everything in place and keep rocking from there. [ Music ] [ grinder humming ] [ Music ]
[ welder crackling ]
[Chris] That is now tacked in place. Now that we have all of our tubing and plate prepped ready to go in we've got Gabby in from Forney Industries. Thank you for coming in Gabby. I was told you're gonna give us a hand doing some work today? [Gabby] Definitely, we'll get working on this and see what kind of help I can give you. [Chris] Awesome. What have you been doing at Forney? [Gabby] I am the supervisor of the engineering service department. So we do a lot of work on our welders, troubleshooting, and different things like that. [Chris] And you're also a teacher? [Gabby] Yes, I also teach at our community college in Fort Collins as a welding instructor. Let's take a look. The 250-MP is a great mig welder. It is also an m-p machine. So you do have the benefits of stick and tig as well. Of course we're just gonna be mig welding this today but for the thicker materials this machine is awesome for that. It's a half inch rated machine. It can do anything you want it to for the most part and it can do thicker if you were to bevel and prep your plates first. This is our new shop size machine with the cart that's involved underneath it. That makes it easy to move around the shop and get where you need it to be. There's also a lot of good settings on that machine. A little bit more advanced settings on the mig side so you can control your crater fills. So that way at the end of your weld you don't just get a big hole and then it's weakened there. It can actually sit there and fill that hole for you. [Chris] Can you also run flux core, multi-shield, and all that on here as well? [Gabby] Yeah you can run gas, gas-less, whatever you need to, dual shield. [Chris] Groovy. Let's rock 'n roll. When I'm doing stuff like this what I like to do is do everything coming down to the bottom and then do the bottom weld so it just ties everything in nice and tight. [Gabby] I agree with that. Then you hide all of your craters and everything else. It pulls it all together and makes it just one piece. [ welder crackling ]
[Chris] That is laying down a seriously nice bead now that we have that dialed in. Now that we have everything cut, welded, and ready to go into the box we are gonna start doing just that. You ready? [Gabby] I'm ready. So the true set here is gonna be the plate with the two arrows going into it. Then we have a plus two trim. You can adjust that if you like. [ welder crackling ] [Chris] Now that we have our plates tacked in we are one step closer to actually getting some tubing in. Now what we need to do is measure where this is gonna go because these notches here have to line up with this. [ Music ]
[ welder crackling ] [ Music ]
So that's up, that's up. Thank you for coming out today Gabby. I really appreciate your help. Where can people get support if they need it? [Gabby] If you visit Fornyind.com you can find the phone number for our customer service team as well as our expert tech team who can help with any troubleshooting or anything that you may need for support on your welders. [Chris] Awesome, you want to tack it out and get going? [Gabby] Let's go ahead. [ welder crackling ] [Chris] I want to give a big thank you to Gabby from Forney Industries for coming out and helping us get this all tacked and fitted in place. Now that everything is in its forever home I'm gonna start burning everything in. [ welder crackling ] [ Music ]
After the break. [Eric] We actually have to remove the transmission assembly from the bell housing before we can remove the bell housing from the engine. Put some Deep Creep on the wheels of this cherry picker, good lord! Right out the bottom. I've seen worse. Oh, never mind. [ metal clanging ]
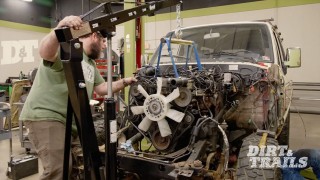
[Eric] Now that we've got everything removed from the truck it's time to do a little bit more teardown before we actually start fixing and replacing stuff. First thing I'm gonna do here is get this transmission removed from this engine so the engine can go on a stand. [ Music ]
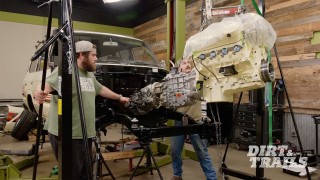
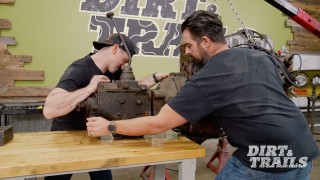
As I take this apart I'm gonna try and reassemble as much as I can to make sure everything gets back in the right place and get all the right spacers in the right places. This last bolt in our linkage assembly isn't actually a bolt. It's just a really big screw. If you know anything about dealing with screws in stuff like you know that over time they actually have a tendency to be even more of a pain to take out than most bolts. So what you're gonna want to do for stuff like this is get an impact driver tool. Basically just an impact actuated screwdriver. What you're gonna do is get it in there, put some tension on it, and then give it a couple of taps. Come out nice and easy. Now I'm gonna go set this aside because after a little bit of rebuilding and cleanup we will be using this again. You can see we've got two bolts here on top of the bell housing that go straight into the engine block. You don't see any other bolts around the outside of this bell housing because they are actually inside right about here and straight in. How are you supposed to get those out? Well that's where the really interesting part comes in. We actually have to remove the transmission assembly from the bell housing before we can remove the bell housing from the engine. What I'm gonna do is get this engine off the side of the table so we can just slide this transmission straight out. I'm not trying to actually pick this engine up. I just need it off the table enough so that I can swing it out. Need to put some Deep Creep on the wheels of this cherry picker. Good lord! Now I'm breaking these by hand instead of with power tools just to make sure that we're eliminating most of the risk of breaking or stripping anything. Just pull this straight on back. There you have it. One Borg-Warner T-98-A four speed. Now that we have the transmission out we've got the engine down off the table. We're gonna go ahead and pull our cross shaft and our throw out bearing first so that we can get our pressure plate and clutch disc removed. Before we can remove the throw out bearing from the cross shaft we've got a little set screw in here that needs to get loosened up. That'll allow it to come off of the shaft. Grab the bearing. Give it a little twist so it starts getting some moving in there. Then start working it out like that. Turning the engine over to remove a clutch, or flywheel, or a flex plate is necessary to try to get to all the bolts. If you want to do this and turn your engine over by hand you can make it a little bit easier by pulling your spark plugs. Then you won't have to fight the compression stroke. Thankfully this one turns over pretty easy. So I don't have to worry about it. Now that we're onto our last bolt I'm gonna make sure I've got my hand under here to support our pressure plate. [ Music ] I've definitely seen worse. Never mind. [ Music ] I'm only loosening this. Not taking them all the way off. That way our flywheel doesn't have a chance to come falling down. Out the bottom. That actually does not look too bad. Got a lot of grime build up around the edge but the actual friction surface here doesn't look bad. On our ring gear here you can see we've got a few dead spots where the teeth have started to wear off. Nine times out of ten it's gonna be easier to replace the whole thing. For this one it's really gonna depend on parts availability. We'll figure that out later. For right now let's get the bell housing out of the way. [ impact driver humming ] We want to be mindful pulling this off because I did leave the starter connected. So when it comes loose it's gonna be a little bit front heavy. [ electric ratchet humming ] [ Music ] Just like that there's a mess all over my floor. [ Music ] [Chris] Coming up. [Eric] I'm going to take a full sheet of gasket material and press it up against all these studs and imprint every single one of them into it. From there I'll punch the holes out and set it straight up against the engine block.
[Eric] Now that we got the engine up on a stand I'm gonna go ahead and keep tearing it apart because there's some stuff that we've gotta check and measure to make sure we get replacement parts that are actually gonna work. That might need the impact. [ impact driver humming ] [ Music ]
Now I'm gonna go ahead and remove our thermostat housing. It's kind of an interesting setup because you can see it sits on top of the intake here. I'm a little curious how it looks inside cause I have never seen a setup like that. [ Music ]
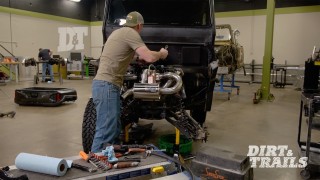
There we go. Now I'm gonna use a pair of these hose grip pliers to help pull these wires off. Gentle grab and twist, they come right off. I'm not really seeing anything that is making me super concerned. So we're not gonna have to go a whole lot further with this teardown. Just taking off the rest of the stuff that we're gonna be replacing. After that start putting it back together. As it sits right now I've got our gasket surfaces for the water pump cleaned up, ready to do, and have stuff put back in. So we're gonna be getting into that here in just a little bit, making our own gaskets. Our first step here is to cut a new gasket for our water pump. That might sound slightly complicated to do but it's actually pretty straightforward. The way I'm gonna do this is take a full sheet of gasket material and press it up against all of these studs and I'm gonna imprint every single one of them into it. After that I'll cut out a rough section that is about the size of our water pump, and from there I'll go ahead and punch the holes out and set it straight up against the engine block. From there I'll go ahead and cut the outside using the edge of our timing cover as a guide and then I'll take a hammer, tap around the inside edge to make sure we've got a nice, sharp line there, and I'll do the same thing. Take a razor blade, trim it out, and we'll have a new gasket. If you look and see in here we really didn't have a whole lot of corrosion to worry about. Even up inside that hole there is really not a whole lot to worry about in this cooling system. I'm actually pretty impressed. A water pump, just like anything else that has any sort of a radial bolt pattern where all the bolts are around a center like this. Basically enclosing something like a valve cover, a water pump, timing cover, etcetera. You always want to make sure that you're tightening in alternating positions. What we're about to do next involves getting this bracket installed right here. Now it's time to install a brand new ignition coil that we got from Duralast. I hopped on the Autozone Pro website, got this ordered up, and because it's Duralast we know that it's gonna meet or exceed o-e specifications and get this engine running nice and reliably. Get nice, solid, consistent spark all the way across the board, and make sure that we're not gonna have any issues to worry about from this portion of our ignition system. Now that that's done it's time to get some brand new Duralast spark plug wires installed. I'm gonna take this guy, head to the bench, get these put together. This is what's known as a set of universal spark plug wires, which translates to build your own. Now that I've got the wire cut to length I'm gonna get our boot installed so I can get our terminal crimped on here. Slide this boot right onto the end here. Let's go test fit this. That popped in there nice and good. I'll just route it up to make sure it reaches where we need it to. Nice click on the spark plug. Of course if we need to route this a little differently we've got a little bit of room to work with but that is sitting pretty good right there. Moving forward we'll get our fuel pump block off plate installed. I tracked down some new bolts and washers for this. Got the block off plate but we also have one more thing we're gonna be installing in this spot and that is our fuel pressure regulator like I mentioned earlier. I've already widened out these holes on the bracket to fit this size of bolt. We're gonna need some kind of a spacer just a little bit in there to separate that bracket from this block off plate, which is why I've got some extra washers here. What I'm gonna do here is get these bolts snugged up one to make sure they fit and two to be 100 percent certain that our spacers are gonna work the way we want them to. We've got clearance from our block off plate. Gasket is in place. We're good to go here. We've got our new Duralast alternator installed and to get that installed I actually had to make this bracket custom because we couldn't find an original fit alternator to this engine. The spacing is about seven and three quarter, which is quite a bit when you think of that compared to regular alternators. So what I have here is a big block Chevy alternator with a six and five-eighth inch bolt spacing. So all we had to do was extend this lower bracket up some. Now we're good to go. I'm gonna go ahead while I'm thinking about it and get this engine filled back up with fresh oil and a new filter. For that we're gonna be using Schaeffer's racing oil. Now this stuff is great. It's got extra zinc. So if you're running yourself a flat tappet engine you know you've got that extra protection. It's also been race proven and is engine builder approved. In addition to the added zinc in this oil it also has better film strength. So it's gonna cling better and better resistance to thermal breakdown. So if you're working your engine hard you've got that added peace of mind knowing that your oil is gonna be able to keep up. We got a good bit of freshening up work done on this engine today but still a little bit more work to do. I've got to clearance that bracket, put some more stuff back on, but it is getting dangerously close to being ready to go back in its home. [Chris] And I got all the basic tube work done on this. All the patch work done. Now when we get the frame back from sand blasting everything's ready to start getting put back together. [Eric] Buddy there is nothing basic about that. This is awesome. [Chris] Thank you, I appreciate that. [Eric] You want to go grab something to eat? [Chris] Absolutely.
Show Full Transcript
[Chris] Hey everybody. Welcome back to Dirt and Trials. Today we are busy working on our Jeep Kaiser build we have dubbed The Spartan. I have been busy pouring coal getting the bed ready for its bed case while Eric has been busy stripping the frame, getting the motor out, all that good stuff so we can inspect it for cracks, rust, and all that other good stuff. How's it looking? [Eric] Like you said, today's the day we're gonna go through and inspect all of our drivetrain parts, engine, trans, transfer case and both of these axles. Once these come off of here we've got a little bit more stripping to do and we can get this frame sent out for sand blasting. All that and then some today on Dirt and Trails. [ Music ]
So what we've got to do now that we've got the engine, transmission, and transfer case out of this thing is check a few more things out before we remove these axles just to make sure we've got a complete list of parts for what's gonna need to be replaced on here. Our steering linkage, for something this old you're always gonna be looking for every kind of issue in the book. You can hear that tie rod just flopping around in there. [Chris] This hole right here and same over. [ Music ] [Eric] You mean like that? [Chris] Yep, just like that. [Eric] Chiefest issue number one right there. We're gonna have to fix this frame. [Chris] The bottom of this crossmember is rotted out completely. I have a ton of fabrication I'm gonna have to do to get this back up and running. [Eric] We know the engine runs. We're off to a pretty good start mechanically. [Chris] Springs, I think we can reuse the same spring pack as long as when you take them apart there's no broken leaves. [Eric] As long as it all stays together I think we'll be alright. I guess all that's left now is to get to work. You want to start cutting that up while I get these axles pulled? [Chris] Might as well. This is gonna get hot. Make sure you watch out. [ impact driver humming ]
[Chris] Do we need this crossmember or can I just get rid of that completely? [Eric] That's for the transfer case. That's up to you. Do you want to have to build a new one? [Chris] I'll build a new one. This is like the never-ending story of vehicles. You think you've solved the riddle and then all of a sudden surprise! The reason that I'm cleaning out the frame before I cut off the bottom section and get this whole plate right out is because it was so full of rust and debris that if I was to cut with the torch all that slag would blow back into the torch and clog up the tip. It would be a pain in the butt. [ torch hissing ] [ Music ]
Can you pass me that knockometer please? [ Music ]
[ saw buzzing ] [ Music ] [Eric] There we go. [ lift – mechanical humming ] [Eric] So the only thing holding that spring pack together right now is what's left of this guy.
I think we're looking at a similar problem here in the front. Honestly I think new leaf springs all around to be safe. [Chris] I was set on pushing you to be like no. Let's just rebuild these ones. [Eric] I was hoping so. [Chris] You can't reuse that. This is one of the tubes that's gonna go from the back of the truck to the front. Now you can start to see how this is all coming together. What I'm gonna do is put that up there like that. I'm going to grab a level. Now I'm gonna confirm that the tube is level, which it is. So I'm done bending. I want to show you guys how I like tacking this stuff together and laying it out. We are going to have a piece of tube that comes up and then goes into the back of the cab. Then we're gonna do some cross bracing. We're gonna put our light bar in. What this is gonna do is make the frame a lot more rigid. It is also going to act as a second roll cage because you've got to remember. We're gonna be doing a cage in the cab as well, and once those two are tied together it's gonna make everything a lot stronger. Coming up. [ welder crackling ]
There we go! That is now tacked in place.
[Chris] So as we continue on with our roll cage for the bed here there's a few things that you need to stop and keep in mind when you're fabricating stuff like this. Sometimes the big picture that you want to build is not what you need to do right off the hop. I don't want it to be just some plain jane light bar. What I am gonna do is build everything off of this inch and three quarter 120-wall DOM. Then I'm gonna bend up this inch and a half 120-wall DOM and it is gonna form a hoop that comes down like this. We're using two LP-9s and two LP-6s that we got from Baja Design. If you want to light up a grid square you go with these guys here. So let's go and put this in the bender. Let's bend it up. Now this is a tool that allows you to measure your CLR or center line reference, and it gives you degrees on one side and how many inches it is consuming in quarter inch increments before the bend itself. So this is telling me that if I want to get right up to the edge of this tube I need to go with 67, 68 degrees. I'm gonna go with 68 and then call her a day there and it'll wrap around nicely to there. [ tubing bender humming ] Now that we have our tube bent it is on the money and exactly what I'm looking for. My next step is start cutting the tubes off. Then once that's done I'm gonna take everything in place and keep rocking from there. [ Music ] [ grinder humming ] [ Music ]
[ welder crackling ]
[Chris] That is now tacked in place. Now that we have all of our tubing and plate prepped ready to go in we've got Gabby in from Forney Industries. Thank you for coming in Gabby. I was told you're gonna give us a hand doing some work today? [Gabby] Definitely, we'll get working on this and see what kind of help I can give you. [Chris] Awesome. What have you been doing at Forney? [Gabby] I am the supervisor of the engineering service department. So we do a lot of work on our welders, troubleshooting, and different things like that. [Chris] And you're also a teacher? [Gabby] Yes, I also teach at our community college in Fort Collins as a welding instructor. Let's take a look. The 250-MP is a great mig welder. It is also an m-p machine. So you do have the benefits of stick and tig as well. Of course we're just gonna be mig welding this today but for the thicker materials this machine is awesome for that. It's a half inch rated machine. It can do anything you want it to for the most part and it can do thicker if you were to bevel and prep your plates first. This is our new shop size machine with the cart that's involved underneath it. That makes it easy to move around the shop and get where you need it to be. There's also a lot of good settings on that machine. A little bit more advanced settings on the mig side so you can control your crater fills. So that way at the end of your weld you don't just get a big hole and then it's weakened there. It can actually sit there and fill that hole for you. [Chris] Can you also run flux core, multi-shield, and all that on here as well? [Gabby] Yeah you can run gas, gas-less, whatever you need to, dual shield. [Chris] Groovy. Let's rock 'n roll. When I'm doing stuff like this what I like to do is do everything coming down to the bottom and then do the bottom weld so it just ties everything in nice and tight. [Gabby] I agree with that. Then you hide all of your craters and everything else. It pulls it all together and makes it just one piece. [ welder crackling ]
[Chris] That is laying down a seriously nice bead now that we have that dialed in. Now that we have everything cut, welded, and ready to go into the box we are gonna start doing just that. You ready? [Gabby] I'm ready. So the true set here is gonna be the plate with the two arrows going into it. Then we have a plus two trim. You can adjust that if you like. [ welder crackling ] [Chris] Now that we have our plates tacked in we are one step closer to actually getting some tubing in. Now what we need to do is measure where this is gonna go because these notches here have to line up with this. [ Music ]
[ welder crackling ] [ Music ]
So that's up, that's up. Thank you for coming out today Gabby. I really appreciate your help. Where can people get support if they need it? [Gabby] If you visit Fornyind.com you can find the phone number for our customer service team as well as our expert tech team who can help with any troubleshooting or anything that you may need for support on your welders. [Chris] Awesome, you want to tack it out and get going? [Gabby] Let's go ahead. [ welder crackling ] [Chris] I want to give a big thank you to Gabby from Forney Industries for coming out and helping us get this all tacked and fitted in place. Now that everything is in its forever home I'm gonna start burning everything in. [ welder crackling ] [ Music ]
After the break. [Eric] We actually have to remove the transmission assembly from the bell housing before we can remove the bell housing from the engine. Put some Deep Creep on the wheels of this cherry picker, good lord! Right out the bottom. I've seen worse. Oh, never mind. [ metal clanging ]
[Eric] Now that we've got everything removed from the truck it's time to do a little bit more teardown before we actually start fixing and replacing stuff. First thing I'm gonna do here is get this transmission removed from this engine so the engine can go on a stand. [ Music ]
As I take this apart I'm gonna try and reassemble as much as I can to make sure everything gets back in the right place and get all the right spacers in the right places. This last bolt in our linkage assembly isn't actually a bolt. It's just a really big screw. If you know anything about dealing with screws in stuff like you know that over time they actually have a tendency to be even more of a pain to take out than most bolts. So what you're gonna want to do for stuff like this is get an impact driver tool. Basically just an impact actuated screwdriver. What you're gonna do is get it in there, put some tension on it, and then give it a couple of taps. Come out nice and easy. Now I'm gonna go set this aside because after a little bit of rebuilding and cleanup we will be using this again. You can see we've got two bolts here on top of the bell housing that go straight into the engine block. You don't see any other bolts around the outside of this bell housing because they are actually inside right about here and straight in. How are you supposed to get those out? Well that's where the really interesting part comes in. We actually have to remove the transmission assembly from the bell housing before we can remove the bell housing from the engine. What I'm gonna do is get this engine off the side of the table so we can just slide this transmission straight out. I'm not trying to actually pick this engine up. I just need it off the table enough so that I can swing it out. Need to put some Deep Creep on the wheels of this cherry picker. Good lord! Now I'm breaking these by hand instead of with power tools just to make sure that we're eliminating most of the risk of breaking or stripping anything. Just pull this straight on back. There you have it. One Borg-Warner T-98-A four speed. Now that we have the transmission out we've got the engine down off the table. We're gonna go ahead and pull our cross shaft and our throw out bearing first so that we can get our pressure plate and clutch disc removed. Before we can remove the throw out bearing from the cross shaft we've got a little set screw in here that needs to get loosened up. That'll allow it to come off of the shaft. Grab the bearing. Give it a little twist so it starts getting some moving in there. Then start working it out like that. Turning the engine over to remove a clutch, or flywheel, or a flex plate is necessary to try to get to all the bolts. If you want to do this and turn your engine over by hand you can make it a little bit easier by pulling your spark plugs. Then you won't have to fight the compression stroke. Thankfully this one turns over pretty easy. So I don't have to worry about it. Now that we're onto our last bolt I'm gonna make sure I've got my hand under here to support our pressure plate. [ Music ] I've definitely seen worse. Never mind. [ Music ] I'm only loosening this. Not taking them all the way off. That way our flywheel doesn't have a chance to come falling down. Out the bottom. That actually does not look too bad. Got a lot of grime build up around the edge but the actual friction surface here doesn't look bad. On our ring gear here you can see we've got a few dead spots where the teeth have started to wear off. Nine times out of ten it's gonna be easier to replace the whole thing. For this one it's really gonna depend on parts availability. We'll figure that out later. For right now let's get the bell housing out of the way. [ impact driver humming ] We want to be mindful pulling this off because I did leave the starter connected. So when it comes loose it's gonna be a little bit front heavy. [ electric ratchet humming ] [ Music ] Just like that there's a mess all over my floor. [ Music ] [Chris] Coming up. [Eric] I'm going to take a full sheet of gasket material and press it up against all these studs and imprint every single one of them into it. From there I'll punch the holes out and set it straight up against the engine block.
[Eric] Now that we got the engine up on a stand I'm gonna go ahead and keep tearing it apart because there's some stuff that we've gotta check and measure to make sure we get replacement parts that are actually gonna work. That might need the impact. [ impact driver humming ] [ Music ]
Now I'm gonna go ahead and remove our thermostat housing. It's kind of an interesting setup because you can see it sits on top of the intake here. I'm a little curious how it looks inside cause I have never seen a setup like that. [ Music ]
There we go. Now I'm gonna use a pair of these hose grip pliers to help pull these wires off. Gentle grab and twist, they come right off. I'm not really seeing anything that is making me super concerned. So we're not gonna have to go a whole lot further with this teardown. Just taking off the rest of the stuff that we're gonna be replacing. After that start putting it back together. As it sits right now I've got our gasket surfaces for the water pump cleaned up, ready to do, and have stuff put back in. So we're gonna be getting into that here in just a little bit, making our own gaskets. Our first step here is to cut a new gasket for our water pump. That might sound slightly complicated to do but it's actually pretty straightforward. The way I'm gonna do this is take a full sheet of gasket material and press it up against all of these studs and I'm gonna imprint every single one of them into it. After that I'll cut out a rough section that is about the size of our water pump, and from there I'll go ahead and punch the holes out and set it straight up against the engine block. From there I'll go ahead and cut the outside using the edge of our timing cover as a guide and then I'll take a hammer, tap around the inside edge to make sure we've got a nice, sharp line there, and I'll do the same thing. Take a razor blade, trim it out, and we'll have a new gasket. If you look and see in here we really didn't have a whole lot of corrosion to worry about. Even up inside that hole there is really not a whole lot to worry about in this cooling system. I'm actually pretty impressed. A water pump, just like anything else that has any sort of a radial bolt pattern where all the bolts are around a center like this. Basically enclosing something like a valve cover, a water pump, timing cover, etcetera. You always want to make sure that you're tightening in alternating positions. What we're about to do next involves getting this bracket installed right here. Now it's time to install a brand new ignition coil that we got from Duralast. I hopped on the Autozone Pro website, got this ordered up, and because it's Duralast we know that it's gonna meet or exceed o-e specifications and get this engine running nice and reliably. Get nice, solid, consistent spark all the way across the board, and make sure that we're not gonna have any issues to worry about from this portion of our ignition system. Now that that's done it's time to get some brand new Duralast spark plug wires installed. I'm gonna take this guy, head to the bench, get these put together. This is what's known as a set of universal spark plug wires, which translates to build your own. Now that I've got the wire cut to length I'm gonna get our boot installed so I can get our terminal crimped on here. Slide this boot right onto the end here. Let's go test fit this. That popped in there nice and good. I'll just route it up to make sure it reaches where we need it to. Nice click on the spark plug. Of course if we need to route this a little differently we've got a little bit of room to work with but that is sitting pretty good right there. Moving forward we'll get our fuel pump block off plate installed. I tracked down some new bolts and washers for this. Got the block off plate but we also have one more thing we're gonna be installing in this spot and that is our fuel pressure regulator like I mentioned earlier. I've already widened out these holes on the bracket to fit this size of bolt. We're gonna need some kind of a spacer just a little bit in there to separate that bracket from this block off plate, which is why I've got some extra washers here. What I'm gonna do here is get these bolts snugged up one to make sure they fit and two to be 100 percent certain that our spacers are gonna work the way we want them to. We've got clearance from our block off plate. Gasket is in place. We're good to go here. We've got our new Duralast alternator installed and to get that installed I actually had to make this bracket custom because we couldn't find an original fit alternator to this engine. The spacing is about seven and three quarter, which is quite a bit when you think of that compared to regular alternators. So what I have here is a big block Chevy alternator with a six and five-eighth inch bolt spacing. So all we had to do was extend this lower bracket up some. Now we're good to go. I'm gonna go ahead while I'm thinking about it and get this engine filled back up with fresh oil and a new filter. For that we're gonna be using Schaeffer's racing oil. Now this stuff is great. It's got extra zinc. So if you're running yourself a flat tappet engine you know you've got that extra protection. It's also been race proven and is engine builder approved. In addition to the added zinc in this oil it also has better film strength. So it's gonna cling better and better resistance to thermal breakdown. So if you're working your engine hard you've got that added peace of mind knowing that your oil is gonna be able to keep up. We got a good bit of freshening up work done on this engine today but still a little bit more work to do. I've got to clearance that bracket, put some more stuff back on, but it is getting dangerously close to being ready to go back in its home. [Chris] And I got all the basic tube work done on this. All the patch work done. Now when we get the frame back from sand blasting everything's ready to start getting put back together. [Eric] Buddy there is nothing basic about that. This is awesome. [Chris] Thank you, I appreciate that. [Eric] You want to go grab something to eat? [Chris] Absolutely.
Dirt & Trails Featured Projects
Dirt & Trails Builds

Want more content like this?
Join the PowerNation Email NewsletterParts Used In This Episode


Schaeffer Specialized Lubricants
Schaeffer's Supreme 7000 Synthetic Plus Racing Oil
Baja Designs
LP6 Pro LED Auxiliary Light Pod
Baja Designs
LP9 Pro LED Auxiliary Light Pod



