Video Transcript
[Eric] You're watching Powernation.
[Chris] This was our 1969 Jeep Kaiser and we were gonna turn this into a recovery beast until this happened. [Eric] Come on baby! Come on! [ engine starts ] [ engine idling ] [Chris] Dude! [ Music ]
Are you kidding me? [Eric] That's right. This all original M-715 Kaiser still runs but the question is can we get it back on the road? That's what we're here to find out today on Dirt and Trails. [ Music ]
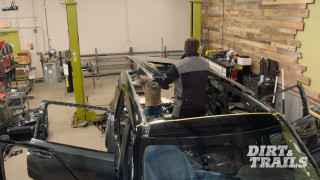
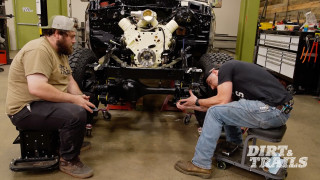
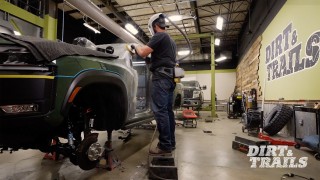
First we've got to tear this '69 Jeep Kaiser apart so we can see exactly what it is that we're working with. [Chris] Lets get the body off complete. [Eric] The M-715 Kaiser is a five quarter ton military truck based on Jeep's old Gladiator platform. [Chris] One, two, three. Just lay her flat. [ Music ] Already it looks a billion times different. [Eric] Yeah. I feel bad pulling everything out now that we know it runs. [Chris] I don't. [Eric] I guess let's get this hood off. [ Music ]
You want to grab me a hammer? Don't even need it. [ ratchet clicking ] [Eric] That has seen better days. You should not be able to see the threads from the outside of the nut. [ Music ]
[Chris] Ha, ha, ha. [ Music ] [ metal clanging ] [Eric] Beautiful. Alright, what's next? Core support? [Chris] What's next is you're gonna go get a tetanus shot. [Eric] It should be up to date. I have a feeling this core support is gonna be a ton of fun. [Chris] Now what is a recovery vehicle? Tow trucks, those are recovery vehicles. You see them every single day. What is an off road tow truck or an off road recovery vehicle look like? Just take said tow truck and jack it up, and that is why we want one. Because we're gonna go out, get stuck. We're gonna need some sort of way to recover ourselves and that is the need that we need to fill with this Kaiser. [ Music ]
[Eric] I just said put the fire out. [ Music ] Unless you drop a big ole chunk of slag on one of those bushings it shouldn't catch anything on fire. Knowing you there's gonna be fire. [ torch hissing ] [ Music ]
[Chris] So you said we're leaving the ones in the front, right? [Eric] I think those ones should be fine, yeah. Were's big Pete? Put you right there. Still ain't budging. [Chris] Hold on, hold on! Don't blow an O-ring. [Eric] I think it's just lifting up on the suspension. [Chris] Yeah but there's nothing holding it. I'll undo the other side and we'll go from there but it could be the two front and rear, in which case those bushings gotta go. While I'm doing the front if you want to start hacking these apart with, I don't know. Get creative. [Eric] I'm just gonna beat on them with whatever I can find until I find something that takes them out. Probably split'em with a chisel and peel them off. It'll probably be fine. [ hammer banging ] [ Music ]
[Chris] I'm deforming the metal. [Eric] Still got nothing. I'm not sure if I should be intrigued or turn and walk away. [Chris] Get me a blade! [ Sawzall humming ] [ Music ]
I have no idea what's going on. [ Sawzall humming ] Yes! [Eric] There it goes finally! [Chris] Coming up. [Eric] You got any Deep Creep? [Chris] I'll go get you some.
[Eric] Get this interior out of here. [ Music ]
[ fabric ripping ] [ Music ] [Eric] There we go. [ Music ] [Chris] Tally-hoo! [Eric] We've still got to get under here and unbolt everything. I've got to undo the steering column. [Chris] I thought we were pushing this. [Eric] I want to get everything disconnected and then we'll push in the lift so we're not having to crawl around the lift arms and the posts and everything. [Chris] Ymm, common sense. [Eric] Get this steering shaft disconnected. That way we leave that steering wheel in there. Probably pull the cab. [Chris] So I am just loosening up the motor mounts here. So when we go to take the motor out it'll be a little easier not having anything holding it in place. So while Eric is chewing away with the mechanical bit over there I'm gonna start on the inside. [Eric] My bad! [Chris] Some of this whatever it is. Supposed to be carpeting. Tear all that out. Get all this cleaned up. Get the battery box out and get the cab. [Eric] Oh jeez, sorry. [Chris] And get the cab out ready to go so we can start doing other cool fabrication stuff. I am going to throw something. You couldn't give me five minutes! [Eric] Some of us are trying to work instead of just stand there and talk. [ drill humming ] [Eric] While Chris is working on that interior. [ drill humming ] [Eric] I see what you're doing. [Chris] I'm so sorry! [Eric] While Chris is working on that interior I'm gonna get our stuff taken care of out here. Get our steering column disconnected, shift linkage off, and all that fun stuff so this cab and everything else can come off, get out of the way, and we can take a look at this frame. When you're dealing with nuts and bolts that are on opposite sides of something like the firewall like what I'm dealing with with this brake booster and you don't have an extra set of hands cause your buddy's too busy breaking stuff I'm gonna show you a little trick to get them undone by yourself. [Chris] All you had to do is ask. [Eric] What I'm gonna do here is get a box end wrench and get it on the back side of the bolt. Then I'm just gonna turn it in the direction that it's gonna need to move to loosen this thing up and get it right to where it's about to press up on something. You just let it sit right there and come back around to the other side. If you're using something like an electric ratchet you don't want to just go for it. Give it a little bit of tension first and make sure it's actually grabbing and then you can go for it. [ saw buzzing ]
[Eric] Is that our whole rocker panel? [Chris] That's our whole rocker panel coming off. So right now we're looking at a whole lot of rot. Is this bad, yes. What I'm gonna do is try and keep this transmission tunnel as much as possible. I'm just gonna worry about the floor here. What' I'm gonna do is put in thicker material. Probably around the 16 to 10 gauge-ish material. I know that's overkill but what that'll allow me to do is then weld straight to it. It just gives me more options right now to make it stronger. [Eric] While Chris is working on that I'm working on getting all this wiring disconnected from our firewall. I haven't quite decided yet exactly how I want to do the wiring in this thing but odds are I'm gonna rebuild the harness just out of some new wire because this stuff, it's old you know. There's no telling where it's been and what it's been through. I'm just trying to keep it intact so that I have a template to work off of to build out a new harness. [ Music ]
[ impact driver humming ] [Eric] Now when you're dealing with stuff this old this is another thing you want to look out for. This looks like it's just a bundle of wires but if you dig and feel around a little bit you'll notice there's actually a hard line in here. This is your oil pressure sender line. With a mechanical oil pressure gauge you're not getting any kind of a sending unit. The oil pressure is coming directly from the engine through a line that has oil in it straight to the gauge. Now if you're doing something like this, pulling this apart, you want to make sure that you don't end up breaking that just in case you end up making a mess with all that old oil in there. [ Music ]
[Chris] Eric I'm gonna have to start moving these pedals around. Is that gonna throw off anything you're doing on your side? [Eric] It should be good. Plug wires can stay with the engine. [ Music ] [Chris] What are you caught on? Nothing, that's what you're caught on. [Eric] Is it better or worse? [Chris] So much worse! So this is a classic example of hope for the best, prepare for the worst. This whole floor on this side is just pop riveted in with this galvanized sheet you get from the hardware store. I think the only thing we're gonna be able to salvage from this is the transmission tunnel, which is great because that's where a majority of the shaping and forming comes into play. It's gonna be fun. [ Music ] [Eric] Up next, trying to decide if I should leave it with the chassis or with the cab. [Chris] That rat's next? [Eric] All of it cause they've got it going through the firewall in four different places here. [Chris] I would just start cutting. [Eric] I know you would and that's why I'm doing the wiring.
[Chris] Just to get you guys up to speed what I'm doing. All I'm doing is drilling off the heads of the rivets. If you wanted to remove a panel and then put a new panel in you would use the drill size of the rivet you'd be putting in. So if you were putting in one-eighths rivets you'd just use a one-eighth drill, drill it out, and then you're not having to use bigger rivets or whatever. Just a word to the wise. [ drill humming ] You interested in learning how to do metal work? [Eric] How bad is it? [Chris] It's bad enough you're gonna learn how. [ Music ] I hadn't even touched the rocker yet. [Eric] We don't need that right? [Chris] What I'm doing right now is looking at where I can surgically start cutting to put in the new floor. Everything is gonna have to get cut out. All of the structure. I'm gonna have to do new cab mounts. This looks pretty solid up into here where the light switch is and your foot pedals are. I'm honestly gonna take a break. Let Eric get in here, do his jam, and then we'll keep moving from there. [Eric] Now that Chris is out of the way I'm gonna get in the cab and start disconnecting some wiring from in here so I can get this harness out of the way. Trying to decide if I should leave it with the chassis or with the cab. [Chris] That rat's next? [Eric] All of it cause they've got it going through the firewall in four different places here. At the very least I'd like to keep it intact enough to use it as a template to redo the wiring. I know there's gonna be a lot we can cut out cause we're gonna simplify it. I'm sure it had a bunch of stuff that didn't come with it. [Chris] Personally I would just start cutting. [Eric] I know you would and that's why I'm doing the wiring. I'd like a chance to at least go over the whole harness before it gets pieced out. [Chris] I'm gonna give Eric a hand taking the wiring out from underneath the dash. Getting it disconnected from the motor so I can then come in and finish removing all the panels that are on the floor. I need to do that so I can see what we have underneath this paneling that I have to work with. Boy was I in for surprise. This whole back wall. This is just more galvanized sheet metal in here. Spray foam, all that good stuff. If I just start cutting I'm gonna lose all shape. I have these three-eighths bars holding what was the rocker panel to the frame. If I start cutting off the back wall here I'm not gonna have anything to weld to. I was taught when I first started metal working if you're gonna do something do it right the first time. So we are gonna build this to our needs. You're gonna see me put in some bracing in here. I'm gonna do some bracing going across, essentially making as many Xs as I can holding the body in place so I can come in and start cutting stuff out. Good? [Eric] Yep! [ Music ] [ welder crackling ] [ Music ]
[Chris] Right there. [ welder crackling ] [ Music ] [Chris] Now that we have our cross bracing in. The doors are closed, locked. Nothing is gonna be moving. I'm going to take our master key and I'm going to cut out this rear support, and that's gonna be the first bit that we start rebuilding in putting in the new floor. [ Sawzall buzzing ] [ Music ] [ grinder buzzing ] [ Music ]
[Chris] Now that I have this removed this is gonna allow us to start making forward momentum, and that's gonna get us one step closer to getting this cab off of the chassis. [Eric] I think it' probably be easier if we roll that chassis back and then I'll have a little more room to get this forklift out of here. Drop the cab on a pallet.
[Chris] Now that we have the rear cab support from our 1969 Jeep Kaiser, which is our recovery rig, here on the table we are ready to start laying out where we're gonna be cutting out all of this rust. We're gonna start on the bottom. As you can see we've got spray foam. We've got old sheet metal in there. So what I'm gonna do is mark everything out where I can weld to and start getting ready to graft in the new supports that I made and get one step closer to having a floor in this Jeep. [ saw buzzing ] [ Music ]
Last time you saw this it was all painted, rusty, and all that. I sand blasted it. Made it look good and clean. Grafted in our two new side pockets here. Because I cut this all apart I need to make sure that the left, center, and right are all straight. Taking a piece of straight bar that we have here in the shop, laying it across the front tube planes, and we are good to go. Everything is square, everything's good. Now I can sit here, burn this, and get it ready to go back into our '69 Kaiser. [ Music ]
Now that everything is tacked together and I know it's not gonna go anywhere now I'm gonna start welding it out. I'm not gonna just sit there and do one big weld all the way around and then one big weld all the way around. I'm actually gonna do one weld in the front, next weld in the front. One weld in the back, next weld in the back. Then left and right. Reason for that. Bouncing around is a good habit to get into so when you are working on projects where distortion is something you need and want to control it's already a habit that you have formed. The other thing you want to get into is tacks. The more tacks that you can put in place before you actually weld things out the better. If you notice I got a couple assortment of different clamps holding everything in. That's another way for me to sit there and control the material while it's welding. Now what is distortion? In this case it's the heating and contracting of the material itself. You want to control that. If not parts that you want to be straight will end up being bowed, which is gonna be ten times harder to bring that back to plum. Control the material while it's welding cause you've gotta remember. You've gotta deal with distortion. You've got to deal with heat. All that fun stuff, and the more of it you can keep in check the better the end result will be. [ Music ]
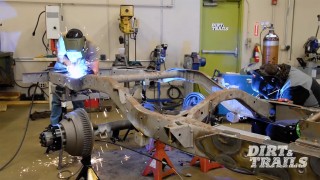
Everything on the flats is done. Now I'm gonna let it cool in position so that any distortion that the heat would put into this in the cooling process it's going to dissipate in this position here. Then I'm going to turn it 90 degrees, weld the back, and then we're ready to start working on the sides. Now that we have our rear cab support Cleco'ed in place we are gonna get ready to start getting this up and off of the chassis so we can inspect all of that. Before we do that we are gonna weld in just a few more support beams that are going to finalize the lateral movement of this cab. So when we go to take it and put it on our fab table it stays as square as possible. Sending. [ welder crackling ] [ Music ]
I want to explain to you guys real quick what a Cleco is. They are probably your best friend when doing sheet metal work like this. Quite often you're gonna have to hold things in place. Invest in some Clecos. What they are is a reusable rivet. You need a special set of pliers. What you do is you sit there, put it in like that. Then on this side here when you squeeze it it gets smaller. Put it through a one-eighths hole, let go, and it squeezes the metal together thereby holding it in place. That like I said is what's holding in this rear cab support. [Eric] Oh yeah, that will not work. [Chris] I think the forklift's gonna be the only way. [ Music ]
And hold. [Eric] Going up! I think it'd probably be easier to roll that chassis back. [ Music ]
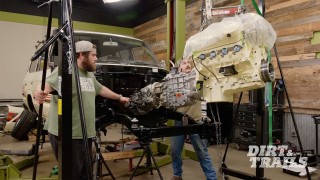
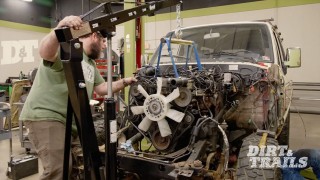
Let me set the parking brake. [Chris] Safety first. [Eric] Now that we've got our body off you guys can get a real good look at everything else we still have to pull off of here. Thankfully the guys over at Seafoam kept us nice and stocked up on Deep Creep, which is gonna be a huge help for this one for pretty obvious reasons. Deep Creep is more than just penetrating oil. You can also use it as a lubricant. If you've got a squeaky hinge or something like that throw some Deep Creep on it. You've got a bolt that's been stuck since 1969 throw some Deep Creep on it. Of course this is not the first time we've used this on this truck. We've actually been spraying it on pretty much everything as we go along trying to avoid stripping and breaking bolts as much as possible. It's 2025. That is 56 years of mother nature just coming at this thing and trying to keep all this stuff stuck together. So you're not just fighting the truck. You're fighting mother nature too. This stuff helps. [Chris] This is gonna get interesting. [Eric] Looks like we're replacing a section of frame huh? [Chris] I already have to replace this crossmember. We have to redo the brackets going from the frame to the bed. I'm gonna have to do some cutting and trimming up front once we start looking at upgrading the axle down the road, but that is a future Chris problem. Keep that. That's a classic body mount. [Eric] What about this one? [Chris] Same thing. [ metal clanging on the floor ] If it's just this here then that's not the end of the world. I can fix that and I already have a thunk in mind. [Eric] Right at the bottom of that kick-up there. [Chris] I have a clear picture of all the work that needs to be done on this. I'm gonna get started drawing everything up that needs to be rebuilt. I'll hand it off to you because this is your neck of the woods now and I'm gonna be in no man's land if I try to help you. [Eric] We got everything sprayed down with Deep Creep. So at this point I'm gonna get this drivetrain pulled off of here and get everything else stripped off. We'll get this chassis sent out for sand blasting and go from there. See you next week.
Show Full Transcript
[Chris] This was our 1969 Jeep Kaiser and we were gonna turn this into a recovery beast until this happened. [Eric] Come on baby! Come on! [ engine starts ] [ engine idling ] [Chris] Dude! [ Music ]
Are you kidding me? [Eric] That's right. This all original M-715 Kaiser still runs but the question is can we get it back on the road? That's what we're here to find out today on Dirt and Trails. [ Music ]
First we've got to tear this '69 Jeep Kaiser apart so we can see exactly what it is that we're working with. [Chris] Lets get the body off complete. [Eric] The M-715 Kaiser is a five quarter ton military truck based on Jeep's old Gladiator platform. [Chris] One, two, three. Just lay her flat. [ Music ] Already it looks a billion times different. [Eric] Yeah. I feel bad pulling everything out now that we know it runs. [Chris] I don't. [Eric] I guess let's get this hood off. [ Music ]
You want to grab me a hammer? Don't even need it. [ ratchet clicking ] [Eric] That has seen better days. You should not be able to see the threads from the outside of the nut. [ Music ]
[Chris] Ha, ha, ha. [ Music ] [ metal clanging ] [Eric] Beautiful. Alright, what's next? Core support? [Chris] What's next is you're gonna go get a tetanus shot. [Eric] It should be up to date. I have a feeling this core support is gonna be a ton of fun. [Chris] Now what is a recovery vehicle? Tow trucks, those are recovery vehicles. You see them every single day. What is an off road tow truck or an off road recovery vehicle look like? Just take said tow truck and jack it up, and that is why we want one. Because we're gonna go out, get stuck. We're gonna need some sort of way to recover ourselves and that is the need that we need to fill with this Kaiser. [ Music ]
[Eric] I just said put the fire out. [ Music ] Unless you drop a big ole chunk of slag on one of those bushings it shouldn't catch anything on fire. Knowing you there's gonna be fire. [ torch hissing ] [ Music ]
[Chris] So you said we're leaving the ones in the front, right? [Eric] I think those ones should be fine, yeah. Were's big Pete? Put you right there. Still ain't budging. [Chris] Hold on, hold on! Don't blow an O-ring. [Eric] I think it's just lifting up on the suspension. [Chris] Yeah but there's nothing holding it. I'll undo the other side and we'll go from there but it could be the two front and rear, in which case those bushings gotta go. While I'm doing the front if you want to start hacking these apart with, I don't know. Get creative. [Eric] I'm just gonna beat on them with whatever I can find until I find something that takes them out. Probably split'em with a chisel and peel them off. It'll probably be fine. [ hammer banging ] [ Music ]
[Chris] I'm deforming the metal. [Eric] Still got nothing. I'm not sure if I should be intrigued or turn and walk away. [Chris] Get me a blade! [ Sawzall humming ] [ Music ]
I have no idea what's going on. [ Sawzall humming ] Yes! [Eric] There it goes finally! [Chris] Coming up. [Eric] You got any Deep Creep? [Chris] I'll go get you some.
[Eric] Get this interior out of here. [ Music ]
[ fabric ripping ] [ Music ] [Eric] There we go. [ Music ] [Chris] Tally-hoo! [Eric] We've still got to get under here and unbolt everything. I've got to undo the steering column. [Chris] I thought we were pushing this. [Eric] I want to get everything disconnected and then we'll push in the lift so we're not having to crawl around the lift arms and the posts and everything. [Chris] Ymm, common sense. [Eric] Get this steering shaft disconnected. That way we leave that steering wheel in there. Probably pull the cab. [Chris] So I am just loosening up the motor mounts here. So when we go to take the motor out it'll be a little easier not having anything holding it in place. So while Eric is chewing away with the mechanical bit over there I'm gonna start on the inside. [Eric] My bad! [Chris] Some of this whatever it is. Supposed to be carpeting. Tear all that out. Get all this cleaned up. Get the battery box out and get the cab. [Eric] Oh jeez, sorry. [Chris] And get the cab out ready to go so we can start doing other cool fabrication stuff. I am going to throw something. You couldn't give me five minutes! [Eric] Some of us are trying to work instead of just stand there and talk. [ drill humming ] [Eric] While Chris is working on that interior. [ drill humming ] [Eric] I see what you're doing. [Chris] I'm so sorry! [Eric] While Chris is working on that interior I'm gonna get our stuff taken care of out here. Get our steering column disconnected, shift linkage off, and all that fun stuff so this cab and everything else can come off, get out of the way, and we can take a look at this frame. When you're dealing with nuts and bolts that are on opposite sides of something like the firewall like what I'm dealing with with this brake booster and you don't have an extra set of hands cause your buddy's too busy breaking stuff I'm gonna show you a little trick to get them undone by yourself. [Chris] All you had to do is ask. [Eric] What I'm gonna do here is get a box end wrench and get it on the back side of the bolt. Then I'm just gonna turn it in the direction that it's gonna need to move to loosen this thing up and get it right to where it's about to press up on something. You just let it sit right there and come back around to the other side. If you're using something like an electric ratchet you don't want to just go for it. Give it a little bit of tension first and make sure it's actually grabbing and then you can go for it. [ saw buzzing ]
[Eric] Is that our whole rocker panel? [Chris] That's our whole rocker panel coming off. So right now we're looking at a whole lot of rot. Is this bad, yes. What I'm gonna do is try and keep this transmission tunnel as much as possible. I'm just gonna worry about the floor here. What' I'm gonna do is put in thicker material. Probably around the 16 to 10 gauge-ish material. I know that's overkill but what that'll allow me to do is then weld straight to it. It just gives me more options right now to make it stronger. [Eric] While Chris is working on that I'm working on getting all this wiring disconnected from our firewall. I haven't quite decided yet exactly how I want to do the wiring in this thing but odds are I'm gonna rebuild the harness just out of some new wire because this stuff, it's old you know. There's no telling where it's been and what it's been through. I'm just trying to keep it intact so that I have a template to work off of to build out a new harness. [ Music ]
[ impact driver humming ] [Eric] Now when you're dealing with stuff this old this is another thing you want to look out for. This looks like it's just a bundle of wires but if you dig and feel around a little bit you'll notice there's actually a hard line in here. This is your oil pressure sender line. With a mechanical oil pressure gauge you're not getting any kind of a sending unit. The oil pressure is coming directly from the engine through a line that has oil in it straight to the gauge. Now if you're doing something like this, pulling this apart, you want to make sure that you don't end up breaking that just in case you end up making a mess with all that old oil in there. [ Music ]
[Chris] Eric I'm gonna have to start moving these pedals around. Is that gonna throw off anything you're doing on your side? [Eric] It should be good. Plug wires can stay with the engine. [ Music ] [Chris] What are you caught on? Nothing, that's what you're caught on. [Eric] Is it better or worse? [Chris] So much worse! So this is a classic example of hope for the best, prepare for the worst. This whole floor on this side is just pop riveted in with this galvanized sheet you get from the hardware store. I think the only thing we're gonna be able to salvage from this is the transmission tunnel, which is great because that's where a majority of the shaping and forming comes into play. It's gonna be fun. [ Music ] [Eric] Up next, trying to decide if I should leave it with the chassis or with the cab. [Chris] That rat's next? [Eric] All of it cause they've got it going through the firewall in four different places here. [Chris] I would just start cutting. [Eric] I know you would and that's why I'm doing the wiring.
[Chris] Just to get you guys up to speed what I'm doing. All I'm doing is drilling off the heads of the rivets. If you wanted to remove a panel and then put a new panel in you would use the drill size of the rivet you'd be putting in. So if you were putting in one-eighths rivets you'd just use a one-eighth drill, drill it out, and then you're not having to use bigger rivets or whatever. Just a word to the wise. [ drill humming ] You interested in learning how to do metal work? [Eric] How bad is it? [Chris] It's bad enough you're gonna learn how. [ Music ] I hadn't even touched the rocker yet. [Eric] We don't need that right? [Chris] What I'm doing right now is looking at where I can surgically start cutting to put in the new floor. Everything is gonna have to get cut out. All of the structure. I'm gonna have to do new cab mounts. This looks pretty solid up into here where the light switch is and your foot pedals are. I'm honestly gonna take a break. Let Eric get in here, do his jam, and then we'll keep moving from there. [Eric] Now that Chris is out of the way I'm gonna get in the cab and start disconnecting some wiring from in here so I can get this harness out of the way. Trying to decide if I should leave it with the chassis or with the cab. [Chris] That rat's next? [Eric] All of it cause they've got it going through the firewall in four different places here. At the very least I'd like to keep it intact enough to use it as a template to redo the wiring. I know there's gonna be a lot we can cut out cause we're gonna simplify it. I'm sure it had a bunch of stuff that didn't come with it. [Chris] Personally I would just start cutting. [Eric] I know you would and that's why I'm doing the wiring. I'd like a chance to at least go over the whole harness before it gets pieced out. [Chris] I'm gonna give Eric a hand taking the wiring out from underneath the dash. Getting it disconnected from the motor so I can then come in and finish removing all the panels that are on the floor. I need to do that so I can see what we have underneath this paneling that I have to work with. Boy was I in for surprise. This whole back wall. This is just more galvanized sheet metal in here. Spray foam, all that good stuff. If I just start cutting I'm gonna lose all shape. I have these three-eighths bars holding what was the rocker panel to the frame. If I start cutting off the back wall here I'm not gonna have anything to weld to. I was taught when I first started metal working if you're gonna do something do it right the first time. So we are gonna build this to our needs. You're gonna see me put in some bracing in here. I'm gonna do some bracing going across, essentially making as many Xs as I can holding the body in place so I can come in and start cutting stuff out. Good? [Eric] Yep! [ Music ] [ welder crackling ] [ Music ]
[Chris] Right there. [ welder crackling ] [ Music ] [Chris] Now that we have our cross bracing in. The doors are closed, locked. Nothing is gonna be moving. I'm going to take our master key and I'm going to cut out this rear support, and that's gonna be the first bit that we start rebuilding in putting in the new floor. [ Sawzall buzzing ] [ Music ] [ grinder buzzing ] [ Music ]
[Chris] Now that I have this removed this is gonna allow us to start making forward momentum, and that's gonna get us one step closer to getting this cab off of the chassis. [Eric] I think it' probably be easier if we roll that chassis back and then I'll have a little more room to get this forklift out of here. Drop the cab on a pallet.
[Chris] Now that we have the rear cab support from our 1969 Jeep Kaiser, which is our recovery rig, here on the table we are ready to start laying out where we're gonna be cutting out all of this rust. We're gonna start on the bottom. As you can see we've got spray foam. We've got old sheet metal in there. So what I'm gonna do is mark everything out where I can weld to and start getting ready to graft in the new supports that I made and get one step closer to having a floor in this Jeep. [ saw buzzing ] [ Music ]
Last time you saw this it was all painted, rusty, and all that. I sand blasted it. Made it look good and clean. Grafted in our two new side pockets here. Because I cut this all apart I need to make sure that the left, center, and right are all straight. Taking a piece of straight bar that we have here in the shop, laying it across the front tube planes, and we are good to go. Everything is square, everything's good. Now I can sit here, burn this, and get it ready to go back into our '69 Kaiser. [ Music ]
Now that everything is tacked together and I know it's not gonna go anywhere now I'm gonna start welding it out. I'm not gonna just sit there and do one big weld all the way around and then one big weld all the way around. I'm actually gonna do one weld in the front, next weld in the front. One weld in the back, next weld in the back. Then left and right. Reason for that. Bouncing around is a good habit to get into so when you are working on projects where distortion is something you need and want to control it's already a habit that you have formed. The other thing you want to get into is tacks. The more tacks that you can put in place before you actually weld things out the better. If you notice I got a couple assortment of different clamps holding everything in. That's another way for me to sit there and control the material while it's welding. Now what is distortion? In this case it's the heating and contracting of the material itself. You want to control that. If not parts that you want to be straight will end up being bowed, which is gonna be ten times harder to bring that back to plum. Control the material while it's welding cause you've gotta remember. You've gotta deal with distortion. You've got to deal with heat. All that fun stuff, and the more of it you can keep in check the better the end result will be. [ Music ]
Everything on the flats is done. Now I'm gonna let it cool in position so that any distortion that the heat would put into this in the cooling process it's going to dissipate in this position here. Then I'm going to turn it 90 degrees, weld the back, and then we're ready to start working on the sides. Now that we have our rear cab support Cleco'ed in place we are gonna get ready to start getting this up and off of the chassis so we can inspect all of that. Before we do that we are gonna weld in just a few more support beams that are going to finalize the lateral movement of this cab. So when we go to take it and put it on our fab table it stays as square as possible. Sending. [ welder crackling ] [ Music ]
I want to explain to you guys real quick what a Cleco is. They are probably your best friend when doing sheet metal work like this. Quite often you're gonna have to hold things in place. Invest in some Clecos. What they are is a reusable rivet. You need a special set of pliers. What you do is you sit there, put it in like that. Then on this side here when you squeeze it it gets smaller. Put it through a one-eighths hole, let go, and it squeezes the metal together thereby holding it in place. That like I said is what's holding in this rear cab support. [Eric] Oh yeah, that will not work. [Chris] I think the forklift's gonna be the only way. [ Music ]
And hold. [Eric] Going up! I think it'd probably be easier to roll that chassis back. [ Music ]
Let me set the parking brake. [Chris] Safety first. [Eric] Now that we've got our body off you guys can get a real good look at everything else we still have to pull off of here. Thankfully the guys over at Seafoam kept us nice and stocked up on Deep Creep, which is gonna be a huge help for this one for pretty obvious reasons. Deep Creep is more than just penetrating oil. You can also use it as a lubricant. If you've got a squeaky hinge or something like that throw some Deep Creep on it. You've got a bolt that's been stuck since 1969 throw some Deep Creep on it. Of course this is not the first time we've used this on this truck. We've actually been spraying it on pretty much everything as we go along trying to avoid stripping and breaking bolts as much as possible. It's 2025. That is 56 years of mother nature just coming at this thing and trying to keep all this stuff stuck together. So you're not just fighting the truck. You're fighting mother nature too. This stuff helps. [Chris] This is gonna get interesting. [Eric] Looks like we're replacing a section of frame huh? [Chris] I already have to replace this crossmember. We have to redo the brackets going from the frame to the bed. I'm gonna have to do some cutting and trimming up front once we start looking at upgrading the axle down the road, but that is a future Chris problem. Keep that. That's a classic body mount. [Eric] What about this one? [Chris] Same thing. [ metal clanging on the floor ] If it's just this here then that's not the end of the world. I can fix that and I already have a thunk in mind. [Eric] Right at the bottom of that kick-up there. [Chris] I have a clear picture of all the work that needs to be done on this. I'm gonna get started drawing everything up that needs to be rebuilt. I'll hand it off to you because this is your neck of the woods now and I'm gonna be in no man's land if I try to help you. [Eric] We got everything sprayed down with Deep Creep. So at this point I'm gonna get this drivetrain pulled off of here and get everything else stripped off. We'll get this chassis sent out for sand blasting and go from there. See you next week.