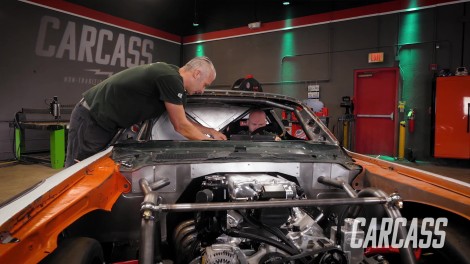
Carcass Featured Projects

Carcass Builds

Parts Used In This Episode

Holley
Holley EFI 12.3" Pro Dash
Speedway Motors
Steering Column
Switch-Pros
Switch Panel Power System

Episode Transcript

(Jeremy)>> You're watching Powernation!

(Jeremy)>> Today on Carcass we'll show you how to fabricate a custom dash on our Road Course Camaro so we can install our new gauge cluster. Plus show you another way to wire up your project that is just plain clean and simple. [ Music ] [ engine revving ] [ Music ]

(Jimmy)>> Hey guys, welcome to Carcass. Jeremy and I have done a lot of work on this car that you guys haven't seen, and some of which we think is really cool. So we want to go over a few details on some things with you guys. One in particular is this steering shaft. It started out as a pretty basic steering shaft but we kinda fancied it up with a few specific parts. So we just want to show you guys how you can also do that at home.

(Jeremy)>> And sticking with everything on the inside we're gonna be going over some wiring, and we're gonna build out a custom dash cause we're gonna wanna mount our massive screen so we can watch all the vital signs of our e-f-i and our engine. Plus we're gonna show you guys about this really cool little thing. It's called a p-d-m, but we're gonna get to all that wiring fun in just a little bit.

(Jimmy)>> Steering is an important part of any build, whether you're doing a full-on race car or a street cruiser, and there are some options out there for you depending on what you're doing. You can get a full blown tilt steering column with turn signal switches. You can get a straight street rod column, or in our case you can go as simple as a steering shaft. Personally I do like the higher end racing columns that have a separate tube on the outside that mounts rigid to the inside of the car. That way when you turn the wheel you don't actually see the steering shaft spin, but those tend to run in the $800 to $1,000 dollar range versus just a simple steering shaft you're probably in it for about $250 bucks. But how can we do something that's a little bit higher end and give the interior a little bit more polished look for less money? I did come up with a solution, and we had this in our car already but I wanted to show you guys how you could do something similar at home. So what we have here is just a basic steering column that we have from Speedway Motors. It comes with the shaft. It is a collapsible steering column, which is a good thing cause in a race car application if you were to ever get into an accident you want to keep the driver safe, and it does come with the quick release for the steering wheel. And to turn this into a nice column we just need a little bit of extra money in terms of tubing, a couple of bearings, and some shaft collars. So the basic process to this with this specific steering shaft the tubing used is one and a half inch o-d by 1.370 i-d, or .065 wall. You can use steel or aluminum tubing just depending on what you're feeling, and for the bearings it's an 18-12 needle roller bearing, and those bearings have an o-d of 1.375. So with this tube unmodified that's a five thousandths press fit, which is way too much. So if you have access to a lathe you'll need to turn this i-d just a little bit, or if you are using an aluminum tube you can use one of those three jaw spring loaded hones to turn it. You want about a thousandth press fit. You definitely don't want these falling out. You do need them to stay put. Also if you do want to prep the tube and give it a nice brushed finished like ours, and ours is a little beat up cause we've had it in and out of the car several times, you can use a red scuffing pad. And with very little work, very little. We probably did ours in less than three minutes. Just take it, work it by hand just a little bit, and even on just this one spot it's already cleaned up quite a bit. You spend a little bit of time on it and it's gonna look really, really nice. So with your tube cleaned up and your bearings pressed in you can start to assemble, starting with a shaft collar at the top of the steering column. I'll just go ahead and get our outside tube slid over. [ Music ] Then we'll put our other shaft collar on. [ Music ] You do want to leave a little bit of a gap here. You don't want it super tight. You want this to have some movement in the axial direction. That way you don't get any bind from the steering shaft rotating inside of the tube. That's pretty much it. You took a pretty basic steering shaft, turned it into something really nice, and with your quick release and wheel of your choice you have something that looks a lot better on the inside of your car. But there's a little bit more involved just to get it mounted it. And in our case because we do have a race car and a roll cage we can use some of these tube mounts. These are made by Sweet Manufacturing. We also got these from Speedway Motors. So this fits a 1.75-inch tube, which is what our roll cage is made of, and then this tube clamp fits around our aluminum tube to hold it rigidly in the car. And it just gives it such a good look, and depending on driver height, maybe how far the seat is from the firewall, you can get these in different sizes. You can get the shaft in a different length to fit any application. Regardless this looks a lot better in our car and it's gonna perform just like the expensive ones.

(Jeremy)>> Coming up, we install the dash panel for our Camaro so we can install our gauges.

(Jeremy)>> Jimmy has the steering installed back into the Camaro. So now I can start working on the dash. The idea behind this is pretty basic. I'm just gonna take a piece of aluminum and bend a 90 on it. We're gonna have that land on top of the roll cage here, and then land in this little recess of the stock dash, or what's left of the stock dash. It's gonna be a little tricky. There's a little bit of contour to the dash up top here, and it kinda arcs in this direction. So we'll have to do some basic trimming, but from here we'll take some measurements and I'll hop out of the Camaro, and we'll transfer that onto a piece of aluminum. [ Music ]

[ Music ] So we have our line laid out. So we're just gonna cut it out with the power shear. Now if you guys don't have one of these you can use a cut off wheel, or if you have a plasma torch you can do it that way as well, but we're just gonna use a shear because it's quick and it's easy. So now that we have our piece cut out we have to add our bend right here in the middle. So we'll head next door and whip this thing into shape. [ Music ] Got her pretty much right on the line. This ain't too critical. And 90! Whoa Betsy, really gonna have to help me pull. Let it relax once. A little more! [ Music ] That's probably close, let's check. [ Music ] So now we can't fit this into the inside of the car just because of all the roll cage tubing that Jimmy has in here. So the easiest solution to get this thing to fit is we're just gonna take out the windshield. [ ratchet clicking ] [ Music ] Do a little test fit here. Slide this in. Looks like we're a little wide. That's not a big deal. Easy solution to that is we'll just come in and nip the corners off. Then we'll just do another test fit quick. Go grab the shears. [ Music ] [ metal clanging ]

(Jeremy)>> So we'll do a little test fit here, see how close we are? That actually fits. It lands on the center of the roll cage here. Now we have the challenge of somehow trying to find a way to get this line of the edge onto our dash. Really can't do it from the bottom by just solely tracing cause it's got too many variations in here where the original dash hooked to. So that's almost impossible, but I did come up with an idea here on how to transfer a line a little bit further out so we can see it. Take a Sharpie and a compass. I've got this set at about two inches. What I can do from here is trace this line with the Sharpie mark right on the dash. When I put the dash in here I'll be able to see that full Sharpie mark, and from there all I've got to do is flip the compass around, eyeball follow the best I can that mark. It'll transfer it back onto the top of our aluminum dash. Then I just have to trim it out and it should fit. Trick here is to keep the compass at a 90 degree cause if we let it go one way or the other the measurement will change or the line will change too. Now that we have our mark on this part of the dash what I'm gonna do is stack up a couple layers of tape right on the edge. That way when we set the compass side, or the pointy side of the compass, down to trace this line the edge has something to follow. So I can stack up two, three, four layers of tape here, and then we'll put the dash in and transfer it over. [ Music ] There's one! Do this you get really good at stacking tape and following a very specific line. [ Music ] So we have our tape down. I did trim the edges here because this line was covering up our new tape line. So we've got Jimmy here to help hold this square in the middle on the roll cage tube that's done here cause that's where we're gonna want it to land anyways. Then we'll take our compass. Again, we're gonna use the pointy edge, run it up against the tape, and we should be good to go.

(Jimmy)>> Harder than it looks. [ Music ] [ metal shear humming ] [ buzzing ]

(Jeremy)>> Let's see how this thing fits. Yeah, it actually fits pretty good. So from here it's pretty simple. All we're gonna do is drill a couple of holes through the aluminum into the dash itself. We'll have to cut out a couple of tabs. We'll weld those onto the roll cage tube. Then we'll just grab some nuts and bolts and bolt it all down.

(Jimmy)>> Now that our dash is complete we need a way to install our new digital gauge cluster.

(Jeremy)>> So we have the dash installed in the Camaro, and the way that we pulled that off is we had Jimmy cut out the same tabs that he used to mount the rear firewall. We took that idea and pretty much copied it. We mounted those tabs to the top of this roll cage tubing, and then I just put a couple of riv nuts in it and we tightened it all down. I did have to do a relief cut here for the steering column. And then on the top since the dash actually curvature this way I did a little relief cut underneath this side and that side of the dash and kinda bent them down so it matched. So we're gonna call that a win just because it looks really good. So from here we're gonna move on and mount the Pro Dash that we got from Holley. Now the screen is pretty big. It comes in at twelve and a half inches, and it's got some pretty good weight to it too. So the solution to mounting this is on the back of this aluminum casing. They actually have a couple of holes that are drilled in here so you guys can build a bracket, or you can use it to build a piece of steel to mount it to. Instead of getting out our ruler or our tape measure they also send you this handy dandy little paper template. So what we're gonna do is cut this out. We're gonna transfer it over to a piece of sheet steel. This is 16-gauge steel, and that should be plenty strong for us to mount it to, but more importantly it's gonna give us something to weld to. Like arts and crafts when you were a little kid, right? Stay on the line. [ Music ]

Now we'll use some painters tape, or Scotch tape here. We're gonna hold this into position. And then we'll go grab a punch and a hammer, and then we'll punch out the center of all these holes I've got to drill. [ hammer tapping ]

(Jeremy)>> Go grab a bunch of drill bits and a couple of hole saws. [ saw buzzing ] [ Music ] [ saw buzzing ]

(Jeremy)>> So we have the holes that we need drilled out. Now we'll just go ahead and cut this out with the cutoff wheel. [ saw buzzing ] [ Music ]

(Jeremy)>> Let's get this thing on here and get it bolted down. [ Music ] So we have our plate made now. We've got Jimmy in the driver's seat. We're gonna try to come up with a good spot to put this. This is kinda where we're thinking is somewhere in here. Can you see up and over the dash? We're not blocking anything?

(Jimmy)>> Yeah it's just a compromised of not having to turn your head so far if we put it over here. Naturally in any car you drive you have the steering wheel that somewhat blocks your view of the dash. So having to move your head around is not that big of a deal.

(Jeremy)>> You don't think that's gonna get in the way like if you've got to bail out of the car real quick?

(Jimmy)>> Nah!

(Jeremy)>> Let's take a couple of measurements and we'll build a bracket that fits in the roll cage tubing here. That's roughly eight. Then we're gonna go 13-ish. I'll grab that and go cut out another bracket. [ Music ]

[ Music ] So we have the basic shape for the bracket laid out. I'm gonna add a couple more marks here. Plan is to add a tab. [ Music ] [ saw buzzing ] [ Music ] [ saw buzzing ]

(Jeremy)>> So now what we're gonna do is bend this tab over. We're gonna bend it up at a 90. This is eighth inch steel. So it's gonna be a little bit of a challenge, but I think what we're gonna do here is score a line on the back with the cut off wheel. That'll let it bend a little bit easier. That way we can just set it in the vice here, give it a little push. Then once we've got it where we want it we'll come back and we can always tack that edge back up to put the strength right back in it. So use the vice to hold it and score a line quick. [ saw buzzing ]

(Jeremy)>> We'll set the vice a little bit deeper so it's close to that line. That should just bend. Heck yeah, just like that. As long as it doesn't break, but we can always weld it if we have to. Nice and slow. Sneak up on the 90. [ Music ] Voila, let's go do a test fit. [ Music ] That should go like that. That looks pretty good but let's go give it some style. [ hydraulic press humming ] [ Music ] [ welder crackling ]

(Jeremy)>> So the dash is installed and it's in a pretty good position. Now one thing to note. The steering wheel does kinda cover up our vision just a little bit, but it's like any daily driving car. This way we don't have to take our eyes off of our line of site or going down the track too far to look at the vital signs of the engine. So we're gonna call that a win for now. We'll check one more thing off the list. Coming up, fuses and relays are a thing of the past. We'll show you a new way to distribute power to your project.

(Jeremy)>> So we have our dash installed in our Camaro, and that got me thinking about wiring. So let's go over the way you might wire a traditional circuit in a car or a truck. You're gonna have three or four major components here. You're gonna have a battery, a fuse box, got a switch. In our case we have a relay because we're gonna have a high load like a headlight. There's nothing wrong with all of this. It's just the fact that it takes three or four different steps to get to the final result, which is turning on your headlight. That's not the way we're gonna be wiring up our Camaro. We're gonna be doing it a little bit differently. We're actually gonna be using something called a PDM. This little black box right here is a PDM, or a power distribution module. It's also known as a solid state relay. We got ours from Switch Pros, and they sent us basically everything we need to get started wiring in our car. Now they've got a bunch of different circuits here. So you have a handful of wires that can run up to a 15-amp circuit, and then they give you a couple of wires here that can also run stuff like 30- and 35-amp circuit. Now this whole system gets away from any types of relays, and it gets you away from fuses, which kinda simplifies everything. Now the way you control all of this is with this little keypad here. This keypad is Bluetooth operated, or you can use it by pushing the buttons, but to set it up you use the Bluetooth. Then we can set up the pad, or the buttons, to do specific things. So I've got a little demonstration here. Let's go over how all this all works. So we're gonna turn on our key. In our case it's just a little toggle switch, and that's gonna power up our PDM. Now over here on the keypad we've got certain buttons to do certain things. So if you wanted to turn something straight on and off, like a fan, you can do that. If you want something to be momentary push and hold the button, like the started, or they also have special functions. So if you guys want to have lights that strobe you can do that, or you can just turn lights on so they blink if you guys want to run blinkers. Now you're thinking to yourself, there's no fuses. So what happens if I have an issue with the circuit? Well we're gonna do that scenario as well. So in the back we have a little light that turns, and let's say this circuit, or the wire, rubs through, touches your frame, and it grounds out your system. The PDM is gonna save itself and it's gonna tell you there's an issue with that circuit. So if we go to push the button again get a little light on top of it that blinks telling you there is an issue with the circuit. You need to repair it. So once we come back, do our repair, we can turn that circuit right back on with no harm done to the PDM. Now this may look very complicated but it's actually quite simple to set up. We're not quite ready to wire up the Camaro quite yet, but when it comes to that point this is the system we're gonna be using. Well Jimmy, what do you think about everything inside so far?

(Jimmy)>> I just love the look of all the fabricated pieces, lot of straight lines. It looks super neat, and also where the dash is it's not too far away. It's just a quick glance and we can see everything we need to know.

(Jeremy)>> We checked a lot of things off the list but we still have a lot to do. Got the oil system to take care of, the cooling, and the fuel system as well, but we're not gonna get to that today. So until next time thanks for tuning in.
Show Full Transcript