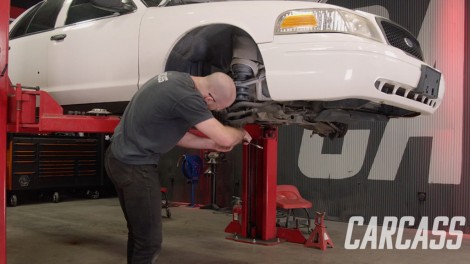
Carcass Featured Projects

Carcass Builds

Parts Used In This Episode

Summit Racing
KYB Shocks & Struts
Summit Racing
Summit Racing Mufflers
The Industrial Depot
Tools, Hardware, Shop Supplies

Episode Transcript

(Jeremy)>> You're watching Powernation!

(Jeremy)>> Today on Carcass we continue to build our Spec Panther race car. We head out to a nearby salvage yard in search of a locked rear end to get all that V-8 power evenly to the track.

(Jimmy)>> Then we'll upgrade our brakes to help us get into the corners harder. Plus, we'll show you a few tricks to get an aggressive stance for better handling on the court. [ Music ] [ engine revving ] [ Music ]

(Jeremy)>> Hey guys, welcome to Carcass. Well, we are still working on the Spec Panther. We're out here at AM Salvage in Unionville, Tennessee, and we're looking for a specific rear axle.

(Jimmy)>> And per the spec rules we can't put any aftermarket parts on the car, but if you can find stock replacement parts, i-e a stock axle with a locker in it, you can do that, and that's a good performance benefit for us. So, we're gonna go find and pick one out.

(Jeremy)>> I think they're over here somewhere.

(Jimmy)>> Let's do it. Come on kitty!

(Jeremy)>> Come on kitty. [ Music ] This is where he said all the axles are for Crown Vics and Grand Marquis.

(Jimmy)>> Well we can kinda look at tags. See if they spin. This one, that's just open. That's not gonna do it. This one says it's from a Crown Vic.

(Jeremy)>> Police too! Let's see if this one spins.

(Jimmy)>> That side's not spinning.

(Jeremy)>> This side's not spinning. So, it must be open. We can check the tag on this one. No, that doesn't have an "L" on it.

(Jimmy)>> I actually think this one is. It's got an "L" between the gear ratio. We'll just have him pick this one and check it out. [ Music ]

(Jeremy)>> Okay, so this is what we're looking for. Down here on the axle tag there's the actual axle ratio, or the gear ratio, and there's an "L" in front of the 27, and that's what we're looking for. We assume the "L" stands for locker, which is what the internet says. So, this is the axle we want. We'll go ahead and load this up. [ Music ] What do you say? We're all loaded up. Get back to the shop and clean it up?

(Jimmy)>> Sounds good. [ Music ] [ aerosol can hissing ]

(Jimmy)>> Looks a bit strange that I have two cans.

(Jeremy)>> That's for twice the cleaning power. [ aerosol can hissing ]

(Jeremy)>> Once we let the degreaser do its work, we'll hit it with the pressure washer. [ pressure washer hissing ]

(Jimmy)>> Jeremy did a good job cleaning up the axle outside, and so the plan here is to get the axle out from under the Crown Vic. We've got to steal some parts off of that one to put on this one, but in the meantime I'm gonna be taking this one apart. We'll clean it even a little bit further, and then we'll give it a nice coat of paint. [ drill humming ]

(Jimmy)>> To get the axle cleaned up we'll take everything we can off of it starting with the sway bar. [ drill humming ]

(Jimmy)>> After that we'll take out the control arms, the watts link... [ drill humming ] [ Music ]

(Jimmy)>> ...and the calipers along with the rotors. [ Music ] [ drill humming ] [ Music ] [ drill humming ] [ Music ]

(Jimmy)>> Then we'll take the diff cover off and drain the fluid so we can service it later. [ Music ] And finally, we're use our wire cup to get as much of the surface rust off as we can before we hit it with some paint. [ grinder buzzing ]

(Jimmy)>> Alright, get to painting. [ aerosol can hissing ] [ Music ]

(Jeremy)>> Coming up, we get our old rear end out so we can add our True Trac setup.

(Jeremy)>> Alright guys, well Jimmy has the junkyard axle all stripped down and cleaned up. So now we have to get this one out from underneath the car. It's all pretty basic. Get rid of the driveshaft. The four-link connection here, the shocks and the brakes out of the way, and get this thing on a stand. [ ratchet clicking ] [ Music ]

(Jeremy)>> After we get the driveshaft off, we'll start tackling the hard parts. Most of this stuff comes off pretty easy with the help of a breaker bar and some elbow grease. [ Music ] Like Jimmy said, we'll need to reuse some of these parts. So, I'll be careful taking them off. [ Music ] When removing the rear axle, you only want to loosen the bolts for the lower and the upper control arm. That way the axle won't fall out of the car, but we will be removing the sway bar links before we set the axle down on its stand. [ drill humming ] [ Music ]

(Jeremy)>> Okay, so now that we have the weight of the axle on the stand here, I'll go ahead and take the bolts out, and then we'll just pick the car up, drag the axle out from underneath it. [ banging metal ] [ mechanical humming ]

(Jeremy)>> Alright guys, well we got the axle out from underneath the car, and we've got to switch some parts over, but let's go over how to figure out if you guys have a locked differential or not. Well, there's a couple of quick and easy ways to do that. One is if you have the tag on the axle like we saw in the junkyard. You can check that, or specific to our Crown Vic if you have the door sticker on the B-pillar you can have a code for the axle. In our case we had a Z-coat, which means we don't have a locked rear diff, but if you guys had a locked rear differential you would have an X-coat, but what if you don't have any of that information. A quick and easy way you guys can test that is if you put one hand on the rotor or the axle shaft on this side, and you can spin the diff over yet that means you don't have a locked diff, unlike that axle right there.

(Jimmy)>> So on our new axle this one is equipped with Ford's traction lock differential. So, if we try to do that test both axles would spin in the same direction, but if you're in a junkyard or something the brakes might be seized up, and if you don't have access to tags how else can you figure it out? Well, the easiest way is to just pop the cover off and specific to the traction lock differential they have this "S" spring in here, which pre-loads the clutch packs, and luckily we were able to verify ours with the tag but there are multiple ways to do it.

(Jeremy)>> We've got a couple of parts that we've got to switch over to get this thing back underneath the car, and when we're done doing that we're gonna do one more quick little upgrade. [ Music ] The E-brake hardware on the junkyard axle was in pretty bad shape. So, we'll salvage the good parts from our stock axle. [ Music ] Alright now we'll just use that hardware. We're gonna just replace these E-brake shoes with ones that we picked up from our local parts store. Adjustor in there, and then we've got one more spring to do, and then we'll move on. [ Music ]

(Jimmy)>> Up next, we'll add extra stopping power to help us on the track.

(Jimmy)>> Hey guys, like Jeremy said, we have a few upgrades to throw on our rear axle before we get it back under the car, and these are allowed per the Spec Panther rules, and that all starts with the Hawk Performance Talon rotors, which are high carbon steel with cross drilled faces to help withstand the abuse that the pads and the fluid will be applying to them. To pair with that we've got Hawk's DTC 60 racing pad, which is Hawk's most popular racing pad. These provide up to three times the friction of a store bought pad and can handle temperatures over 1,600 degrees. This is a huge deal because when stock brake systems are pushed on a track setting, they tend to fade, or can even fail completely. So, these components are gonna keep our car safe and consistent, and once we move back up to the front of the car we will be using Hawk's HP-660 brake fluid. Just like these components, brake fluid will soak in heat from the caliper, and in stock brake systems if it loses viscosity you can have brake fade, or the system will fail completely. So, this stuff has the highest boiling point of Hawk's brake fluid line. So, it's a must have for track cars, but you can even use this stuff on the street. So, we'll get this stuff on the axle and get it back under the car. [ Music ]

(Jeremy)>> This should go pretty easy, I think. Got to move it underneath here and we'll be alright.

(Jimmy)>> Lower the car down. Alright, here we go. [ Music ]

(Jeremy)>> Alright guys, now the spec rules clearly state that you can run any stock part from any other vehicle. So, in the rear here we're gonna be running a set of springs from an '05 Mustang. Now besides for the physical difference between the two there's also a spring rate difference. The Mustang's got 135 pounds per inch spring rate and the Vic's got 163. Now that may or may not give us any gains on the performance side of things but that is gonna make the car sit a little bit lower. At least we hope it will, and that's always a good thing. So, what we're gonna do here is get the springs installed, and then we're gonna wrap up the install of the rear axle. [ Music ] Alright, go ahead Jimmy. [ hissing ]

(Jeremy)>> A little more, right about there! [ Music ] There's one! Ready? There it goes! [ Music ] With our axle basically installed we'll throw on our Hawk pads and finish out the brakes. Alright so the last thing we're gonna do here is install a set of shocks that we got from Summit Racing. These are KYB shocks, and this is an o-e replacement for the car, and from here we'll move up front and start on that suspension. [ ratchet clicking ] [ drill humming ]

(Jeremy)>> Alright, well that basically buttons it up back here. I've got a couple more things I've got to take care of, like the driveshaft and the watts link, but then we will go ahead and transition to the front, tackle that suspension too. [ Music ] With the rear done we head up front to give our Spec Panther a sportier stance.

(Jimmy)>> We've got the rear axle back under the car now and we're moving up to the front. To get the drop we need up here all we have to do is take the strut and spring out of here, take the spring off, cut the spring down just a little bit, and then we'll throw that on a new strut and get it back under here, and the front should match the back. [ Music ] With the wheel and tire off, I'll start by taking out the lower bolt of the strut. Alright I think that's pretty well seized in there. So, we'll have to get some heat on it. So sometimes bolts get stuck. You hammer on them, do whatever you can, but ultimately if you use some heat usually this helps, and sometimes even that doesn't work. So, you either have to cut it with the torch, or find another way to cut it and get it out. So, we'll try this. Hopefully it works. [ torch hissing ]

(Jeremy)>> Alright Jimmy you ready?

(Jimmy)>> Yep.

(Jeremy)>> Set, go! [ metal banging ]

(Jeremy)>> Yeah that's moving. Nice! [ metal tapping ]

(Jimmy)>> With the lower bolt finally out I'll go up top and take off the three nuts holding the strut in. [ Music ] [ drill humming ] [ Music ]

(Jimmy)>> To get the strut all the way out I'll have to take the upper and lower ball joints out of the upright assembly. [ Music ] Alright, let's get this spring off, and we'll cut it down. [ Music ] Get the top of this strut off, and after that we'll take the spring off it. Get to cutting. [ Music ] Alright, so that works too. Getting a new one anyway. So, it doesn't really matter. [ saw buzzing ]

(Jimmy)>> We're just gonna take out one coil to start, but we do think this will give us all the drop we need. If not, we can always go back and cut more later. [ Music ] We'll take our freshly cut spring and install our new KYB strut from Summit Racing. [ Music ] Alright get this back in. [ Music ] Just to be safe we'll replace our stock lower strut bolt with a grade eight bolt. [ Music ] [ drill humming ] [ Music ]

(Jimmy)>> Alright, that wraps up the front, and just like in the back we're gonna throw on some Hawk Performance rotors and pads, and then I'll go back up top and tighten the top of the strut.

(Jeremy)>> Since we have the car up in the air, we figured it'd be a good time to tackle the exhaust system. Now we plan on driving this car on the street. So, we want to keep the catalytic converters underneath the car, and there's really no point in doing this big elaborate exhaust system anyways. So, we're gonna keep it nice and simple. What we're gonna do is just replace the muffler with these Summit branded mufflers. It'll give us a nice, good tone. We got a little piece of pipe here to help us tie this all together. So, I've got to get back underneath the car. We're just gonna cut the old mufflers out, and then we'll weld all this stuff in. [ saw buzzing ] [ Music ] [ saw buzzing ]

(Jeremy)>> Okay, so that little relief cut loosened the front up. So now we'll just come back, cut the back out of this, get the muffler out of here. [ saw buzzing ] [ Music ] [ saw buzzing ]

(Jeremy)>> Same thing goes for the second side. [ Music ] Okay, so this is a universal fit muffler, and I ordered the longest one that they had, and you can see we end up a little bit short here, but I also ordered a piece of pipe. So, we'll go ahead and take this measurement. Somewhere around eight inches, and then we'll go cut that out on the chop saw. [ saw buzzing ]

(Jeremy)>> Alright, let's do a quick test fit and see how this works. That should work just fine. From here we'll just prep everything, fire up the welder, get this all welded in. [ grinder buzzing ] [ Music ]

(Jeremy)>> With the welder set up I'll tack the parts in it first. Then fully weld up the new mufflers. [ welder crackling ] [ Music ]

(Jimmy)>> Look at that!

(Jeremy)>> What do you think?

(Jimmy)>> Just look at that!

(Jeremy)>> That squats a long way, doesn't it?

(Jimmy)>> That's two or three good inches right there.

(Jeremy)>> The back's really down too. I like it! It should handle a whole lot different when we're out on the track.

(Jimmy)>> Lower center of gravity, that's always a good thing.

(Jeremy)>> I think from here on out I think we should do a color change on the car. Get it off the hoist and get her down in the booth. If you like anything you've seen on the show today check out Powernation TV.
Show Full Transcript