
In This Episode
- 0:00 Introduction to the project
- 1:21 Discussing the color shift wrap and modifications
- 3:01 Planning for SEMA show and trailer details
- 5:01 Building a custom trailer hitch
- 9:01 Installing a new air ride system
- 16:01 Calibrating and testing the air ride system
- 20:01 Final preparations and test drive
Video Transcript
[Brian] You are
watching Powernation.
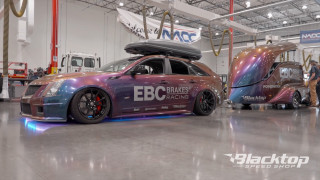
[Brian] How do you make one of the rarest wagons ever stand out at the world's biggest auto show when it's surrounded by some of the coolest cars ever built? And you don't want to saw the horn off a unicorn to make it happen. [Jason] That's the problem we've got to tackle today on Blacktop Speed Shop. [ Music ] -You know SEMA is the biggest car show in the world, and we partnered with our friends at EBC brakes to transform this 2014 Cadillac CTSV into something that's going to get everyone's attention in Vegas. [ phone vibrating ] Speaking of the EBC, here's James right here. Hey, what's up James? How you doing buddy? Good to hear from you. [James] I'm just giving you a quick call to see how the project's going for SEMA '26. -Anytime James, it's great to hear from you buddy. So as you know, like we discussed before, we're working on this 2014 CTSV wagon. In our opinion, definitely me and Jason, this is the number one production wagon ever built, especially here in the States. -Love these cars, Brian. They're so good. I mean they look cool and they got huge amounts of power. -So yeah James, as you know, from the factory this car is over 550 horse. This is a 2014. Pretty clean car, very well maintained at low mileage, less than 60,000 miles on this car. Interior is pretty much perfect on it as well. So what do we do or what can we do to make this really stand out? We're going to add a color shift wrap from Avery Dennison. It's really going to help this pop. It's going to change a blue green base to a purpleish red color depending on where you look. Very possible one end of the car would be one color, the other end at the same time will look a different color. So definitely an eye catcher. Other than that we're going to do wheels, tires. It's really going to be a nice ride buddy. -That's going to look so cool. Can't wait to see it finished. -Yeah it's really going to stand out James. So we sent you over a couple renderings with some different color choices for the Avery Dennison wrap. Our personal favorite though is Rushing Riptide. So it has a blue green base and it will flop to a purpleish red color. So it's really possible, James, you could be at the front of the car and it would be a completely different color at the rear bumper. So really going to stand out and look good. -So it's like a chameleon style wrap. I love the look of them, especially in the sunshine. -Yeah it's a chameleon color for sure. So in addition to our wrap we're going to put some polished wheels on. We're also going to do some performance tires on this vehicle as well. We have a roof rack and a roof box we're going to install. Also over here in the States these vehicles a lot being over 550 horsepower from the factory, They use them for drag and drives a lot. So in the states sick week is very big over here, and for them to qualify for sick week they have to be able to drive their pit or all their materials with their high performance car from track to track to be able to make it to the end. So we decided we were going to install a trailer hitch on the car and we got a surprise for you. In addition to the car it is a fiberglass ride-in motorcycle trailer. So super lightweight, convenient. It'll look really good behind the car. We're going to wrap it in the same wrap as the vehicle, and we're going to have the same wheels and performance tires put on the trailer. So everything's cohesive and looks good together. -It'll be super useful for me to have one of those when I lived in Vegas to go dirt biking every weekend. I'd have loved that. -Yeah with the unique look of the trailer, the shape and the color shift wrap that's going to match the car it's going to be a real unique eye catcher for your booth at SEMA. -So we actually have one more surprise for you. We wanted to do something interactive for your booth. So we got a full turnkey mobile racing simulator that may even fit in the trailer. -That's cool. That is like a proper simulation truck for racing in F1, I guess. -So it's a complete package. It comes with wheel, pedals, bucket seat, speakers. Also, we're going to have satellite Wi-Fi. That way we can play live as well in the booth. -The people at Sema will absolutely love this. They'll go crazy for it. -We're really looking forward to working and partnering with EBC Brakes this year. It's going to be super impressive and I really think it's going to look good in your booth. -I'm looking forward to seeing your guy's craftsmanship going on in there because it is looking good already from the renderings. I can't wait. -You know James, I know it's been a long workday for you already. Unfortunately, it's just beginning for me and him. So we really need to get after it to get started. So thanks for checking in. The next check in is going to be super impressive. -You guys take care. We'll speak to you soon, and perhaps we'll have a project update in the next couple of months. -Yes, sir. We'll reach back out. Good talking to you, James. Have a great afternoon. -Take care Brian, take care Jason. Have a good one. -See you buddy. -Okay, well now we just got to build it. -Okay, let's do it. -Up next, we gotta do some custom fab work to build a hitch from scratch.
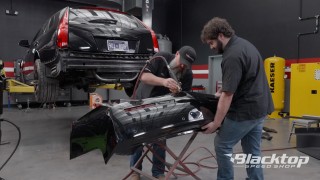
[Brian] So what else will we do to a car with over 500 horsepower from the factory and a phenomenal vehicle to start with? You've got to figure out things that sets you apart. So while a lot of people build drag and drive vehicles they put a trailer hitches on high horsepower fast track vehicles. We're doing the same. So in order to do that we have our hitch here, but for this particular vehicle this hitch mounts behind the reinforcement bar for the rear bumper. So we had to remove the rear bumper to access the bar. Now to access the bar bolts we have to remove the exhaust. Whoever has installed this system right here it is a slip fit exhaust system. But come here and check this out. Somebody has gone through and tack welded this slip fit system and put the exhaust clamps on. So we have to go all the way up front to where it connects up here to be able to slip it off. We have to get this out to access the rear body bolts. To do that we've got to pull out the rubber isolators. So let's get that done. [Jason] Here's your pry bar. [ impact driver humming ] [ Music ] [ metal clanging ] [ Music ]
What's that? -The lock to keep it from falling off in your face. [ Music ] -Are you kidding? For sure ain't for a Cadillac. -So we ran into a small problem with our hitch install on our CTSV wagon. The hitch that we actually ordered for this car does not fit. So let us show you this first. So this is a definite problem. It is supposed to mount behind the reinforcement bar on the rear body of the car using the factory hardware. We looked online and tried to find a different one and they are actually discontinued, the model after this hitch. So we're going to make our own. So we had our buddies over in Dirt and Trails cut us some quarter inch plate brackets to mimic what was already here. So these brackets mount in the factory location. The rebar bolts through it, and we're going to make a rebar that goes all the way across behind it, and we're going to make a hoop that comes down, drops, and goes underneath the spare tire well with our receiver on the bottom. We need to cut this off. We're going to use this piece as a template. It does have a six inch radius on it already. This is two inch tube with eighth inch wall. So this should be plenty for what we're going to haul this trailer on the back of our car. So all we did was we went ahead and pre-bent it so we'd have a radius piece, but I am going to cut this off. So we have 11 inches between the center of this two inch bottom to the top. That will fit behind the reinforcement bar like we showed you earlier, and it will come down and follow the radius of the spare tire well in the car. It won't be 100 percent exact but it will make sure our radius looks good and everything is going to line up like we need to. [ saw buzzing ] [ Music ]
Now we have the top piece off. We can also mimic the fitment because it's going to fit on top. We will notch out the top piece so it fits tight where we can weld it, and if we need the gusset or plate it we can do that as well. So originally we ordered a hitch that did not fit. The frame rails were wider on our vehicle than it was on the factory hitch from the manufacturer we purchased it from. So we're going to invent or make our own. We reached out to our buddies over at Dirt and Trails. We had them plasma table us some quarter inch bracket plate steel that matches the mounts for our reinforcement bar in the rear. So it's going to be sandwiched in between. We're going to weld a crossbar at the top right here for stability and to keep it square. And we prevent a hoop that we're going to attach at the bottom as well. Once we get this hoop attached and notched to fit the top bar then we're going to notch the center of the hoop to take our receiver, and our receiver is going to be welded in between it and gusseted on the sides. I'm going to go ahead and dress the inside of my brackets. Then we'll bevel the edge of our tube. [ grinder humming ] [ Music ]
[ welder crackling ] -Like a bumper for a modified. -It's a modified bumper all right. -This thing is quite a bit heavier than the other one. It's not done yet. [ grinder buzzing ] [ welder crackling ] [ Music ]
-Put it up there He-Man. -It's fine. I'll get mine over here on the table. -A whole lot of complaining going on over there. -This Sharpie is old and crusty. We have already made our brace. Our cross brace, our plates, our down hoop for our hitch install on our Cadillac. Now once the bumper is in place on the car it is underneath the bottom. So you're never going to see that. It will still have the factory look, but we are going to have to do a little surgery on it. [ drill humming ] -Why are you so comfortable cutting up a car that I'll never be able to own. [ air saw buzzing ] [ Music ]
-I just want you to have this memento of the car that you'll never own sir. You're welcome. [ Music ]
[ welder crackling ] [ Music ]
Dead money son! -Coming up, we install a new air ride system, which is easier said than done.
[Jason] Next thing we're going to do is suspension on this. And instead of going with new shocks and new springs we're actually going to put airbags in it. Now based off just looking at it, I only think a couple of things have to come off. Maybe the sway bar link, a couple other bolts. Definitely the sensor right here. That's fragile and I don't want to buy that. So we're going to see how this goes, and I'm just going to close my eyes and hope. But I do need tools to start that with. Just so you know, I can't do this with my bare hands. And if I had to guess, everything is going to be a 12, 13, 15, 17. All of the above. [ Music ]
I think I should just take that bottom one out and let the spring shoot it to the ground like a shotgun. What do you think? It's safe. That's OSHA approved. Don't say no to me. That's OSHA approved. I'm going to warn both of you. I've never done this on independent rear suspension. So if this flies apart and it kills me, sorry. [ ratchet clicking ] I don't know if you know this or not. There's a control arm right there that has a hump that goes over the top that stops it from going down too far. I don't know if you knew that or not, but it's there. This whole thing probably has to come apart now. Cool, fun. Always pull on a ratchet. Never push. I lied. I actually always push. Pulling a ratchet you'll hit yourself in the face. [ ratchet clicking ] [ impact driver humming ] [ Music ]
[ ratchets clicking ] [ Music ]
Can't say I didn't try. [ Music ]
[ squealing ] Thank you. Ah, yes. Watch your eyes. Gotcha! Uno spring out! Now that we got the spring out we have to assemble the bags before we can put them in. The assembly itself doesn't seem like it's too much, but if you've never done this before you don't know how any of these brackets go on. After I get these assembled. The front ones are already assembled but I figured I'd show you guys how to put these back ones together. This is the bottom bracket. Why does that feel so stupid? [ Music ]
The next thing you have to do is put this, the elbow, on because you can't reach that once you've set this on and you can't tighten it. So that is the next step. This is a push style connector. It's very simple. You just take your airline. You shove it in and it it does its magic. The torque spec etched in the top of the bag says for the three eighths NPT it's hand tight and then one turn. You don't need a torque wrench to do this. You just need to hand tighten it to the best of your ability and then do one full turn past that to crush the brass and create a seal. And if you want to get crazy with it you can just get an angle finder and do 360 degrees, but it's not that serious. Sure, good enough. And once it is tight this isn't final. This is still loose but you can swivel this. So after you do get that on and get it pointed out. It's a little easier to see now. It's got a little window in the top bracket so this can point through and you can put your airline through. That's why you have to put the elbow in first. You can't get a wrench in there to tighten that after it's already on. Now the fun part is fishing these down in there around that elbow that you just put in to hopefully get in their bolt holes up top, which are those bolt holes right there. If you are doing this at home take your time. Be patient. I'm not patient and I wish I was. My fat fingers don't fit in there very well when we put this all together. One down, one to go. [ Music ]
What idiot thought it was a good idea to put air ride on this thing. -I don't know but they are an epic genius I know that. -You're missing it. I'm dumping dirt everywhere. There she is. I gots it. [ Music ]
[ ratchet clicking ] [ Music ]
That first click may be the torque spec but sometimes on a rubber mount the rubber will be torqued up and it'll read higher and then once you let go it'll relax and it actually needs a little more. -Up next, we dial in our air ride and test our custom trailer hitch.
[Brian] So got the tank in. We got the compressors in. Everything is wired up, working like it should. Next, E-level system. We got this kit from Summit Racing. It's going to allow you to control your ride level with the push of a button and we're going to show you how to set it all up. This is going to be your Summit Tech Tip. [ Music ] So we're going to go through the functions and get our E-level system calibrated. So what's really good about this? There's two different options. You do have a medallion or a pendant that can stay inside the car, or they have a handy dandy app right. So in this app as well we can set tank pressure. We can change bag pressure each side individually. We could do it as a whole. And also this one has three different functions. [Jason] Ride height. There's one that's lowered, and then there's one that's raised for speed bumps and stuff. But you can manually set them too. So the calibration just tells the computer where the car's at, and then we set the height we want it to be at. -Let's get this auto calibration on. That's what we're going to do first, right? I'm just gonna leave that back there. -You might want to stand back. -Yes, sir, got it. -The system will automatically rise and lower the vehicle in the next procedure. Remove all obstructions and keep clear. Are you obstructing? -I am. [ air bag hissing ] -That's what I'm talking about. -Right there it's perfect. Let it sit there. It's just playing around. -But it's still cool to watch. -I could watch it go up and down all day. I've never messed with air ride before. Okay, it says calibrated. Let's do our presets. [ air hissing ] -So is that up? -That's everything. That's all the way. -So will that be like speed bump, right? -Right. I don't think the rear needs to be quite that high. -No, let's level it down. The front is good. -So that'll be preset one. -That's probably pretty good right there, right? In the paperwork for the quick start guide it says the push and hold the function for three seconds and it will auto save in that position. So we'll see. Let's dump it. Let's go to number two. Let's just let it down to regular ride height. That's pretty good in the front. -I really like doing that. -I think level right, front to rear. -That's just how it was sitting. I didn't have to adjust it. -Let's set that one for two. We could drive that anywhere we want. [ air hissing ] -Wish we could ride like that. -I don't want to put a fender on it or two. -It'd look cool until it happened though. -Maybe we can set that at lower, and then we'll put ride height just a little bit higher than that. Tennessee tilt. There's only one thing left to do. That's put the rear bumper back on it, make sure it clears our hitch. Let's go drive it. -Let's go. -We got the full air suspension installed on our Cadillac. We already preset the ride heights. Levels three, two and one. We got all that done. So we want to hook the trailer up. Everything looks good. We're going to take it for a test pull and make sure everything's fine and functioning like it should. What do you think? -We might burn some rubber too? I haven't decided yet, but I'm ready. -All right man, you watch that mirror and make sure everything's good. -That mirror is looking at me. I can't see anything. -It's powered. -Well you have the adjuster. There you go. I can see something now, not really. -Down, up? -Out, there you go. I can see now. See, perfect. How fast you think we can go with this thing on? -I don't know. I think we're doing about 70 right now through the parking lot. -Looks good, sounds good. I don't hear any unfortunate noises. -Let's go running around one more time. -If we're gonna jackknife might as well do it now while we can fix that. -I think our distance on our hitch was great. Dude, I cannot wait for James to check this out. -I can't wait to wrap it so he can see what it looks like. -It's gonna be so cool, man. -You're going to have to fight me to get me out of that sim by the way. I'm going to be in that thing. -You know I'm old. We don't fight fair. -Oh great. [ engine revving ] -That'll never get annoying. -No, but it keeps cutting out because traction control is kicking on. -How do we turn it off? -I don't know. We gotta figure that out. -Looks good, rides good. Now next thing we got to do is get up under the hood. -I think we can improve on this 550 horsepower? -I got a couple of ideas.
Show Full Transcript
[Brian] How do you make one of the rarest wagons ever stand out at the world's biggest auto show when it's surrounded by some of the coolest cars ever built? And you don't want to saw the horn off a unicorn to make it happen. [Jason] That's the problem we've got to tackle today on Blacktop Speed Shop. [ Music ] -You know SEMA is the biggest car show in the world, and we partnered with our friends at EBC brakes to transform this 2014 Cadillac CTSV into something that's going to get everyone's attention in Vegas. [ phone vibrating ] Speaking of the EBC, here's James right here. Hey, what's up James? How you doing buddy? Good to hear from you. [James] I'm just giving you a quick call to see how the project's going for SEMA '26. -Anytime James, it's great to hear from you buddy. So as you know, like we discussed before, we're working on this 2014 CTSV wagon. In our opinion, definitely me and Jason, this is the number one production wagon ever built, especially here in the States. -Love these cars, Brian. They're so good. I mean they look cool and they got huge amounts of power. -So yeah James, as you know, from the factory this car is over 550 horse. This is a 2014. Pretty clean car, very well maintained at low mileage, less than 60,000 miles on this car. Interior is pretty much perfect on it as well. So what do we do or what can we do to make this really stand out? We're going to add a color shift wrap from Avery Dennison. It's really going to help this pop. It's going to change a blue green base to a purpleish red color depending on where you look. Very possible one end of the car would be one color, the other end at the same time will look a different color. So definitely an eye catcher. Other than that we're going to do wheels, tires. It's really going to be a nice ride buddy. -That's going to look so cool. Can't wait to see it finished. -Yeah it's really going to stand out James. So we sent you over a couple renderings with some different color choices for the Avery Dennison wrap. Our personal favorite though is Rushing Riptide. So it has a blue green base and it will flop to a purpleish red color. So it's really possible, James, you could be at the front of the car and it would be a completely different color at the rear bumper. So really going to stand out and look good. -So it's like a chameleon style wrap. I love the look of them, especially in the sunshine. -Yeah it's a chameleon color for sure. So in addition to our wrap we're going to put some polished wheels on. We're also going to do some performance tires on this vehicle as well. We have a roof rack and a roof box we're going to install. Also over here in the States these vehicles a lot being over 550 horsepower from the factory, They use them for drag and drives a lot. So in the states sick week is very big over here, and for them to qualify for sick week they have to be able to drive their pit or all their materials with their high performance car from track to track to be able to make it to the end. So we decided we were going to install a trailer hitch on the car and we got a surprise for you. In addition to the car it is a fiberglass ride-in motorcycle trailer. So super lightweight, convenient. It'll look really good behind the car. We're going to wrap it in the same wrap as the vehicle, and we're going to have the same wheels and performance tires put on the trailer. So everything's cohesive and looks good together. -It'll be super useful for me to have one of those when I lived in Vegas to go dirt biking every weekend. I'd have loved that. -Yeah with the unique look of the trailer, the shape and the color shift wrap that's going to match the car it's going to be a real unique eye catcher for your booth at SEMA. -So we actually have one more surprise for you. We wanted to do something interactive for your booth. So we got a full turnkey mobile racing simulator that may even fit in the trailer. -That's cool. That is like a proper simulation truck for racing in F1, I guess. -So it's a complete package. It comes with wheel, pedals, bucket seat, speakers. Also, we're going to have satellite Wi-Fi. That way we can play live as well in the booth. -The people at Sema will absolutely love this. They'll go crazy for it. -We're really looking forward to working and partnering with EBC Brakes this year. It's going to be super impressive and I really think it's going to look good in your booth. -I'm looking forward to seeing your guy's craftsmanship going on in there because it is looking good already from the renderings. I can't wait. -You know James, I know it's been a long workday for you already. Unfortunately, it's just beginning for me and him. So we really need to get after it to get started. So thanks for checking in. The next check in is going to be super impressive. -You guys take care. We'll speak to you soon, and perhaps we'll have a project update in the next couple of months. -Yes, sir. We'll reach back out. Good talking to you, James. Have a great afternoon. -Take care Brian, take care Jason. Have a good one. -See you buddy. -Okay, well now we just got to build it. -Okay, let's do it. -Up next, we gotta do some custom fab work to build a hitch from scratch.
[Brian] So what else will we do to a car with over 500 horsepower from the factory and a phenomenal vehicle to start with? You've got to figure out things that sets you apart. So while a lot of people build drag and drive vehicles they put a trailer hitches on high horsepower fast track vehicles. We're doing the same. So in order to do that we have our hitch here, but for this particular vehicle this hitch mounts behind the reinforcement bar for the rear bumper. So we had to remove the rear bumper to access the bar. Now to access the bar bolts we have to remove the exhaust. Whoever has installed this system right here it is a slip fit exhaust system. But come here and check this out. Somebody has gone through and tack welded this slip fit system and put the exhaust clamps on. So we have to go all the way up front to where it connects up here to be able to slip it off. We have to get this out to access the rear body bolts. To do that we've got to pull out the rubber isolators. So let's get that done. [Jason] Here's your pry bar. [ impact driver humming ] [ Music ] [ metal clanging ] [ Music ]
What's that? -The lock to keep it from falling off in your face. [ Music ] -Are you kidding? For sure ain't for a Cadillac. -So we ran into a small problem with our hitch install on our CTSV wagon. The hitch that we actually ordered for this car does not fit. So let us show you this first. So this is a definite problem. It is supposed to mount behind the reinforcement bar on the rear body of the car using the factory hardware. We looked online and tried to find a different one and they are actually discontinued, the model after this hitch. So we're going to make our own. So we had our buddies over in Dirt and Trails cut us some quarter inch plate brackets to mimic what was already here. So these brackets mount in the factory location. The rebar bolts through it, and we're going to make a rebar that goes all the way across behind it, and we're going to make a hoop that comes down, drops, and goes underneath the spare tire well with our receiver on the bottom. We need to cut this off. We're going to use this piece as a template. It does have a six inch radius on it already. This is two inch tube with eighth inch wall. So this should be plenty for what we're going to haul this trailer on the back of our car. So all we did was we went ahead and pre-bent it so we'd have a radius piece, but I am going to cut this off. So we have 11 inches between the center of this two inch bottom to the top. That will fit behind the reinforcement bar like we showed you earlier, and it will come down and follow the radius of the spare tire well in the car. It won't be 100 percent exact but it will make sure our radius looks good and everything is going to line up like we need to. [ saw buzzing ] [ Music ]
Now we have the top piece off. We can also mimic the fitment because it's going to fit on top. We will notch out the top piece so it fits tight where we can weld it, and if we need the gusset or plate it we can do that as well. So originally we ordered a hitch that did not fit. The frame rails were wider on our vehicle than it was on the factory hitch from the manufacturer we purchased it from. So we're going to invent or make our own. We reached out to our buddies over at Dirt and Trails. We had them plasma table us some quarter inch bracket plate steel that matches the mounts for our reinforcement bar in the rear. So it's going to be sandwiched in between. We're going to weld a crossbar at the top right here for stability and to keep it square. And we prevent a hoop that we're going to attach at the bottom as well. Once we get this hoop attached and notched to fit the top bar then we're going to notch the center of the hoop to take our receiver, and our receiver is going to be welded in between it and gusseted on the sides. I'm going to go ahead and dress the inside of my brackets. Then we'll bevel the edge of our tube. [ grinder humming ] [ Music ]
[ welder crackling ] -Like a bumper for a modified. -It's a modified bumper all right. -This thing is quite a bit heavier than the other one. It's not done yet. [ grinder buzzing ] [ welder crackling ] [ Music ]
-Put it up there He-Man. -It's fine. I'll get mine over here on the table. -A whole lot of complaining going on over there. -This Sharpie is old and crusty. We have already made our brace. Our cross brace, our plates, our down hoop for our hitch install on our Cadillac. Now once the bumper is in place on the car it is underneath the bottom. So you're never going to see that. It will still have the factory look, but we are going to have to do a little surgery on it. [ drill humming ] -Why are you so comfortable cutting up a car that I'll never be able to own. [ air saw buzzing ] [ Music ]
-I just want you to have this memento of the car that you'll never own sir. You're welcome. [ Music ]
[ welder crackling ] [ Music ]
Dead money son! -Coming up, we install a new air ride system, which is easier said than done.
[Jason] Next thing we're going to do is suspension on this. And instead of going with new shocks and new springs we're actually going to put airbags in it. Now based off just looking at it, I only think a couple of things have to come off. Maybe the sway bar link, a couple other bolts. Definitely the sensor right here. That's fragile and I don't want to buy that. So we're going to see how this goes, and I'm just going to close my eyes and hope. But I do need tools to start that with. Just so you know, I can't do this with my bare hands. And if I had to guess, everything is going to be a 12, 13, 15, 17. All of the above. [ Music ]
I think I should just take that bottom one out and let the spring shoot it to the ground like a shotgun. What do you think? It's safe. That's OSHA approved. Don't say no to me. That's OSHA approved. I'm going to warn both of you. I've never done this on independent rear suspension. So if this flies apart and it kills me, sorry. [ ratchet clicking ] I don't know if you know this or not. There's a control arm right there that has a hump that goes over the top that stops it from going down too far. I don't know if you knew that or not, but it's there. This whole thing probably has to come apart now. Cool, fun. Always pull on a ratchet. Never push. I lied. I actually always push. Pulling a ratchet you'll hit yourself in the face. [ ratchet clicking ] [ impact driver humming ] [ Music ]
[ ratchets clicking ] [ Music ]
Can't say I didn't try. [ Music ]
[ squealing ] Thank you. Ah, yes. Watch your eyes. Gotcha! Uno spring out! Now that we got the spring out we have to assemble the bags before we can put them in. The assembly itself doesn't seem like it's too much, but if you've never done this before you don't know how any of these brackets go on. After I get these assembled. The front ones are already assembled but I figured I'd show you guys how to put these back ones together. This is the bottom bracket. Why does that feel so stupid? [ Music ]
The next thing you have to do is put this, the elbow, on because you can't reach that once you've set this on and you can't tighten it. So that is the next step. This is a push style connector. It's very simple. You just take your airline. You shove it in and it it does its magic. The torque spec etched in the top of the bag says for the three eighths NPT it's hand tight and then one turn. You don't need a torque wrench to do this. You just need to hand tighten it to the best of your ability and then do one full turn past that to crush the brass and create a seal. And if you want to get crazy with it you can just get an angle finder and do 360 degrees, but it's not that serious. Sure, good enough. And once it is tight this isn't final. This is still loose but you can swivel this. So after you do get that on and get it pointed out. It's a little easier to see now. It's got a little window in the top bracket so this can point through and you can put your airline through. That's why you have to put the elbow in first. You can't get a wrench in there to tighten that after it's already on. Now the fun part is fishing these down in there around that elbow that you just put in to hopefully get in their bolt holes up top, which are those bolt holes right there. If you are doing this at home take your time. Be patient. I'm not patient and I wish I was. My fat fingers don't fit in there very well when we put this all together. One down, one to go. [ Music ]
What idiot thought it was a good idea to put air ride on this thing. -I don't know but they are an epic genius I know that. -You're missing it. I'm dumping dirt everywhere. There she is. I gots it. [ Music ]
[ ratchet clicking ] [ Music ]
That first click may be the torque spec but sometimes on a rubber mount the rubber will be torqued up and it'll read higher and then once you let go it'll relax and it actually needs a little more. -Up next, we dial in our air ride and test our custom trailer hitch.
[Brian] So got the tank in. We got the compressors in. Everything is wired up, working like it should. Next, E-level system. We got this kit from Summit Racing. It's going to allow you to control your ride level with the push of a button and we're going to show you how to set it all up. This is going to be your Summit Tech Tip. [ Music ] So we're going to go through the functions and get our E-level system calibrated. So what's really good about this? There's two different options. You do have a medallion or a pendant that can stay inside the car, or they have a handy dandy app right. So in this app as well we can set tank pressure. We can change bag pressure each side individually. We could do it as a whole. And also this one has three different functions. [Jason] Ride height. There's one that's lowered, and then there's one that's raised for speed bumps and stuff. But you can manually set them too. So the calibration just tells the computer where the car's at, and then we set the height we want it to be at. -Let's get this auto calibration on. That's what we're going to do first, right? I'm just gonna leave that back there. -You might want to stand back. -Yes, sir, got it. -The system will automatically rise and lower the vehicle in the next procedure. Remove all obstructions and keep clear. Are you obstructing? -I am. [ air bag hissing ] -That's what I'm talking about. -Right there it's perfect. Let it sit there. It's just playing around. -But it's still cool to watch. -I could watch it go up and down all day. I've never messed with air ride before. Okay, it says calibrated. Let's do our presets. [ air hissing ] -So is that up? -That's everything. That's all the way. -So will that be like speed bump, right? -Right. I don't think the rear needs to be quite that high. -No, let's level it down. The front is good. -So that'll be preset one. -That's probably pretty good right there, right? In the paperwork for the quick start guide it says the push and hold the function for three seconds and it will auto save in that position. So we'll see. Let's dump it. Let's go to number two. Let's just let it down to regular ride height. That's pretty good in the front. -I really like doing that. -I think level right, front to rear. -That's just how it was sitting. I didn't have to adjust it. -Let's set that one for two. We could drive that anywhere we want. [ air hissing ] -Wish we could ride like that. -I don't want to put a fender on it or two. -It'd look cool until it happened though. -Maybe we can set that at lower, and then we'll put ride height just a little bit higher than that. Tennessee tilt. There's only one thing left to do. That's put the rear bumper back on it, make sure it clears our hitch. Let's go drive it. -Let's go. -We got the full air suspension installed on our Cadillac. We already preset the ride heights. Levels three, two and one. We got all that done. So we want to hook the trailer up. Everything looks good. We're going to take it for a test pull and make sure everything's fine and functioning like it should. What do you think? -We might burn some rubber too? I haven't decided yet, but I'm ready. -All right man, you watch that mirror and make sure everything's good. -That mirror is looking at me. I can't see anything. -It's powered. -Well you have the adjuster. There you go. I can see something now, not really. -Down, up? -Out, there you go. I can see now. See, perfect. How fast you think we can go with this thing on? -I don't know. I think we're doing about 70 right now through the parking lot. -Looks good, sounds good. I don't hear any unfortunate noises. -Let's go running around one more time. -If we're gonna jackknife might as well do it now while we can fix that. -I think our distance on our hitch was great. Dude, I cannot wait for James to check this out. -I can't wait to wrap it so he can see what it looks like. -It's gonna be so cool, man. -You're going to have to fight me to get me out of that sim by the way. I'm going to be in that thing. -You know I'm old. We don't fight fair. -Oh great. [ engine revving ] -That'll never get annoying. -No, but it keeps cutting out because traction control is kicking on. -How do we turn it off? -I don't know. We gotta figure that out. -Looks good, rides good. Now next thing we got to do is get up under the hood. -I think we can improve on this 550 horsepower? -I got a couple of ideas.