

Video Transcript
[Brian] You are watching Powernation!
[ engine revving ] [Brian] Can we upgrade our exhaust without blowing up the budget? [Jason] We've got 48 hours to make it happen. This is Blacktop Speed Shot. We got a BMW that wants to play. We ain't got nothing for you, buddy. I'm sorry. [ Music ]
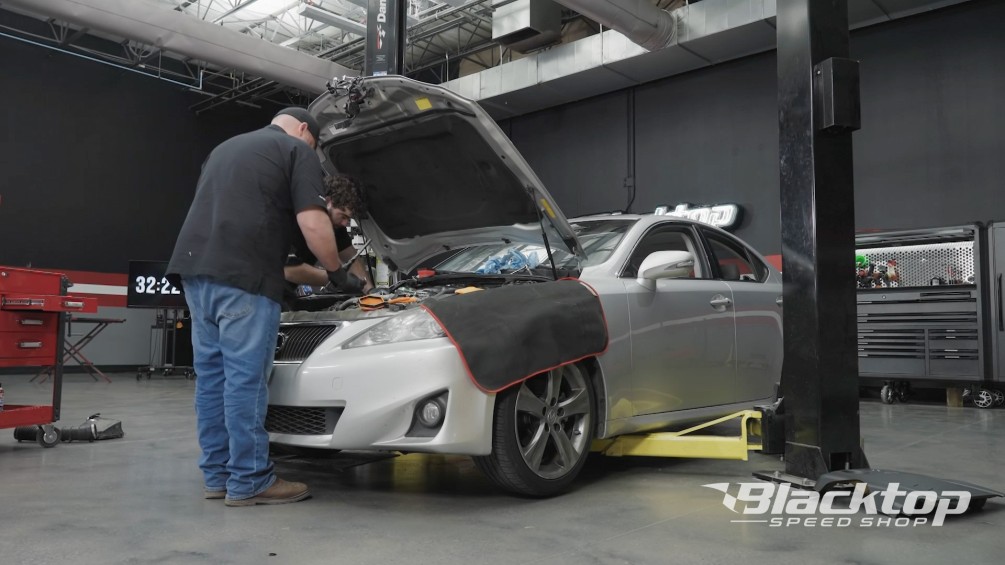
-Anytime you're working on a project you need to have an end goal in mind. Our vehicle that we chose was the 2011 Lexus IS 250. We wanted a good, solid platform with plenty of aftermarket support and affordable parts. So that's why we chose the vehicle we did. First of all, we wanted to handle stance and handling. We did that by fully adjustable coil overs all the way around. Next stopability or braking. This vehicle had the bone stock brakes on it. Don't know if they've ever been serviced. What is all this packed in here? Do you see it? -That's the forbidden pepper. -So they definitely needed some attention. We did that as well. Check. Rotors, pads, rear calipers. Next in line for us though is definitely the sound.
-And everything we're gonna be doing to this car you can do with simple hand tools in 48 hours. We're going to have a clock running the whole time so you can keep up with our progress but the clock doesn't start until the work does. -When we talk about sound improvements or upgrades there's a couple items through the exhaust system of the vehicle that we can do or change to change the tone and how our vehicle sounds. However, we're going to start with some baseline results. Bone stock exhaust, stock resonator, stock mufflers, and we have a decibel meter behind it. I got Jason in the car now. I'm gonna do a series of test. Idle, around 2,500 rpm, and around 4,000 or maybe even a rev to 5,000 to see where our baseline is. You ready? -Let's go. [ engine starting ]
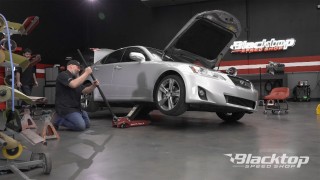
-So we're currently around 54 on our decibel meter at the moment, and this is at idle as we speak. Let's go back to park and do 2,500. [ engine revving ] All right we're dead on at 65 decibels at 2,500. So that would be our baseline to compare it to in our upcoming test as we make some improvements. So let's do a couple revs maybe around 4,000 rpm. Kind of leave me some spots in between all right. -Okay. -71, 76, 71. So we're going to call it 73. We'll take an average of three. So we should be around 71 decibels at almost 4,000 rpm. So now we know where we're starting. Let's get under the car. We got a car up in the air now. So we're just gonna talk a little bit about the factory setup that we already have. On this vehicle, it is rear wheel drive. Actually, driveshaft tunnel, rear end. However, we have pre and post cats in the factory exhaust system, O2 sensors. Then it goes to a resonator in the middle, and then it splits into two separate mufflers in the rear with two tips. So our plans are what? What are our plans? -We'll replace this. -What is this? -This is the resonator. -Thank you, perfect. So we're going to replace the resonator. However we're going to do this in steps as well. So we want to see the difference in between just the resonator, what the change would be, and then with the muffler change after that. So when all else fails you don't want to unbolt it. Get the sawz-all. -That's my favorite part. I don't know what we're waiting for. -Bring it on. So we're going to also replace the resonator. The first part, because we want to leave the mufflers hanging in the factory exhaust mounts. So that way nothing moves and goes nowhere. So you're not going to cut it. -I grabbed it and then you just kept talking. -Cause you were gone to the toolbox. -Are we cutting it now? -Yes! Fine, I'll do it. -I guess we're cutting now. [ sawz-all buzzing ] [ Music ]
-So it's finally off. [ Jason laughing ] So what do you think about this resonator? Right off the bat weighs probably five pounds, maybe 10 pounds. This is nothing, right? Length wise pretty much the same. We have a very important thing to do, do we not? -Oh the unwritten rule? Now everybody knows that once you cut something off you got to see what it sounds like. Everything in front of the resonator is still there including the catalytic converters, but everything behind that is disconnected. So now we're going to see what it sounds like. [ exhaust humming ] -Dude that sounds horrible. -That's awful. -There's 96. So this is the drone that we were talking about. [ engine revving ]
-110 baby, 110! -That's actually really fun. -What a difference. Just the resonator. [ engine revving ] Now look, let's be clear. Nothing is hooked up past the intermediate pipe at this point. So no mufflers, no exhaust tips, no anything. -Just converters. -Yeah, just converters. I say we're done. -Let's button it up and let's go. -Let's go to track. Exhaust complete. -Cheap too. Up next. -Oh yeah, it's gonna work, of course. -Will we have to cut the budget to get a better tone?
[Brian] So after our exhaust sound test, by far one thousand percent improvement. [ engine revving ] 110 baby, 110! If it was up to us we'd just leave it like this. However, we want to prove that our improvements that we are doing are really going to make a difference. So keeping with our at home theme I'm going to lop this off at the end right here to fit our new resonator that we purchased. [ sawz-all humming ] We're also using regular exhaust clamps. So if you don't have a welder at home you can still do this. Now let her back. Oh yeah, that's gonna work. Put this rubber mallet right here, perfect. That was a great idea. -You got a rubber mallet? [ Music ] It's a bit at the edge of her travel. Get a little more extra next time. [ impact driver humming ] Ooh, I think I just slid it off. -Let's go ahead and snug this one up because we know it's on there, and then we can shift it. I'm doing what we would do at home. Trial and error. If you don't have a welder but I want to put this in, then how am I going to make it work? And if we don't then we can do that. I mean we have a welder. Let's do this again. Can you get over here in front of me? [ impact driver humming ] Okay, I guess we're going to weld it. So we run into a problem here installing our resonator. We tried to do it with some exhaust clamps and we thought that it would work out in our favor. However, there are some issues. So let's check this out so you understand what I'm showing. From the factory Lexus put this elbow in and staggered the actual resonator from the factory to make room for the actual driveshaft and yoke from the rear end. So it's putting our straight piped resonator in a bind trying to meet the factory weld. So we cut it off flush as we could to leave us all the pipe that we had. However, there's no where to actually clamp this to get it to seal. [ welder crackling ] [ Music ]
-Gonna see how fast I can burn through this blade real quick. -Cut heat shield and all dude. It'll eat it. [ sawz-all buzzing ] [ Music ]
-How's that for a flush cut? -Love it. [ sawz-all buzzing ] [ Music ]
It's fixing to be so loud. -Good, better than too quiet. -Let her down. It's going to be a completely different tone. It may verberate a lot differently than before. -So much tone. The chassis twisted coming off the line.
-Who says you have to spend big money to have big sound. -Nobody with a sawz-all. [ welder crackling ] That's probably as good as it's gonna get. We should probably tach the other side too to make sure the two look good together. And then we'll weld it all the way around, and then we can weld the hangers on wherever we need to to make it hang where we want to. [ welder crackling ] -Burn, baby, burn! Not bad for a 110. So we got our exhaust replaced. Deleted our mufflers. We did our resonator. Change as well on this vehicle. We're going to fire it up to see. We haven't heard it run yet. So this could go good. This could go bad. We really don't know yet. -I'm a little nervous. -Yeah, me too. I can't wait. It's going to sound amazing. [ engine starts ] -Oh, yeah. Super drone-y? Let's try 1,500. [ engine revving ] Go to 2,500. [ engine revving ] It don't sound bad at all. -I hear nothing in here. -Ramp it. [ engine revving ] Do it again. Dude, come check this out. [ engine revving ]
Can you believe it? Just cutting the mufflers off, straight pipe. -It's at 88? One more time. [ engine revving ] That's 93. -That was the limiter. -It actually sounds really good. -Yeah, super impressed. Muffler delete for the win, and it doesn't sound like a pissed off bumblebee. -I thought it was going to be really raspy. -I think it was a killer job. -I wouldn't change nothing about it. -Coming up, will our mistake cost us more than time? That worked great. -Did it? -No.
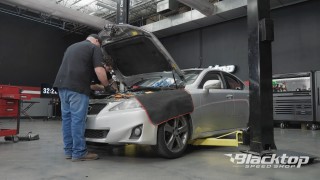
[Jason] Now that we're done with the exhaust we're going to focus our attention under the hood. We don't have any service records for this car. So we don't know what's been done, but what we do know is that it's got 112,000 miles on it. We're going to change out the plugs, coils, belts, and a couple filters just to do some maintenance on it. And to continue our theme with doing this from home, we're still going to use our tool cart with our basic hand tools that anybody can own. [Brian] Tens for everybody. [ ratchet clicking ] [ Music ] There's that. -Smell that. What do you smell? -Where? -You trust me to hold it? -Yeah dude, straight gas? -You're no fun. -Straight gas. -No fun, no fun, no fun. -Get a Lexus they said. They're easy to work on. No problem. -Who told you they're easy to work on? That wasn't me. -Easy to access everything. -The hardest part of doing plugs on this car is the fact that you have to take everything off from up top to get to anything. It's like the intake design was an afterthought after they designed the rest of the engine because the intake just kind of lays over this whole patch or driver side bank of coils and plugs. So it's not that it's hard, but it's time consuming and ridiculous. -And who in their right mind has you take the intake plenum off to change your plugs to begin with? -That's why I said I think it was an afterthought. -They just forgot. -They designed and they're like, oh man, someone's supposed to have to service this thing. Not my problem. -Somebody else will do so. Unfortunately, we had a pretty big problem that came up. We actually had a bolt on the plastic intake that the head of the Allen bolt was stripped out. It was pretty much round. So I took a torx bit of the next size up, drove it in it. However, due to all the heat and everything that's been under the hood at over 100,000 miles it was a little brittle. That worked great. -Did it? -No. We're going to put some two part epoxy on it. We're going to address it just for safe measures as we don't want it to bite us later. So I'm just gonna take some 320 grit. Use whatever grit you got at home, especially on your budget build. But I'm just gonna rough the edges up because I want it to have a good surface to adhere to. I'm going to use some 3M panel bond is what I prefer to use. However, we are out of mixing tips at the moment. So I'm going to run out a good inch and a half, two inches of material out of the end of the cartridge and it should mix enough. And then I'll stir it up to make sure it works. Remember this is a chemical reaction. This is way more than what we need but I want to make sure we've got enough to mix. Just make sure it's all uniform. We don't want a bunch of streaks and stuff in it. Make sure everything is covered and is all mixed together. Now this particular stuff right here has about a 90 minute work time. What that means is I can actually move it around and use it before it starts to dry. So I got plenty of time to put this on. I am going to try to make it look as decent as I can. However, it's just not going to be perfect no matter what we do. I will definitely not run this much material out for this small of a repair if we did have the mixing tip we needed. We'll let it sit and it'll be good to install about 90 minutes. -Duralast sent us these coil packs, and since you have to remove the intake to get to some of them we're going to just do them all. -I gotta do the old push and twist in this one. -You got to do what? -The push-n-twist. Yes! Can we do it like everybody does on YouTube and just throw it and it magically bolts itself on there? -No cause that's not how it works. -I seen it, it's on the internet. -Oh, star pattern. -Everything's hooked up, wires out of the way, check. Now all you gotta do is put the bolts in the throttle body and then plugs, right? -I think so. [ Music ] -Mass airflow sensor going into our cold air, warm air, open air intakes. -Excuse you. [ Music ] [ electric ratchet humming ] [ Music ]
-Just remove the sound of the electric ratchet and then it's like we put it in with the regular one. -Correct! [ Music ] -Up next, we hit the streets to test drive our budget baller. -It's my turn to drive.
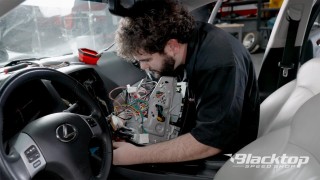
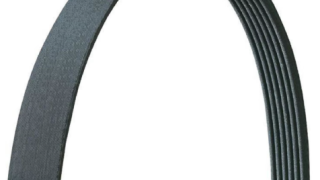
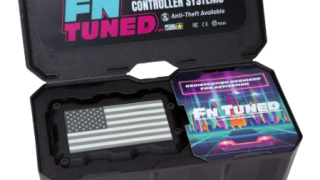
All right, now we got our coil packs installed with our new spark plugs. We also noticed that our serpentine belt has some dry rotting in it, which is something that is normal for a vehicle with 100 plus thousand miles, especially a used vehicle. So this car luckily is pretty simple to get to. It's not going to take a whole lot of hand tools. 14 millimeter and a ratchet should get her done. We're going to swap it with our Duralast belt we picked up at AutoZone. So check this out. This is what we're talking about. So sometimes some people call this charring or alligator. And some of this is okay with a serpentine belt depending on the number of ribs and how severe this is. Not knowing the maintenance history, this is out. Also make sure you get to the center of your belt with your ratchet or your tool. There it went. He zoomed in hard on that. Now we got the under hood portion completed. Pedal Commander reached out to us. They sent us this new tuner that they have. This is their new FN Tuner. It's plug and play and uses the FN Tuner app to control it so you can tuck it out of sight. So no more Velcro or mouse required. It's supposed to be pretty simple to install. So let's get it done. So it says to plug it into the throttle pedal. Female side goes here. Any electronically controlled vehicle has a delay between the go fast pedal and the actual throttle body itself. This increases the response time and decreases the lag that you feel from baseline or idle to wide open throttle. So that's what this is for. So here we go. Once again no control. So I'm going to zip tie this up here. Jason I'm gonna have you help pull me out of the dash man. -I'd rather not lay on my back and work on interior stuff. This is a job for the vertically challenged. [ Music ] -Super easy. Got some ibuprofen. Now we got to download the app. Let me get the box. -I'll be waiting. Whenever you're done let me know. -So let me pull up my FN Tuner app. Super simple to use. Swipe up to turn it on. So let's roll. The first mode, let's go. -I got my foot halfway to the ground and it's not hardly moving. -So not impressed so far? [ Music ] -You want to tell me what that is? -Yeah, next mode, keep going. [ Brian laughing ] [ Music ] -All right, dead stop. You got it on? -Yep, let's go. [ Music ] -What in the world? -I told you. So pretty amazing, right? -That was fun. I'm never messed with anything like that before. -This FN Tuner does exactly what it's supposed to do. All right, it's my turn to drive. -We set out to prove that better tone doesn't always mean more expensive. Oh, we got a BMW wants to play now. We ain't got nothing for you buddy, I'm sorry. We swapped out the factory exhaust and had to do some cutting and welding but it wasn't anything you can't get done for a few hundred bucks. -We also addressed some maintenance issues under the hood and added some FN acceleration to the throttle. We're pretty close to balling and we're still under budget. After having driven it the way we have no more money than we spent in it for our budget aspect it's perfect. -I love it. Don't forget you're in manual. You've got to shift. [ engine revving ]
Show Full Transcript
[ engine revving ] [Brian] Can we upgrade our exhaust without blowing up the budget? [Jason] We've got 48 hours to make it happen. This is Blacktop Speed Shot. We got a BMW that wants to play. We ain't got nothing for you, buddy. I'm sorry. [ Music ]
-Anytime you're working on a project you need to have an end goal in mind. Our vehicle that we chose was the 2011 Lexus IS 250. We wanted a good, solid platform with plenty of aftermarket support and affordable parts. So that's why we chose the vehicle we did. First of all, we wanted to handle stance and handling. We did that by fully adjustable coil overs all the way around. Next stopability or braking. This vehicle had the bone stock brakes on it. Don't know if they've ever been serviced. What is all this packed in here? Do you see it? -That's the forbidden pepper. -So they definitely needed some attention. We did that as well. Check. Rotors, pads, rear calipers. Next in line for us though is definitely the sound.
-And everything we're gonna be doing to this car you can do with simple hand tools in 48 hours. We're going to have a clock running the whole time so you can keep up with our progress but the clock doesn't start until the work does. -When we talk about sound improvements or upgrades there's a couple items through the exhaust system of the vehicle that we can do or change to change the tone and how our vehicle sounds. However, we're going to start with some baseline results. Bone stock exhaust, stock resonator, stock mufflers, and we have a decibel meter behind it. I got Jason in the car now. I'm gonna do a series of test. Idle, around 2,500 rpm, and around 4,000 or maybe even a rev to 5,000 to see where our baseline is. You ready? -Let's go. [ engine starting ]
-So we're currently around 54 on our decibel meter at the moment, and this is at idle as we speak. Let's go back to park and do 2,500. [ engine revving ] All right we're dead on at 65 decibels at 2,500. So that would be our baseline to compare it to in our upcoming test as we make some improvements. So let's do a couple revs maybe around 4,000 rpm. Kind of leave me some spots in between all right. -Okay. -71, 76, 71. So we're going to call it 73. We'll take an average of three. So we should be around 71 decibels at almost 4,000 rpm. So now we know where we're starting. Let's get under the car. We got a car up in the air now. So we're just gonna talk a little bit about the factory setup that we already have. On this vehicle, it is rear wheel drive. Actually, driveshaft tunnel, rear end. However, we have pre and post cats in the factory exhaust system, O2 sensors. Then it goes to a resonator in the middle, and then it splits into two separate mufflers in the rear with two tips. So our plans are what? What are our plans? -We'll replace this. -What is this? -This is the resonator. -Thank you, perfect. So we're going to replace the resonator. However we're going to do this in steps as well. So we want to see the difference in between just the resonator, what the change would be, and then with the muffler change after that. So when all else fails you don't want to unbolt it. Get the sawz-all. -That's my favorite part. I don't know what we're waiting for. -Bring it on. So we're going to also replace the resonator. The first part, because we want to leave the mufflers hanging in the factory exhaust mounts. So that way nothing moves and goes nowhere. So you're not going to cut it. -I grabbed it and then you just kept talking. -Cause you were gone to the toolbox. -Are we cutting it now? -Yes! Fine, I'll do it. -I guess we're cutting now. [ sawz-all buzzing ] [ Music ]
-So it's finally off. [ Jason laughing ] So what do you think about this resonator? Right off the bat weighs probably five pounds, maybe 10 pounds. This is nothing, right? Length wise pretty much the same. We have a very important thing to do, do we not? -Oh the unwritten rule? Now everybody knows that once you cut something off you got to see what it sounds like. Everything in front of the resonator is still there including the catalytic converters, but everything behind that is disconnected. So now we're going to see what it sounds like. [ exhaust humming ] -Dude that sounds horrible. -That's awful. -There's 96. So this is the drone that we were talking about. [ engine revving ]
-110 baby, 110! -That's actually really fun. -What a difference. Just the resonator. [ engine revving ] Now look, let's be clear. Nothing is hooked up past the intermediate pipe at this point. So no mufflers, no exhaust tips, no anything. -Just converters. -Yeah, just converters. I say we're done. -Let's button it up and let's go. -Let's go to track. Exhaust complete. -Cheap too. Up next. -Oh yeah, it's gonna work, of course. -Will we have to cut the budget to get a better tone?
[Brian] So after our exhaust sound test, by far one thousand percent improvement. [ engine revving ] 110 baby, 110! If it was up to us we'd just leave it like this. However, we want to prove that our improvements that we are doing are really going to make a difference. So keeping with our at home theme I'm going to lop this off at the end right here to fit our new resonator that we purchased. [ sawz-all humming ] We're also using regular exhaust clamps. So if you don't have a welder at home you can still do this. Now let her back. Oh yeah, that's gonna work. Put this rubber mallet right here, perfect. That was a great idea. -You got a rubber mallet? [ Music ] It's a bit at the edge of her travel. Get a little more extra next time. [ impact driver humming ] Ooh, I think I just slid it off. -Let's go ahead and snug this one up because we know it's on there, and then we can shift it. I'm doing what we would do at home. Trial and error. If you don't have a welder but I want to put this in, then how am I going to make it work? And if we don't then we can do that. I mean we have a welder. Let's do this again. Can you get over here in front of me? [ impact driver humming ] Okay, I guess we're going to weld it. So we run into a problem here installing our resonator. We tried to do it with some exhaust clamps and we thought that it would work out in our favor. However, there are some issues. So let's check this out so you understand what I'm showing. From the factory Lexus put this elbow in and staggered the actual resonator from the factory to make room for the actual driveshaft and yoke from the rear end. So it's putting our straight piped resonator in a bind trying to meet the factory weld. So we cut it off flush as we could to leave us all the pipe that we had. However, there's no where to actually clamp this to get it to seal. [ welder crackling ] [ Music ]
-Gonna see how fast I can burn through this blade real quick. -Cut heat shield and all dude. It'll eat it. [ sawz-all buzzing ] [ Music ]
-How's that for a flush cut? -Love it. [ sawz-all buzzing ] [ Music ]
It's fixing to be so loud. -Good, better than too quiet. -Let her down. It's going to be a completely different tone. It may verberate a lot differently than before. -So much tone. The chassis twisted coming off the line.
-Who says you have to spend big money to have big sound. -Nobody with a sawz-all. [ welder crackling ] That's probably as good as it's gonna get. We should probably tach the other side too to make sure the two look good together. And then we'll weld it all the way around, and then we can weld the hangers on wherever we need to to make it hang where we want to. [ welder crackling ] -Burn, baby, burn! Not bad for a 110. So we got our exhaust replaced. Deleted our mufflers. We did our resonator. Change as well on this vehicle. We're going to fire it up to see. We haven't heard it run yet. So this could go good. This could go bad. We really don't know yet. -I'm a little nervous. -Yeah, me too. I can't wait. It's going to sound amazing. [ engine starts ] -Oh, yeah. Super drone-y? Let's try 1,500. [ engine revving ] Go to 2,500. [ engine revving ] It don't sound bad at all. -I hear nothing in here. -Ramp it. [ engine revving ] Do it again. Dude, come check this out. [ engine revving ]
Can you believe it? Just cutting the mufflers off, straight pipe. -It's at 88? One more time. [ engine revving ] That's 93. -That was the limiter. -It actually sounds really good. -Yeah, super impressed. Muffler delete for the win, and it doesn't sound like a pissed off bumblebee. -I thought it was going to be really raspy. -I think it was a killer job. -I wouldn't change nothing about it. -Coming up, will our mistake cost us more than time? That worked great. -Did it? -No.
[Jason] Now that we're done with the exhaust we're going to focus our attention under the hood. We don't have any service records for this car. So we don't know what's been done, but what we do know is that it's got 112,000 miles on it. We're going to change out the plugs, coils, belts, and a couple filters just to do some maintenance on it. And to continue our theme with doing this from home, we're still going to use our tool cart with our basic hand tools that anybody can own. [Brian] Tens for everybody. [ ratchet clicking ] [ Music ] There's that. -Smell that. What do you smell? -Where? -You trust me to hold it? -Yeah dude, straight gas? -You're no fun. -Straight gas. -No fun, no fun, no fun. -Get a Lexus they said. They're easy to work on. No problem. -Who told you they're easy to work on? That wasn't me. -Easy to access everything. -The hardest part of doing plugs on this car is the fact that you have to take everything off from up top to get to anything. It's like the intake design was an afterthought after they designed the rest of the engine because the intake just kind of lays over this whole patch or driver side bank of coils and plugs. So it's not that it's hard, but it's time consuming and ridiculous. -And who in their right mind has you take the intake plenum off to change your plugs to begin with? -That's why I said I think it was an afterthought. -They just forgot. -They designed and they're like, oh man, someone's supposed to have to service this thing. Not my problem. -Somebody else will do so. Unfortunately, we had a pretty big problem that came up. We actually had a bolt on the plastic intake that the head of the Allen bolt was stripped out. It was pretty much round. So I took a torx bit of the next size up, drove it in it. However, due to all the heat and everything that's been under the hood at over 100,000 miles it was a little brittle. That worked great. -Did it? -No. We're going to put some two part epoxy on it. We're going to address it just for safe measures as we don't want it to bite us later. So I'm just gonna take some 320 grit. Use whatever grit you got at home, especially on your budget build. But I'm just gonna rough the edges up because I want it to have a good surface to adhere to. I'm going to use some 3M panel bond is what I prefer to use. However, we are out of mixing tips at the moment. So I'm going to run out a good inch and a half, two inches of material out of the end of the cartridge and it should mix enough. And then I'll stir it up to make sure it works. Remember this is a chemical reaction. This is way more than what we need but I want to make sure we've got enough to mix. Just make sure it's all uniform. We don't want a bunch of streaks and stuff in it. Make sure everything is covered and is all mixed together. Now this particular stuff right here has about a 90 minute work time. What that means is I can actually move it around and use it before it starts to dry. So I got plenty of time to put this on. I am going to try to make it look as decent as I can. However, it's just not going to be perfect no matter what we do. I will definitely not run this much material out for this small of a repair if we did have the mixing tip we needed. We'll let it sit and it'll be good to install about 90 minutes. -Duralast sent us these coil packs, and since you have to remove the intake to get to some of them we're going to just do them all. -I gotta do the old push and twist in this one. -You got to do what? -The push-n-twist. Yes! Can we do it like everybody does on YouTube and just throw it and it magically bolts itself on there? -No cause that's not how it works. -I seen it, it's on the internet. -Oh, star pattern. -Everything's hooked up, wires out of the way, check. Now all you gotta do is put the bolts in the throttle body and then plugs, right? -I think so. [ Music ] -Mass airflow sensor going into our cold air, warm air, open air intakes. -Excuse you. [ Music ] [ electric ratchet humming ] [ Music ]
-Just remove the sound of the electric ratchet and then it's like we put it in with the regular one. -Correct! [ Music ] -Up next, we hit the streets to test drive our budget baller. -It's my turn to drive.
All right, now we got our coil packs installed with our new spark plugs. We also noticed that our serpentine belt has some dry rotting in it, which is something that is normal for a vehicle with 100 plus thousand miles, especially a used vehicle. So this car luckily is pretty simple to get to. It's not going to take a whole lot of hand tools. 14 millimeter and a ratchet should get her done. We're going to swap it with our Duralast belt we picked up at AutoZone. So check this out. This is what we're talking about. So sometimes some people call this charring or alligator. And some of this is okay with a serpentine belt depending on the number of ribs and how severe this is. Not knowing the maintenance history, this is out. Also make sure you get to the center of your belt with your ratchet or your tool. There it went. He zoomed in hard on that. Now we got the under hood portion completed. Pedal Commander reached out to us. They sent us this new tuner that they have. This is their new FN Tuner. It's plug and play and uses the FN Tuner app to control it so you can tuck it out of sight. So no more Velcro or mouse required. It's supposed to be pretty simple to install. So let's get it done. So it says to plug it into the throttle pedal. Female side goes here. Any electronically controlled vehicle has a delay between the go fast pedal and the actual throttle body itself. This increases the response time and decreases the lag that you feel from baseline or idle to wide open throttle. So that's what this is for. So here we go. Once again no control. So I'm going to zip tie this up here. Jason I'm gonna have you help pull me out of the dash man. -I'd rather not lay on my back and work on interior stuff. This is a job for the vertically challenged. [ Music ] -Super easy. Got some ibuprofen. Now we got to download the app. Let me get the box. -I'll be waiting. Whenever you're done let me know. -So let me pull up my FN Tuner app. Super simple to use. Swipe up to turn it on. So let's roll. The first mode, let's go. -I got my foot halfway to the ground and it's not hardly moving. -So not impressed so far? [ Music ] -You want to tell me what that is? -Yeah, next mode, keep going. [ Brian laughing ] [ Music ] -All right, dead stop. You got it on? -Yep, let's go. [ Music ] -What in the world? -I told you. So pretty amazing, right? -That was fun. I'm never messed with anything like that before. -This FN Tuner does exactly what it's supposed to do. All right, it's my turn to drive. -We set out to prove that better tone doesn't always mean more expensive. Oh, we got a BMW wants to play now. We ain't got nothing for you buddy, I'm sorry. We swapped out the factory exhaust and had to do some cutting and welding but it wasn't anything you can't get done for a few hundred bucks. -We also addressed some maintenance issues under the hood and added some FN acceleration to the throttle. We're pretty close to balling and we're still under budget. After having driven it the way we have no more money than we spent in it for our budget aspect it's perfect. -I love it. Don't forget you're in manual. You've got to shift. [ engine revving ]
More Budget Baller Lexus Episodes
Blacktop Speed Shop Featured Projects

Blacktop Speed Shop Builds

Want more content like this?
Join the PowerNation Email NewsletterParts Used In This Episode
Vitalen Auto Performance Inc. DBA Pedal Commander
FN Tuned Throttle Response Controller