
Video Transcript
[Brian] You are watching Powernation.
[Brian] We've got 48 hours to pull, prime, paint, and install. If we don't finish in time someone's taking a sick day from work because we can't drive it. [Jason] What are you looking at? [ Music ]
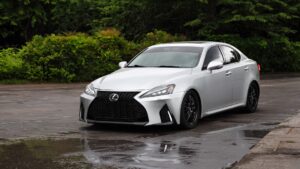
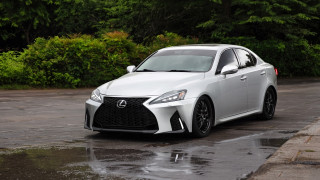
[ coughing ] -This is our new body kit that we ordered for our 2011 Lexus IS250. We ordered this a while ago. It's got a new bumper, headlights, taillights, rear diffuser, and a lot of other things that is really going to up the game but. -We got it from China. It took around three months to get here and it got confiscated in customs. So we have no idea what's in this box or if anything's broken. -Let's open the crate. You ready? Let's do it. [ Music ]
Wreck-It Ralph, calm down. -A couple of these are nailed together a little bit better than the other ones. [ Music ]
You gonna scare the tape? -Yep. -I Almost scared it with their knife and I trusted that. -Yes, it's like Christmas time. This is the rear diffuser. [ Music ]
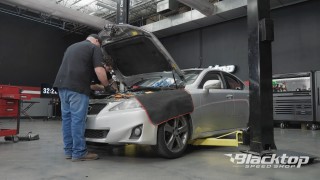
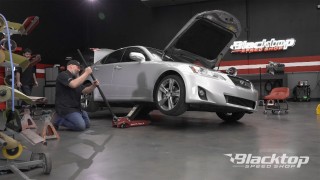
-Well everything that we ordered came in, and it looks great. We got our bumper, we got our grill, we got our wing, and we got the lights. And the lights are pre-wired. Ready for us to drop in and go. -Next step's blow apart this old stuff. Get it off the car. Pre-fit our new to make sure everything fits and looks good. Now with that we're going to do it in the floor sticking with our at home theme with a floor jack, jack stands, and our hand toolbox that you could purchase at any big box store without any specialty tools. Also, before we told you we're going to do this in 48 hours to duplicate a weekend project but with two of us we should be able to do it in 24. Let's get it. -Oh while we're working. [ drill humming ] -All right Yason. [ Music ] I just got 75 screws to get out over here. -Well I got a hole in mine from the wheel rubbing it. So that's cool. -If you see something like this on yours you know this is not factory. We've got the 200 mile an hour zip tie over here as well. -No way. The special UV resistant, high speed black ones. -So if y'all can see this, this is not factory as well, and this is not its first rodeo in the collision facility for sure. That one's bent all the way up and then tore through the cover too. That should come loose from the fender liner. You shouldn't have to take them out. -Do you even need me down here anymore? -That should be it. -Never mind, I'm moving it back where it was. -So these are special. They're supposed to have rubber fasteners around them like this for the grill, and that one's missing it. That's just another indicator that something has happened to this at one point or another. That is not a factory. Other than fog light wiring we should be able to pull back on it. So if you grab it from the side. Pull back like this. Just barely do it and it should come right out. -Are you kidding me? -Makes sense why it won't work. -So that means someone was in there. -Also, just a couple of dead giveaway things, right? You won't find grease pencil, Posca marker, or anything like that on factory parts of a vehicle. So this means something LKQ, or like, kind, and quality, has been used from a salvage yard. So this vehicle has been in an accident at some point or another in its life. [ Music ]
See all this? Dead giveaway man. -That's nice. I'm pretty sure the Carfax said it was clean. -It only gets reported if you report it. Not bad. Pretty quick too, right? -What's now? -Plug in some headlights. [ Music ]
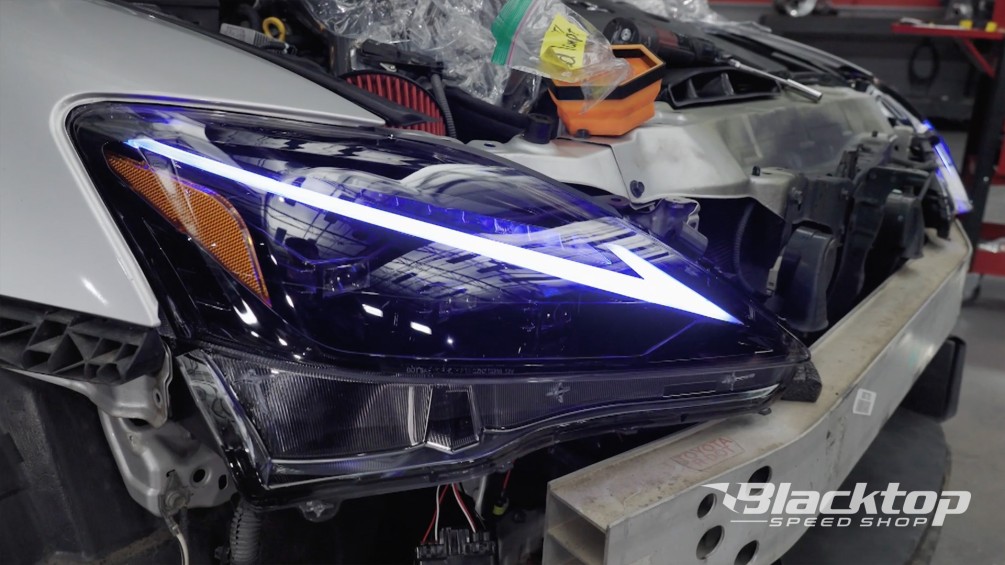
This comes from China as well. So don't forget that. So everything may or may not be exactly where it needs to be. Mainly we just want to see them light up so we know they're good. [ Music ]
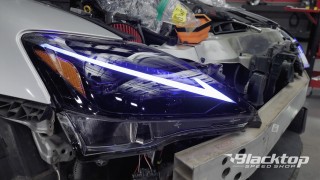
-Yep, high beams and low beams. Whoa, they changed color. Hold on a second. Stand right there. First of all, that looks really good. -Yeah, it's pretty awesome looking honestly. -Low beams, there's your high. Keep watching them. -Dude they chase. -Watch. -No freaking way dude. -I don't know why it turned blue but it turned. -Let's go! That is badass. -I don't know why they change color like that. I wonder if there's an app that we can download for this. That is cool. -Pretty sick my friend. Well at least we know they work. -Razor blades and regret. We trim down our new grill and if we cut too much we'll blow the budget.
[Brian] So after our first initial trial fit we see we have some pretty significant changes right off the bat and some trimming that we need to do. So I'm doing a comparison right now so everybody can see this firsthand. You can see the differences actually in the bumper itself. So I'm gonna take these clamps. They're laid bottom to bottom. I'm just going to do this so it holds it together so you can see the placement of it is exactly the same as the other bumper. So we definitely got to do some fabrication with that. However it's plastic. So heat can do a lot for you as well as a razor blade or any kind of cutting device. Initially we're going to go through and cut this tab that goes under the headlight just like we talked about a second ago. There is a place that comes down lower than the flat portion. So we need to get rid of that because it will not fit in our bracket. And that's what's holding it out at the lower headlight portion right off the bat. So take a simple razor blade and we're gonna get it cut. [ Music ]
This guide right here is really going to help that saw a lot, especially with it flapping up and down. [ saw buzzing ] [Jason] And it was not fun. -Tech talk. -Brian and Jason. Welcome to my Ted talk. If it doesn't look like it belongs there cut it off. -Let's talk about butter sausage. Let's catch you up to date where we're at. So we had everything on the vehicle. Got it all fitted. We did some trimming that we needed to on the brake ducts that were in the front and the under shield to make everything sit like we wanted it to. We went ahead and removed everything. Got it all ready to scuff, to shoot for our paint job. Next we've got a couple of dents we've got to address. We are going to glue pull these. The hood is aluminum as well. So this is the least invasive method that we can do. So you know we chose the glue pull method because we want it to be less invasive and we have aluminum hood too. So natural conventional repair would be grind to bare metal. You would stud pull it if it was steel. However aluminum you know most people glue pull it. If you could afford one of these kits. I'm sure they sell them aftermarket places, at any store or online store. This is definitely the way to go. So for ease of use and quickness of repair. So this is a kind of a no brainer for me. It's like that booger you could never get out. It just keeps going and going and going. -Maybe a little too much glue. -I got it. -What are you looking at? -Look at the. -Is that how it's supposed to look? It looks great Brian. I'm so glad. -That means so much coming from you. -Impressed with how it turned out, I really am. -This is a lot better option than the alternative of having to sand, grind, wipe. It takes a little bit more time on the front end but saves you a lot of prep work. First time I've ever used a glue pool, not going to lie. So impressed so far. That's crazy. Still flat on the face. Once you have bumpers you should be scuffing.
-I do. I've got a lot of dents in my truck thanks to awesome drivers around Nashville, Tennessee. -Wow. [ Music ] -Does it matter if I do swirls, change directions, straight line fine? Does it matter? -No, it doesn't really matter. We're going to seal it anyway. But just whatever you do, make sure it looks pretty uniform. Just not shiny. -Okay? -All I know is conventional body repair. If I can do this I'm pretty sure anybody can do it. Maybe not you. -That's a bold statement. -Most people could do it. But I am thoroughly impressed so far. -All I'm doing here is scuffing this a little bit to get the shine off from it. All I know is paint don't stick to shiny, and the only reason I know that is because Brian told me that. -Like I said earlier, the hood is aluminum. So therefore you can't weld to it unless you have aluminum welder with aluminum studs, so on and so forth. So now I'm just trying to glue pull this dent that's in the middle of the hood on the body line right here. Hoping for some relief without having to grind it, wipe it, fill it, prime it, and do all that. So that's why we're trying this first. Definitely the quickest, easiest method before we really have to get down and dirty with it. So you know nothing? -I know absolutely nothing. In one ear, out the other. Do what Brian says. Don't do what I do. -If you could get the same results as Brian is getting right now, you definitely, definitely need to do this because this is so much easier. -I've messed around with Bondo in college but it wasn't on a car. -Those college experiments. -My college experiments were different than yours. I don't know what you were going through. -Not only is this getting the glue residue off of my panel I'm working on, it's also cleaning the bacteria out of my cut on my finger simultaneously, which is outstanding. -Feels fantastic don't it? -Yes. [ hammer light tapping ] Tapping the crown down. When something pushes in it creates a crown outside of it like a swimming pool. So you pull it from the middle. The crown's still up too. So now you got a mountain in the middle and a swimming pool on the outside. So you got to flatten that out. You know what I mean? -Why don't you tell the American public. Why don't you tell the people what that's actually called Brian. What have you been calling that? -This is called paintless dent repair, sir. -No, sir. What's that crown that you're talking about called that you've been saying to me? Why don't you go ahead and tell everybody what that's called? -I sure will. It's called a high and a low spot in the hood that you can visually see. -Oh, so close. You could have just laid it out there. [ laughing ] The point of no return. We don't nail the paint job the first try we'll never finish on time.
[Brian] So we need to address some things here. You know, we said earlier we were using the glue puller and it was working out for us. However, it did not give us the complete finish that we're looking for. So I am going to have to go through and skim coat a couple spots. But don't get this wrong. This saved us a ton of time without intruding on our factory corrosion protection and saved us time in the long run for the light amount of filler that we're going to have to put on here. Matter of fact, I'm going to use metal glaze only. So it's not going to be a thick coat. It's just going to be a skim. But I'm gonna hit this with some 320 and it'll expose what I'm talking about. You know what's key, pressure of the d/a, the layout of the pad, how you have it against the panel. All of this comes into play. Go ahead and hit these rock chips too. Once again I don't want a bunch of rings in the hood that I've got to prime out. So I'm just going to razor blade and wipe these rock chips but I do want something for it to stick to. I'm letting the tool do the work and the grit of the paper is actually doing the cutting. So I'm literally just holding it on the spots that I want. Works good. [ d/a humming ] As you can see right here this rock chip, and it's still got paint around it. So therefore I wasn't gouging it or going back and forth like this? I kept moving the d/a around. Now it's just as simple as a little wipe with the razor blade and we're good to go. [ d/a humming ]
Now we could spend the time and make sure everything is covered. This is a used car. It's a budget build. So don't forget that. I'm not saying skip over everything, but this is not a Barrett-Jackson auction car or a SEMA build. So we're getting what we need to get to make it look good. Just remember 320 was the single stage solid color. You're not just gonna base over that. It ain't going to happen. [Jason] When you say single stage like that do you mean like tractor paint? Is that the same thing? -Base and clear all in one? -It's like hanging your kid an unplugged Xbox controller. How about that? -I really don't know what the hell y'all are talking about. -Snowrunner is about running in the snow and Mudrunner is about running in the mud. [ Music ] I just want to see if you'd catch it. I was testing you. -He usually just watches it until it gets hard on there. And then he's like, well. -I just did the edges on the top of the fender here and around the headlight. You told me to scuff it. All I did was scuff it. I have no idea if I'm done. That tells me I'm doing something. Something's coming off. -Now that we got our Lexus all prepped, primed, and blocked, we got it ready to paint. You could do this in your own garage. However you want to be able to control your environment, your air pressure and contaminants that are around you. So, Tom at Mobile Environmental Solutions sent us this booth right here. So this booth does all of that. It's also EPA certified. You could use this booth outside if you wanted to but luckily we have enough space in our studio to use it. So therefore we're going to get this done. Next step, get some sealer on the car. [ spray gun hissing ] [ Music ]
Keeping our budget down isn't just about parts. We rigged up an LED light so I could see when I was spraying. Two base coats, two clears, one day. I couldn't afford to miss anything. [ spray gun hissing ] [ Music ]
[ spray gun hissing ] [ Music ]
[ spray gun hissing ]
-No lights, no drive. We make a break towards the finish line as we make these taillights shine. -Oh my God that is badass dude.
[Brian] Well, what do you think? [Jason] Speechless guys. I can't believe it. -We chose to take it a little further than what you might want to do at home. There's no reason this car couldn't have had the headlights in it, the black front bumper, the black fog lamp bezels, and drive the vehicle and be happy. -By myself I would have left it black and drove it and then blown it back apart to paint it. -Enough talking about all this. What's the next steps? -Put it back together. -Genius. I want to get this done so we can see it. -Don't forget the wire. -What wire? -Are you taking notes? -I hear it. Next step, build the bumper. A good tip, glass cleaner works good for your plastic clips. If for some reason you experience some rigidity you can spray glass cleaner on it. It'll evaporate but it does lubricate it enough to actually push it together and get everything to snap. For the marker. -Should we pull that tape out a little bit on the headlights so don't get stuck in there. -You can, or you can just go on and take it all the way off. Just don't scratch the headlight. It even looks new now with just the headlights in it. Don't scratch it. -I'm going to try not to. -That means you're gonna do it. [ drill humming ] -You have an extra set of hands? -Fits like a glove that's too big. -It's like a completely different car. What year is this supposed to be? -2024. -I believe it. -Could we make it fit better? Sure, if you want to spend 30 hours or whatever cutting, bending, and heating, flexing, all that. But for a bolt on ready to go weekend project can't beat it. So not only do we have a front upgrade kit that we've already finished, looks phenomenal, but we also have a rear taillight upgrade to go with our ducktail spoiler that goes on the trunk and our rear diffuser. Full LED strip across the trunk, two sequential taillights. Everything works in unison. Can't wait to get it done. It's key to take care of these clips and do not flex them, bend them, and break them, okay? -Okay. [ drill humming ] -I'm done. [ Music ]
-She's strong. -I'll just let you scratch it. -What year is this, '11? So that's 15 years of two sided tape goodness? -What do we do? -Lay it on the floor. -On the floor. -So we're using the eraser wheel to get the two sided tape remaining off before we put our new ducktail on. However, I want to mount the taillights in it because that's a good stationary point to judge how far down on the trunk lid we're going to put the spoiler. But I want to get all this off first. [ drill humming ]
-I am. Gonna be my belt buckle. -I'll just keep cleaning, that's fine. You do that. -There you go sir. [ Music ]
Well everything is done. Put in the new taillights. Third brake light. Also trunk lights. Everything's ready to go and fitted. Next up, let's turn them on and see what they look like. -Hit it! I like sequential lights. -Oh my God that is badass dude. Let's do the brake lights. That is bright. It don't even look like the same car at all. This is something that you could definitely do this too and flip and make some money. -It's supposed to be an '11. -Yeah, I'm still baffled at how good everything fit, with no trimming. -I wish every car had update kits like that. -Well we proved once again in 24 hours this time though what we could do and still go to work. -Our goal was to update this 15 year old Lexus for around five grand to look like a 2025, and now that everything's on it I think it looks pretty good. -We did stay on our budget and we did everything we were doing in less than 24 hours over a weekend long. So we fulfilled everything that we talked about at the beginning. -But we're not done. We've still got wheels and tires and some audio upgrades to do. After all that we're gonna take it out for a drive, or we can just drive it now. -I'm ready. Let's go.
Show Full Transcript
[Brian] We've got 48 hours to pull, prime, paint, and install. If we don't finish in time someone's taking a sick day from work because we can't drive it. [Jason] What are you looking at? [ Music ]
[ coughing ] -This is our new body kit that we ordered for our 2011 Lexus IS250. We ordered this a while ago. It's got a new bumper, headlights, taillights, rear diffuser, and a lot of other things that is really going to up the game but. -We got it from China. It took around three months to get here and it got confiscated in customs. So we have no idea what's in this box or if anything's broken. -Let's open the crate. You ready? Let's do it. [ Music ]
Wreck-It Ralph, calm down. -A couple of these are nailed together a little bit better than the other ones. [ Music ]
You gonna scare the tape? -Yep. -I Almost scared it with their knife and I trusted that. -Yes, it's like Christmas time. This is the rear diffuser. [ Music ]
-Well everything that we ordered came in, and it looks great. We got our bumper, we got our grill, we got our wing, and we got the lights. And the lights are pre-wired. Ready for us to drop in and go. -Next step's blow apart this old stuff. Get it off the car. Pre-fit our new to make sure everything fits and looks good. Now with that we're going to do it in the floor sticking with our at home theme with a floor jack, jack stands, and our hand toolbox that you could purchase at any big box store without any specialty tools. Also, before we told you we're going to do this in 48 hours to duplicate a weekend project but with two of us we should be able to do it in 24. Let's get it. -Oh while we're working. [ drill humming ] -All right Yason. [ Music ] I just got 75 screws to get out over here. -Well I got a hole in mine from the wheel rubbing it. So that's cool. -If you see something like this on yours you know this is not factory. We've got the 200 mile an hour zip tie over here as well. -No way. The special UV resistant, high speed black ones. -So if y'all can see this, this is not factory as well, and this is not its first rodeo in the collision facility for sure. That one's bent all the way up and then tore through the cover too. That should come loose from the fender liner. You shouldn't have to take them out. -Do you even need me down here anymore? -That should be it. -Never mind, I'm moving it back where it was. -So these are special. They're supposed to have rubber fasteners around them like this for the grill, and that one's missing it. That's just another indicator that something has happened to this at one point or another. That is not a factory. Other than fog light wiring we should be able to pull back on it. So if you grab it from the side. Pull back like this. Just barely do it and it should come right out. -Are you kidding me? -Makes sense why it won't work. -So that means someone was in there. -Also, just a couple of dead giveaway things, right? You won't find grease pencil, Posca marker, or anything like that on factory parts of a vehicle. So this means something LKQ, or like, kind, and quality, has been used from a salvage yard. So this vehicle has been in an accident at some point or another in its life. [ Music ]
See all this? Dead giveaway man. -That's nice. I'm pretty sure the Carfax said it was clean. -It only gets reported if you report it. Not bad. Pretty quick too, right? -What's now? -Plug in some headlights. [ Music ]
This comes from China as well. So don't forget that. So everything may or may not be exactly where it needs to be. Mainly we just want to see them light up so we know they're good. [ Music ]
-Yep, high beams and low beams. Whoa, they changed color. Hold on a second. Stand right there. First of all, that looks really good. -Yeah, it's pretty awesome looking honestly. -Low beams, there's your high. Keep watching them. -Dude they chase. -Watch. -No freaking way dude. -I don't know why it turned blue but it turned. -Let's go! That is badass. -I don't know why they change color like that. I wonder if there's an app that we can download for this. That is cool. -Pretty sick my friend. Well at least we know they work. -Razor blades and regret. We trim down our new grill and if we cut too much we'll blow the budget.
[Brian] So after our first initial trial fit we see we have some pretty significant changes right off the bat and some trimming that we need to do. So I'm doing a comparison right now so everybody can see this firsthand. You can see the differences actually in the bumper itself. So I'm gonna take these clamps. They're laid bottom to bottom. I'm just going to do this so it holds it together so you can see the placement of it is exactly the same as the other bumper. So we definitely got to do some fabrication with that. However it's plastic. So heat can do a lot for you as well as a razor blade or any kind of cutting device. Initially we're going to go through and cut this tab that goes under the headlight just like we talked about a second ago. There is a place that comes down lower than the flat portion. So we need to get rid of that because it will not fit in our bracket. And that's what's holding it out at the lower headlight portion right off the bat. So take a simple razor blade and we're gonna get it cut. [ Music ]
This guide right here is really going to help that saw a lot, especially with it flapping up and down. [ saw buzzing ] [Jason] And it was not fun. -Tech talk. -Brian and Jason. Welcome to my Ted talk. If it doesn't look like it belongs there cut it off. -Let's talk about butter sausage. Let's catch you up to date where we're at. So we had everything on the vehicle. Got it all fitted. We did some trimming that we needed to on the brake ducts that were in the front and the under shield to make everything sit like we wanted it to. We went ahead and removed everything. Got it all ready to scuff, to shoot for our paint job. Next we've got a couple of dents we've got to address. We are going to glue pull these. The hood is aluminum as well. So this is the least invasive method that we can do. So you know we chose the glue pull method because we want it to be less invasive and we have aluminum hood too. So natural conventional repair would be grind to bare metal. You would stud pull it if it was steel. However aluminum you know most people glue pull it. If you could afford one of these kits. I'm sure they sell them aftermarket places, at any store or online store. This is definitely the way to go. So for ease of use and quickness of repair. So this is a kind of a no brainer for me. It's like that booger you could never get out. It just keeps going and going and going. -Maybe a little too much glue. -I got it. -What are you looking at? -Look at the. -Is that how it's supposed to look? It looks great Brian. I'm so glad. -That means so much coming from you. -Impressed with how it turned out, I really am. -This is a lot better option than the alternative of having to sand, grind, wipe. It takes a little bit more time on the front end but saves you a lot of prep work. First time I've ever used a glue pool, not going to lie. So impressed so far. That's crazy. Still flat on the face. Once you have bumpers you should be scuffing.
-I do. I've got a lot of dents in my truck thanks to awesome drivers around Nashville, Tennessee. -Wow. [ Music ] -Does it matter if I do swirls, change directions, straight line fine? Does it matter? -No, it doesn't really matter. We're going to seal it anyway. But just whatever you do, make sure it looks pretty uniform. Just not shiny. -Okay? -All I know is conventional body repair. If I can do this I'm pretty sure anybody can do it. Maybe not you. -That's a bold statement. -Most people could do it. But I am thoroughly impressed so far. -All I'm doing here is scuffing this a little bit to get the shine off from it. All I know is paint don't stick to shiny, and the only reason I know that is because Brian told me that. -Like I said earlier, the hood is aluminum. So therefore you can't weld to it unless you have aluminum welder with aluminum studs, so on and so forth. So now I'm just trying to glue pull this dent that's in the middle of the hood on the body line right here. Hoping for some relief without having to grind it, wipe it, fill it, prime it, and do all that. So that's why we're trying this first. Definitely the quickest, easiest method before we really have to get down and dirty with it. So you know nothing? -I know absolutely nothing. In one ear, out the other. Do what Brian says. Don't do what I do. -If you could get the same results as Brian is getting right now, you definitely, definitely need to do this because this is so much easier. -I've messed around with Bondo in college but it wasn't on a car. -Those college experiments. -My college experiments were different than yours. I don't know what you were going through. -Not only is this getting the glue residue off of my panel I'm working on, it's also cleaning the bacteria out of my cut on my finger simultaneously, which is outstanding. -Feels fantastic don't it? -Yes. [ hammer light tapping ] Tapping the crown down. When something pushes in it creates a crown outside of it like a swimming pool. So you pull it from the middle. The crown's still up too. So now you got a mountain in the middle and a swimming pool on the outside. So you got to flatten that out. You know what I mean? -Why don't you tell the American public. Why don't you tell the people what that's actually called Brian. What have you been calling that? -This is called paintless dent repair, sir. -No, sir. What's that crown that you're talking about called that you've been saying to me? Why don't you go ahead and tell everybody what that's called? -I sure will. It's called a high and a low spot in the hood that you can visually see. -Oh, so close. You could have just laid it out there. [ laughing ] The point of no return. We don't nail the paint job the first try we'll never finish on time.
[Brian] So we need to address some things here. You know, we said earlier we were using the glue puller and it was working out for us. However, it did not give us the complete finish that we're looking for. So I am going to have to go through and skim coat a couple spots. But don't get this wrong. This saved us a ton of time without intruding on our factory corrosion protection and saved us time in the long run for the light amount of filler that we're going to have to put on here. Matter of fact, I'm going to use metal glaze only. So it's not going to be a thick coat. It's just going to be a skim. But I'm gonna hit this with some 320 and it'll expose what I'm talking about. You know what's key, pressure of the d/a, the layout of the pad, how you have it against the panel. All of this comes into play. Go ahead and hit these rock chips too. Once again I don't want a bunch of rings in the hood that I've got to prime out. So I'm just going to razor blade and wipe these rock chips but I do want something for it to stick to. I'm letting the tool do the work and the grit of the paper is actually doing the cutting. So I'm literally just holding it on the spots that I want. Works good. [ d/a humming ] As you can see right here this rock chip, and it's still got paint around it. So therefore I wasn't gouging it or going back and forth like this? I kept moving the d/a around. Now it's just as simple as a little wipe with the razor blade and we're good to go. [ d/a humming ]
Now we could spend the time and make sure everything is covered. This is a used car. It's a budget build. So don't forget that. I'm not saying skip over everything, but this is not a Barrett-Jackson auction car or a SEMA build. So we're getting what we need to get to make it look good. Just remember 320 was the single stage solid color. You're not just gonna base over that. It ain't going to happen. [Jason] When you say single stage like that do you mean like tractor paint? Is that the same thing? -Base and clear all in one? -It's like hanging your kid an unplugged Xbox controller. How about that? -I really don't know what the hell y'all are talking about. -Snowrunner is about running in the snow and Mudrunner is about running in the mud. [ Music ] I just want to see if you'd catch it. I was testing you. -He usually just watches it until it gets hard on there. And then he's like, well. -I just did the edges on the top of the fender here and around the headlight. You told me to scuff it. All I did was scuff it. I have no idea if I'm done. That tells me I'm doing something. Something's coming off. -Now that we got our Lexus all prepped, primed, and blocked, we got it ready to paint. You could do this in your own garage. However you want to be able to control your environment, your air pressure and contaminants that are around you. So, Tom at Mobile Environmental Solutions sent us this booth right here. So this booth does all of that. It's also EPA certified. You could use this booth outside if you wanted to but luckily we have enough space in our studio to use it. So therefore we're going to get this done. Next step, get some sealer on the car. [ spray gun hissing ] [ Music ]
Keeping our budget down isn't just about parts. We rigged up an LED light so I could see when I was spraying. Two base coats, two clears, one day. I couldn't afford to miss anything. [ spray gun hissing ] [ Music ]
[ spray gun hissing ] [ Music ]
[ spray gun hissing ]
-No lights, no drive. We make a break towards the finish line as we make these taillights shine. -Oh my God that is badass dude.
[Brian] Well, what do you think? [Jason] Speechless guys. I can't believe it. -We chose to take it a little further than what you might want to do at home. There's no reason this car couldn't have had the headlights in it, the black front bumper, the black fog lamp bezels, and drive the vehicle and be happy. -By myself I would have left it black and drove it and then blown it back apart to paint it. -Enough talking about all this. What's the next steps? -Put it back together. -Genius. I want to get this done so we can see it. -Don't forget the wire. -What wire? -Are you taking notes? -I hear it. Next step, build the bumper. A good tip, glass cleaner works good for your plastic clips. If for some reason you experience some rigidity you can spray glass cleaner on it. It'll evaporate but it does lubricate it enough to actually push it together and get everything to snap. For the marker. -Should we pull that tape out a little bit on the headlights so don't get stuck in there. -You can, or you can just go on and take it all the way off. Just don't scratch the headlight. It even looks new now with just the headlights in it. Don't scratch it. -I'm going to try not to. -That means you're gonna do it. [ drill humming ] -You have an extra set of hands? -Fits like a glove that's too big. -It's like a completely different car. What year is this supposed to be? -2024. -I believe it. -Could we make it fit better? Sure, if you want to spend 30 hours or whatever cutting, bending, and heating, flexing, all that. But for a bolt on ready to go weekend project can't beat it. So not only do we have a front upgrade kit that we've already finished, looks phenomenal, but we also have a rear taillight upgrade to go with our ducktail spoiler that goes on the trunk and our rear diffuser. Full LED strip across the trunk, two sequential taillights. Everything works in unison. Can't wait to get it done. It's key to take care of these clips and do not flex them, bend them, and break them, okay? -Okay. [ drill humming ] -I'm done. [ Music ]
-She's strong. -I'll just let you scratch it. -What year is this, '11? So that's 15 years of two sided tape goodness? -What do we do? -Lay it on the floor. -On the floor. -So we're using the eraser wheel to get the two sided tape remaining off before we put our new ducktail on. However, I want to mount the taillights in it because that's a good stationary point to judge how far down on the trunk lid we're going to put the spoiler. But I want to get all this off first. [ drill humming ]
-I am. Gonna be my belt buckle. -I'll just keep cleaning, that's fine. You do that. -There you go sir. [ Music ]
Well everything is done. Put in the new taillights. Third brake light. Also trunk lights. Everything's ready to go and fitted. Next up, let's turn them on and see what they look like. -Hit it! I like sequential lights. -Oh my God that is badass dude. Let's do the brake lights. That is bright. It don't even look like the same car at all. This is something that you could definitely do this too and flip and make some money. -It's supposed to be an '11. -Yeah, I'm still baffled at how good everything fit, with no trimming. -I wish every car had update kits like that. -Well we proved once again in 24 hours this time though what we could do and still go to work. -Our goal was to update this 15 year old Lexus for around five grand to look like a 2025, and now that everything's on it I think it looks pretty good. -We did stay on our budget and we did everything we were doing in less than 24 hours over a weekend long. So we fulfilled everything that we talked about at the beginning. -But we're not done. We've still got wheels and tires and some audio upgrades to do. After all that we're gonna take it out for a drive, or we can just drive it now. -I'm ready. Let's go.