Trucks! Builds

Parts Used In This Episode

CanDo Specialties, Inc
Mini Caddy tail lights.
Custom Classic
Spring loaded door poppers and door latch actuators.
Grant Kustoms
Taillight filler panel, front corner filler panel, door handle filler panels, tailgate panel with integral roll pan, smooth front bumper.
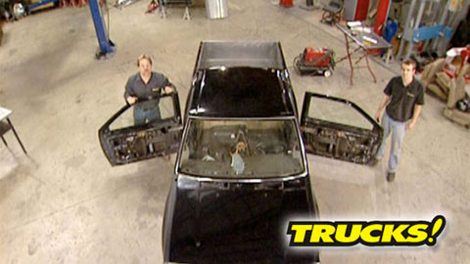
Suicide Doors.com
Door Hinge kit.
Summit Racing
Heavy duty battery disconnect.
The Little Shop of Horrors
Relocation of air and gas tank, tailgate panel install, custom bed floor and tub.

Video Transcript

Today, we're committing suicide with body bag, suicide doors. That is,

we'll show you how to give your truck some cool reverse opening doors. And we'll also show you how to french tail lights

and we'll take a trip to Valve's

oil research labs to watch them test oil in ways. You won't believe that's all today here on trucks.

Hey, welcome to trucks. You remember this one? Well, in case you don't, this is project body bag. Our slammed 97 Nissan hard body that'll lay out the frame while it's tuck in 20 inch wheels and mini trucks are everywhere and some of the workmanship.

It's pretty amazing. So we wanted to do something that had never been done on trucks before. Build a wild mini truck that'll drag all day long.

So we

took a bone stock, hard body chopped a six lug axle off the back and added a Toyota five lug two wheel drive axle for better wheel and tire selected. Then we fabricated a triangulated four link with huge sea notches for maximum axle travel. So we could lay frame no matter what wheels we had out front. We used can do customs upper lower control arms with Toyota drop spindles and ball joints to match the bolt pattern out back.

But to let us roll on twenties, we needed to create some room on the inner aprons and firewall

and use a smaller geometric brake booster as well as utilizing pathfinder front fenders for more room in the wheel opening.

Also, we could throw an air system on this truck and drop it into the weeds

once the fabrication was done and we wired up the switches,

we drag it up and down the highway for the better part of a day. It hammered on it pretty hard.

But whatever we threw at it, it could definitely take it.

So with the suspension done and having proven itself to be roadworthy, it's only right that we deck this truck out with some custom body work and finish what we started.

So we're gonna give body bag all kinds of custom body minds like shaving the door handles, we'll give it roll pants, we'll fill in the light pockets. But one thing that we're gonna show you guys how to do is something that's been around hot rodding since hot rodding began. And even before suicide doors.

Now, there are several theories on how suicide doors got their name. Some say it's because of the

door were to open while the car or truck is moving. Your natural reaction is to grab the door and try to close it. And if you're not belted in, it could literally pull you right out of the car when it caught the wind.

And another theory, if a driver is getting out of his car on a tight city street with the potential is there to get sideswiped. You can imagine the consequences,

but it didn't stop the car manufacturers from making vehicles like Lincoln's and Mercury. As a matter of fact, they're still making reverse opening doors. Mazda Rolls Royce F 150 Silverado.

They all have suicide doors. And if they were unsafe, the great custom car builders like George Barris Ed Roth and Gene Winfield, well, they still incorporated them into their classic custom designs.

Another custom builder, Eric Saliba

of the little shop of horrors gave us a hand the first time around with some of the fabric on body bag. Eric and the crew have come through again big time with a custom bed floor, smooth tailgate and obviously the reverse changes on the passenger door, Eric, this looks great, nice work man. Thank you.

But there's more to it than just the skin.

So we loaded Eric up with a camera last time he was here, he set it off in the corner and captured what it takes to get to this point. Check it out.

The first thing Eric and the boys did was to relocate the fuel tank compressors and air tank between the frame rails.

Then they created a framework of rectangular tubing in the bed

and fabricated a huge tub to go over the axle

side and floor panels were cut from 18 gauge steel and a fuel door was liberated from a Chevy truck.

They pulled the bed off again to mark the braces and everything was drilled and then welded in place using over 100 and 50 rosette welds. Finally, the welds were ground flush and any gaps got smoothed with sealer.

That's about all I take. Yeah, that about 80 hours worth of work. No kidding. And

that's all custom fab work. But you guys used a kit on the passenger side door. That's right. This comes from suicide doors.com. These are the receiver tubes, the strikers, the latches,

the recesses and these heavy duty hinges and using the kit like this stops you from having to reverse the factory hinges. Really makes it simpler, doesn't it? Exactly.

Well, let's do it

now before you get punchy, start taking things apart. Remember, your doors need to stay on for alignment,

but these interior trim panels, they gotta go away.

The inner structure behind the door needs to be trimmed for clearance around the new hinges.

The hinge pockets need to be perfectly parallel. So using a length of 5/16 all thread, the pockets are bolted together with jam nuts.

The location is marked from the outside

and trimmed until the pockets slide in from behind the door jam.

Everything gets tacked just to hold it in place. Once your pockets are located

the all thread can come out

and the hinges get bolted onto the receivers.

Now that Eric's got the hinges located, the next step is to take the recesses and attach them to the door. And the easiest way to locate them properly is to bolt them to the hinges.

He closed the door on the hinges

and just trace them out from the backside.

Cool. Now that we got these in place, we pull the factory pins up front and then tack these back in place.

Here's where you're going to need a buddy. Eric holds the door while Kevin knocks the hinge pins out. Now, the hinges are still mounted on the door and frame which locates the door perfectly while the recesses get tacked into their new home.

All right, give it a try.

Cool.

We're halfway home.

When we come back,

we're going to Valve's

engine facility to watch them test their newest oils by punishing them around the clock day and night

and later we'll show you how to make your suicide doors pop. Literally,

stay tuned.

Hey, welcome back to trucks. We're

dipping the body bag, throwing some custom sheet metal mods at it like that suicide door kit. And by the time we're through, this will truly be a custom truck through and through.

Now, body work aside, this was a good running truck. And if you follow this pro,

you'll realize that we hadn't done anything to the engine. This thing runs like a top and that's with 100 and 72,000 miles on it.

The long life of an engine has a lot to do with the quality of the motor oil used in it. So, if you've ever wondered how engine oil is developed and tested well, you might find this interesting.

The trend is to blend specialty oils even for high mileage applications like our Nissan.

To check out how this is done. We headed to Kentucky home of the valve

facilities.

They developed the first motor oil, the first multi viscosity oil and the first racing oil all designed to solve different problems

today with six out of 10 cars having 75,000

miles or more. The challenge is designing one for high mileage engines

to make that happen. Oil engineers have a lot of ingredients to consider.

He has to select what types of base oils. What types of detergents, dispersants, anti

oxidants, anti wear agents, friction mo

fires a whole array of different components that have different functions

as prototypes are blended. A team of chemical engineers subject them to a battery of punishing tests, boundary friction, cold, cranking levels, viscosity flow high and low shear, pumping rates,

four points,

spectrographic analysis and heat loss. This is an

A S MD 58 evaporation loss test and we use it for max like to determine the evaporation loss in engines.

And just when you think this lab testing can't get tougher,

it does

vain

is the only oil company with its own engine test facility that can qualify passenger car oils,

whether it's oil for air and liquid cooled motorcycles or marine testing for coast guard patrol boats,

nothing gets approved without passing some extreme and unique engine tests.

Adam Schwarz

dyno

test competitor oils on an Acura RSXS turbo

at just 3500 RPM and only four pounds of boost.

The 1300 degree egt the oil cokes wiping out the turbine bearing

Tim Pale

studies. The effect of high mileage oil on fuel economy using chassis dinos

and a pair of ex Michigan police cars 24 7,

these 4.6 L crown vic interceptors burn through thousands of gallons of gas testing. Max like formulations looking for improved fuel economy.

Currently, they're probably up in 100 and 60

170,000 mile range. Designing the world's first high mileage. Oil took two years

because we took older cars, older engines, we inspected older engines to see what they needed. They needed seal swell, they needed improvements in oil consumption,

they needed deposit removal.

We formulated that

to meet those needs

while the American Petroleum Institute created the test to beat the oil. These guys formulate oils to beat the test.

The engine facility runs around the clock, administering, punishing a STM tests

everything from low temperature cam warre hot and cold sludge tests, valve seal testing and viscosity tests.

And after all that testing,

this is where we break down the engines and analyze the results.

Parts do fail but most survive for detailed analysis.

This is what the piston looks like before we put it in the engine.

This is what one looks like after 100 hours of running.

The brutal and expensive G three piston test costs $45,000 to run each time.

It measures a different oil for a varnished blow by.

It takes a skilled eye to measure 20 different oils day in and day out.

Now, this is what we're looking for

when the oil's right.

We have very little deposits.

A sequence. Eight test uses this special one cylinder engine to test different oils for rod

bearing wear.

This is the rod out of that engine. We're gonna measure it for bearing weight loss

after 40 hours at 3150 RPM. Dave Capone uses a digital scale to determine exactly how many milligrams of bearing wear occurs with each oil tested.

These tests may be constant but with engine technology changing, constantly formulating and testing newer, better specialty oils is a never ending process. It's exactly like painting the Golden Gate Bridge.

Once you're finished, you go back to the other end and start over again.

Up next. It's remote control door poppers for body bag

and we're gonna shave the door handles.

Hey, welcome back to trucks. Project body bag is on the table getting autopsied and suicide doors are the word of the day,

Eric

Seib is sticking around to help us out. And so far today, we've gotten the suicide door hinges done on the back. A little bit of reinforcement in place and everything roughed in. Now it's time to put the latches in. Now where the center pool used to be on these doors makes a nice location for these bear cloth style latches that came with the kit.

So these will mount here, the striker mounts on the hinge pillar,

it's locked into place when the door closes and it's all released

with a cable pole. Now, over here on the passenger side with the latch installed and the cover plate welded in, here's what you'll end up with.

And since we're shaving the outside door handle, we're going to use a technique that car builders have been using for decades. So we had custom classics.com send us this actuator kit that includes key fobs, this control unit and these door poppers that'll kick the door open when the latch is released. Using these 50 pound solenoids,

we've mounted our spring loaded coppers in the front of the door frame where we had a strong piece of flat metal on the door to push against

the actuator gets mounted at a 45 degree angle to the latch in the bottom corner of the door.

Now don't use pop rivets or sheet metal screws to mount it. They can back out and loosen over time.

Our cable length is measured with a piece of wire with the latch and actuator in the door.

Now, pulling the latch and actuator out of the door makes this a lot easier. And then you can install the supplied cable and crims

using the wire as a guide factor in about a half inch of slack and then crimp the cables, then the whole assembly goes back into the door.

The actuator is grounded to the chassis by bolting it in

and only needs a single wire with a 12 volt source to activate it.

Sweet

with the door trimmed and the cover plate tacked in

Kevin attaches a cable to the latch for a temporary release and installs it into the door.

Eric lays down a final tack on the striker

and we're ready to test the alignment.

Is that it? Yeah,

cool. All right, you're on your own now, man. Thanks for your help. All right,

if you're doing custom body work, you need to be pretty confident in your welding and fabrication skills. Well, grant customs makes this easier by providing custom sheet metal for you. Bob Grant grew up around custom cars and hot rods started Grant customs in 1995 has been popping out hand formed custom sheet metal for all kinds of vehicles ever since. Now, these pieces that we've got in front of us are handmade for our Nissan hard body and they include these marker light fillers, a three piece tail light filler kit

a smooth front bumper,

door handle inserts if you're shaving your handles like we are and a tailgate skin that incorporates the tailgate

and a custom roll pan for a nice, smooth look. But now let's talk about door handles.

This insert is designed to sit inside the factory recess and get welded in for a nice flush fit. But you know, if you've ever done any welding on sheet metal, especially on an import,

you stand a pretty good chance of warping the sheet metal with your welder. So I'm going to show you some techniques that are going to help you minimize your warpage, but you can't weld to paint.

Now, even though we're just welding around our insert, the heat from those welds is going to draw the sheet metal in below and above the handle. So we're going to brace it with some heavier stock and that's going to stabilize the metal and keep it from drawing in with the heat.

Now, we sped this process up. But the important thing to remember is to let your welds cool between tax. So you don't force distortion into the metal

after the break.

We like French dressing on our tail lights

and then for just a buck, we'll show you how to fix a leaky door. Stay tuned.

Hey, welcome back.

We're doing custom sheet metal work to body bag. Eric

Saliba has already installed the Grand Customs tailgate and roll pan skin,

but we wanted to change out the lame factory tail lights for something cooler. So we had can do custom send us their new mini Cadillac tail

light kit.

It comes with one piece stamped fillers, recess led tail lights and your choice of clear or red brake lenses. Now, the cool thing about a custom truck so you can put things anywhere you want.

We're gonna put ours right about there

with the light frame traced out. Brighton uses a four inch wheel for a nice straight cut,

a carbide bur rounds out the corners from the inside.

Then the light frame can be slid into the filler panel.

This technique is traditionally known as branching

Ryan's tacking from the inside so that when the outside of the frame is ground flush, the weld strength is not compromised.

Now, with the light branched in the insert gets tacked to the body about every two inches

and the led tail light gets a test fit.

That looks great. D

sweet.

Well, there you go. We've showed you some custom body mods, you could apply it to just about any vehicle.

Now, all we gotta do is spend another couple 100 hours welding, smoothing, priming and blocking no body bag. Here is gonna be ready for some custom paint.

Hey, here's something for you guys that are heading out to the race track. Something you definitely want to consider. This is Summit's new high amp main power disconnect switch. This is a rotary on off switch that can handle 250 amps continuously. And a 2500 amp surge

even comes with its own mounting bracket. We're going to mount ours right near the A pillar. Well, within the reach of the driver and safety crew members and for just 50 bucks, it might save your hide.

If you've ever had an annoying wind or water leak in a late model vehicle. Here's a way to fix it. This is one going to cost you a buck. Open your door, throw your dollar bill in between the door frame

and the weather seal. Now, you should encounter a little bit of resistance,

but you can see as we travel a little further up, it, it's sloppy. So we've identified where our leak is. Now, here's how to fix it.

Now, make sure your windows open, but brace your door frame with your knee. Grab a hold of the window frame. Give it a couple of tugs,

put your dollar back in.

There you go.

Leaks fixed. Thanks for watching trucks. See you guys next week.
Show Full Transcript