Trucks! Builds

Parts Used In This Episode

Auto Body Color & Supply Co.
Materials provided for preping and painting.
Banks Power
Power P-D-A and software can clear trouble codes and recalibrate for oversized tires.
Banks Power
Six Gun Diesel Tuner that has six power levels and can add up to an extra 128 horses and up to 345 more pound feet of torque.
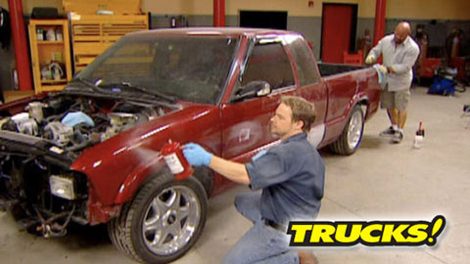
Chevrolet Performance
350 Performance Crate Engine.
Koul Tools
AN fitting installer.
LMC Truck
Body panels, air dam, grill and roll pan.
LMC Truck
Dash trim kit and billet pedal covers.
PPG
Viper Silver paint.
PPG
S-X 10-60 rollable prime.

Video Transcript

Today, we're finishing project S

10-K

by showing you how to fix rusty spots without a welder.

Then we'll prep for the paint booth

and shoot at some cool color.

It's all here today on trucks.

Welcome to trucks. Hey, guys,

if you remember, we put a $10,000 budget on our S

10-K project.

The good news is

we're on the home stretch and we've got this thing breathing fire with its new GM performance crate 350 engine.

So far we've spent 7710 bucks and that has bought us a 320 horse four bolt main small block,

a TB I induction,

a set of headers, a shift kit and a torque converter to handle the power of our new VA. We also got a twofour drop kit to get the stance that we were after.

And the 17 inch wheels and tires really set off the whole look.

The cow hood along with the twin 12 inch pusher fans will keep her cool on the road

and the new exhaust makes it sound like a real muscle truck.

Now that we've got our S

10-K running like a champ.

It's time to make it look like one. Now with the cost of the truck, we've got 1300 bucks left over. Yeah, because a paint job alone can run into tens of thousands of dollars for a high end restoration job. Heck, the tools alone for body work can totally

out the whole budget. We've set aside for our s 10. A good welder starts at about 800 bucks. But

what if I told you guys that we can show you a way to fix those rusty cab corners for about 100 and 50 bucks. That's materials, patch panels, everything and you don't have to buy a welder

and you could do this in your driveway

if you think that sounds too good to be true.

Get a pen and paper and take some notes and

these cab corners are rotten, which is pretty common in trucks. And over the years I've seen some seriously cheesy repairs happen. I'm talking about newspaper and steel wool stuffed up in the hole and then the whole mess mudd it over, but we're not gonna cheese out here and you shouldn't cheese that at home. So, here's the plan today. We're using panel bonding adhesive. This stuff's got a 3700 pound tinsel strength.

Now, that's about as strong as a weld only with a lot more consistency.

A good welder will run you about 800 bucks,

this adhesive, about 30 bucks.

Now, this stuff's not new. Matter of fact, it's been around for a long time and a lot of your professional body shops, they use it,

but you can't just slap your patch over top of the rust,

whether you're gluing or welding. There's some simple rules that you gotta follow first things first. You have to determine where the rust stops.

So we'll grind the surface to bear steel

mark out where your patch will be. Then cut it with a cut off wheel,

cut at least an inch past where you find solid metal and cut carefully because you're making a template,

transfer the template to the patch panel,

then trace it out

carefully, cut it out of your panel

because you don't want to ruin the surrounding metal.

I'll show you why in a minute

trim your piece. So you got about 1/16 of an inch all the way around. Good. We got a nice fit,

but we're gluing this in. There's nothing for it to stick to tell them what to do. Paul,

you're gonna wanna go back to the patch panel and measure an inch outside your cut out

and then you wanna carefully cut those pieces out.

These are what's gonna keep your patch in place.

There you go. Thanks.

That's right. Paul's just fabricated these backing plates that will give our patch something to sit on and the glue something to stick to. Now, this allows us to create what's known in the welding world. As a butt joint or butt weld. And this is usually tons harder to create than this was right here.

Let me go r

those up.

All right.

The adhesive we're using really needs some tooth to bite into.

So we're using 50 grit, sandpaper to grind down the pieces. Make sure we get a good strong bond.

Yeah.

This part of the repair has to be prepped just like the backing panels. So I took a fiber wheel,

ran it on the inside, followed it with 40 grip by hand.

Give it that nice tooth that we need now a way to check that. So the flashlight and the inspection mirror, you can just go all the way around

and see what you've done, make sure it's prepped right

one last bit of work to do. So

we wanna bevel this edge. So the burr or the sharp metal edge doesn't show through your primer and your filler

a

huge advantage to using adhesive bonding

is that it comes in several different dry times. I'm talking from 30 seconds all the way up to over an hour

and that should give you plenty of time to set your patch.

Thank you.

We're using a one minute set time for our repair here. Now, one thing you wanna make sure and do

is set your panel clamps to where they've got the right amount of tension you don't want too much tension because it could force the adhesive out from between the two panels and sacrifice your bond strength.

I'll run a 38 inch wide bead along the part to be glued,

use a throwaway brush to spread it evenly,

then clamp it into place, leaving a half inch overlap for the patch to sit on.

Then just do the same all the way around.

Let it sit for about 10 minutes

and then get rid of the excess with a fiber wheel or a grinder.

And then you're ready for the patch.

You can use sheet metal screws or magnets to hold things steady while the glue kicks.

And again,

don't worry about the excess that's gonna get squeezed out of the edges.

There's gonna be plenty of time to deal with that

cool. Let that set up a little while. About enough time for us to take a break. Yeah.

And when we get back from break, we're gonna show you guys how to fix those patches and get that thing under primer without a spray gun or a compressor.

You're not gonna wanna miss it

after the break. We'll smooth our patch down and use a primer that really is easy to apply.

Hey, welcome back. We're doing low buck rust repair that you can do at home. And we're one step closer to transforming this boring ass pan into an awesome looking street machine.

Yeah. Now that we've got the rust taken care of in her cab corners, it's time to get her to look as good as her newfound power. All we gotta do is seal it up and throw some primer on it.

The panel glues had plenty of time to sit. Now, we gotta grind this out of the scene.

You don't wanna use fillers over the excess glue. It won't stick anywhere

and it'll probably show through your repairs.

Just grind it out with a stripping disk or a sander.

Next, we will use some fiberglass filler to fill in the seam we've created. First, we have to prep the whole surface with 50 grid to give it the proper tooth. It needs tooth means deep scratches for your filler to grab onto

without it. Your filler could just fall out.

I'm using a ribbon of hardener over my filler.

This is a safe way to get enough catalyst in the mix without getting too much.

Now, we'll let that dry, which should take about 10 minutes

after that. I use 80 grit paper on a hand block to level it out.

Polyester filler is much finer than the fiberglass and will give us a smooth level surface to prime and block her paint

Bondo gets a bad rap sometimes. But when you use it properly and no more than a quarter inch thick, it'll last the life of the vehicle and probably a lot more.

Taking your time on the metal work makes all these steps a lot easier.

This filler is really finishing putty

and sets up quick.

You can feel it and tell if it's ready to sand by using a little pressure with the fingernail.

When it feels solid, it'll probably powder nicely when you block it down.

I'll start with 80 grit and just shape the top.

We got everything to prep and paint our truck from a good friend at auto body color and supply and it only cost us about 350 bucks.

We'll use a little powdered guide code to see our high and low spots,

then switch to 100 and 80 grid to finish blocking for primary.

Now it's prime time.

Normally you'd mask up the truck suit up and spray the primer on.

But this,

you just roll it on.

This is ppgssx 1060 rollable primer.

It's easy to use, but

don't be a mad scientist use the recommended ratio of four parts primer to one part hardener

then blend together.

This is not just a metal coating. This is a primer

surfer which is designed to be sanded and leveled

after it dries.

Most spray primers will end up at about 4 to 6 millimeters thick after three or four coats.

This stuff is no different.

All right,

this primer

takes a few hours to dry in the open air,

but

10 minutes if you've got one of these infrared cure lamps.

So

while you guys take a break, we're gonna go ahead and finish up the body work and get this ready for the paint job.

Oh, yeah, that looks good.

When we come back, we're sanding down the truck, wrapping it up and sneaking in the muscle cars, paint booth.

Hey, welcome back

where we are so close to throwing some color on our S

10-K. Now, if you're just joining us so far today, we've done some low buck rust repair. We've primer the body work without using the spray gun and now we're ready to prep it, paint it and put it all back together.

That's right. So now we can finish these panels which start

with blocking the primer. That's the last stage of your body work and it gives you one more chance to check your work.

You wanna choose a block that fits your panel and the size of your repair, this

block is gonna be just about perfect. Now, Paul's been using a dry guide coat that's gonna show me where the high and low spots are. It gets sanded off the high spots and stays in the low spots and will reveal any deep scratches that might have gotten left behind.

I'm using 220 grid here, which is aggressive enough to level my primer surface around, but it's not so aggressive that I'm gonna have to re prime to sand for final paint.

Kev's using a cross blocking technique or an X pattern to evenly block the panels.

You don't wanna use too much pressure here, just let the sandpaper do the work.

But once your guide code is gone. You're ready to move on to the next step.

Then clean your truck with a wax and grease remover. Because after an engine swap like ours,

you don't want to contaminate your paint by leaving engine fluids on the sheet metal.

We're gonna scuff the finish so we can paint the truck from the belt line down.

Now, we can finally start finishing the sanding process. I'm using 600 grit paper on ad a sander and I'm just hitting the flat spots

with the flat parts of the panel sanded with 600. Now, we're gonna use a scuffing pad inside this crevice. You don't wanna use ad A because it's flat and it can't conform these, you can bend them around and put them inside the gullies and the gaps.

Now, we're not painting the whole truck. We've said all along our paints in decent shape, but we got to cover up our primer spots. So we're gonna save a little cash by two toning it here at the belt line. Now, what I'm using here is 1500

that's gonna give me enough tooth for my paint to stick, but it's gonna leave me some freedom to lay my line wherever I want to and have a little fun with it.

All right. Now that we've wiped it all down again, got all the dust off. It's time to mask it up.

We've seen a lot of these s tens split at the belt line and it looks good, but

we're gonna go a little further and Kev's gonna do something really cool.

We waited until Lou and the guys left the muscle car shop. Then we snuck into their booth to shoot our truck.

You wanna choose your colors before you get to the paint booth.

I did a spray out of silver and pewter. Both colors will look good, but we're gonna stay with the silver because it's gonna match our wheels real well.

My first coat is a clear base coat.

This will act as a sealer and fill in any scratches that might show through the color.

After about five minutes of flash time, we're ready for color.

What Kevin's technique? He's using a 50% overlap on each pass down the truck.

This makes sure that the metallic color is even and streak free.

This color would take about three coats to cover completely

and then I'll lay down some color on our cow hood

after the break. It's the final touches on our budget street truck project. Stay tuned.

Hey, welcome back. We're so close to the finish line. I can taste it. So now we got a few details to take care of and rub out the paint.

Yeah, and then it's time to put the final touches on our S

10-K project.

The rest of our body panels come from L MC truck. These are affordable boltons

that make a dramatic difference. In the look of our S 10,

like our hood. These are also nice enough to scuff and shoot and fit in place just like the original parts

and a roll pan from L MC is actually a GM factory stamped panel. Even the screw holes line up.

This two tone paint

looks awesome,

but there's still something missing.

That's right. What Paul is talking about is an accent stripe between our two colors. That's pretty common in a custom paint job. What you usually do is pay a guy several $100 to come out and put lines on your paint job. But this roll of pinstripe tape about 12 bucks, but you gotta use it right.

Pull enough striping so you don't have to hold the roll while you're working,

then stick the end of your stripe to the edge of the panel and pull off enough paper vacuum to stripe the whole panel

gently stretching. The tape

will give it tension and ensure that your line is straight.

Once you're comfortable,

then you can start getting creative.

The tape has two stripes and that's pretty common, but you don't have to use both. I'm pulling one of the stripes away with the cellophane backing to create my own design.

I created this graphic in the paint by cutting a checkerboard pattern in five stripes of quarter inch fine line tape and removing every other square before we sprayed it.

I'll just use the black tape as an accent

with the exterior done. We're gonna spend a few bucks on the inside

and with the stainless steel inserts,

it's really gonna set things off in here.

We got these trim pieces from L MC truck

where we also got these cool billet pedal covers,

got it all done inside.

We're gonna let this paint dry for a couple of days and after next week's show, we're gonna do exactly what you guys always ask us to do. That's right.

We're gonna run this thing through the mill and that'll be the payoff for our project. S

10-K. You don't wanna miss it. I'm not gonna miss it.

Check it out.

This is B

six gun diesel tuner.

It has six power levels and can add up to an extra 128 horses and up to 345 more pound feet of torque to your diesel.

If you want to go to the next level, you can actually use a power PD A as your six guns in cab interface using bank software.

You can use the PD A to switch between the different power levels.

It can also clear trouble codes and recalibrate for oversized tires.

The six gun,

it's gonna run you a little over 1000 bucks.

The power PD A around 250

cool tools has come up with a great system that takes all the pain out of attaching A and fittings to braided stainless lines. Truly simple. You pop your fitting in to the box

mounted in the vice

lube, the end

and then just twist it in a place.

What you end up with is the finished product. All you do is thread the rest of the fitting in and you're done. It's that simple. These come in all the popular sizes and a set of three starts at about 70 bucks. Thanks for watching trucks.
Show Full Transcript