HorsePower Builds

Video Transcript

That's good. Just roll it on back.

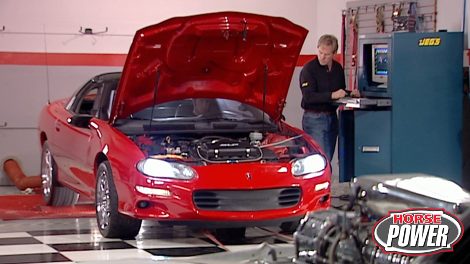
Hey, the Ls gun is back and we're gonna be shooting for more horsepower. Welcome to the shop. Now, you gotta remember our 98 Camaro there. It's an Ls One powered Camaro that we call the Ls gun.

Well, the reason we got it is because that motor is such a popular platform for all kinds of performance modifications.

Now, shortly after we got it though, we found ourselves troubleshooting the engine for a strange noise in there and of course to do that.

Well, we had to pull the engine now with a Camaro like that,

you just don't pull a motor from the car.

You actually pull a car from the motor check this out.

After loosening all the connections, the engine and cradle dropped out from underneath

later. While disassembling the engine, we discovered a spun rod bearing.

So we sent everything out for machining

and reassembled it including a balanced rotating assembly.

Then we added a crane roller cam and valve train,

CNC ported heads

and a new fast composite intake.

Later, we bolted on a new center force 11 inch clutch.

Then we reinstalled the engine in trans again from under the car.

And after that, we bolted up a fast 78 millimeter throttle body to match their intake

on its last dyno Jet run. The LS gun fired off an impressive 368 horsepower

at the rear wheel.

That's not bad at all. But today, we're aiming for much higher numbers and part of their plan to get us there.

It's in the palm of my hand. This is Crane Cam's new power max power tuner. And this thing is full of new technology for a handheld, not only does it increase stock settings up to 30 horsepower, but also let you get the most out of modifications like intake exhaust and even ignition.

Here's something else for you to think about before you begin the reprogramming process, you wanna make sure that your battery has a full 12 volts,

otherwise your car's computer won't accept those new parameters. Now, we found out about that the hard way because our original battery went down on volt. So we're replacing it

with this new yellow top here from Optima. Now, this thing's got 870 cranking amps. Now, that's some pretty good advice. Now, you know, the modifications we've done to our LS one are a little more than the stock computer wants to handle. So this tuner is gonna help us out first by changing the fuel curve

along with the timing curve and rate of spark advance

plus the idle speeds and shift points for the automatics. Now, this thing will also allow you to adjust for different tire sizes and gear ratios. Let's see what kind of power this tuner is gonna make.

Wow, 381 horsepower, we're off to a good start, but we're still a long ways from being finished for the day. Now, all along, we've been talking about bolting on a super charger on the old Ls gun here. But hey, what if today instead we go for a little modification that'll give us the most bang for our horsepower buck when it comes to making big power on a small budget. Well, spray is the only one way to go. You see with nitrous oxide, there aren't many modifications to make and the installation time doesn't take near as long.

In fact, you can install one of these performer ef I nitrous kits from Edelbrock in just about three hours. Now, this is a dry kit that'll give us between 80

100 and 25 horsepower. Now, what's the difference between a dry and a wet system?

Well, here's a little animation we put together to help you understand a little better

in a dry nitrous system, nitrous oxide is injected separately through a nozzle into the incoming air charge.

There, it interfaces with a stock fuel system

and fuel flow to the injectors is increased when the system is triggered

in a wet system, one direct port style nozzle injects both nitrous and additional fuel metered by tuning jets into the incoming air

in a direct port system.

Each intake runner has its own direct port style nozzle that injects nitrous and additional fuel into the incoming charge.

A dry system like the one we're using is a lot easier to install in a wet system because you don't have to plumb that additional fuel source.

Now, the car's computer is actually gonna tell those injectors to deliver more fuel once the nitrous is kicked in. But we still wanna make sure that we get some extra fuel up to the injectors

to do that.

We're gonna install this in tank pump from

Edelbrock. This thing's rated at 67 gallons per hour. Now, here's a little tip for you.

If you get in the fuse box here and remove the fuse for the fuel pump,

go ahead and start the engine until it dies and we let them get rid of all that extra fuel in the system.

Remove the tank by first dropping the exhaust,

then remove the heat shields

and the patter bar assembly.

Then after removing the straps and disconnecting the fuel lines, you can lower the tank

to get to the fuel pump. We first need to remove this retaining ring.

Then the pump pickup and sending unit come out as an assembly

and replace the old pump with the new.

Once I tighten up this hose, I can take care of the electrical connections and then this whole unit can slide in as an assembly.

Now, while you take a little bit of a break, we're gonna get the tank back in there. And when we come back, we're gonna bolt this silver bullet and the old Ls gun there.

Hey, welcome back to the shop before we both that nitrous skin up to the LS gun. I just got to show you a closer look at this 67 Nova here

built by our buddies. At year one, they started with a pro Max Venom fiberglass body that was chopped, channeled and

voted to a tube frame.

The engine is a 620 horse version of the 572 from GEO performance parts fed by a sheet metal intake with AD F I fuel injection set up

that also controls the prototype coil per cylinder ignition.

Now this showpiece is no trailer queen.

It recently completed the power tour rolling on Colorado custom rims with

NTO radio rubber

on the inside. This thing's tricked out all the way

with a full leather interior, custom fiberglass console and an entertainment package that has to be seen and heard to be believed.

Well,

I believe that it's time for us to get back to work on our nitrous installation starting of course with these nitrous solenoids. Now check this out. I've already preassembled both of these using fittings and the bracket from the kit. Here.

Here's a little tip for, you always use Teflon paste rather than tape here on the tapered fittings. And the reason for that is because a piece of that tape could break off, get in the system and actually interrupt the flow of nitrous. Now, we're gonna mount this thing up here on the radiator support using a pre existing hole right here. Now, the reason for that is because ultimately, we're gonna plumb our nitrous nozzles right here in the air box.

After marking the nozzle locations on each side of the box, go ahead and remove it.

Now, you can drill a couple of 7/16 holes.

Now you can install the nitrous collar

into the air box lid.

But next, you can reinstall the air box, then screw the nitrous nozzle

into the collar,

then we can insert a jet into the nozzle.

Finally attach the line from the nozzle down here to the t fitting on the solenoid.

Once that's done,

cinch them down,

the kit comes with this fuel pressure safety switch that reads the fuel pressure in the system and shuts down the nitrous

solenoids if it falls below a preset limit. Now, I've already moved the Schrader valve from the fuel rail where the switch installs. And once we get this thing tightened up, we'll go ahead and install the micro switch on the throttle arm.

I had to modify the bracket that retains that switch with an S bend. Now, we can go ahead and bolt it to the intake

after tweaking on the bracket. I made sure that the throttle blade makes contact with the micro switch only at wide open throttle.

Now, I can go ahead and wire up the system. We're gonna mount this bottle back here in the cargo area. Now, before drilling holes, make sure you're clear of any brake lines, fuel lines or other interference underneath.

I also drilled a hole for the nitrous line and I'm connecting this into the bottle.

The other end of course goes up to the engine compartment.

By the way, if your bottle is mounted in the passenger compartment, like ours, be sure to install the safety blow down tube that comes in the kit.

When you run your nitrous line, be sure to secure it away from heat, rotating objects or suspension parts.

I'm gonna finish up this installation by tightening the feed line from the bottle

up here to the solenoids. Now, I want you to take a look at a few options that'll help you get the most out of your system.

This bottle heater will help maintain a constant temperature and pressure to give you a consistent flow.

And the blanket will help retain the heat and insulate it from the sun coming through the hatchback.

And finally, there's a nitrous gauge that'll help you accurately monitor the pressure in your bottle.

Now, speaking of that, I guess the pressure is on us to see how much horsepower we can make.

Now remember we're gonna go conservative on this first run with our 80 horse jets,

man, 443 horsepower and look at the torque.

Ok, let's go all the way with our 125 horse jets,

man. Look at that 37 more horsepower and 60 more foot pounds of torque.

All right. What about a quick recap on how far we've come today?

The Camaro came in with a baseline of about 368 horsepower and we bumped that to 381 with that power max turner. We got 423 with our 80 horse jets and the nitro set up and, well as you saw four 160 horsepower with the 125.

Now, that's a grand total of 92 rear wheel horsepower that we made today and

we could get more if we had time to tweak on this thing.

Oh, by the way, the cost for the boss

is just under 1200 bucks. Well, stay with us. When we come back, Chuck's got a tip on how to upgrade that distributor. Your muscle car. You don't want to miss it.

You know, when it comes to firing off a healthy muscle car motor, some of you just don't get the point.

In fact, this week's quick tech is all about going pointless. Now for years, virtually all automobile manufacturers have been using electronic ignitions.

They deliver rock solid reliability with a lot higher output than a point type distributor like this one.

Surprisingly, these setups are still in use today, especially in classic muscle cars. But a popular upgrade is swapping in a later model electronic piece like this G Mh E I.

Now, in most cases, it's a simple drop in with a single 12 volt connection, all that's required to get it up and running.

But as good as that upgrade is there are some drawbacks for one.

Well, there just may not be enough room at the firewall for this large body distributor.

Plus if you're restoring a car, well, you definitely don't wanna lose that all original look. So why don't we take a look at a way to get the best of both worlds with electronic conversion kit from PROT TRS that'll fit right inside your original distributor.

After removing the distributor from the engine,

you can also remove the rotor points, condenser vacuum pod and the factory wiring

then slip the magnet ring over the shaft

and insert the studs

through the rotor retaining holes.

The rotor goes on next

loosely secured by the nuts supplied in the kit.

You can follow up by installing the igniter two module. Now it's held in place with the same screws that held the points in.

Now you can adjust your air gap, make sure you check it for 10 to 60,000 between the module and the magnet ring.

The kit also includes spacers for the magnet ring and the distributor shaft to help you get the clearance you need.

Once you've got them tighten the rotor and the module then feed the wires through the opening in the base of the distributor

and reinstall the vacuum can.

Well, that was pretty simple. Huh. Now, all we have left to do is slide this gromit up into place, cut the wires to the appropriate length and then crimp on our connectors.

Oh And to connect this system up. Well, that's pretty simple too. You just connect the black wire to the negative side of the coil and the red one to the positive side.

Now, the protonic system works best with coils that are rated at 6/10 of an or better. So we're gonna use their flamethrower two coil. Now, this thing just requires 112 volt hook up here and it eliminates the need for any ballast resistor

or resistance wire.

Now, here's something else that's really cool about this, set up the igniter to automatically adjust the dwell time to compensate for engine RPM s and engine load. Now, it does this by sensing the current level inside the coil and of course, the ultimate result is a hotter spark at high RPM and fewer misfires. Now,

while you're upgrading the guts of your distributor, it's also a pretty good idea to make sure the rest of the system is equally up to the task.

Patrons

also offers a match cap and rotor kit to ensure full spark delivery. Now, these are molded from high alky

material with solid brass inserts and close internal tolerances between the rotor and the plug terminals. So what you get is maximum energy transfer with minimum resistance. Now, they're available with either male or female plug

connectors. Speaking of plug wires, you've definitely got a choice here too, depending on your preferences. Now, if you're going for the stock restored, look, you definitely want to check out the seven millimeter black plug wires. But if high performance is the name of your game, well, then you wanna take a look at these eight millimeter red wires. Either way they both use stainless steel alloy winnings as the main power path. Plus they both use high temp silicone sleeves and only have 500 ohms of resistance per foot.

So

there you have it, this whole exercise has been kind of pointless, wouldn't you say? But that's been the purpose. Now, you can enjoy the benefits of high tech electronics without giving up the look of that. All American muscle.

You know, my partners are always telling me to pipe down, but now here's a cool and easy way to get your exhaust system to pipe out.

It's the exchange crossover kit from pipes performance exhaust that allows you to convert your street set up to a straight exhaust path for the strip.

Now, thanks to the universal fit, it'll work on almost all headers for an increase of up to 15 horsepower.

It's available in 2.5 and three inch sizes. Plus you can get it aluminized or with an optional ceramic coating. Now, prices start at under 100 and 90 bucks.

Now you big block four guys can start bridging the gap in performance with Edel Brock's new performer RPM. Air gap for 429 and four sixties. Now, it's designed with extra long runners that are separated from the hot engine heat resulting in a cooler denser air charge. Now you can also run standard or cobra jet cylinder heads and this thing makes maximum power and torque from 1500 to 6500 RPM.

They recommend it for high performance street or marine applications. The coolest thing you don't have to be a performer or put a big air gap in your wallet with a price at 330 bucks.

Chances are your brake booster uses engine vacuum to increase stopping power. But if you have a high overlap cam, it may not generate enough, especially at lower speeds. The solution could be this new hydro booster from power brake service

that uses pressure from your power steering pump to generate up to 2000 P si at the brake calipers. Now standard mounting flange boats up to most engine firewalls for a neat appearance and plenty of clearance around the valve cover. They also have a frame mounted version for street rides so you can put a stop to your braking problems. Price is starting at about 485.

Well, no stopping us from bringing you a great horse power next week. We'll see you then.
Show Full Transcript