HorsePower Builds
Want more content like this?
Join the PowerNation Email NewsletterVideo Transcript
Hey, whether you like vintage muscle or the latest in high tech horsepower, you've come to the right place today
today on horsepower TV. How do you build 1000 horse engine that runs on pump gas? We'll take you through the latest in monster motor technology
and we'll start popping up our budget Honda with a new intake, high flow header and free flowing exhaust system before strapping it to the dyno
check.
So hang on for horsepower TV.
Hi, welcome to the horsepower shop back in the beginning of the muscle car craze. It didn't get any better or better than this 65 trip powered goat. Now, right out of the box, this Pontiac cranked out 360 horsepower from 389 cubic inches.
What's more it kind of set the pace for a horsepower race? All the manufacturers got involved in
today. That race is still being run but now the aftermarket has gotten involved. Now for years, names like
Arias Milo Don and Rode
have been supplying blocks mainly for the racing industry. But can you imagine a brand new engine displacing up to 1000 cubic inches and get this? It'll work just as well on the street as it does. The strip.
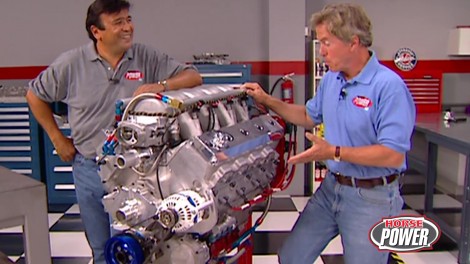
Yeah, this monster Motor is the brainchild of all star engines out of Oshkosh Wisconsin. And what started out as a way to power up offshore racing boats has evolved into a platform that has possibilities for everything from drag racing to tractor pulling. And if you're nuts enough to try it, you could drop one of these between the frame rails of your favorite Chevy. Well, like one of my Chevelle, why not?
Here's what makes it all work. Now, the block has a standard Chevy Bell housing pattern and motor mount locations. Plus the header
FLS are right off of a big block. Chevy. Now, the crank two is also configured to accept a standard Chevy fly wheel.
Now, what do you say? We take a look at the All Star block compared to a GM performance parts +502, which a lot of us still consider to be a pretty large engine.
The All Star block is cast in aluminum and uses these iron wet sleeves with bores ranging from four and three quarter inches up to five inches. Now, to accommodate those big bores, the centers had to be moved out to 5.4 inches. And of course, the blocks also been substantial,
essentially stiffened with additional ribbing right here in the Lifter Valley.
Plus the crank is supported with these cross bolted steel billet caps. Now, speaking of the crank, it's a steel billet piece with three inch mains, a center thrust bearing and a one piece. Chevy rear seal.
The crank pins use a standard
hemi rod dimension with a 125 rolled filet and radius oilers. Now, it's 708 cubic inches. That crank has a five inch arm, but with a little bit of machining right here in the bottom end. Hey, a six inch is gonna fit
man. Check that block is armed and dangerous and just check out what else is inside.
The pistons are forged aluminum flat tops that give a nominal 9 to 1 compression. But you can special order, reverse ones like this for supercharged applications or raise domes to get the ratio you need.
Now they hang on eight inch billet I beam rods with a bronze bush floater on the small end
and 7/16 cap screw fasteners here on the big end.
Now, motor, this big needs specially designed heads to make big power. The intake boards measure a massive two and three quarters by two and 18 inches. And the valves, well, they spec out at 2, 400 on the intake two inches on the exhaust side,
they're housed inside 1 54 cc combustion chambers that have been C and C machine to make them nice and smooth like this. And each is surrounded by six half inch studs. Of course, the extra thick deck promotes good ceiling and gasket clamping.
Wow, those valves are huge. Now, here's a look at the camshaft that it takes to move those monsters.
It's a steel billet, hydraulic roller for reduced friction and to work with those massive valve springs. Now, to reduce friction even more, this camshaft spins inside a full set of roller bearings and well, the roller theme is carried even to the rocker arms which are an amazing 2 to 1 ratio. Of course, they're shaft mounted
for improved stability and they work with a set of 716 push rods
to reduce flex. Now, if you're saying to yourself, hey, that stuff looks like it belongs on a race car. You're absolutely right. A
lot of similar hardware is found on many of the nation's top running pro stalkers.
Yeah. And here's something else borrowed from the pro stockers to keep this bad boy lube that uses a five stage dry subsystem with a fabricated aluminum pan.
Why a dry subsystem? Well, not only does it ensure adequate oil supply but allows for different pan configurations for different chassis,
even though a push rod engine might be considered low tech. Well, the electronics used to fire off this beast are definitely high tech. The control module is a stand alone unit that controls both the fuel delivery and the ignition timing and well, eight stand alone coils fire off the incoming fuel charge for each cylinder. That fuel charge is managed by a pair of 1000 CFM throttle bodies. One at each the end of the plenum.
Now, the plenum also mounts eight high flow injectors that are matched to the engine's fuel requirements. Oh, by the way, these extra long runners here, well, they're engineered to promote mixture velocity and increase low end torque. Hey, did you say torque? Well, how does 800 ft pounds at only 2500 RPM hit you?
Well, how about 1000 ft pounds of torque at only 4000 RPM?
Now, the best part of the whole deal though is that it does it on pump gas
and with relatively tame cam timing. Well,
with torque like a semi truck, you gotta be wondering by now, how much horsepower does this thing crank out? We strapped a 708 cubic inch version to an engine
dyno recently where it grunted out 880 horsepower at a tractor like 5300 RPM.
Now, that's a pretty impressive number, but
there's a whole lot more potential left in this.
And if you recall, it'll go out to 1000 cubic inches plus with more C
A
compression and, well, maybe a little bit of head work. I think this thing could generate enough power to peel the pavement right off the road, you know. Yeah, if you could hook up all that power, I still think we ought to drop one in your Chevelle though. Uh, after you drop about 30 grand to get one. Well, I've got a grand idea. How about I provide the car and you provide the engine.
I got a better idea. Let's take a short break and when we come back, we're gonna think small.
Wow, 3500 bucks. And hey, the body doesn't look too bad. I wonder how the rest of it looks.
Last week we bought a $3500 Civic to kick off our budget Honda build up
next. We'll see how much horsepower we make with a new intake,
a high performance header
and a free flowing exhaust system before strapping it to the
dyno.
Hi, welcome back to the shop. Last week on the show, we introduced you to Chris here who helped us find our latest project car. This 94 Honda Civic,
as you may remember, Chris and Chuck went on a little shopping trip and landed a pretty good deal on this car for 3500 bucks.
Now that we got our car, it's time to bear down and spend some wrenches you ready for that? That's why I'm here. Ok.
I think all of us agree that one of the best ways to pick up power in any car is to improve the flow in and out of the engine.
So what do you got for us? Well, we're gonna start off by getting more air into the engine.
Today. We have airspeed front mount intake system which can be put on in the driveway at the house, other intakes stop at the fender, this one mounts behind the front bumper for colder air. All right. Well, it seems like a little more work. Yeah, but it's worth the horsepower.
Speaking of horsepower, let's first get a baseline here on the
dyno Jet.
So, what did we get?
Whopping 87 horsepower? Let's get to work.
After disconnecting the battery, we removed the throttle body clamp,
the boats holding the filter box.
Then the box itself comes out.
Now to install a front mount system, we have to remove the front bumper cover.
Just takes a little while to find all the boats
by removing two boats on the fender. Well, take out the intake muffler box
and finally this down pipe.
01 more thing on this model, you have to reposition the horn
to make room for the inlet box.
Ok. Now that our young friends finished all the ground work, I'm gonna get started on the piping.
Now with our boot in place along with two clamps,
I go ahead and connect the upper pipe which by the way is made of lightweight two inch aluminum
to protect that pipe. The kit comes with a rubber strip to put in the factory hall. All right,
with the boot loosely clamped the lower pipe to the upper pipe.
Well, here are all the stock inlet pieces we took out and it doesn't take a lot of imagination to see how all the bins, twists and chambers were restricting air and holding back horsepower
before we install this intake box, let me show you something.
It's got a reusable
he protected by this plastic shield that allows air in. But for everyday driving keeps the bugs and rain out. Comes race day though, remove the four screws for the plastic shield. You got a true ram air effect
lower
et right. Let's get finished
to mount the box, attach these brackets to the back of the housing,
then connect the outlet to the lower pipe
using the self tapping screws from the kit mouth. The air box
finally trim the grill out of the bumper to clear the box and reinstall the bumper.
Hey, good job there, Chris. But as you know, we ain't done yet today. That's right now that we've got good flow in the engine and we need to get good flow out of the engine and that sounds like a great job for you. And Chuck, speaking of Chuck, he told me about you.
Look at my hands and look at yours.
Hey, you quit listening to Chuck. All right,
and you stay with us. We'll be right back.
Ok, Chris, come on back
looking good.
Got plenty of room.
Keep coming.
Good, good. Keep coming.
Good right there.
Hey, welcome back to the horsepower shop and more of our budget Honda build up.
Now, we've already improved the air flow into the engine
with an aero speeded intake kit and well now it's time to turn our attention to the exhaust.
Now, here in the shop, we have the luxury of a lift to get our car in the air. But if you're doing the work at home in your driveway, be sure to use a set of wheel ramps or jack stands to keep your vehicle safely supported.
Ch
I disconnected the battery. Now we'll pull the oil stick, get it out of the way,
then we'll come in, remove the heat shield
to get to the manifold bolts.
Then finally unplug the oxygen sensor.
Well, now we need to get our Honda in the air
so we can get it the rest of the exhaust system.
You can do this in your driveway.
It's a simple single exhaust and you get started by removing the exhaust manifold
while Chris was up front there working on that manifold and head pipe. I went ahead and removed the bolts that hold the muffler to the tail pipe.
Now, we can go ahead and start popping those hangers loose.
Now, here's a little tip for you. Put some lube on those rubber hangers and they sure come apart a whole lot easier
back here. All right, let's drop it. Then corrosion prevents us from reusing the 02 sensor. Same thing with our cat converter here. Just check out how rust is eating away at this flan. Now, our Honda has over 100,000 miles on it. So I say we go ahead and replace both those parts. Of course, if your car doesn't have that many miles on it,
you might be able to get away with reusing your original parts,
you know, popping for a new header is a no brainer. After all, this stock cast iron piece is not only restrictive
but it's heavy too.
Our new air mass header has manual bent free flowing large diameter tubing that dumps into this oversized head pipe.
Now, the flange on the end here will bolt right up to the stock Cadillac converter. And with this wiring extension kit, we can relocate the 02 sensor right here in the head pipe.
After applying anti seize to the 02 sensor,
screw it into the bung
install the 20 ring gaskets from the kit
and attach the head pipe to the header.
Then from underneath, slide the header into place
over the manifold studs,
tighten the nuts starting in the center and working your way out,
then reconnect the 02 sensor using the wiring from the kit.
Chuck. Check out how big this pipe is on the thunder
ruff system. It'll get us the flowing.
You bet. Now we're gonna need it too if we add nitrous later on. Now, this system just bolts right in place of the stalker and hey, check this out, this polished stainless steel muffler is gonna look good and sound great for a long time to come. Now, give me a hand here.
Let's get this thing into place.
All right.
I like the way those hangers just slide right into place there. Yeah, and everything fits good back here too.
Yeah, and check this out. Everything even lines up with our new cat.
Now, before we tighten everything down, it's always a good idea to check for proper clearance around any fuel lines,
brake lines and electrical connections.
Hey, let's tighten down all the bolts. Then we'll check for leaks.
Well, it looks good. You remember what it used to sound like?
Now, that's the sound we're looking for
and
how much horsepower will our budget Honda make? Now only the
dyno Jet knows for sure, but you will too right after this.
I'm sure glad you got some work out of Hanson today.
That looks pretty good under here. You about ready?
All right. How much horsepower do you think we'll make about 10 to 15, man? I hope so. Hi. Welcome back. Well, after making our budget, Honda breathe better with a new intake and exhaust about time to run some more numbers on the dyno Jet. Now, remember our baseline was only 87 horsepower Chris to see if our work paid off.
Go.
Well, you got about 97 horsepower. Now, think about it. That's about a 12% increase. Kind of like adding 60 horses to a 500 horse big block. Well, we're not benefiting from our ram
a
effect. So let's take it to the street. Good point. Now, while he's getting this thing unstrapped, let's see how we're doing with our budget.
If you don't count the cat in 02
through which you may not have to buy.
We spent 250 on the aero speeded intake, another 300 on the air mass header and 450 on that thunder muff exhaust system for a grand total of $1000. Now, we spent $3500 on the car. So we got about four grand left out of an $8500 budget.
Yeah.
Oh,
hey, let's face it.
The reason many of us spend a lot of our money and most of our time working on our cars is so that we can be seen at our local cruise spot on a Saturday night,
but it's hard to go cruising if you can't crank your motor. Now, you chevy guys know exactly what I'm talking about, especially if you've got a big block with high compression and a set of headers.
Now, the problem stems from a heat sink condition in the starter. Now, here's some things that you can do to help alleviate that problem first, make sure that your ignition is set to factory specs and I'm not talking about just your initial timing. I'm also talking about your mechanic
and advance. Now, too much timing is gonna cause your engine to kick back against the starter and make it difficult to turn over.
Also make sure you have a high torque starter to help overcome the high compression in big cubes. Now, you can identify it
by this spacer here at the back of the solenoid. Now that spacer is required because the starter uses a longer armature and more windings. By the way, this is what a standard starter looks like.
Of course, if you've already got a high torque starter, then the heat sink problem that I told you about earlier can be helped out tremendously with a heat shield like this one from Moroso. Now it's made from aluminum and installs right on the starter like that
to keep it away from exhaust heat.
Of course, many starters have become popular too, not only because of their lightweight, but their diminutive size also keeps them further away from your headers.
Well, needless to say, you also wanna make sure that you have good grounds, no corrosion on your battery terminals and that your battery cables are of adequate size.
Well, I hope these tips have been adequate enough to keep you cranking cruising and looking good on Saturday night.
Well, here's some good looking hot parts coming up for you. Next
horsepower TV S hot parts is brought to you by Wyotech,
the nation's premier technical training school.
Hey, if you'd like to see a little more performance out of your Ford focus, then take a look at this new Iceman Cold air kit from Ford Racing.
It replaces the stock restrictive inlet ducting with these high flow high tech pieces that funnel cooler, denser air into your engine.
Now, it retains the use of the stock air cleaner and can be installed in less than an hour
with ordinary hand tools.
Now, you'll get all the ducting clamps and connectors that you need to bring your performance into focus for about $235. Hey, is the battery in your street machine or race car terminal? Well, you might get a charge out of the spiral core battery from Optima.
It's got a design that keeps the plates inside cover
with acid. And since the out gas chemicals are reabsorbed, well, it's truly maintenance free.
That's got 800 coal cranking amps has side and top terminals and you can mount at any position even upside down. The price shouldn't turn your budget upside down about 100 and 30 bucks.
Hey, my partner says, I don't know jack about a lot of different things, but I do know that you're gonna get a rise out of this pro sport floor jack from Argo manufacturing. Now it's got an aluminum frame and a steel lifting beam plus a one ton capacity.
You can get it in either a three pump or a six pump version that'll raise the lifting platform from about three inches all the way up to 18 inches.
Now, it's got ball bearings in this wide front roller and handles on the side. So it's easy to put it
right where you need it.
Now, you're gonna have to jack your wallet though for about $750. I guess. You do know Jack about a few things and we wanna get you, uh, pumped up about next week's show.
We'll take a late model Camaro road racer in need of better breaks. Take it to the horsepower shop for a killer high performance upgrade
and then back to the speedway for amazing results. That'll stop you in your tracks.
Later, we cruise to Saint Louis, Missouri to witness the biggest and rarest collection of Chevy supercars
and all the muscle in the world's here today. It's just wonderful
all this and more on the next horsepower TV,
for information about the products used in today's show and more. Check us out online at horsepower tv.com
Horsepower TV is an RTM production.
Show Full Transcript
today on horsepower TV. How do you build 1000 horse engine that runs on pump gas? We'll take you through the latest in monster motor technology
and we'll start popping up our budget Honda with a new intake, high flow header and free flowing exhaust system before strapping it to the dyno
check.
So hang on for horsepower TV.
Hi, welcome to the horsepower shop back in the beginning of the muscle car craze. It didn't get any better or better than this 65 trip powered goat. Now, right out of the box, this Pontiac cranked out 360 horsepower from 389 cubic inches.
What's more it kind of set the pace for a horsepower race? All the manufacturers got involved in
today. That race is still being run but now the aftermarket has gotten involved. Now for years, names like
Arias Milo Don and Rode
have been supplying blocks mainly for the racing industry. But can you imagine a brand new engine displacing up to 1000 cubic inches and get this? It'll work just as well on the street as it does. The strip.
Yeah, this monster Motor is the brainchild of all star engines out of Oshkosh Wisconsin. And what started out as a way to power up offshore racing boats has evolved into a platform that has possibilities for everything from drag racing to tractor pulling. And if you're nuts enough to try it, you could drop one of these between the frame rails of your favorite Chevy. Well, like one of my Chevelle, why not?
Here's what makes it all work. Now, the block has a standard Chevy Bell housing pattern and motor mount locations. Plus the header
FLS are right off of a big block. Chevy. Now, the crank two is also configured to accept a standard Chevy fly wheel.
Now, what do you say? We take a look at the All Star block compared to a GM performance parts +502, which a lot of us still consider to be a pretty large engine.
The All Star block is cast in aluminum and uses these iron wet sleeves with bores ranging from four and three quarter inches up to five inches. Now, to accommodate those big bores, the centers had to be moved out to 5.4 inches. And of course, the blocks also been substantial,
essentially stiffened with additional ribbing right here in the Lifter Valley.
Plus the crank is supported with these cross bolted steel billet caps. Now, speaking of the crank, it's a steel billet piece with three inch mains, a center thrust bearing and a one piece. Chevy rear seal.
The crank pins use a standard
hemi rod dimension with a 125 rolled filet and radius oilers. Now, it's 708 cubic inches. That crank has a five inch arm, but with a little bit of machining right here in the bottom end. Hey, a six inch is gonna fit
man. Check that block is armed and dangerous and just check out what else is inside.
The pistons are forged aluminum flat tops that give a nominal 9 to 1 compression. But you can special order, reverse ones like this for supercharged applications or raise domes to get the ratio you need.
Now they hang on eight inch billet I beam rods with a bronze bush floater on the small end
and 7/16 cap screw fasteners here on the big end.
Now, motor, this big needs specially designed heads to make big power. The intake boards measure a massive two and three quarters by two and 18 inches. And the valves, well, they spec out at 2, 400 on the intake two inches on the exhaust side,
they're housed inside 1 54 cc combustion chambers that have been C and C machine to make them nice and smooth like this. And each is surrounded by six half inch studs. Of course, the extra thick deck promotes good ceiling and gasket clamping.
Wow, those valves are huge. Now, here's a look at the camshaft that it takes to move those monsters.
It's a steel billet, hydraulic roller for reduced friction and to work with those massive valve springs. Now, to reduce friction even more, this camshaft spins inside a full set of roller bearings and well, the roller theme is carried even to the rocker arms which are an amazing 2 to 1 ratio. Of course, they're shaft mounted
for improved stability and they work with a set of 716 push rods
to reduce flex. Now, if you're saying to yourself, hey, that stuff looks like it belongs on a race car. You're absolutely right. A
lot of similar hardware is found on many of the nation's top running pro stalkers.
Yeah. And here's something else borrowed from the pro stockers to keep this bad boy lube that uses a five stage dry subsystem with a fabricated aluminum pan.
Why a dry subsystem? Well, not only does it ensure adequate oil supply but allows for different pan configurations for different chassis,
even though a push rod engine might be considered low tech. Well, the electronics used to fire off this beast are definitely high tech. The control module is a stand alone unit that controls both the fuel delivery and the ignition timing and well, eight stand alone coils fire off the incoming fuel charge for each cylinder. That fuel charge is managed by a pair of 1000 CFM throttle bodies. One at each the end of the plenum.
Now, the plenum also mounts eight high flow injectors that are matched to the engine's fuel requirements. Oh, by the way, these extra long runners here, well, they're engineered to promote mixture velocity and increase low end torque. Hey, did you say torque? Well, how does 800 ft pounds at only 2500 RPM hit you?
Well, how about 1000 ft pounds of torque at only 4000 RPM?
Now, the best part of the whole deal though is that it does it on pump gas
and with relatively tame cam timing. Well,
with torque like a semi truck, you gotta be wondering by now, how much horsepower does this thing crank out? We strapped a 708 cubic inch version to an engine
dyno recently where it grunted out 880 horsepower at a tractor like 5300 RPM.
Now, that's a pretty impressive number, but
there's a whole lot more potential left in this.
And if you recall, it'll go out to 1000 cubic inches plus with more C
A
compression and, well, maybe a little bit of head work. I think this thing could generate enough power to peel the pavement right off the road, you know. Yeah, if you could hook up all that power, I still think we ought to drop one in your Chevelle though. Uh, after you drop about 30 grand to get one. Well, I've got a grand idea. How about I provide the car and you provide the engine.
I got a better idea. Let's take a short break and when we come back, we're gonna think small.
Wow, 3500 bucks. And hey, the body doesn't look too bad. I wonder how the rest of it looks.
Last week we bought a $3500 Civic to kick off our budget Honda build up
next. We'll see how much horsepower we make with a new intake,
a high performance header
and a free flowing exhaust system before strapping it to the
dyno.
Hi, welcome back to the shop. Last week on the show, we introduced you to Chris here who helped us find our latest project car. This 94 Honda Civic,
as you may remember, Chris and Chuck went on a little shopping trip and landed a pretty good deal on this car for 3500 bucks.
Now that we got our car, it's time to bear down and spend some wrenches you ready for that? That's why I'm here. Ok.
I think all of us agree that one of the best ways to pick up power in any car is to improve the flow in and out of the engine.
So what do you got for us? Well, we're gonna start off by getting more air into the engine.
Today. We have airspeed front mount intake system which can be put on in the driveway at the house, other intakes stop at the fender, this one mounts behind the front bumper for colder air. All right. Well, it seems like a little more work. Yeah, but it's worth the horsepower.
Speaking of horsepower, let's first get a baseline here on the
dyno Jet.
So, what did we get?
Whopping 87 horsepower? Let's get to work.
After disconnecting the battery, we removed the throttle body clamp,
the boats holding the filter box.
Then the box itself comes out.
Now to install a front mount system, we have to remove the front bumper cover.
Just takes a little while to find all the boats
by removing two boats on the fender. Well, take out the intake muffler box
and finally this down pipe.
01 more thing on this model, you have to reposition the horn
to make room for the inlet box.
Ok. Now that our young friends finished all the ground work, I'm gonna get started on the piping.
Now with our boot in place along with two clamps,
I go ahead and connect the upper pipe which by the way is made of lightweight two inch aluminum
to protect that pipe. The kit comes with a rubber strip to put in the factory hall. All right,
with the boot loosely clamped the lower pipe to the upper pipe.
Well, here are all the stock inlet pieces we took out and it doesn't take a lot of imagination to see how all the bins, twists and chambers were restricting air and holding back horsepower
before we install this intake box, let me show you something.
It's got a reusable
he protected by this plastic shield that allows air in. But for everyday driving keeps the bugs and rain out. Comes race day though, remove the four screws for the plastic shield. You got a true ram air effect
lower
et right. Let's get finished
to mount the box, attach these brackets to the back of the housing,
then connect the outlet to the lower pipe
using the self tapping screws from the kit mouth. The air box
finally trim the grill out of the bumper to clear the box and reinstall the bumper.
Hey, good job there, Chris. But as you know, we ain't done yet today. That's right now that we've got good flow in the engine and we need to get good flow out of the engine and that sounds like a great job for you. And Chuck, speaking of Chuck, he told me about you.
Look at my hands and look at yours.
Hey, you quit listening to Chuck. All right,
and you stay with us. We'll be right back.
Ok, Chris, come on back
looking good.
Got plenty of room.
Keep coming.
Good, good. Keep coming.
Good right there.
Hey, welcome back to the horsepower shop and more of our budget Honda build up.
Now, we've already improved the air flow into the engine
with an aero speeded intake kit and well now it's time to turn our attention to the exhaust.
Now, here in the shop, we have the luxury of a lift to get our car in the air. But if you're doing the work at home in your driveway, be sure to use a set of wheel ramps or jack stands to keep your vehicle safely supported.
Ch
I disconnected the battery. Now we'll pull the oil stick, get it out of the way,
then we'll come in, remove the heat shield
to get to the manifold bolts.
Then finally unplug the oxygen sensor.
Well, now we need to get our Honda in the air
so we can get it the rest of the exhaust system.
You can do this in your driveway.
It's a simple single exhaust and you get started by removing the exhaust manifold
while Chris was up front there working on that manifold and head pipe. I went ahead and removed the bolts that hold the muffler to the tail pipe.
Now, we can go ahead and start popping those hangers loose.
Now, here's a little tip for you. Put some lube on those rubber hangers and they sure come apart a whole lot easier
back here. All right, let's drop it. Then corrosion prevents us from reusing the 02 sensor. Same thing with our cat converter here. Just check out how rust is eating away at this flan. Now, our Honda has over 100,000 miles on it. So I say we go ahead and replace both those parts. Of course, if your car doesn't have that many miles on it,
you might be able to get away with reusing your original parts,
you know, popping for a new header is a no brainer. After all, this stock cast iron piece is not only restrictive
but it's heavy too.
Our new air mass header has manual bent free flowing large diameter tubing that dumps into this oversized head pipe.
Now, the flange on the end here will bolt right up to the stock Cadillac converter. And with this wiring extension kit, we can relocate the 02 sensor right here in the head pipe.
After applying anti seize to the 02 sensor,
screw it into the bung
install the 20 ring gaskets from the kit
and attach the head pipe to the header.
Then from underneath, slide the header into place
over the manifold studs,
tighten the nuts starting in the center and working your way out,
then reconnect the 02 sensor using the wiring from the kit.
Chuck. Check out how big this pipe is on the thunder
ruff system. It'll get us the flowing.
You bet. Now we're gonna need it too if we add nitrous later on. Now, this system just bolts right in place of the stalker and hey, check this out, this polished stainless steel muffler is gonna look good and sound great for a long time to come. Now, give me a hand here.
Let's get this thing into place.
All right.
I like the way those hangers just slide right into place there. Yeah, and everything fits good back here too.
Yeah, and check this out. Everything even lines up with our new cat.
Now, before we tighten everything down, it's always a good idea to check for proper clearance around any fuel lines,
brake lines and electrical connections.
Hey, let's tighten down all the bolts. Then we'll check for leaks.
Well, it looks good. You remember what it used to sound like?
Now, that's the sound we're looking for
and
how much horsepower will our budget Honda make? Now only the
dyno Jet knows for sure, but you will too right after this.
I'm sure glad you got some work out of Hanson today.
That looks pretty good under here. You about ready?
All right. How much horsepower do you think we'll make about 10 to 15, man? I hope so. Hi. Welcome back. Well, after making our budget, Honda breathe better with a new intake and exhaust about time to run some more numbers on the dyno Jet. Now, remember our baseline was only 87 horsepower Chris to see if our work paid off.
Go.
Well, you got about 97 horsepower. Now, think about it. That's about a 12% increase. Kind of like adding 60 horses to a 500 horse big block. Well, we're not benefiting from our ram
a
effect. So let's take it to the street. Good point. Now, while he's getting this thing unstrapped, let's see how we're doing with our budget.
If you don't count the cat in 02
through which you may not have to buy.
We spent 250 on the aero speeded intake, another 300 on the air mass header and 450 on that thunder muff exhaust system for a grand total of $1000. Now, we spent $3500 on the car. So we got about four grand left out of an $8500 budget.
Yeah.
Oh,
hey, let's face it.
The reason many of us spend a lot of our money and most of our time working on our cars is so that we can be seen at our local cruise spot on a Saturday night,
but it's hard to go cruising if you can't crank your motor. Now, you chevy guys know exactly what I'm talking about, especially if you've got a big block with high compression and a set of headers.
Now, the problem stems from a heat sink condition in the starter. Now, here's some things that you can do to help alleviate that problem first, make sure that your ignition is set to factory specs and I'm not talking about just your initial timing. I'm also talking about your mechanic
and advance. Now, too much timing is gonna cause your engine to kick back against the starter and make it difficult to turn over.
Also make sure you have a high torque starter to help overcome the high compression in big cubes. Now, you can identify it
by this spacer here at the back of the solenoid. Now that spacer is required because the starter uses a longer armature and more windings. By the way, this is what a standard starter looks like.
Of course, if you've already got a high torque starter, then the heat sink problem that I told you about earlier can be helped out tremendously with a heat shield like this one from Moroso. Now it's made from aluminum and installs right on the starter like that
to keep it away from exhaust heat.
Of course, many starters have become popular too, not only because of their lightweight, but their diminutive size also keeps them further away from your headers.
Well, needless to say, you also wanna make sure that you have good grounds, no corrosion on your battery terminals and that your battery cables are of adequate size.
Well, I hope these tips have been adequate enough to keep you cranking cruising and looking good on Saturday night.
Well, here's some good looking hot parts coming up for you. Next
horsepower TV S hot parts is brought to you by Wyotech,
the nation's premier technical training school.
Hey, if you'd like to see a little more performance out of your Ford focus, then take a look at this new Iceman Cold air kit from Ford Racing.
It replaces the stock restrictive inlet ducting with these high flow high tech pieces that funnel cooler, denser air into your engine.
Now, it retains the use of the stock air cleaner and can be installed in less than an hour
with ordinary hand tools.
Now, you'll get all the ducting clamps and connectors that you need to bring your performance into focus for about $235. Hey, is the battery in your street machine or race car terminal? Well, you might get a charge out of the spiral core battery from Optima.
It's got a design that keeps the plates inside cover
with acid. And since the out gas chemicals are reabsorbed, well, it's truly maintenance free.
That's got 800 coal cranking amps has side and top terminals and you can mount at any position even upside down. The price shouldn't turn your budget upside down about 100 and 30 bucks.
Hey, my partner says, I don't know jack about a lot of different things, but I do know that you're gonna get a rise out of this pro sport floor jack from Argo manufacturing. Now it's got an aluminum frame and a steel lifting beam plus a one ton capacity.
You can get it in either a three pump or a six pump version that'll raise the lifting platform from about three inches all the way up to 18 inches.
Now, it's got ball bearings in this wide front roller and handles on the side. So it's easy to put it
right where you need it.
Now, you're gonna have to jack your wallet though for about $750. I guess. You do know Jack about a few things and we wanna get you, uh, pumped up about next week's show.
We'll take a late model Camaro road racer in need of better breaks. Take it to the horsepower shop for a killer high performance upgrade
and then back to the speedway for amazing results. That'll stop you in your tracks.
Later, we cruise to Saint Louis, Missouri to witness the biggest and rarest collection of Chevy supercars
and all the muscle in the world's here today. It's just wonderful
all this and more on the next horsepower TV,
for information about the products used in today's show and more. Check us out online at horsepower tv.com
Horsepower TV is an RTM production.