MuscleCar Builds

Parts Used In This Episode

Borgeson
Increased ratio manual gearbox, U-joints and steering shaft.
Loctite
Loctite sealers, thread locking compounds, gasket making compounds.
Powder-X
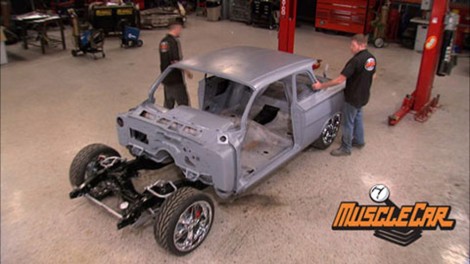
Black powder coated frame section and media blasting of body parts and frame parts.
Stainless Steel Brakes
13 inch front rotors, four piston calipers, red powdercoating, chrome booster and billet master cylinder.
Stainless Steel Brakes
Rear disc brake package for LB Torino ends, powdercoated red.
YearOne
RH floor brace, LH and RH full floor pan, RH trunk floor, LH floor brace, RH floor brace, trunk floor center section, RH floor box brace, LH floor box brace, RH outer trunk extension floor panel, LH and RH toe board, shift tunnel plate seal, shift tunnel plate, trunk floor brace, fuel tank brace, upper rear seat floor brace, upper trunk floor, upper trunk floor brace, LH outer trunk floor extension panel, RH under seat floor brace, LH under seat floor brace, LH under seat pan, RH under seat brac

Video Transcript

Today on muscle car. The science of powder coating. Red Sled loses some weight and a ride in a 67 Corvette Stingray.

Hey guys, welcome to muscle car. A red Sled's got a lot of body work ahead and we're gonna get rolling on that today. But before we can start that, we need to get our chassis put back together.

We've already modified the X frame on the 61 Impala by boxing the center

and adding bracing to the rear. We mocked up the air right to make sure everything fit, tore it back down and sent it out for powder coating.

If you've never seen powder coating done. It's actually a pretty interesting process. I bought our frame here down to powder X to get it done and our camera crew came along so you guys can check it out.

Uh Well, here we are Powder Express.

Picked a heck of a day for this trip. Huh?

You must be the infamous

Joey Golliver. How you doing? Nice to meet you, Rick. How you doing? Good to meet you. Oh,

we got a frame for you. Good deal. I got it all reinforced and boxed and ground down and now we got it all covered with rust. Hope you can take care of that for us too. I'm sure we can. What color are we gonna do this thing? Gloss, black sounds

pretty, pretty good deal. We'll get you guys in, out of the rain and get this thing coated for you. Awesome. Sounds good.

Look at this. This is after 45 minutes out in the rain, you can see how fast the rust starts to attack this thing. It's a good thing we're here because we got a whole crew that's going to take care of it and clean it up for us. The first thing these guys do is break out ad a sander to knock the surface rust off

the steps, not necessary if the part is already clean and rust.

Next, a steam bath, the heat pulls the oils out of the metal and from behind our wells,

the steam also contains phosphate which creates a chemical reaction that allows the powder to bond with the metal.

It also protects the part minimizing any rust. If the coating ever gets scratched,

it goes into the oven. But just for a few minutes to draw any remaining oils to the surface.

Another bath this time without phosphate, it'll clean off the last of the contaminants

and back into the oven to dry it just for about five minutes.

Then it goes into the powder booth

dust

off your seventh grade science knowledge. Because it might come in handy here.

The part being coated is grounded first. Why?

Well, it's a matter of

physics,

the gun creates negative ions that the powder collides with. Given it a negative charge. Since negative particles are attracted to the strongest ground, they're pulled straight onto the part.

But once it's evenly coated, it goes into the 400 degree oven,

it has to bake for about 40 minutes. So I caught up with Joey to get the lowdown on powder

E

powder X was one of the leading powder coating equipment manufacturers in the country. We design and build all of our own powder coating equipment

and we sell it to individuals around the country that are looking to get into their own powder cutting business.

The great thing about powder that most people don't understand is that you can do basically any color with powder that you can do with liquid.

There's powdered chromes, there are candies, translucent

textures. It's an endless supply of colors. You can do whatever color that that you choose. Hm. I could just see the Impala with that candy pink frame.

Ok, maybe not. Oh

man, looks great, doesn't it? Holy smoke.

You want a gloss black?

Oh,

you guys are making us look good

and how was I gonna hold up?

That's gonna hold up. Fantastic. We know how much damage you guys do

say you do know you're doing this for muscle car. We beat the hell out of these things.

Awesome. Awesome, good job. I'll get the truck, we'll get this thing loaded up, time to get this baby back to the shop and get the chassis reassembled.

Now, this time the chassis is going back together for real and we don't want this thing coming apart when we're driving down the road. So I'm gonna use a few drops of lock tight on the threads to make sure that everything stays put. I gotta tell you this is one time when just a few bucks can really save your butt.

Now, Impala came from the factory with drum brakes on all four corners and we all know that drum brakes are weak. So stainless steel hooked us up with a major upgrade. We got 11 inch rotors on the back and thirteens up front. But another cool part,

the calipers are gonna match our paint scheme.

We decided not to use power steering, but we are gonna upgrade with a close ratio of steering box and linkage from Borgeson

before we can tackle the body. We're gonna roll the completed chassis to check clearance.

We knew that the first point of contact would be the new bracing in front of the rear end. So we'll have a little cutting to do under the back seats and these box braces are in the way. So we're trimming them back too.

The rear seat pans will eventually be replaced, but Brent's cutting the old ones in the right places. Now,

that way we'll have a reference where to cut the new ones. When the time comes,

where the modifications done, we can check clearance one more time.

This back brace clears perfectly. So we're looking good so far.

All right, now is the moment of truth, we already know we had the body trim to clear those 20 twos of ride heights. But now we need to drop it all the way down to make sure we still have clearance.

I'll tell you what that was a lot easier fit than I thought it was gonna be.

And I think we're just gonna have to put a little mini tub in it. Well, maybe an inch or so.

Yeah, about an inch, do that and re radius. The wheel wells here a little bit. I think we got

it

cool,

cool.

Well, our parts showed up just in time because we're ready to start cutting the Swiss cheese out of this thing.

So we're going to get the rest of the parts unpacked and attack this thing with a plasma. So stick around

coming up the bottom drops out of the 61 Impala and Rick's Rusty Rocker repair.

Hey, welcome back. The first thing to go is gonna be this floor pan here because it's just wasted. Now, this front cross member, this is going too because it's rusted through anyway. So it's not doing any good

the rear brace. I'm gonna keep that in place just to hold the body together while I work on it,

the quickest way to get the majority of the junk metal cleared out. And with one of my favorite tools, plasma cutter,

I even used it to cut out a little souvenir to hang on the wall.

Once the big chunks are out of the way I can cut the braces out.

Last goes the rear seat pan, leaving that rear brace,

the spot weld drill bit will get the last of the old floor pan loose

on pinch welds like this. You can use a spot spot weld cutter,

a little hammer and dolly work will flatten out the edges

as you can see here. This rocker seen better days. So while Brent gets rolling on the mini tubs in the back, I'm gonna stick some new sheet metal up here in the front.

Once the outer sheet metal is removed, you can get a better look at the damage

and no patch panels are made for this part. That's why I'm

fing some up

while I do that, Brent's making short work of that trunk saving whatever it can

the trunk latch is. All right. So it's a keeper.

Unfortunately. Well, not much else is worth saving.

Uh

It looks like we better order some more sheet metal.

You know, a rusty car is a lot like a box of chocolates. You really don't know what you got till you get into it.

If I got into this one. It's a lot worse than I thought. And that means my patch panels are gonna be a lot bigger.

The trick here is to take your time and make sure your patch panels are accurate to the originals since I'm dealing with a fender mount. Also any variance from the stock location

that's going to mean that our fender won't line up

done.

Finally, we can test fit our floor pans,

clamps and

Cleo

will hold them in place while we mark for the braces,

then they come back out to punch holes for the plug wells.

Now, only the ends are available for the front brake. So they're welded into place first. Then the original is measured marked

and chops up to fill the gap.

Now, once the front brace is replaced, we can chop out the rear

with the new one in. We can move on

the

floor pans go in for the last time

and more

Clios and Clamps will hold everything in place while it becomes a permanent part of our impala.

Finally, the Clio

come out

and the last place goes in.

Hey, man, the floor is looking awesome.

Appreciate it.

Sweet. Well, I know you're anxious to get on the rear tubs on this thing. So if you want, I'll tackle this side and you can get on the back.

Sounds good to me.

Well, hey, Red Sleds made a lot of progress today. But man, we still got a long ways to go. So stick around.

Did the 67 Stingray mark the end of an era for vets decide for yourself after the break

today. On flashback, a 67 corvette stingray.

You ever wonder where the name corvette comes from? Well, I'll tell you

corvette is a class of lightly armored warships. They're known for their speed and agility.

And that's an accurate description for the 67 stingray with an original 427 big block under the hood.

One. Look at that means stinger and you know this bad boy is ready for battle.

This vet is owned by Milton Robson. He's an avid car collector and it was fully restored in the mid eighties with all Ns parts

in 1967. It cost $5604.10

and now it's worth over a couple 100,000. The 427 boasts 435 horsepower and 460 ft pounds of torque.

This thing burns up the road and goes from 0 to 60 in 5.6 seconds.

What does Milton love about his 67 Stingray

67. It just

looks at horsepower, the mold on wheels, the side pipes.

I mean things that draw your eyes to the car

that just really improved it over the 6364 fives, Joe Stun that's maintains and restores Milton's cars and he gladly took this bed out for a spin.

That feels awesome, man. You just go down the road, be rolling around 3040 miles an hour, just cruising and decide to mat

it. It's on.

That's the thing about the little tires and the big big motor, you can do a lot of damage and have a lot of fun

to many. The 67 was the pinnacle of achievement for the corvette brand.

The corvette was born in 1953 the brain child of gm's chief designer, Harley Earl.

It's all fiberglass body was a first for an American made car and every corvette since then has followed that formula.

People quickly fell in love with the style but they weren't so hot about the paltry 150 horse six banger truck motor under.

By 1954 the corvette was losing ground to Ford's two seater T bird and only about 700 were sold in 1955.

The man who saved it was GM engineer Zor

Arcus Dun

who dropped in a V8 engine coupled with a three speed transmission boosting the horsepower to 195.

63 saw a complete revamp by GM designer Bill Mitchell. In the introduction of the Stingray moniker, the second generation of Corvettes would last until 67 in

this time span, many refinements were made including independent rear suspension side exhaust pipes, four wheel disc brakes, and the killer 427 V8 with a raised hood scooter

back in this day. If you've seen the Stinger and the

the blackness.

You

better look out. Part of those 435 horses were derived from the triple ha ha

tuber

carburetors known as the tri power. They were introduced in 1967. Now, this system was capable of sucking in 1000 cubic feet of air a minute.

The cost for this option was 430 $47.10

which meant about a buck for horsepower. Not bad.

Some other changes in 67 were the optional bolt on

alloy wheels, functional, five slotted side fender vents and a parking brake relocated between the seats pretty handy. The 67 still had plenty of chrome to go around and of course, those aerodynamic retractable headlights,

the rally red exterior and color matched interior is a pretty unique look. I am a red lover. I

want red

red

and that's just

a

better eye catcher than me.

The interior is designed to feel like a cockpit which makes sense when you're throttling through curves at high speed.

The stingray performs extremely well. Thanks to its four wheel independence inspection.

The earlier Corvettes had a rougher ride. These last year stingrays were just a good comfortable car.

67 was the end of an era for Corvettes. It was the last of the CW.

Some enthusiasts even feel it was the last of the true Corvettes.

Corvettes have gone through many transitions, but one thing remains the same.

People love them. Maybe where you go

up next, see what a difference an inch can make.

Well, the front floor pans are in, well, it's solid looking killer and that means we get to turn our attention back to these rear tubs. Now, Brent's already got the trunk cut out and all the bracings out of the way. So what's the plan on the rear end here?

I'm f just taking an inch out of both sides. Got it marked, dude. So

when you say we start cutting

right on,

I'm on it.

Just remember, measure twice cut. Once. If you plan ahead, keep all your cuts straight, it should almost fall back together.

And a saw with a wide blade is used for the first cuts.

Then the plasma is brought in for slicing the wheel wells.

Once the section is cut loose, the grinder will clean up the edges.

Ok? After about four hours worth of measuring and 10 minutes worth of cutting, we managed to gain an extra inch.

So now what we need to do is get this thing tacked in place and start filling in the gaps

with the tub tag back in place. We can build the filler strip.

More

Clios are pressed into service to help hold things solid while it's all stitched together.

Well, we got one tub in, we got one more to go here. Now, Red Sleds got a lot of hours left in the shop. But unfortunately for this week, we're out of time, but check us out next week because we're gonna be rolling in a whole new project. But for now we're out of here.
Show Full Transcript