HorsePower Builds
Want more content like this?
Join the PowerNation Email NewsletterParts Used In This Episode
Currie Enterprises
Complete Third Member Assembly 3.50 Gears, Nodular Case, Detroit Locker and 1350 Yoke
TCI Automotive
6X Six-Speed Automatic Transmission Package w/ GM Bellhousing & Paddle Shifter
Street Rod Garage
2" Dropped Spindles"
Street Rod Garage
Tri-Five Chevrolet Frame
Street Rod Garage
Triangulated 4 Link Kit
Street Rod Garage
Tubular Upper & Lower Control Arms
Weldon Pumps
Billet Fuel Filter
Weldon Pumps
Flow Through Fuel Pump 135 GPH/0-95 PSI
Video Transcript
Ok.
It's a car that launched the Golden Age of Chevrolet
1955 was the first of a three year series of cars known as Try Fives.
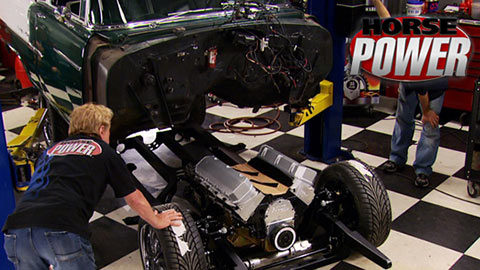
And today Horse Power got an original for a unique Try Five transformation.
This one is a bel air two door post car and well, like many over the years, the original 265 got replaced. In
this case, a blown 454 big block making about 700 horsepower
problem is the factory frame was never intended to handle that much power
and we've got the cracks to prove it.
And this is common in overpowered tri five frames. When you put a load on the car, you can actually see the crack get bigger
and who knows if you stand on it long enough, you might even end up passing that big block in the blower.
What we're going to do is give this classic bow tie all the benefits of contemporary framework, performance and power while keeping the same looks that change Chevrolet's history.
It was the midpoint of the fabulous fifties.
Marilyn Monroe was the country's hottest bombshell. Disney's new theme park, the hottest place to take a vacation.
They were fast changing times
reflected in everything from youthful radical new music
to G M's radical New Chevy for 1955.
What's new? Everything? The new Motor Amic Chevrolet is new from the ground up.
Its so called motor Amic styling changed the car's image from basically boring
to fun and exciting.
It was a whole new car
and suddenly cool to drive a Chevy new from the ground up. GM spent a truckload of cash spreading the word about its all new hot one for 55.
Like this commercial featuring a slick haired newscaster.
Hello, ladies and gentlemen, this is Robert Trout bringing you some great news for 1955. Of course. Part of the story was Chevy's history making 265 V8,
all 162 horsepower
180 with a $59 power pack option.
Are you all ready?
The ad guys went all out to prove the new Chevy could beat the competition.
The gal in this spot is proving how well the power steering works with her own version of
tow.
They pulled out all stops and even pulled a skier in this ad to prove. Well, probably nothing.
There was a new wider chassis used for 55 through 57 models. One reason for the name Tri Fives more about that later
today, all try fives are revered for their timeless personality and appeal,
whether they're stock or chopped and stuffed with blowers and big blocks
or even modified for drag races.
Yeah, the legend lives on thanks to G MS, legendary launch of a history changing car. The one and only motor Amic Chevrolet of 1955
more than a new car. A new concept of low cost motoring.
Take a look at what's in store for the Bel Air. It's a 580 cubic inch big block Chevy. That's gonna be outfitted with twin 76 millimeter turbines turbos. Now, how much horsepower do you ask? Well enough to twist that stock frame like a pretzel. So to give our 55 shoe box a stout foundation, we paid a visit to a little company with a big reputation for producing some of the best tri five chassis in the world.
It's here in the quiet little town of Grand Alabama,
a family fabrication business that opened its doors back in 1979.
This is where old world craftsmanship meets new age technology to turn out everything from turnkey hot rods like this 38 Chevy to try five foundations like the one we're gonna use for our project.
The way we look at it is like building a house, that's your foundation that you're starting with.
There's still a lot of work to be done after you get the foundation la
but
if you don't start with a good foundation, then you're gonna have problems down the road. What we're gonna do, we're gonna take our chassis platform. We're gonna start at a, at a, a ground line
and then we're gonna set a ride,
then we will go in
and drop a, a body drawing on it just to kind of give him the feel of, of where that car is gonna sit and what it's gonna look like.
Then we will go in and, and build all of our stands, uh build our cross member and all of our bracketry and then we can actually take that and convert it into a cut path.
The plasma cam CNC laser cutter is a fairly new addition to the facility,
adding speed and total precision to the chassis building process.
It sounds like a lot of work and it is. But once you get it to that cut path, it's virtually ready to go.
It makes you wonder how you got by without that thing. I don't even wanna imagine it. We have nightmares about what would happen if it went down.
Meanwhile, on the main shop floor, several chassis projects are in the works following the specs from C
AD program.
Needless to say there's more than one way to build a chassis and the more traditional ways to take a piece of two by four square tubing like this man will bend it
and you're done.
Now here after the various plates are sculpted and back welded,
inner supports are added every 10 inches or so before the top plate goes on. Now, that's gonna last.
It's a longer process for us, but we're more about building a better looking and a stronger piece than we are about just turning out more product.
So after all the pieces are cut, we just start to assemble them in the, in the jigs and uh
uh put it all together
when it, uh, when it's all pulled out, it's basically ready to go
next up the powder coat.
And thanks to Chris Tr, 55 will have a foundation fit for adding new muscle to a classic old try five
to
take something from nothing
and take it from a concept to a complete finished product.
Uh That makes me happier than you think.
Well, here it is back from the powder coder complete with all that bracketry plus holes in the frame for the exhaust
man. No wonder those guys are so proud of their work. Now, we gotta get it from here to under there. That's what we do after the break. No need to get your frame off the couch.
Horse power back to take a modified tri five and modify it even more with a 580 cubic inch big block with twin turbos that'll sit on a custom built foundation in place of the stock chassis. So how do we make that happen?
The only way you can by separating the body from the original chassis. Now, 55 frame off, gotta start somewhere. We're gonna start by removing the front cliff first, the front bumper gotta come off,
the radiator comes out
and after removing several bolts underneath and on top with a little finesse, the front clip comes loose. It's not so heavy,
it's not bad at all.
Now, on to the rest of the body which involves separating everything from it and the engine like this brake booster assembly,
then more body mount bolts
and in a situation like this expect the unexpected back here, someone bought our access to one of the bolts with a piece of sheet metal for some reason.
So I'm gonna saw a hole through it.
A couple of the bolts are running into the floorboard. So we're just going to cut them off to free them from the frame.
And here's a good example of stock body flex unbolted, the weight of the engine pulls the frame a half inch away from the firewall.
Well, here's another example, notice the movement
when we take the weight off the frame by lowering the lift,
replacing the lift extenders directly under the body's pinch wells where it has the most strength.
Here we go.
And after the body clears the back wheels, the chassis is ready to roll out.
Now that we got the body separated, we're able to see a couple more things that could end up to be big problems if the car was still driven this way,
this mid engine mount is supposed to be flat end up, right but the amount of power this engine makes has got it bent forward and down
and that only leads to other things
like the clutch linkage.
It's pushed forward and makes contact with the header.
Hey, if you had a cross member like somebody did here, please weld or at least bolt it in place.
Now, let's remove that big block blower and trans from the factory frame for a little comparison
without the added on cross member. The factory frame has no inner support.
Our Street Rod Garage upgrade has twin J legs welded to it for all the support you would ever need
up front. Despite the factory engine cradles mass, it's far weaker than the sleek set up of our replacement
and look at what we got to make our chassis a full roller. It's all
good stuff including a
curry nine inch rear end
from Flaming River. This manual rack and pinion set up.
Now Street Rod Garage custom made all of our suspension components including the front and rear sway bars, the upper lower control arms to mention a couple for shocks. Well, coil overs from Bill Stein
and bear brakes including slotted rotors and six piston calipers, front and back. Plus these mustang two type spindles.
One more comparison before we get to work the stock upper control arm is a lot more massive than the upgrade and a lot heavier. Plus this one's got all kinds of adjust ability downstairs. Same story,
the lower arms, the first to go on using a through boat,
then with a jack stand for support, we need to make sure it's level for the spindle which goes in place. Next, followed by this bump stop.
Now the upper control arm goes in place and attaches to the spindle.
Then we snug everything down and add cotter pins
before moving on. We need to check for perfect 90 degrees vertically
and the level indicates the bottom needs to come out a bit.
Now, this is where the adjustable ends come into play.
Next, we can install a pair of cushion blocks to our chassis for the Flaming River manual rack and pinion system.
This thing is made of cast aluminum and only weighs 15 pounds and installs with a hind joint to each spindle.
The front sway bar has its own mounting place too and it installs with four bolts.
It also comes with the split rings designed to prevent lateral movement.
The sway bar also connects to the lower control arm
using links with spherical lens.
After mounting the caliper brackets, the bare 13 inch rotors go on with just a couple of nuts for now so that we can check the toe.
We use a pair of tape measures to square up the rotors.
In this case, 55 inches on each side.
Then by giving this tie rod in a few turns, we give it an eight inch of tow in which is ideal for this set up with that handle, we can install our coil over shocks, first bolting the top to the chassis,
then using a pair of spacers, the bottom bolts to the lower control arm.
Well, next, we're gonna install this curry track
nine rear end and notice how Street Rod Garage made these brackets with their plasma cam and welded them in place before the powder coat.
Now, we're leaving this thing empty for now, which will make hanging it to the chassis a whole lot easier.
This is the first bar of our triangulated four L
system. And with this design, you don't need to run a centering device like a hand hard bar. So how do you know what link to set these things? Well, if you're nice to your chassis builder, he'll give you all those specs, then get you one of these radius ride set up bars.
It'll put you right on the money.
Now, you can loosely bolt in the two shorter lens
and the rear sway bar
after we get through C
down the sway bar in four lengths.
Well, we could fill the center section, throw in some axles and well, the chassis project keeps rolling on after the break. That is
welcome back to Horsepower's Try Five Transformation.
We just removed the body from a 55 bel air to swab its weak stock chassis
with one. We just had custom made at Street Rod Garage.
Then we got busy building it up with lower and upper control arms. A mustang two spindle
and a Flaming River manual rack and pinion system. After bolting up a front sway bar and bear brake rotors, we set the tow in
and install front Bill Stein coil over shock.
Then out back, we bolted up an empty curry rear end housing
and moved on to a four L
triangulated suspension
and rear sway bar.
We're filling it up with an eat in Detroit locker and a 350 ring gear. Now, what this is gonna do is give us great strength for that big block we're putting in here and it'll be great for cruising down the highway.
The rear set of coil overs can bolt up to the chassis next.
Then we drop bear emergency brakes onto the curry axles
and after sliding the axles into place, put on the backing plates and bolt everything down.
Next. It's a caliper brackets,
the rotors and the rear brake calipers
and we can finish the entire new brake set up with the front calipers
to feed our twin turbo big block Chevy. We're gonna start the fuel system out with this 22 gallon stainless steel tank from Rick's Hot rod shop. Now, they did an awesome job by filling the insides with a welding pump and filter. The pump is Weldon's 1100 A which is rated at 1100 horsepower. It flows up to 100 and 35 gallons per
hour. It's super quiet and draws a low amperage. And here's how everything's rounded fuel comes into the tank from the return line and gets held in the sump from there. It's picked up, goes through the filter into the pump and the pump pressurizes it up to the fuel rail and regulator. Now, the reason the sump is here is to keep fuel concentrated in that area,
that way the pump will never go dry unless you run the tank out.
This thing looks like a work of art. It's almost a shame to cover it with a body
for a custom chassis with all the top shelf stuff like this. You're gonna lay down some major cash.
Oh, did we mention this is not a budget bill?
Hey, it's fun to fantasize sometimes though
and to make a true roller out of it, it's gotta have wheels and tires and we'll use these while we're making up our mind on what to order
time now to drop in this big 580 big block, which is gonna rest down here on the frame.
Thanks to these adjustable mounts we got with our chassis that also have urethane isolators in them.
All right. Easy, slow
stop.
Just for mock up purposes. We're mounting the transmission, a TCI four L 80 E six speed automatic.
It's versatile enough to fit Chevy small blocks, big blocks and LS engines and it comes with a lifetime guarantee.
We're getting close. But before we make the body to the chassis, we have some work to do in the trunk.
Now, the big recess for the spare tire would interfere with the new fuel tank.
So we're drilling all around the opening and eventually the well comes right out.
Now the stock tank has to come right out too.
Then after cutting a metal plate, tweaking it just a bit,
we can tack it in place and add some seam sealer
ready
mush. Come on.
Now we can roll the chassis under the body.
All
right. Come down, everybody clear.
Are we looking
and back
and with new mounts from propane installed,
the body can come to rest on its new foundation.
I did it.
All right. Come on. Let's go.
Then the front clip goes back on. So you wanna lay it in right there.
Start your bolt.
So what's next for the try? Five, well, a trip to another shop to fab up some special tubing for the turbos. Then back here for a bunch more mods and we'll eventually christen it on the dyno Jet. But hey, that's a whole other show.
We got more of this one coming up. Stay with us.
You're watching Horsepower for a DVD copy of this episode. Just go to power block tv.com and order your copy for just 595 plus shipping and handling. Start your own horsepower collection delivered right to your door from the power block.
You know what the sun and road debris do to your headlight lenses,
they get discolored, oxidized and pitted.
Instead of spending a wad of cash for replacements, you can actually rest storm yourself with the help of this mother's powerball for lights headlight restoration kit. After masking and cleaning the surface, use a variable speed drill, the powerball and plastic polish
run the drill at a slow speed, polishing the lens with a back and forth motion
when the entire lens is clean and clear, buff it with the supplied microfiber towel.
The difference is pretty impressive.
Now, if you still have pitting or discoloration, the severe duty pads from the kit should do the trick. Now, either way it's gonna improve the looks of the car and it's gonna improve your ability to see and be seen at night and that's clearly a safety factor out on the road. Now, these kits are running about 25 bucks at your local parts store. That's it for this week's horsepower. We'll see you next time.
Show Full Transcript
It's a car that launched the Golden Age of Chevrolet
1955 was the first of a three year series of cars known as Try Fives.
And today Horse Power got an original for a unique Try Five transformation.
This one is a bel air two door post car and well, like many over the years, the original 265 got replaced. In
this case, a blown 454 big block making about 700 horsepower
problem is the factory frame was never intended to handle that much power
and we've got the cracks to prove it.
And this is common in overpowered tri five frames. When you put a load on the car, you can actually see the crack get bigger
and who knows if you stand on it long enough, you might even end up passing that big block in the blower.
What we're going to do is give this classic bow tie all the benefits of contemporary framework, performance and power while keeping the same looks that change Chevrolet's history.
It was the midpoint of the fabulous fifties.
Marilyn Monroe was the country's hottest bombshell. Disney's new theme park, the hottest place to take a vacation.
They were fast changing times
reflected in everything from youthful radical new music
to G M's radical New Chevy for 1955.
What's new? Everything? The new Motor Amic Chevrolet is new from the ground up.
Its so called motor Amic styling changed the car's image from basically boring
to fun and exciting.
It was a whole new car
and suddenly cool to drive a Chevy new from the ground up. GM spent a truckload of cash spreading the word about its all new hot one for 55.
Like this commercial featuring a slick haired newscaster.
Hello, ladies and gentlemen, this is Robert Trout bringing you some great news for 1955. Of course. Part of the story was Chevy's history making 265 V8,
all 162 horsepower
180 with a $59 power pack option.
Are you all ready?
The ad guys went all out to prove the new Chevy could beat the competition.
The gal in this spot is proving how well the power steering works with her own version of
tow.
They pulled out all stops and even pulled a skier in this ad to prove. Well, probably nothing.
There was a new wider chassis used for 55 through 57 models. One reason for the name Tri Fives more about that later
today, all try fives are revered for their timeless personality and appeal,
whether they're stock or chopped and stuffed with blowers and big blocks
or even modified for drag races.
Yeah, the legend lives on thanks to G MS, legendary launch of a history changing car. The one and only motor Amic Chevrolet of 1955
more than a new car. A new concept of low cost motoring.
Take a look at what's in store for the Bel Air. It's a 580 cubic inch big block Chevy. That's gonna be outfitted with twin 76 millimeter turbines turbos. Now, how much horsepower do you ask? Well enough to twist that stock frame like a pretzel. So to give our 55 shoe box a stout foundation, we paid a visit to a little company with a big reputation for producing some of the best tri five chassis in the world.
It's here in the quiet little town of Grand Alabama,
a family fabrication business that opened its doors back in 1979.
This is where old world craftsmanship meets new age technology to turn out everything from turnkey hot rods like this 38 Chevy to try five foundations like the one we're gonna use for our project.
The way we look at it is like building a house, that's your foundation that you're starting with.
There's still a lot of work to be done after you get the foundation la
but
if you don't start with a good foundation, then you're gonna have problems down the road. What we're gonna do, we're gonna take our chassis platform. We're gonna start at a, at a, a ground line
and then we're gonna set a ride,
then we will go in
and drop a, a body drawing on it just to kind of give him the feel of, of where that car is gonna sit and what it's gonna look like.
Then we will go in and, and build all of our stands, uh build our cross member and all of our bracketry and then we can actually take that and convert it into a cut path.
The plasma cam CNC laser cutter is a fairly new addition to the facility,
adding speed and total precision to the chassis building process.
It sounds like a lot of work and it is. But once you get it to that cut path, it's virtually ready to go.
It makes you wonder how you got by without that thing. I don't even wanna imagine it. We have nightmares about what would happen if it went down.
Meanwhile, on the main shop floor, several chassis projects are in the works following the specs from C
AD program.
Needless to say there's more than one way to build a chassis and the more traditional ways to take a piece of two by four square tubing like this man will bend it
and you're done.
Now here after the various plates are sculpted and back welded,
inner supports are added every 10 inches or so before the top plate goes on. Now, that's gonna last.
It's a longer process for us, but we're more about building a better looking and a stronger piece than we are about just turning out more product.
So after all the pieces are cut, we just start to assemble them in the, in the jigs and uh
uh put it all together
when it, uh, when it's all pulled out, it's basically ready to go
next up the powder coat.
And thanks to Chris Tr, 55 will have a foundation fit for adding new muscle to a classic old try five
to
take something from nothing
and take it from a concept to a complete finished product.
Uh That makes me happier than you think.
Well, here it is back from the powder coder complete with all that bracketry plus holes in the frame for the exhaust
man. No wonder those guys are so proud of their work. Now, we gotta get it from here to under there. That's what we do after the break. No need to get your frame off the couch.
Horse power back to take a modified tri five and modify it even more with a 580 cubic inch big block with twin turbos that'll sit on a custom built foundation in place of the stock chassis. So how do we make that happen?
The only way you can by separating the body from the original chassis. Now, 55 frame off, gotta start somewhere. We're gonna start by removing the front cliff first, the front bumper gotta come off,
the radiator comes out
and after removing several bolts underneath and on top with a little finesse, the front clip comes loose. It's not so heavy,
it's not bad at all.
Now, on to the rest of the body which involves separating everything from it and the engine like this brake booster assembly,
then more body mount bolts
and in a situation like this expect the unexpected back here, someone bought our access to one of the bolts with a piece of sheet metal for some reason.
So I'm gonna saw a hole through it.
A couple of the bolts are running into the floorboard. So we're just going to cut them off to free them from the frame.
And here's a good example of stock body flex unbolted, the weight of the engine pulls the frame a half inch away from the firewall.
Well, here's another example, notice the movement
when we take the weight off the frame by lowering the lift,
replacing the lift extenders directly under the body's pinch wells where it has the most strength.
Here we go.
And after the body clears the back wheels, the chassis is ready to roll out.
Now that we got the body separated, we're able to see a couple more things that could end up to be big problems if the car was still driven this way,
this mid engine mount is supposed to be flat end up, right but the amount of power this engine makes has got it bent forward and down
and that only leads to other things
like the clutch linkage.
It's pushed forward and makes contact with the header.
Hey, if you had a cross member like somebody did here, please weld or at least bolt it in place.
Now, let's remove that big block blower and trans from the factory frame for a little comparison
without the added on cross member. The factory frame has no inner support.
Our Street Rod Garage upgrade has twin J legs welded to it for all the support you would ever need
up front. Despite the factory engine cradles mass, it's far weaker than the sleek set up of our replacement
and look at what we got to make our chassis a full roller. It's all
good stuff including a
curry nine inch rear end
from Flaming River. This manual rack and pinion set up.
Now Street Rod Garage custom made all of our suspension components including the front and rear sway bars, the upper lower control arms to mention a couple for shocks. Well, coil overs from Bill Stein
and bear brakes including slotted rotors and six piston calipers, front and back. Plus these mustang two type spindles.
One more comparison before we get to work the stock upper control arm is a lot more massive than the upgrade and a lot heavier. Plus this one's got all kinds of adjust ability downstairs. Same story,
the lower arms, the first to go on using a through boat,
then with a jack stand for support, we need to make sure it's level for the spindle which goes in place. Next, followed by this bump stop.
Now the upper control arm goes in place and attaches to the spindle.
Then we snug everything down and add cotter pins
before moving on. We need to check for perfect 90 degrees vertically
and the level indicates the bottom needs to come out a bit.
Now, this is where the adjustable ends come into play.
Next, we can install a pair of cushion blocks to our chassis for the Flaming River manual rack and pinion system.
This thing is made of cast aluminum and only weighs 15 pounds and installs with a hind joint to each spindle.
The front sway bar has its own mounting place too and it installs with four bolts.
It also comes with the split rings designed to prevent lateral movement.
The sway bar also connects to the lower control arm
using links with spherical lens.
After mounting the caliper brackets, the bare 13 inch rotors go on with just a couple of nuts for now so that we can check the toe.
We use a pair of tape measures to square up the rotors.
In this case, 55 inches on each side.
Then by giving this tie rod in a few turns, we give it an eight inch of tow in which is ideal for this set up with that handle, we can install our coil over shocks, first bolting the top to the chassis,
then using a pair of spacers, the bottom bolts to the lower control arm.
Well, next, we're gonna install this curry track
nine rear end and notice how Street Rod Garage made these brackets with their plasma cam and welded them in place before the powder coat.
Now, we're leaving this thing empty for now, which will make hanging it to the chassis a whole lot easier.
This is the first bar of our triangulated four L
system. And with this design, you don't need to run a centering device like a hand hard bar. So how do you know what link to set these things? Well, if you're nice to your chassis builder, he'll give you all those specs, then get you one of these radius ride set up bars.
It'll put you right on the money.
Now, you can loosely bolt in the two shorter lens
and the rear sway bar
after we get through C
down the sway bar in four lengths.
Well, we could fill the center section, throw in some axles and well, the chassis project keeps rolling on after the break. That is
welcome back to Horsepower's Try Five Transformation.
We just removed the body from a 55 bel air to swab its weak stock chassis
with one. We just had custom made at Street Rod Garage.
Then we got busy building it up with lower and upper control arms. A mustang two spindle
and a Flaming River manual rack and pinion system. After bolting up a front sway bar and bear brake rotors, we set the tow in
and install front Bill Stein coil over shock.
Then out back, we bolted up an empty curry rear end housing
and moved on to a four L
triangulated suspension
and rear sway bar.
We're filling it up with an eat in Detroit locker and a 350 ring gear. Now, what this is gonna do is give us great strength for that big block we're putting in here and it'll be great for cruising down the highway.
The rear set of coil overs can bolt up to the chassis next.
Then we drop bear emergency brakes onto the curry axles
and after sliding the axles into place, put on the backing plates and bolt everything down.
Next. It's a caliper brackets,
the rotors and the rear brake calipers
and we can finish the entire new brake set up with the front calipers
to feed our twin turbo big block Chevy. We're gonna start the fuel system out with this 22 gallon stainless steel tank from Rick's Hot rod shop. Now, they did an awesome job by filling the insides with a welding pump and filter. The pump is Weldon's 1100 A which is rated at 1100 horsepower. It flows up to 100 and 35 gallons per
hour. It's super quiet and draws a low amperage. And here's how everything's rounded fuel comes into the tank from the return line and gets held in the sump from there. It's picked up, goes through the filter into the pump and the pump pressurizes it up to the fuel rail and regulator. Now, the reason the sump is here is to keep fuel concentrated in that area,
that way the pump will never go dry unless you run the tank out.
This thing looks like a work of art. It's almost a shame to cover it with a body
for a custom chassis with all the top shelf stuff like this. You're gonna lay down some major cash.
Oh, did we mention this is not a budget bill?
Hey, it's fun to fantasize sometimes though
and to make a true roller out of it, it's gotta have wheels and tires and we'll use these while we're making up our mind on what to order
time now to drop in this big 580 big block, which is gonna rest down here on the frame.
Thanks to these adjustable mounts we got with our chassis that also have urethane isolators in them.
All right. Easy, slow
stop.
Just for mock up purposes. We're mounting the transmission, a TCI four L 80 E six speed automatic.
It's versatile enough to fit Chevy small blocks, big blocks and LS engines and it comes with a lifetime guarantee.
We're getting close. But before we make the body to the chassis, we have some work to do in the trunk.
Now, the big recess for the spare tire would interfere with the new fuel tank.
So we're drilling all around the opening and eventually the well comes right out.
Now the stock tank has to come right out too.
Then after cutting a metal plate, tweaking it just a bit,
we can tack it in place and add some seam sealer
ready
mush. Come on.
Now we can roll the chassis under the body.
All
right. Come down, everybody clear.
Are we looking
and back
and with new mounts from propane installed,
the body can come to rest on its new foundation.
I did it.
All right. Come on. Let's go.
Then the front clip goes back on. So you wanna lay it in right there.
Start your bolt.
So what's next for the try? Five, well, a trip to another shop to fab up some special tubing for the turbos. Then back here for a bunch more mods and we'll eventually christen it on the dyno Jet. But hey, that's a whole other show.
We got more of this one coming up. Stay with us.
You're watching Horsepower for a DVD copy of this episode. Just go to power block tv.com and order your copy for just 595 plus shipping and handling. Start your own horsepower collection delivered right to your door from the power block.
You know what the sun and road debris do to your headlight lenses,
they get discolored, oxidized and pitted.
Instead of spending a wad of cash for replacements, you can actually rest storm yourself with the help of this mother's powerball for lights headlight restoration kit. After masking and cleaning the surface, use a variable speed drill, the powerball and plastic polish
run the drill at a slow speed, polishing the lens with a back and forth motion
when the entire lens is clean and clear, buff it with the supplied microfiber towel.
The difference is pretty impressive.
Now, if you still have pitting or discoloration, the severe duty pads from the kit should do the trick. Now, either way it's gonna improve the looks of the car and it's gonna improve your ability to see and be seen at night and that's clearly a safety factor out on the road. Now, these kits are running about 25 bucks at your local parts store. That's it for this week's horsepower. We'll see you next time.