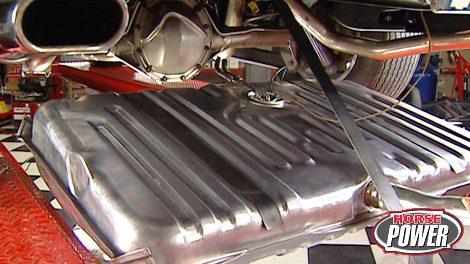
HorsePower Builds

Video Transcript

Hey, welcome to the show. You know, everybody wants more horsepower, but it doesn't matter how much you make if you can't rein it in. Now, recently we added a super charger and a high flow exhaust o project nightmare here. And well, well, it was great making nearly 300 horses at the rear wheel. Well, the stock brakes came up short in more ways than one, but we got a cure for that back at the horsepower shops.

Looks like those guys finally decided to show up for work. But in the meantime, let me show you my latest Chevelle project. It's a 1969 S s3 96 convertible that's just had a total frame off restoration.

But what makes it so unusual is the engine? Now, this is a 375 horse 396 with aluminum heads

and a rare dealer option.

Kyle Planum Air Cleaner. Now, they only built 400 of these aluminum head engines for all the Chevelles and well, only a handful were installed in convertibles and that's what justified this concourse restoration. Now, I'm gonna admit something though. I did cut corners in one

and that was the gas tank, the original one was nice enough. So all I had to do is clean it up, repaint it and reinstall it. But I gotta admit

that thing is costing me points at the shows. Well, since you got here first, today, we'll put the Mustang brake swap on hold till later. But I gotta tell you a gorgeous show car like this deserves the correct gas tank. Uh Even if it is a Chevrolet, what do you got over there?

This reproduction tank is just like the original right down to the filler neck and the galvanized coating.

I went ahead and ordered this one from year one along with a new sending unit, gas tank retaining straps and some anti squeak material.

Now, I've already gone ahead and disconnect the battery and drain the fuel. So all that's left now is to get that old car up in the air and get the whole tank out of there

with the tank supported. We first loosen the retaining straps,

then disconnect the fuel lines

and lower the tank enough to disconnect the sending wire for the fuel gauge.

Next, remove the ground wire.

And once that's done, the tank comes right out.

Well, now we can drop this new sending unit into place. But first I got a tip, I think you ought to know about

if you take your old ring and put some petroleum jelly around it. Like so

there we go.

That's gonna make sliding this lock ring into position a whole lot easier.

Then using a screwdriver and small hammer,

tap the locking ring into place,

attach the anti

squeak material to the tank, using some weather strip adhesive.

Now lift the tank in a position and support it while you reconnect the sending unit and ground wires,

then raise it the rest of the way,

reconnect the fuel lines and tighten the straps down.

Yeah.

And I had to do it.

The final piece to our gas tank replacement is a brand new cap. And of course, when you're chasing points, even it needs to be correct. So we got a hold of the folks at year one. Check out what they sent me. This is a brand new GM piece.

Now, this wasn't a very difficult job. It shouldn't take you much more than a couple of hours in the driveway and it shouldn't cost you much more than a couple 100 bucks.

Well, now it looks like the Chevy Boy won't be losing points at the car shows. But right now I suggest we don't lose any time bringing that Mustang to a better halt. Oh, check out what we got to work with

earlier today, Mike and I took the GT to a music city raceway to establish a 60 to 0 baseline.

Now, after getting the brakes up to operating temperatures, we made three stops

and our average distance was 127 ft.

Of course, this pony came from the factory with disc brakes all the way around 11 inch rotors up front, 10.5 out back.

But there's room for some big improvement.

We'll show you how big right after the break.

Hey, welcome back to the shop. You've no doubt heard the expression bigger is better. Well, that doesn't just apply to cubic inches. Check out these massive 14 inch rotors that

came from the kit that's going on project nightmare.

There you go.

Now, you've heard the name rush

applied to the world of racing. Of course. Well, now they've applied what they've learned from the race track and took it to a new product line that includes everything from crate motors to suspension pieces and well, even brakes

the kit we got for Joe's Mustang is easy to install yet, very impressive. Check out these lightweight aluminum four piston calipers. Now being four piston, this means that the pad is going to have a better mating surface to the rotor, therefore, better stopping power

to improve the performance even more. Ralph loaded these pads into the calipers which have a special compound that's so secret. They won't even tell us about them. You know how those NASCAR guys are any secret that works on the track, never gets out of the garage out back. We've got 13 inch rotors that we're using with our stock calibers, but we're gonna fill those calibers with new cobra pads.

We've also got new mounting brackets that'll help move those calibers out to clear those larger rotors

to get off the old brakes, remove the caliper mounting bolts

and the caliper itself,

then unbolt the caliper mounting bracket

and separate the stock rotor from the hub.

Now, I know these 14 inch rotors look pretty big out of the box, but just check this one up against our stocker. Now, that is an incredible difference. Also, the rouse rotors are slotted to allow gasses from the paths to escape.

And

up here we've got slanted cooling bins to help move air through the rotor as it rotates and that help keep it cool. Plus here's something you won't see on your stock rotors. These are actually weights that help keep this big guy in balance. In fact, if you ever balance your wheels and rebalanced them, but you still had a vibration. Well, guess what? That could be your rotors. Good point. Now, the first thing we need to do is install the new caliper mounting bracket using the supplied grade eight hardware that's in the kit.

Now, check this out. It's pretty cool. The bolts come with thread lock are already applied. So we'll get these started,

tighten down and torque to 85 ft pounds.

Next clean the hum mating surface to ensure the new rotor fits flush,

then slide the rotor into place.

Now you can install the caliper to the mounting bracket

and torque the mounting bolts to 75 ft pounds. Now, with everything bolted up, it's time to check to make sure the caliper is properly centered over the rotor

and we've got

at least 10 thousands clearance on either side of the rotor. As you can see, we're in great shape. Now, if you don't have the clearance you need, you're gonna have to remove the caliper, the rotor and the bracket and use some of these shims from the kit

until you get the clearance you need

with everything centered up. It's time to install the new stainless braided brake lines that are supplied in the kit.

Now, with the stainless line, you're not going to get the expansion under pressure. You do with the rubber line.

So you'll have a more solid brake pedal, plus it'll resist abrasion better and it'll look pretty cool with the rest of the brake kit

using the banjo bolts that are also supplied in the kit, install one crush washer on each side of the brake line

and with it pointed up and slightly towards the strut,

torque it down to 20 ft pounds

with the old brake line removed, replace it with the new stainless line.

Finally reinstall the line retaining clip.

Well, that's about it for up front except for one important test, turn the steering wheel lock to lock while you get a buddy to check the brake lines for any interference or binding. How's it look? My looks pretty good to me. Good deal. Now that does take care of the front brakes. When we come back, we'll attack the rears. We'll bleed the system, break them in and take this Mustang back to the track.

Hey, while those guys were taking a break, I've been busy back here removing the old caliper and the caliper bracket. Now, the last part to come off here

is the rotor.

If you recall, we're gonna use the original Caler, but we're gonna reload it with these cobra pads here. And since we're using a larger rotor than this one,

the kit comes with this bracket that'll move the caler further out and give us the clearance that we need. But before we can mount that bracket, we got a little more work that we need to do back under here.

After loosening the U bolt on the anti grown bracket,

move the bracket back about an inch,

then sandwich the new caliper bracket between the axle flange

and the anti grown bracket

to

the retaining bolts to 85 ft pounds,

then tighten the U bolts on the anna grown bracket

with this new bracket bolted up. The next thing we need to do is check for clearance between it

and the dust shield here. Now, we're in pretty good shape, but if you've got clearance problems, all you gotta do is loosen up these little retaining bolts here, rotate it slightly and well, that ought to take care of any clearance issues there. But now the next thing to do is install our rotor

like that and I'm gonna give you a little tip that's gonna make it a lot easier to install that caliper later on.

I'd like to take an open ended lug nut like this one. Just thread it on their hand tight and that'll help keep that rotor in place pretty good idea. Now, here's a cool tool that'll make compressing those rear calipers a little bit easier for you. Just insert these lugs into the caliper slots, rotate clockwise and apply a little bit of pressure. That'll make it easier for the caliper to slide over the pads.

Now, we can install the new anchor plate from the kit

and slide the pads into place,

then bolt the caliper to the intermediate bracket

and torque it to 25 ft pounds.

See, I told you that kit was easy to install. I didn't even have to disconnect through your calipers. So all we need to do is bleed the fronts, put the wheels back on and go see how well she stops.

Well, not so fast. The wheels we took off the Mustang have a huge interference problem between their spokes and these larger calipers.

Now, these things are 18 inches and well, they clear the rotors just fine, but

it just goes to show you how you need to check for clearance between the caliper and the wheels or call the manufacturer and see if your wheels will work with bigger brakes

or you could end up popping for a whole new set up like these Rouse design wheels. They're engineered to work specifically with their big brake set up. Now up front, they use an 18 by nine inch rim with a 28

millimeter back space. Now back, it's an 18 by 10 inch rim with a 30 millimeter backspace. Of course, they use good rubber on them too. Now we've used these BF Goodrich G force tas before. So we know they work well in dry and wet conditions.

Up front 2 65 35 ZR 18 and out back a 2 95 35 18,

man, those wheels really set off the car and

everyone will be able to check out those bad ass brakes we put on here. You got that right. Well, right now I'm gonna put my bad one in the driver's seat. Once we get out to the parking lot, we can check everything, make sure it works properly, then we'll hit the streets and start seating in those brakes

and to properly seat your brakes. You wanna go to a street where there's not much traffic and make several stops at about 20 miles an hour,

then firmer stops at progressively higher speeds until you hit about 60 miles an hour.

Ready.

Ok. Now, don't forget to cool off the brakes between cycles or else you might warp your rotors. Let's say we head to the track and lay down some cones,

same track music city raceway, same cone set up and same 60 mile an hour to zero stops

this time though, I could immediately feel the difference

and as the brakes heated up at stopping distance continued to get shorter.

Not bad. Looks like 97 ft. That's about 30 ft shorter than our baseline. Oh. And by the way, if you wanted to pick up some of these rouse brakes plan on spending about three grand. Now, I don't know if 30 ft sounds like a lot to you, but it's almost a couple of car lengths and believe us, that'll keep you out of trouble. The price of the brakes is a lot less than replacing your front end. Well, we're out of here but stay tuned. There's more horsepower ahead. Let's try that again. You want to.

All right, man, let's go for it.

Horsepower T V's Quick Tech is brought to you by

Wyotech

ready for an inside makeover or your ride. Well, when you shift your attention to things like seats and door panels, you quickly see there's a lot more involved than just picking a theme,

whether it's a faithful original or just original to your imagination.

Well, chances are you may never master a professional machine like this one and neither will I, but wouldn't it be great to talk the talk when you go to the upholstery shop to launch your own project? I mean, have you ever thought about things like. What kind of seams can you use?

Seems like we've come to the right place here at Wild Text. Blairsville, Pennsylvania Campus students learn how to creatively master the latest automotive upholstery methods.

And instructor harry Weyman showed us some of the fabrics and stitches you can choose from for your next inside upgrade.

This is just your standard scene.

Ok. This is what they call a double reinforced seam

reinforced on the back is your strongest seam.

This is a a welted single reinforced scene.

And this here we have is just a regular welted seam welt corridor beating as a lot of people will call it.

Ok. Then we get into our actual uh designs or insert designs. This is just a top stitched pleat where you actually see the stitching.

Ok?

Now, if we do that on a on

a on a cloth,

the stitching disappears.

So it does look real nice on cloth.

Ok? And then this is our tuck and roll as everybody refers to you

around,

been around a while, use it on a fifties style hot rod.

Uh This is a standard tuck and roll

and this is a tuck and roll that's used a lot today.

This being the type that if you had a concourse car, an antique. This is what they used back in the thirties and the forties. So you wanna use this style

after you settle on the stitch, then comes the material to use everything from exotic leather to suede. And more

another thing it's hot

is the perforated leathers,

use them as an insert design. A

lot of the seats.

So this is all ties in together, real nice stuff.

Ok. Then we have our ever so popular Tweed that was used a lot in the, uh,

in the nineties cars. Very stretchable. Used a lot in molded door panels.

You've seen that in a lot of the hot rods in the, uh, street rods.

Ok. Then we deal with our, the standard vinyl

that uh is used and it's still used today in every car that's out there.

So remember while there are lots of ways to express yourself on the outside of your ride,

there are just as many ways between the doors

in. Thanks for schools like Wyotech, there will be plenty of talented hands to sew up the deal on your next makeover.

You know, we hear from a lot of you guys who wanna start an engine build up without coughing up a lot of cash. Well, this could be your answer. It's a remanufactured 350 long block from advanced auto parts. Now, this thing comes with a brand new rotating assembly, new bearings, oil pump and gaskets. Now, the heads and cam have been refurbished and the whole thing's been spin tested and comes with a 15 month warranty.

You can get a two bolt main

for about 850 with an exchange, a four boat like this one will set you back a little bit more.

Here's something pretty cool that I found. It's a trans cooler from Hayden.

It'll give you up to 60 degrees. Better cooling. It's made from lightweight aluminum and powder coated, so it'll last longer.

It comes with these heavy duty sae fittings

and you can get them in three different sizes for medium to heavy duty use and you can pick one up for under 50 bucks.

If you're doing some serious racing, you need a torque converter that handles the extra power and abuse. This eight inch computer balance converter from BT E is built to take it with anti

ballooning plates and a flame harden hub for long wear inside. It's got furnace braised fins, Torrington bearings

and the Kevlar line lock up clutch. Now you can convert your racing set up with one of these for just under 700 bucks.

Well, that's it for this week's horsepower. Next week you've asked for it and you're going to get it. We're taking project supernova to the track for a little test and tune. See you there.
Show Full Transcript