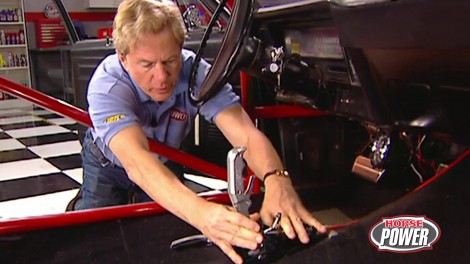
HorsePower Builds

Video Transcript

Hi, welcome to horsepower TV. Glad you joined us. Well, today we're gonna get our project supernova even closer to being race ready. All thanks to the pile of parts. My partner just brought in

now in case you've missed some of the build up on this 69 of our,

let me bring you up to speed a bit.

We back half the car with a rear clip and nine inch rear end

installed a 12 point roll cage

and

fed up the tin work.

Last time you saw it, we installed a 572 race engine and our transmission.

In the meantime, we painted up our road cage red to give us some color. And today, well, we're gonna drop the hammer on a performance shifter installation, bolt in some racing seats, harnesses, gauges, ignition.

Well, we got a busy day ahead of us. Right,

man. You sure call that right now. We're gonna get started today by taking on that shifter installation first. Remember we're building a race car here, so we need a shifter that will not only stand the rigors of competition, but it'll also meet those safety regulations of the sanctioning bodies. So we chose this magnum grip pro stick from B and M. Now this one is built

just for a power glide with this two speed gay plate here and check this out. The kit also comes with a special shift lever that doesn't have a throttle valve shaft hole. Now, what that does for you is it allows you to operate a transmission like ours that has a manual valve body and a trans brake.

We're gonna get started though first with a little bit of pre assembly outside the car.

This is a neutral safety switch and what it does is prevents you from starting the car in gear. And of course, it's also mandated by all sanctioning bodies.

It attaches to this little bracket here with a couple of screws that come in the kit.

Then the bracket attaches to the side of the shifter.

Next attach the shifter cable

to the shifter base,

finally slipped the eye

over this pin

and secure it with an E

CIP.

Now we're gonna mount that shifter to the floor here

and

there you go. Thanks.

We're gonna use it as a template to mark four mounting holes.

Next run the cable through a one inch hole in the floor

and secure the shifter with the boats from the kit

underneath the car. Installed the cable bracket using two transmission pan bolts,

slide the cable into the bracket and install the large nut with a washer,

place the transmission selector into low gear,

put your shifter into low gear

and fit the pin into the bracket hole, making any adjustments with a large nut.

Well, now you wanna operate the shifter, making sure you're grabbing all the gears and once you're satisfied,

go ahead and insert the cotter pin down at the transmission end of the cable, then you can drop on this housing over the transmission shifter

and secure it with a couple of these quick release pins.

Hey, that went pretty well. Now, what do you say we shift our attention to the Nova's ignition set up where we're gonna use a complete GM performance parts set up including a distributor like this one that's already installed in the engine. Now, we're also gonna use their control box, a soft touch rev limiter and their heavy duty coil. But first, I want you to check out this distributor,

it's a bulletproof magnetic pickup type distributor with a bill aluminum shaft.

Now, here's something that makes a lot of sense to me. This collar here is adjustable, which makes it real easy to set that proper installation depth. Now, that's important on engines that have modified blocks, heads and intakes that have a different installation height.

Of course, the coil that we're gonna use with that distributor cranks out 45,000 volts.

Well, I'll tell you one thing, this system sure gets my bolt. You know what I mean?

I love doing that.

Ok, let's look at the rest of the ignition system. We're using G M's heavy duty ignition control box that delivers multiple sparks thanks to its capacitive discharge circuitry. Of course, it plugs right into the soft touch rev limiter which comes with three different plug in modules for 67 and 8000 RPM limits. Now, you could hardwire all this stuff together, but GM makes it so easy for you with this one firing harness that features weather pack connectors configured. So they only plug into their proper mate like that. Now, even my bow tie bub over there could do this. Sounds like you want me to handle all the work once again. But you know what? That's cool. Actions. Speak loud in words. Anyway.

Now I've already scoped out the situation here and we're gonna mount both the control box and the rev limiter right up here on the firewall where they'll be away from heat and moisture. Now, here's something else that you wanna keep in mind though.

You'll need to maintain access to these little plug in porch here for those rev limiter modules. So make sure you leave yourself plenty of room there.

Now, on the other side here, we're gonna mount the coil right here where the windshield wiper motor used to live. But like that. Huh. That looks good. Right. Ok. Well, he does a little work. Let's take a little break when we come back, we're gonna show you the best seats in the house. So sit tight

later. We'll install some safety equipment we'll need in our nine second nova along with a way to crank up its 700 horses. Plus we may not have NASCAR or even N Hr A. But we do have the best car stool racing you've ever seen

and the fun.

It's all on the house.

Don't forget Chuck and Joe's bar stool races are coming up.

I wonder if they remember to top off their nitrous bottles.

Hey, thanks for sticking with us. Time for more work on our project supernova. But before we check up on Chuck and that ignition over there, chances are you've been wondering about this cool little Camaro that a friend parked in the shop this weekend?

Well, it's a 71 rally sport that's been fully pro street with the humongous tires, of course. And how do you like those shaved door handles inside? It's got a matching yellow road cage and while this thing is gorgeous on the outside, it's equally eye popping here under the hood. How about a nitrous

at 502, horse 502 backed by a turbo 400. I tell you there are enough silver looking goodies under here to make the lone ranger jealous. All right, Kimo

Sabe, while you've been over there drooling and gawk and

I've been over here drilling and ranching. In fact, I've already mounted up the control box, the rev limiter and the coil plus wired it in using that harness. I even

fed up a little plate here to cover the hole that was left by that windshield wiper motor. Now, check out what we got next for the old supernova.

These are the racing seats that we ordered from jazz products. Now, they're molded from a high density polyethylene. So they're strong and lightweight. We also pop for these optional cloth, flame resistant seat covers here and hey, anybody that spent any time sweating in the stage

lanes know why we chose the cloth rather than the vinyl seats.

We're gonna mount these seats using these adjustable brackets here. So we're gonna adjust the seats for different drivers. They just attach right here on the bottom and once we get them bolted up, all we have to do then is find a suitable location for them inside the car.

Hey, no, buts about it, that seat looks really good in there but restrain yourself. We still need a harness and window net to meet safety regulations. Now, these two come from Jazz and the harness features three inch wide shoulder belts and lab belts, plus this two inch wide submarine belt,

the shoulder belt is gonna attach to the back brace of our road cage over there. The other two belts both to the floor. Of course, the rules stipulate the use of one of these window nets. And uh let me show you where it goes in the nova

the top of the net attaches to the roar

roof loop right here.

And it also attaches down here on this diagonal door brace. Make sure you use grade eight hardware and oh check the rule books for proper positioning of your mounting points.

Yeah.

Well, even with a safety harness and window net, the rules stipulate you have to have Robar padding, of course, to protect the driver.

Now, with our supernova, we could have gotten by with that foam padding, but we went the extra mile to get this sf I approved padding from Jazz

comes in 3 ft links and installs pretty easily. Thanks to these velcro strips,

here's something else that attached pretty easily, especially with this low mount alternator kit that we're using, that includes a small diameter pulley and these billet brackets. Now, both the kit and the alternator come from Power master

and we're using their excess volt alternator that cranks out 100 amps and only uses one wire to hook it all up.

Now, it's also got an adjustable voltage feature that makes it compatible with all 12 to 16 volt batteries,

including those that use dry or gel cell technology.

Oh, and here's something else, erasers alike. It also has an adjustable output feature

that'll reduce the amount of horsepower drain on the engine.

We're also gonna bolt up one of their excess torque starters, a gear reduction unit that cranks out 200 ft pounds of torque enough to spin off a motor that has an 18 to 1 compression ratio. Now, this thing will clear most headers and oil pans. It features a billet snout for extra strength and

only weighs about eight pounds.

Hey, it looks like we got a good start on things now, but we're gonna have to stop, take a little bit of a break. And when we come back, we're gonna show you an efficient way to monitor your race cars, vital signs. So stick with us,

Michelle back on power block. And if you love tricked out cars

ride with Funkmaster Flex each week during slamming Saturday nights

going down

Funk Master Flex TV.

But right now let's get back to horsepower TV.

Oh, work, huh? Hey, that's some of the nicest stuff I believe I've seen.

Hey, welcome back to the shop and thanks for sticking with us, man. It has been a busy day in the shop today.

We started off by installing a racing shift in our supernova.

Then we installed a racing seat and some safety equipment on the inside before we moved outside

and installed a performance ignition system of fire the motor off. Then we also installed a starter and alternator,

man. This thing is gonna be ready for the race track before we know it.

Yeah, but let's face it. Those race parts are expensive

and the last thing we wanna do is scatter them around the race track. So, a good set of gauges is a great way to protect your investment. The next thing we're gonna do is install this set of pro comp ultra light gauges from auto meter. We got ours with the two and 58 inch faces, a full sweep design

and black numbers over silver background that makes them easy to read.

We're also gonna use some of this large diameter braided hose for the oil pressure gauge for quick response and accurate readings. Oh, and this fuel pressure gauge uses an electrical cinder. That means you can mount this thing inside the car

without bringing fuel in with you.

Well, here's a gauge that you just can't do without, especially in drag racing. It's a tachometer now, not too long ago attacks only function was to monitor engine RPM s foot man. They've sure come along

in a short time. Check this out.

This is auto meters ultimate to playback tack. It's a dual channel device that measures both engine and driveshaft RPM to help you analyze torque converter or clutch performance, tire slippage or shake and even shift point efficiency.

Now it uses a four stage shift light to help optimize each gear change and it comes with its own software so you can upload each run into your laptop or your computer for on screen and analysis man. I gotta tell you that thing does everything but drive the car, it really does. Of course, it comes with the standard tack hookups, add this long shielded cable that hooks up to your drive shaft sensor. You will need to order one of these drive shaft collars depending on what rear end you use. Now, a lot of this thing's got more connections than an agent for the CIA. It is a useful tool that'll make your race car more consistent

and consistency is what counts in drag racing.

This gauge panel we ordered was designed to go under the dash

and that's exactly where we're gonna install it.

Uh, something like that.

Now, I've already removed the two outer gauges here, so we can attach the panel with a couple of sheet metal screws to the dash

once that thing's secured, all we have to do then is find a suitable place in the firewall to pass this sensor through

so we can attach it to the engine.

Now, we need to find a proper place to mount this monster. Of course, the drag racing, you wanna keep your eye on the track as well as your tack and

that means in your line of sight. And I think right here on the roll cage will work fine for us.

We'll attach the pedestal to this forward tube

using a hose clamp

and we use another hose clamp to attach the fuel pressure gauge to the steering column.

You know, a 12 volt battery like this one might be great in a street machine. But if you've got a drag race car, a 16 volt battery really provides the extra juice that you need to fire off those high powered ignitions.

Plus they'll also make other 12 volt components more efficient too, you know, like fuel and water pumps, cooling fans and even the starter motor. Now, this 16 volt battery here comes from turbo start and it's engineered just for racing.

It's got deep cycle plates that are epoxy to the bottom of the case to eliminate damage from vibration. Plus it has a built in hydrometer right here so you can easily check its state of charge.

Oh, and speaking of that turbo start 16 volt system also comes with this 25 amp, fully automatic charger that'll work with lead acid gel or even dry cell batteries.

We're gonna mount that battery back here in the trunk to take advantage of the weight,

but not today

in a week or so. We're gonna complete the electrical system with a state of the art wiring kit

and even design and fab up a custom set of headers for the Nova.

I can't wait to see the that but you know, we still have to plumb the whole fuel system. We need to rehang the sheet metal. And how about some super graphics to make the old Nova have a super look. Hey, I like that idea. But don't you look away from your set for one minute? We got something really hot for you right after this

coming up. The moment you waited for horsepower's happy hour. A bar stool brawl at a local strip with guaranteed DWIs that is driving while insane.

Want the latest on horsepower. Check out our website at Horsepower tv.com.

No, man, your memory is fading. I won that race. No, yours is fading. Just like your voice. You cheated. I won.

Oh, hey, you're back. Hey, back me up on this now. About a year ago. My partner and I engaged in a little bar stool brawl

here in the shop. Yeah, we were even sober at the time. They were actually bar fly racing, bar stools we barred for the big challenge. And as I recall, I was whipping Hansen's

Heiney until he got desperate and cut me off on one of the corners. He was disqualified and I won.

Well, it looks to me like the only way we're gonna settle this argument is with a rematch and you know what, this time it's gonna be bar stool drag racing.

Hey, check this out.

The folks at Barfly have really stepped it up this time by feeding the motor a whole snout full of nitrous. And, hey, speaking of motors that 3.5 horse Briggs has been replaced by a 4.5 horse Robin engine with a single overhead cam and four valves per cylinder.

Now, the Chrome Molly chassis has been stretched and widened for more stability, but it still uses the same disc brakes, aluminum racing wheels and slicks that is slick. They've also re-engineered the front end with tunable steering geometry where you can change the caster camber, even the steering ratio. Now, they also have added some pretty outrageous options like wheelie bars. Now, if Nitro ain't enough to make your bar fly, fly though, you can get one supercharged or even turbocharged.

Hey, man, why don't you shut your face and let's race. In fact, I know the perfect piece of pavement just down the road

on.

Mhm.

Mhm.

Well, there you have it

two in a row.

That's two out of three. Not bad, huh?

Men, two out of three. You know, I think you're sitting on a ringer there. Not only that, but you're giving up about 75 pound weight advantage there, buddy. He thinks it's a stool. Let's switch. All right, let's switch.

I'll beat you on the block.

Ok.

I don't know. I told you you were on this ringer.

What you beat me like that for. But, but I tell you what, I still got you two out of three and that makes it for that time. You got me remember at Bristol and this Firebirds? I remember that. Revenge is sweet pal. Ok. I'll give that to you. Now, here's something else that's sweet and hot

horsepower TV. S hot parts is brought to you by Jags. One call gets it all. One click, gets it quick

first. Here's a way to help your computer controlled engine get with the program. It's a handheld micro tuner from super chips, you enhance the factory tuning at part and wide open throttle with more aggressive timing and fuel curves. Plus, you can raise your shift points and make them firmer, raise or lower your rev limiter and even correct your speedometer for tire size or gear ratio changes. Now, it plugs right into your computer and it's easy to use and well, for $420 you can program your way to better performance. Here's a way for you, Chevelle guys and the rest of you with G MA bodies to pump up your performance flow. Master's American Thunder exhaust system is now available in a massive three inch diameter for those of you with more than 500 horses under the hood.

Now, they aluminize pipes are all mandrel bent for maximum flow and they feed into a pair of 30 series two chamber mufflers.

They're designed to hook right up to most headers and they're pre bent for easy home installation. Of course, the price won't get you bent out of shape either starting at about 650.

Here's an exhaust tip for you. Literally, that is these reproduction exhaust tips from year one, that late sixties and early seventies, dusters, Demons and Kutas.

Now, they are stamped just like the originals except they feature a high flow two and a quarter inch inlet. Now, they even have the correct hangers to ensure proper placement when you install them. And well, if you've exhausted your outlets at finding a set of these, well, you'll be all set after you plop down about 50 bucks a piece. Well, it looks like we've, uh, exhausted all our time again for this week. But, hey, it's been a real gas. Come back, see us next week again to get your fill of horsepower TV. Speaking of gas.

Yeah.
Show Full Transcript