HorsePower Builds
Want more content like this?
Join the PowerNation Email NewsletterVideo Transcript
Today on horsepower TV.
We'll take a pre 96 Chevy small block and modify the TB with a more efficient multi port fuel injection.
We'll upgrade the fuel pump and swap out the computer chip before we strap this baby to the
dyno Jet for testing.
Not for this, for this. You'll see what it takes to make the loudest sound statement at the world finals of DD drag racing.
So hang on for horsepower TV.
Hey, welcome to horsepower TV.
Whether you haul a race car, a show car or just haul trash just about everybody needs a good truck these days.
Now, a few weeks ago we pumped up the power on our horsepower haulers Cummings diesel
and we did it with a bully dog controller, propane injection kit and bigger injectors. That's all well and good. But chances are you're running a gas engine like the 350 Chuck's Chevy 93 half done here.
That's right
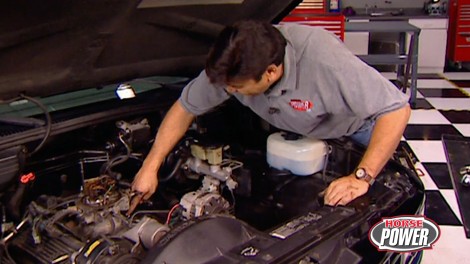
now. The problem with pre 96 Chevys is they use a throttle body fuel injection
and it shoots the fuel in right here above the throttle blades. That fuel doesn't stay in suspension with the incoming air And of course, the result is less power because of uneven fuel distribution. Now, Chevrolet fixed that problem in 96 to a large extent when he introduced the Vortec engine with multi point fuel injection.
Well, today we're gonna follow Chevy's lead by installing a similar system that delivers a more even fuel charge to each cylinder.
This kit we got from Edelbrock includes a new intake manifold with reconfigured runners and injectors for each cylinder. Now, the kit also includes brackets, hoses and the hardware. You need to complete the installation.
There are also instructions on how to convert your old throttle body into an air valve that retains the original throttle position sensor, transmission controls and cable connections.
Hey, while you've been over there gab, but I've been busy getting this thing ready for a baseline on our
dyno Jet here.
We say we make some noise, let's have at it
there. You have it
100 and 45 horsepower
pretty good place to start.
What do you say? We get this thing off the
dyno Jet and get our hands dirty.
Now, the first thing that we want to do is disconnect the battery.
Then we can start stripping the top of the engine while the coolant drains,
then remove the upper radiator hose,
vacuum fittings,
electrical connections,
spark plug wires from the cap after marking their locations
and finally the distributor cap itself.
Well, now we're ready to remove the distributor. But before you do make sure you note the location of the distributor body and the rotor.
Then you can go ahead and loosen up the retaining clamp,
just pull up straight on the distributor while rotating counterclockwise on the rotor.
There we go. That wasn't too bad.
Now, we can just set this thing aside and get to work on those intake manifold bolts.
Hey, good job there. Well, that intake is ready to come off now
and I like to use a screwdriver to prowl on the front end of the manifold to break it loose. Now, don't worry if a little cool it comes out when you're doing this, just make sure you mop up the lifter valley with a paper towel.
Once the intake manifold is loose, lift it straight out,
then clean the old gaskets off the heads.
Now you wanna lay the manifold side by side so you can compare the two and transfer any hardware from the old to the new. Now, that's gonna include things like the EGR valve vacuum fittings, brackets, thermostat housing and even a sensor or 20. And here's a little tip for you before you start any of the threaded fittings, give them a shot of thread sealer first to keep them from leaking.
Ok. Now that we got the surfaces of the intake cleaned up,
they can lay in these ultra seals from Mr gasket and a thin bead of this R TV on each end of the manifold mating service. Now, speaking of silicone, the reason we like these is they've got a thin bead around each port to ensure a leak proof seal.
Hey, hey, looks like you've done a great job there. You've got an eye for great work. Yeah, but I haven't had my eyes checked lately.
Ok. Give me a hand with this. Set her straight down. Ok.
Looking good. How you looking there?
All right,
the four center bolts for the intake project down into the lift valley. So we give them a dab of silicone to leak proof them, then we're gonna tor
them to 25 ft pounds. Now, once we start that tightening sequence, we'll begin in the center and work our way outward in a circular pattern.
Well, the distributor is next and we wanna make sure that we maintain our orientation by using those marks that we made earlier. Now, this one is for the rotor
and this one points to the front of the engine.
Ok. With that, we can drop the cap back on and to get a good spark, we're gonna install a set of these moroso ultra 40 wires. They call them that because they only have 40 ohms of resistance per foot so we can get the most out of our stock ignition.
Well, we know you'll get something out of these following messages. Stay tuned. We'll be right back.
Welcome back to the shop where we're swapping out the stock throttle body set up on Mo Chevrolet truck there for Edel Brock's multi point fuel injection set up. Now, while we're on break, Joe got busy reattaching some of the hoses, brackets and lines and well, now it's time to convert our throttle body which is gonna eliminate these fuel injectors and regulator set up.
First, remove the fuel inlet
and return lines here at the back of the throttle body,
then remove three torque screws
that retain the fuel injector and regulator assembly to the main body.
Then use those same screws to attach the block off plate
that comes in the kit.
Now with a new base gasket, we're ready to bolt this thing up to the intake.
Ok.
All we have left to do under here is reconnect the throttle linkage.
Now, this is a 93 truck, the first of its kind with an electronic transmission
if you've got a 92 or earlier. However, you're gonna have to readjust your throttle valve control cable.
Now, you could lose your transmission if you don't do it properly, but it's not difficult to do. And the whole procedure is outlined in the Edelbrock constructions. Now it's about time to get wired. This harness comes with the kit,
these ends connect to our new injectors. Well, these four leads here will connect to the stock harness using this original injector wiring,
cut the factory injector wires above the grommet,
then remove the gromit,
fill the gromit holes for silicone
and reinstall it back into the throttle body.
As we told you earlier, the original wiring hooks right up to the new wiring on the Edelbrock harness and to make things easier. Well, it's color coded the same blue to blue, red to red and so on. Now, after you crip them all together, give them a nice little tug to make sure you got a solid connection.
Now you're gonna have to re plumb part of your fuel system, but everything that you need is included in the kit. Now, we're gonna start with this 90 degree fitting that attaches to the fuel pressure regulator on the passenger side of the fuel rail. Now it feeds down to a metal return line that's attached to the frame.
This 45 degree fitting connects to the rear of the fuel rail on the driver's side and in turn goes down to the fuel filter, which is also on the frame.
Well, now we need to get the truck up on a couple of jack stands so we can finish hooking up those fuel lines.
I'm installing a couple of adapters from our kit one here on the fuel filter, one on return line. Now, the adapter is attached to barbs that hold the lines in place, so we don't need any clamps.
Most installations are gonna require a high volume, high pressure pump that Edelbrock sell separately. Now, this one is for our single tank applications here, but they also make them for dual tank applications as well. Now, to get to our tank, we're first gonna have to remove our bed and, well, it's held in place with eight bolts, couple electrical connections and some grounds. Oh, we're also gonna need about four good men to help us lift it off the frame. I don't suppose, you know, where we might find those good ones. We'll get some help somewhere and while we round them up, you watch this, we'll be back to wind up this project right after this.
Hi, welcome back to the shop as we finish up our EF I upgrade on Chuck's 93 Chevy here.
Well, as you can see, we got that bed off with the help of some of our friends. Now, the top of the tanks exposed, in fact, we're gonna be working around this sending unit area.
Now, we used a wire brush and some compressed air to clean it up so that no debris falls into the tank. Once it's open next, we gotta disconnect these lines and electrical wiring so that we can loosen that lock ring assembly
using a wooden block or brass punch to prevent sparks. Rotate the locker ring counter clockwise until it clears the tanks
then use compressed air to clean everything off again.
Now, you can remove the entire pump and send a unit assembly.
Well, I guess we're ready to swap out this old pump for our new one
and to do that
when first disconnect this power wire,
then we want to loosen this clap.
There we go.
And
the old pump should slide right out.
We want to transfer this rubber isolation ring from the old pump
to the new one
slip. This output fitting into the hose
at the other end into the bottom of the bracket. Here,
squeeze on the clamp to tighten it,
then pop on the new filter
and reconnect the power line.
Hey, man,
I've handled the hard part. I hope you're uh pumped up to do some work. Hey, good job.
Now, before we slide this thing back into the tank, we're gonna put a little bit of grease right down here on the O ring.
I've already done it
to the receiver on the tank there. And
what that's gonna do is help that tank
slide into place while we rotate it.
There we go.
Now, tap the lock ring into place,
reconnect the wires
and the lines.
Now with the fuel connections handled and the battery reconnected, it's a good idea to cycle it a few times to make sure there are no leaks.
Everything's nice and dry up here. Great.
Our computer mods are next.
First, we need to get this module out of the glove box
and then remove this panel here so we can get to the chip.
All right, there's the old chip out. Now, we're gonna be putting a lot more fuel into this Chevy. So our new chip that came with the kit has been calibrated for our application.
Now, it comes with this piggyback adapter and check this out.
It has an alignment lug so it only installs one way,
you know, sometimes running good isn't quite good enough. In fact, I like all my stuff to look as good as it runs. And that's why I went ahead and pop for these moroso polished aluminum center bolt valve covers
and this chrome air breather lid from Edelbrock. Oh, and one more thing, this Rush air filter from Barry Graham.
Hey, it's gonna keep the air clean and improve the flow a little bit at the same time.
Now, once we get everything bolted up under here, we can go ahead and fire this bad boy up.
Ok. Fire it up, Joe.
Hey, pretty sweet. Huh. Now, with the engine running,
make sure that you check everything one last time for any fuel, oil or water leaks. And
well, if everything looks pretty cool,
which it does under here,
you're ready to start setting your timing.
Now, to do that, you first need to disconnect your ignition interrupter wire.
It's a tan wire with a black stripe that's
up here on the firewall in this 93 model, but on other models,
it might be found inside the cab next to the computer.
Now, let's see what our timing has got to say.
There we go.
That ought to do it.
All right. Now with the ignition timing set,
just reconnect the ignition interrupter wire and
I guess we'll bolt the bed back on and then we can strap to the
dyno Jet and see what kind of numbers we get.
Hey, cut her off, Joe.
Hey man, check this out. 164.5. Let's call it
100 and 65 horsepower at the rear wheel 20 more than our baseline. Not to mention the extra torque and fuel mileage pretty good. Huh?
Now, you're gonna have to budget about a day out in the driveway and about 1100 bucks for the fuel injection and that fuel pump. That's right. Well, right now, I think we need to take a little pause for the cause. Our sponsors that is, we'll be back with more horsepower TV. After this
horsepower happenings is brought to you by Wyotech. The nation's premier technical training school
in most kind of drag racing. Winning is all about ETS here. It's all about D BS. Welcome to the world finals of DB drag racing.
Ok.
One minute, ladies and Gent
go,
you've just created a stereo on wheels that you can't listen to.
You just spent your life savings
on this vehicle that you can no longer listen to, to create sound. Now, what sense does that make?
Uh not a lot, man, but when you make it to the World Series of loud sound, you'll pop for the amps, speakers and batteries it takes to in some cases break the 170 decimal
sound
bar.
We had over 1000 shows this year and we bring in the top 200 competition, teams
competitors accrue points throughout the season. And then they also have to have one of the loudest cars in their class to get an invitation to the finals.
45.
Here's how it works. A sound pressure microphone is installed on the windshield. Each team runs the same low frequency tone through a CD player into the vehicle.
You can't hear much on the outside, but they sometimes have to literally stop the sound from blowing the roof off.
Ok? You're gonna scream as loud as you can and you can see your sport so you can compare it to that car. Ok.
Just scream as loud as you can.
Ah,
five,
five decibels that was 20 times louder than your scream.
Five
Eric Parsley's team has two entries in the extreme class where you can spend well over six figures on a vehicle. You can't even drive
a top field dragster is, is, is made to do 325 miles an hour for 4.5 seconds for one, run straight down the track.
This bad boy set it to be as loud as it can be for one note for a second and a half.
That's it. Now, all the drag racers wanna go faster and quicker. You wanna go louder, right louder. That's what it is, baby. It's all about louder.
Arthur Shaker Turgeon is a veteran of this young sport and uses 4, 300 amp alternators
to generate about 100 and 30,000 watts of power.
He's got over 300 grand in his ride.
It's really loud.
We'll take a look inside.
Yeah.
Shaker's cab is modified with quarter inch steel all around with 1415 inch woofers in the rear.
This industry has gotten to the point where there's a lot of physics involved at this point
and the physics has so much in the power. It's, it's in how you distribute the power and how you distribute inside the cab.
The DB drag events are also a showcase for everything that's hot in the way of cool car, audio and video.
The editor in chief of mobile entertainment magazine offered to show me around,
lots of sound, lots of sound quality in here, even though as you can tell it's a little bit loud on the noise floor. But that's
exactly right.
Everybody's competing just trying to show off their goods. Uh But out here this is where you're really gonna find the cutting edge of technology. A lot of companies are a lot of innovation these days, there's some uh DVD based navigation that we're gonna see you here in just a couple of minutes. There's people with
satellite radio, all sorts of exciting products.
Yeah,
we got here, Cadillac.
Let's take a look.
The choices of car V gear today are staggering.
But as a professional audio file, Mike recommends you start with the end result. The most personal choice you can make are speakers uh for myself personally, I actually took believe it or not two full years to decide on the speakers that I put in my own explorer.
The exhibits are not only loaded with new hardware but also some cool concept vehicles.
We like this tricked out ma audio golf cart that model Nicole demo for me.
Oh, this reminds me DB drag events are well known for something that relates in no way to woofers and tweeters. Welcome to the Miss Hawaiian Tropic
International Model Search.
So what's this got to do with sound competition?
Probably nothing but who cares. Anyway, this is one new phase of the high performance lifestyle you'll see and hear more of in years ahead
just like the battle for quickness on the quarter mile strip.
There's a battle building for Decibel domination
horsepower TV S hot parts. A close up. Look at the latest in high performance hardware.
Hey, we all wanna have high performance under the hood but now you can have it right in the palm of your hand with this black and decker firestorm cordless multi tool. Now it comes with a drill driver attachment plus a jigsaw and Sander Polisher attachments. And hey, check this out, you also get an extra battery, battery charger and this handy storage case all for about 70 bucks.
Now, if you've got a high mileage vehicle valve's
new max
life engine oil will condition the seals to prevent leaks and reduce oil consumption as well as deposit formations.
Plus it'll provide easier coal starts and it works with your new or rebuilt engine as well. Hey, well, it's time for us to fire up our engine and get on out of here. But you check this out first.
It's tuner time again as we improve the stance and attitude of our budget Honda project car.
We'll show you how to convert your old points type distributor to an HE I
plus some hot horsepower bloopers to boot
horsepower TV is an RTM production.
Show Full Transcript
We'll take a pre 96 Chevy small block and modify the TB with a more efficient multi port fuel injection.
We'll upgrade the fuel pump and swap out the computer chip before we strap this baby to the
dyno Jet for testing.
Not for this, for this. You'll see what it takes to make the loudest sound statement at the world finals of DD drag racing.
So hang on for horsepower TV.
Hey, welcome to horsepower TV.
Whether you haul a race car, a show car or just haul trash just about everybody needs a good truck these days.
Now, a few weeks ago we pumped up the power on our horsepower haulers Cummings diesel
and we did it with a bully dog controller, propane injection kit and bigger injectors. That's all well and good. But chances are you're running a gas engine like the 350 Chuck's Chevy 93 half done here.
That's right
now. The problem with pre 96 Chevys is they use a throttle body fuel injection
and it shoots the fuel in right here above the throttle blades. That fuel doesn't stay in suspension with the incoming air And of course, the result is less power because of uneven fuel distribution. Now, Chevrolet fixed that problem in 96 to a large extent when he introduced the Vortec engine with multi point fuel injection.
Well, today we're gonna follow Chevy's lead by installing a similar system that delivers a more even fuel charge to each cylinder.
This kit we got from Edelbrock includes a new intake manifold with reconfigured runners and injectors for each cylinder. Now, the kit also includes brackets, hoses and the hardware. You need to complete the installation.
There are also instructions on how to convert your old throttle body into an air valve that retains the original throttle position sensor, transmission controls and cable connections.
Hey, while you've been over there gab, but I've been busy getting this thing ready for a baseline on our
dyno Jet here.
We say we make some noise, let's have at it
there. You have it
100 and 45 horsepower
pretty good place to start.
What do you say? We get this thing off the
dyno Jet and get our hands dirty.
Now, the first thing that we want to do is disconnect the battery.
Then we can start stripping the top of the engine while the coolant drains,
then remove the upper radiator hose,
vacuum fittings,
electrical connections,
spark plug wires from the cap after marking their locations
and finally the distributor cap itself.
Well, now we're ready to remove the distributor. But before you do make sure you note the location of the distributor body and the rotor.
Then you can go ahead and loosen up the retaining clamp,
just pull up straight on the distributor while rotating counterclockwise on the rotor.
There we go. That wasn't too bad.
Now, we can just set this thing aside and get to work on those intake manifold bolts.
Hey, good job there. Well, that intake is ready to come off now
and I like to use a screwdriver to prowl on the front end of the manifold to break it loose. Now, don't worry if a little cool it comes out when you're doing this, just make sure you mop up the lifter valley with a paper towel.
Once the intake manifold is loose, lift it straight out,
then clean the old gaskets off the heads.
Now you wanna lay the manifold side by side so you can compare the two and transfer any hardware from the old to the new. Now, that's gonna include things like the EGR valve vacuum fittings, brackets, thermostat housing and even a sensor or 20. And here's a little tip for you before you start any of the threaded fittings, give them a shot of thread sealer first to keep them from leaking.
Ok. Now that we got the surfaces of the intake cleaned up,
they can lay in these ultra seals from Mr gasket and a thin bead of this R TV on each end of the manifold mating service. Now, speaking of silicone, the reason we like these is they've got a thin bead around each port to ensure a leak proof seal.
Hey, hey, looks like you've done a great job there. You've got an eye for great work. Yeah, but I haven't had my eyes checked lately.
Ok. Give me a hand with this. Set her straight down. Ok.
Looking good. How you looking there?
All right,
the four center bolts for the intake project down into the lift valley. So we give them a dab of silicone to leak proof them, then we're gonna tor
them to 25 ft pounds. Now, once we start that tightening sequence, we'll begin in the center and work our way outward in a circular pattern.
Well, the distributor is next and we wanna make sure that we maintain our orientation by using those marks that we made earlier. Now, this one is for the rotor
and this one points to the front of the engine.
Ok. With that, we can drop the cap back on and to get a good spark, we're gonna install a set of these moroso ultra 40 wires. They call them that because they only have 40 ohms of resistance per foot so we can get the most out of our stock ignition.
Well, we know you'll get something out of these following messages. Stay tuned. We'll be right back.
Welcome back to the shop where we're swapping out the stock throttle body set up on Mo Chevrolet truck there for Edel Brock's multi point fuel injection set up. Now, while we're on break, Joe got busy reattaching some of the hoses, brackets and lines and well, now it's time to convert our throttle body which is gonna eliminate these fuel injectors and regulator set up.
First, remove the fuel inlet
and return lines here at the back of the throttle body,
then remove three torque screws
that retain the fuel injector and regulator assembly to the main body.
Then use those same screws to attach the block off plate
that comes in the kit.
Now with a new base gasket, we're ready to bolt this thing up to the intake.
Ok.
All we have left to do under here is reconnect the throttle linkage.
Now, this is a 93 truck, the first of its kind with an electronic transmission
if you've got a 92 or earlier. However, you're gonna have to readjust your throttle valve control cable.
Now, you could lose your transmission if you don't do it properly, but it's not difficult to do. And the whole procedure is outlined in the Edelbrock constructions. Now it's about time to get wired. This harness comes with the kit,
these ends connect to our new injectors. Well, these four leads here will connect to the stock harness using this original injector wiring,
cut the factory injector wires above the grommet,
then remove the gromit,
fill the gromit holes for silicone
and reinstall it back into the throttle body.
As we told you earlier, the original wiring hooks right up to the new wiring on the Edelbrock harness and to make things easier. Well, it's color coded the same blue to blue, red to red and so on. Now, after you crip them all together, give them a nice little tug to make sure you got a solid connection.
Now you're gonna have to re plumb part of your fuel system, but everything that you need is included in the kit. Now, we're gonna start with this 90 degree fitting that attaches to the fuel pressure regulator on the passenger side of the fuel rail. Now it feeds down to a metal return line that's attached to the frame.
This 45 degree fitting connects to the rear of the fuel rail on the driver's side and in turn goes down to the fuel filter, which is also on the frame.
Well, now we need to get the truck up on a couple of jack stands so we can finish hooking up those fuel lines.
I'm installing a couple of adapters from our kit one here on the fuel filter, one on return line. Now, the adapter is attached to barbs that hold the lines in place, so we don't need any clamps.
Most installations are gonna require a high volume, high pressure pump that Edelbrock sell separately. Now, this one is for our single tank applications here, but they also make them for dual tank applications as well. Now, to get to our tank, we're first gonna have to remove our bed and, well, it's held in place with eight bolts, couple electrical connections and some grounds. Oh, we're also gonna need about four good men to help us lift it off the frame. I don't suppose, you know, where we might find those good ones. We'll get some help somewhere and while we round them up, you watch this, we'll be back to wind up this project right after this.
Hi, welcome back to the shop as we finish up our EF I upgrade on Chuck's 93 Chevy here.
Well, as you can see, we got that bed off with the help of some of our friends. Now, the top of the tanks exposed, in fact, we're gonna be working around this sending unit area.
Now, we used a wire brush and some compressed air to clean it up so that no debris falls into the tank. Once it's open next, we gotta disconnect these lines and electrical wiring so that we can loosen that lock ring assembly
using a wooden block or brass punch to prevent sparks. Rotate the locker ring counter clockwise until it clears the tanks
then use compressed air to clean everything off again.
Now, you can remove the entire pump and send a unit assembly.
Well, I guess we're ready to swap out this old pump for our new one
and to do that
when first disconnect this power wire,
then we want to loosen this clap.
There we go.
And
the old pump should slide right out.
We want to transfer this rubber isolation ring from the old pump
to the new one
slip. This output fitting into the hose
at the other end into the bottom of the bracket. Here,
squeeze on the clamp to tighten it,
then pop on the new filter
and reconnect the power line.
Hey, man,
I've handled the hard part. I hope you're uh pumped up to do some work. Hey, good job.
Now, before we slide this thing back into the tank, we're gonna put a little bit of grease right down here on the O ring.
I've already done it
to the receiver on the tank there. And
what that's gonna do is help that tank
slide into place while we rotate it.
There we go.
Now, tap the lock ring into place,
reconnect the wires
and the lines.
Now with the fuel connections handled and the battery reconnected, it's a good idea to cycle it a few times to make sure there are no leaks.
Everything's nice and dry up here. Great.
Our computer mods are next.
First, we need to get this module out of the glove box
and then remove this panel here so we can get to the chip.
All right, there's the old chip out. Now, we're gonna be putting a lot more fuel into this Chevy. So our new chip that came with the kit has been calibrated for our application.
Now, it comes with this piggyback adapter and check this out.
It has an alignment lug so it only installs one way,
you know, sometimes running good isn't quite good enough. In fact, I like all my stuff to look as good as it runs. And that's why I went ahead and pop for these moroso polished aluminum center bolt valve covers
and this chrome air breather lid from Edelbrock. Oh, and one more thing, this Rush air filter from Barry Graham.
Hey, it's gonna keep the air clean and improve the flow a little bit at the same time.
Now, once we get everything bolted up under here, we can go ahead and fire this bad boy up.
Ok. Fire it up, Joe.
Hey, pretty sweet. Huh. Now, with the engine running,
make sure that you check everything one last time for any fuel, oil or water leaks. And
well, if everything looks pretty cool,
which it does under here,
you're ready to start setting your timing.
Now, to do that, you first need to disconnect your ignition interrupter wire.
It's a tan wire with a black stripe that's
up here on the firewall in this 93 model, but on other models,
it might be found inside the cab next to the computer.
Now, let's see what our timing has got to say.
There we go.
That ought to do it.
All right. Now with the ignition timing set,
just reconnect the ignition interrupter wire and
I guess we'll bolt the bed back on and then we can strap to the
dyno Jet and see what kind of numbers we get.
Hey, cut her off, Joe.
Hey man, check this out. 164.5. Let's call it
100 and 65 horsepower at the rear wheel 20 more than our baseline. Not to mention the extra torque and fuel mileage pretty good. Huh?
Now, you're gonna have to budget about a day out in the driveway and about 1100 bucks for the fuel injection and that fuel pump. That's right. Well, right now, I think we need to take a little pause for the cause. Our sponsors that is, we'll be back with more horsepower TV. After this
horsepower happenings is brought to you by Wyotech. The nation's premier technical training school
in most kind of drag racing. Winning is all about ETS here. It's all about D BS. Welcome to the world finals of DB drag racing.
Ok.
One minute, ladies and Gent
go,
you've just created a stereo on wheels that you can't listen to.
You just spent your life savings
on this vehicle that you can no longer listen to, to create sound. Now, what sense does that make?
Uh not a lot, man, but when you make it to the World Series of loud sound, you'll pop for the amps, speakers and batteries it takes to in some cases break the 170 decimal
sound
bar.
We had over 1000 shows this year and we bring in the top 200 competition, teams
competitors accrue points throughout the season. And then they also have to have one of the loudest cars in their class to get an invitation to the finals.
45.
Here's how it works. A sound pressure microphone is installed on the windshield. Each team runs the same low frequency tone through a CD player into the vehicle.
You can't hear much on the outside, but they sometimes have to literally stop the sound from blowing the roof off.
Ok? You're gonna scream as loud as you can and you can see your sport so you can compare it to that car. Ok.
Just scream as loud as you can.
Ah,
five,
five decibels that was 20 times louder than your scream.
Five
Eric Parsley's team has two entries in the extreme class where you can spend well over six figures on a vehicle. You can't even drive
a top field dragster is, is, is made to do 325 miles an hour for 4.5 seconds for one, run straight down the track.
This bad boy set it to be as loud as it can be for one note for a second and a half.
That's it. Now, all the drag racers wanna go faster and quicker. You wanna go louder, right louder. That's what it is, baby. It's all about louder.
Arthur Shaker Turgeon is a veteran of this young sport and uses 4, 300 amp alternators
to generate about 100 and 30,000 watts of power.
He's got over 300 grand in his ride.
It's really loud.
We'll take a look inside.
Yeah.
Shaker's cab is modified with quarter inch steel all around with 1415 inch woofers in the rear.
This industry has gotten to the point where there's a lot of physics involved at this point
and the physics has so much in the power. It's, it's in how you distribute the power and how you distribute inside the cab.
The DB drag events are also a showcase for everything that's hot in the way of cool car, audio and video.
The editor in chief of mobile entertainment magazine offered to show me around,
lots of sound, lots of sound quality in here, even though as you can tell it's a little bit loud on the noise floor. But that's
exactly right.
Everybody's competing just trying to show off their goods. Uh But out here this is where you're really gonna find the cutting edge of technology. A lot of companies are a lot of innovation these days, there's some uh DVD based navigation that we're gonna see you here in just a couple of minutes. There's people with
satellite radio, all sorts of exciting products.
Yeah,
we got here, Cadillac.
Let's take a look.
The choices of car V gear today are staggering.
But as a professional audio file, Mike recommends you start with the end result. The most personal choice you can make are speakers uh for myself personally, I actually took believe it or not two full years to decide on the speakers that I put in my own explorer.
The exhibits are not only loaded with new hardware but also some cool concept vehicles.
We like this tricked out ma audio golf cart that model Nicole demo for me.
Oh, this reminds me DB drag events are well known for something that relates in no way to woofers and tweeters. Welcome to the Miss Hawaiian Tropic
International Model Search.
So what's this got to do with sound competition?
Probably nothing but who cares. Anyway, this is one new phase of the high performance lifestyle you'll see and hear more of in years ahead
just like the battle for quickness on the quarter mile strip.
There's a battle building for Decibel domination
horsepower TV S hot parts. A close up. Look at the latest in high performance hardware.
Hey, we all wanna have high performance under the hood but now you can have it right in the palm of your hand with this black and decker firestorm cordless multi tool. Now it comes with a drill driver attachment plus a jigsaw and Sander Polisher attachments. And hey, check this out, you also get an extra battery, battery charger and this handy storage case all for about 70 bucks.
Now, if you've got a high mileage vehicle valve's
new max
life engine oil will condition the seals to prevent leaks and reduce oil consumption as well as deposit formations.
Plus it'll provide easier coal starts and it works with your new or rebuilt engine as well. Hey, well, it's time for us to fire up our engine and get on out of here. But you check this out first.
It's tuner time again as we improve the stance and attitude of our budget Honda project car.
We'll show you how to convert your old points type distributor to an HE I
plus some hot horsepower bloopers to boot
horsepower TV is an RTM production.