HorsePower Builds

Video Transcript

Today on horsepower TV.

It's back to more horsepower basics on Chuck 69 Chevelle swapping headers for the old manifolds and adding a free flowing exhaust system.

We've got some sure fire tricks and tools to help you get the most wheel and rubber under your ride.

Plus we'll take a ride to Las Vegas for a look at the hottest mods and models at the annual Seamus Show.

You ever thought about doing any TV?

So hang on for horsepower TV.

All back, man.

Hey, that looks pretty good right there.

Welcome again to horsepower T VA. Couple of weeks ago, Chuck brought in the 69 Chevelle for some induction upgrades that included an En

Brock performer RPM intake and 850 CFM car.

Now for a few hours work, we made 23 horsepower over our baseline on the

dyno Jet. Hey, but you know how it is with us, gear heads, more horse

power, still not enough and sometimes too much is just right now. Today, we're gonna see if we can find a little more horsepower in this 396 by opening up the exhaust.

After all, it came from the factory with some restrictive cast iron manifolds that fed into some equally restrictive mufflers.

Plus that system's old rusty and starting to leak.

Oh, kind of like you, huh?

Well, seriously, though a head or exhaust swap is the kind of basic bolt on that'll free up horse power in any kind of street machine. Whether you got a carbureted muscle car like Chuck's or a late model fuel injected car, like a Camaro or Mustang. Now, we decided to go with this set of Headman headers that use one and three quarter inch primaries feeding into a three inch collector.

Now, this will be fine for that 396. But if you got more cubes and compression, well, you wanna go with larger primaries and a 3.5 inch collector. That's some good advice, Joe. Now, here's another option that you might wanna consider. A lot of you guys are riding around with slam suspensions out there and, well, sometimes ground clearance can be a real issue.

So Hedman came out with the shorty headers that'll keep you from grinding those collector pipes on those speed bumps. Now, you're gonna give up a little bit of primary tube length and you're also gonna give up just a little bit of bottom end torque. Yeah. Well, either way you can get them with this optional ceramic coating that keeps them looking good

and improves your engine's thermal efficiency. Hey, speaking of that, I'd be happy to get any kind of efficiency out of you. Give me a hand getting the Chevelle on the lift.

We're lucky enough to have this Eagle hoist here in our shop to work with. But you can do this job at home in your driveway. Just make sure you have at least 36 inches clearance under your car and of course, support it with jack stands.

Our first step was to disconnect the battery. Well, now we can get started on removing the old exhaust system

that depending on your application, you might have to remove the spark plugs, uh dipstick, any clutch linkage and maybe even a sensor or two first.

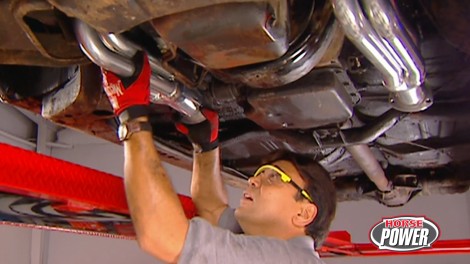
Now we're gonna get started by taking the head pipe loose right here at the manifold. And if your system is like ours,

it's probably got plenty of rust on it

and a little bit of this penetrating oil will go a long ways towards making this an easy job.

Well, Chuck's busy up front.

I'm gonna go ahead and remove these mufflers and the tail pipes and hangers.

Hey, you ready up there, Joe. You bet, Sroda.

All right.

Now, in our Chevelle, the driver side header goes in from underneath.

The job

is a whole lot easier if you've got a buddy to start the bolts while you hold it in place,

it's best to hang each header on the two outermost boats loosely. Of course, that way you can slide the gasket in between the cylinder head and the header, Flans here. Oh, we just want to do this job one time. So we're going with these copper seals for Mr gasket.

This ringing around each port here gives you a good crushed seal. Plus, since they're made of copper,

they're a lot less likely to blow out on you

while Joe's still up there. I'm gonna pass him this other header too. You

got it. Yeah, it looks good. All right.

That way

I can go ahead and hold the header in place while he starts the bolts. Of course, once both headers are in place,

make sure you check for proper clearance, running, break, fuel or fluid lines plus linkage and any cables. Now, you may have to reposition them to give them the room they need.

Ok. We've taken care of one bottleneck and that's Chevelle exhaust. Now to handle the other, we're going with this free flowing American thunder system from Flowmaster.

It uses 2.5 inch Illumina

tubing with mandrel bends and it also features this equalizer tube to improve scavenging and also give us a nice mellow rumble. Well, speaking of a mellow rumble, these delta flow 50 series mufflers are gonna get rid of a lot of the bark without losing any of the Bi

plus. They use flow masters sound canceling technology and well, here's how it works. Exhaust comes in here and the sound waves are directed around these two diverter plates here. Now, when they collide on the backside of them. Well, they just cancel each other out. Now, what that means for you is minimum restriction and maximum horsepower. And we like that. Now we're gonna hang this exhaust system in a minute. But meanwhile you hang with us, we'll be back right after the break

later in the program, we'll get you fired up for the latest S A

show and we'll roll out the coolest and hottest features of this annual celebration.

And if the wheel fits, wear it,

we'll show you how to get the most wheel and rubber under your ride.

Hey, welcome back to the shop and our exhaust system upgrade on a 69 Chevelle. Well, so far today, we've replaced the cast iron manifolds with a set of headman headers and well, now it's time to finish the job with our flow master American thunder exhaust and delta flow muffler.

Now, Joe is already hard at it underneath the cart, believe it or not. And well, let's check and see what he's up to.

Hey, well, I have been hard at it and you can believe that. In fact, I got our new hangers in place in the stock locations. Of course, got some clearance. Thanks to that little jack and I am ready for that tailpipe. There you go.

It just lifts over the actual housing

and the muffler in goes into the forward hangar

then lo to clamp the other end

into the rear hanger.

Well, I guess we're ready for the muffler. Now, we're gonna take this in and just slip it right up on the tailpipe.

There we go.

Now, Joe, if you'll bring that stand in here,

we can get this muffler supported

right there. Yeah, that looks pretty good right there.

We're next with the H five in place.

I'm gonna go ahead and slip on this head pipe.

Now I'm gonna hold it up against this reducer.

Make a mark.

Now, we know exactly where to cut it.

Now, we're using a pipe cutter here, but hacksaw do the job just about as well.

Now, before we install this head pipe, we're gonna slip the collector reducer up inside of it.

And like Joe said earlier,

hey, we only want to do this job once. So we're gonna use these copper seal collector gaskets back here too.

All right, this is looking pretty good up here. How you doing back there, Joe looks great. Everything fit in place.

I think we're ready to drag that. Well, draft

plants are included in the kit and you can use them, but welding adds integrity and prevents leaks.

Of course, if you don't have your own welder at home, you can always clamp the system together

and have your local muffler shop, finish the job.

All right. Now that we got the Chevelle breathing better. Let's see what our afternoon of work is worth over there on the

dyno Jet

pretty good.

Now, would you believe 259 horsepower at the rear wheel that time. Now, according to my calculations, that's 13 more than we started out with today. Not bad, man. Hey, pretty good. Plus the throttle response is a lot crisper.

I wouldn't even be surprised if the mileage picks up some,

but

there's something that Donald Jet doesn't measure. What's that? The sound of power? Oh, yes. Well, I'll tell you what, that sound alone is worth the time and money, which by the way is about 700 bucks for the whole project. Well, it's time for us to take a little bit of a break. But you can bet money that we'll be right back after this.

Next. The Beauty and the beast from the annual Sma

Show in Las Vegas. Keep your seat.

Horsepower happenings is brought to you by Wyotech. The nation's premier technical training school.

If you want to find out what's going on in the industry, this is the place to be. Well, Seema is the coolest place to be. If you're a car guy,

Seema is the greatest show in town and I'm having a blast. I wish you guys were all here.

Now to us, sea

shows the world's wildest collection of hot parts, cool cars and the people that put them together

now it's not open to just anyone. That's right. You have to be an industry insider. But hey, we're gonna take you inside. Give you a peek at our picks of the thousands of wild wonders that are on display here.

Hey, you know how I like my grocery getters. Well, how about this? 55 New Mad that took over 15,000 man hours to construct. Now, the reason they call it a new Mad is because the only original sheet metal left on this thing are the B pillars. Everything else is either hand

fed or modified extensively. Now, this thing gets plenty of attention,

whether it's hauling groceries

or halling, but suspensions themselves are getting a lot of attention this year

and where the hottest trends going is bagging it. It changed the stance and attitude of your street machine with the flip of a switch.

Now, how do they do that?

Well, it takes somebody full of hot air to answer the questions.

Well, at least I'm not an air head. Now, all bag systems work basically the same. These bladders replace the stock springs right here. Now, an air compressor that's on board supplies air to this holding tank and then these valves control the flow of air to the bladders.

You pump it up.

Hey, you're at normal ride height. Let it down though,

man, you're laying frame. Now, here's some sheet metal that'll bring you back some memories. It's the hurst Harry Oldsmobile from 1966.

Now, this four wheel drive 442 makes 1000 horsepower thanks to a pair of

tornado engines up front and back here in the rear in its heyday. Now, this thing laid down some tire scorching, terrifying burnouts, the whole length of the strip.

This dual motor monster is a pretty hairy ride too. In fact, it's called The Twin Mill.

Now, it's a full size replica of this miniature hot wheels model created by Mattel

back in the sixties,

originally designed by Ira Guilford, it's been faithfully fashioned into a running driving full size fantasy machine. Now, to fulfill that fantasy, you're gonna have to lay out about 350,000 bucks.

Too much money, don't like the color. Well,

there's always this miniature replica of the full size replica and hey, even I can afford this 11 of my fantasies is to own a classic 53 vet. How about you? Well, here's a new spin on the old favorite designed to celebrate its 50th anniversary. The original styling is transferred to the current C five platform for the best of both worlds. Classic styling with

temporary comfort handling and power.

If Magnus Stire, the creators of this nostalgic bed get their way,

you'll be able to place your order in time to join the celebration. It seems everyone is mixing the old with the new these days. Just check out this 68 charger.

Now it keeps all the original sheet metal, but under the hood, there's an asphalt ripping Viper V 10 that's made it to a six speed manual track

mission.

Of course, the suspension has been upgraded and it rolls on high tech rims and rubber. Now, I gotta tell you this is one hard charger. Speaking of rims and rubber, get a load of this cannibal quad fx 400. This thing runs on eighteens up front, 20 twos out back. And just for giggles, this, a T V's got an onboard nitrous system.

In fact, I think the activator switch is this one.

Well, somebody get me off of this thing.

Just make it out to Chuck.

Well, looks like my partner turned from an airhead into a bone head. But hey, I've got to get back to the studio with or without him.

Hm.

You ever thought about doing any TV?

Do you know anything about cars?

What doesn't matter?

Welcome back to the shop.

That doesn't matter whether you're into pro street or pro touring. Chances are you'll want to fit the biggest possible wheel and tire combination under your car. Now, a lot of guys will listen to their buddies or maybe even take a wild guess out of themselves. But one thing's for sure, nothing will ruin your new rubber quicker than cutting them down

on a wheel lip. Oh, man, I'm afraid we've all done that from time to time.

But, you know, investing a little time and making some measurements can pay big dividends when it's time to lay down some green for a new set of wheels and tires. Well, today we're gonna stuff some big bologna under the Z 28. And you know what, it won't be sliced baloney if we do our job. Right.

So,

there we go.

Now, we've already decided that we want to use 17 inch rims on this Camaro here. So the next step is to figure out just how much tire we can physically stuff up inside the wheel. Well, and you do that by measuring from the inside of the wheelhouse to a plumb line on the outside of the wheelhouse.

Now, you can make a simple plumb line using a string and an old lug nut

and just tape it

right here to the wheel lip.

The surface is irregular in here. So take several measurements and use the narrowest one,

then subtract about an inch to compensate for the wheel lip

using that formula. It looks like we need about a 12.5 inch tire back here. Now, I've already checked up front

and elevens will fit up there.

We decided to go with the Oklahoma tires on this project. So I ordered this fitment guide from them to do a little homework.

Now, a book like this among other things will give you three critical dimensions,

overall width,

overall diameter and tread width.

The most important is overall width that's measured side wall to side wall, always a little wider than the tread width. Now, the book tells us we can go with 275 forties up front and believe it or not, 3, 1535 is out back. Both are gonna measure 25.7 inches tall.

Here's what we came up with.

Yokohama's A vs sport tire is a great choice for the type of driving that we do.

It borrows heavily from the race, rain tire technology, especially right here on the tread where these y shaped patterns channel the water towards the outside edges and still maintain a big contact patch. Now, they ought to give us great handling, wet or dry.

Yeah. And here's a little tool we found that can help you determine the correct wheel width and back spacing. It's a wheel works mount mate and well, it attaches right here to the tire bead

once it's mounted both it and the tire to the wheel hub,

the mount mate slides in and out to center the tire on the wheel.

Once the tires positioned, make note of the measurement using the scale,

make all your measurements with the car at normal ride height

and up front, move the wheels lock to lock to make sure you've got clearance around any moving suspension parts like control arms and tire rides.

Now, here's what the mountain mate told us. We need an 11 inch rim out back with a 6.5 inch back space. Oh, and up front a 9.5 inch rim with a 6.5 inch back space.

There are no manuals or gadgets. That'll tell you what looks good on your car. But the Z 28 is an icon. So it needs a classic Timeless. Look. Now, check these out,

look at the latest from American racing and they call them the hob.

They've got that timeless look that we're after just check out these big windows and the exposed lug nuts.

Plus they're available in rim diameters up to 20 inches. So you can mount that high tech rubber. Yeah, but before you mount that one, check out the difference between it and this F 6015 hook that came on the car and we used to think this was wide

and with a contact patch like that man, your Camaro is gonna handle as good as it looks,

man. My old Camaro looks like it's ready for the road course. Now, I'd have never believed we have got that much tire under there.

I did.

Of course, you can too now and

that's no baloney

horsepower TV

S hot parts. A close up. Look at the latest in high performance hardware.

So do you have the urge to purge when you pull up to the line at the strip? Well, this purge kit from N OS will help you clear the vapors from your nitrous line. Now, it connects upstream from your nitrous solenoid. And the kit includes this purge solenoid plus all the wires and lines you need to hook it up and this handy activation switch. Now you can take the pressure off your system and put it on the competition where it belongs

all for about 95 bucks. Well, no doubt about it. Late model small block Chevys with center bolt valve covers run great. But have you ever tried to make one look good?

Well, up until now, the choices have been somewhat limited.

Now, we've seen high dollar billet aluminum valve covers and, well, even some that are made out of carbon fiber. But now Moroso has these cast valve covers. That'll beautify your small block without busting your budget.

They're fully polished and they'll clear all the factory brackets. They won't clear out your bank account though.

You're gonna have to give out about 100 and $40 for a pair of these,

you know, something nobody likes to get rubbed the wrong way

and neither do your engines, fluid lines, electrical wires or hoses for that matter.

Well, now Velcro's got you covered with their line of protection products we take, for example, this reflex wrap. Now, this is good protection anywhere where heat's a problem. It's aluminum foil laminated over a special fiberglass weave and hey, check this out. It's got this adhesive strip so you can seal it up once it's in place. Hey, that's a pretty cool

stuff. But here's something that's pretty hot.

It's

fro's fire jacket. Now, this stuff uses a fiberglass sleeve too, but it's covered with a special silicone rubber. Now it'll give short term protection against direct flame and, well, it'll even insulate your lines to help maintain a constant temperature.

It sounds like just the stuff for you. Nitrous guy. Yeah. Makes a lot of sense. And I know something else that makes a lot of sense. Uh, I know where you're going with this. You're right. It's our show next week and here's a little bit of what you're gonna see.

We'll take a pre 96 Chevy small block and modify the TB with a more efficient multi port fuel injection.

We'll upgrade the fuel pump and swap out the computer chip before we strap this baby to the

dyno Jet for testing

enough for this for this.

You'll see what it takes to make the loudest sound statement at the World finals of D

drag racing

for information about the products used in today's show and more. Check us out online at Horsepower tv.com

Horsepower TV is an RTM production.
Show Full Transcript