HorsePower Builds
Want more content like this?
Join the PowerNation Email NewsletterVideo Transcript
Hey, we're gonna turn our horsepower hauler into a lower tower. So stay with us
today on horsepower TV.
Our horsepower hauler back for a high tech suspension upgrade.
We'll bulk up an air ride suspension kit to give our duly adjustable attitude
and altitude.
Plus, it's a wild pony ride to remember at the annual
Busang reunion down in the heart of Georgia.
So hang on for horsepower TV.
Hey, welcome to the horsepower shop.
You know, to me, there's nothing cooler than a Mustang with a drop top
unless it's a Mustang with a drop suspension check this out.
All right.
Well, these days you can have the best of both worlds. A normal ride height for when you're on the highway. Then with a flick of a switch, a low profile for when you're cruising or you can even slammer all the way down for when you park. That's right now, having an adjustable suspension like this is in the bag, literally
to show you how everything works. We brought in this rolling chassis that's already been fitted with an air suspension system.
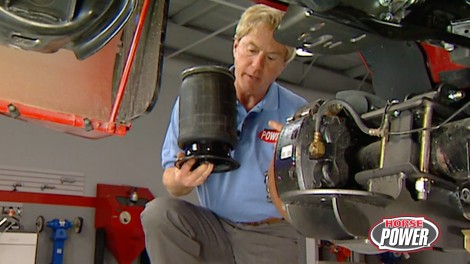
Now, this front bag here replaces the stock spring to keep everything suspended and it gets its air from this little compressor that feeds into this holding tank here.
Now, in simpler systems, they use just front and rear controls. But if you want your car to handle as good as it looks, well, you might want to consider an independent four way set up
today. We're gonna install an airbag system on our horsepower hauler here. And for good reason, now, we could use springs and spindles to lower it and we get the attitude we want,
but we wouldn't have the altitude we need when it's time to haul a load or pull a trailer.
An airbag system is adjustable, of course. So you get the ride height you want regardless of the load.
Well, Charles, my good man, why don't you favor us with a description of this air ride technologies kit we're using? Well, it would be my distinct pleasure, Joseph.
Now each one of their kits is custom made for every application including our duly over there
up front. It's a pretty simple set up. You get a couple of bags and upper and lower mounting plates, but out back is where things start to get a little more complex. Now, we convert the stock leaf spring set up to a four L
using these upper and lower control arms, plus this axle plate that also serves as a mounting spot for our rear bags
and to keep the axle centered under the truck. Well, we have this pattered kit that also is included plus a set of shorter shocks for our lowered stance.
By the way, this air ride kit is pretty much a bolt on deal. There's no welding involved. You will have to drill some new holes to mount brackets.
Now, once I get this thing supported on jack stands, we could pop off the rear wheels and start disassembling the rear suspension
with the rear end evenly supported, removed the shocks.
Then the front and rear spring I boats
next, remove the axle U bolts,
finally rotate the springs to get them out.
The back end is gonna drop about six inches even. So you won't have to see not the frame here. What you will have to do though is trim. The bump stops down about two and a quarter inches like we've already done this one
well, with the old suspension out of the way, we can go ahead and start in on these actual brackets. Now, the top one just nests right here on the original spring pad
and everything's held in place with these 58 diameter grade eight bolts. The lower bracket
just slides in here like this.
All right. Now, we need to lower the gas tank a couple of inches so we can have access to the inside of the truck frame. That way we can bolt up the forward, upper control arm mount. Of course, we gotta have something to support that tank while we're working an extra jack and block of wood here ought to do the trick.
There we go.
Now, after removing the spring overload pad, which we don't need anymore,
I went ahead and bolted up this bracket using these two existing holes and used it as a guide to drill three new ones.
Now, we can install the remaining three bolts
bulked up the upper control arms
and the lower control arms using the new lower bracket and the front spring up.
Well,
now we're ready to install the upper bag mount. Now, the first thing they wanna do though is jack, the rear end up to within four inches of the frame rail,
then you can measure 10.5 inches up from the lower bag mount. Now that's gonna help establish our ride height. Then we can use the upper bag mount.
There we go
as a template to mark and drill our mounting holes. Once the holes are drilled, both the driver side, upper bag mount
and pattered rod bracket to the frame. Then the axle pattered bracket attaches to the differential cover using five bolts from the kit.
Finally install a Panter rod between the new brackets.
Airbags aren't exactly new. They've been used on over the road 18 wheelers for years in larger versions, of course. So reliability is not a problem as long as you keep them away from exhaust heat, rotating objects or anything that might chafe a hole in the back.
Well, I guess we're ready to boot this one here between the brackets.
Matt. We told you earlier that we'd need a shorter shock for our shortened stance here. And these gas units come with a kit, of course, they bolt right up in the stock location using the original hardware.
Now, the final step in the rear set up is this spacer that raises the driveshaft carrier bearing to compensate for our new pinion angle. Of course, it bolts right in the stock location using the factory bolts.
Why don't you bolt away while we take a break? Now, we'll be back to bag the front end of our horsepower hauler right after this.
Hey, welcome back to the shop and the rest of our air suspension upgrade on our dodge duly here. Now, so far, we've got the hard part out of the way
the rear suspension. Now we're ready to start up front where things are a whole lot simpler. First thing we're gonna do is disconnect the A BS sensor,
then we'll disconnect the sway bar,
tie rod ends
and remove the shocks.
The factory bump stops are designed to help limit the amount of suspension travel. Now, when we get rid of them, we're gonna increase the amount of travel and make more room for those airbags which already have the bump stops designed in
the final step in our disassembly process is to knock this upper ball joint loose with a pickle fork. Now, I've already removed the cotter pin here and loosen the nuts. So we're about ready, by the way, for safety's sake, you wanna run a chain or a strap through the spring to retain it
once you take the load off your suspension.
Now, the reason we knocked the upper spindle loose is to let the lower control arms swing down out of the way. So we've got easy access for installing that new air spring, plus it's faster and it's gonna save us a lot of time putting everything back together
before we start bolting up our new parts. We say we take a look at them. Now, this is the bottom
of the air spring assembly and it nests right down in the spring pocket of the lower control arm.
This hole here lines up with the sway bar link hole. Now, back here, there are two bolts that line up with a slot on the frame that we're gonna show you later. Now,
if I'm not wrong, I think Joe is about ready for this thing.
Ok.
Hey, partner, how we doing over here? Great, man. We got lots of room to pop that new air spring in place. Now, in fact, why don't you take my place and get to work? Good idea.
Now, the top of the spring goes in first and I've already inserted the line here into the fitting because this thing is gonna be difficult to get at later on. Now, one more thing you wanna make sure that the tongue of this upper bracket goes in on top of this frame mount here.
After raising the lower control arm and reattaching the upper ball joint,
we align this hole with the one for the sway bar link. Then we can attach the bracket here to the lower control arm using the link itself.
There we go.
Now, that wasn't too bad. But remember, no matter what your application is always torque that ball joint nut to the factory specs and don't forget to use a new counter pin either
good deal. Now, out back as you may recall, we installed new shorter shocks but up front here on our dodge Dooley. Well, the originals were just fine, so I'm gonna stab them back in.
Actually,
they reconnect the A BS sensor
and the Tyrod.
Ok. We've got all the major components installed on the duo
and now it's time to take a look at the rest of the hardware. We need to make everything work. Now, you've already seen a compressor and a holding tank, but check these out,
these are the air valves that actually control the inflation and deflation of the system. And of course, we got two of them, one for the front and one for the rear. Hey, that'll come in handy no matter what kind of load we have with that thing. Now, the rest of the kit includes dot Approved Airlines and fittings and check out how easy. These things are to connect and disconnect. Now, the kit also includes a four way control panel and a wiring harness with weather pack connections. Oh, by the way, this panel comes standard with analog gauges, but you can pop for these digital pressure gauges. Well, like we did, hey, well, the pressure is on to take a little bit of a break right now. But hey, while we keep working, you keep watching, we'll be right back.
Oh,
hi. Welcome back. Well, I told you we would be busy during the break, didn't I? Now I just took some sheet metal and
fed up this mounting plate for our tank compressor and air valves. And, hey, not bad for a couple of minutes work. Right. Well, this thing mounts on the passenger side between the frame and fender. Here we go.
Ok.
Of course, we could have mounted these components anywhere in just about any position, but this way we got to pre assemble everything on the bench and, well, we only had to drill four holes to mount up all these components.
Yeah,
wiring the air ride system in our dealer here couldn't be any easier.
It comes with this wiring harness and, well, this end just plugs right up to the control panel. Yeah, this end goes to the air valves underneath here. Oh, by the way, you will have to furnish your own wire to the compressor to power it and make sure you use at least 10 gauge wire because that compressor pulls at least 20 amps. I tell you what,
I'll get finished up underneath. If you get started on that control panel. Hey, you got a deal. All right.
I checked out my options inside the cab here and we kind of decided that the best place to mount the control panel is right down here by the console. So I fed up these brackets to help us mount it there.
Then I went ahead and bent up this side shield to help keep the driver's feet out of the wiring back here.
Wiring is all handled control panels mounted up front. The only thing left is to hook up the hoses.
Hey, Chuck, I got to tell you, man, after all that work,
I really don't see much difference than earlier today. Well, that's because I've got the system aired all the way up so we could check it for leaks. But trust me on this, we've got a lower tower. Well, you know, I used to live in Missouri, so you gotta show me. All right. Well, check this out.
Well, just look at this hauler now. Well, what do you think? I think we got all the altitude we need for towing and the attitude we need for cruising all of this work. Now, a kit like ours is gonna set you back about three grand, but it's a heavy duty kit that'll let you tow a trailer up to 40 ft long
mustangs. Of course.
Yeah. Kit for your street machine will start at about 1300 bucks. In either case, you need to head to an alignment shop after the installation. Hey, good advice. Now, this thing is gonna ride a little bit stiff at first, but after a couple of 100 miles those bags will break in and then you'll think you're riding on air.
Wait a minute you are. That's right. Anyway, we're gonna take a little ride away from the shop coming up. So you strap in and stick with us
mustangs, huh?
What else?
Horsepower happenings is brought to you by Wyotech? The nation's premier technical training school.
Well, does it get any better than a rouse drop top? I don't know, but I do know that a lot of people think the Mustang was named after the P 51 fighter that fought during World war two.
Well, if that's true, it's appropriate that this gathering of the Mustang Club of America
should be a patriotic and performance picnic celebrating Ford's favorite muscle car,
green gray parachuters filled the skies while the ground level was covered with mustangs. Maybe 1000 of them from year one in 1964 to 2002,
the Mustang Club of America was started 25 years ago by a handful of pony enthusiasts today. There are chapters full of members in every state and many foreign countries, you bet and every one of them a little bit crazy
because they love their car. There's, there, there's something about the camaraderie of, of a Mustanger. That
is almost incredible.
The nice thing about a Mustang is they were sold
with all kinds of options available and you could do to the car, what you want
and the aftermarkets that you can put onto a car just turned them into unbelievable things.
The concourse at commerce was loaded with almost 40 years of Mustang models concepts and options,
vendor skirts on a fast back. Yep, they were available in the mid sixties. This has been my favorite car ever since I knew Mustangs. I bought 302.
This car I always wanted, finally got the chance to buy one about five years ago and
we worked on it for about four years
while the Boss 30 twos are getting scarce. They don't get any more rare than this 69 convertible.
It came stock from the Ford factory with a four speed, a shaker hood and 428 Cobra Jet. They made approximately 45 of the cars. They only made
five red shaker hood scoop, four speed convertibles.
Tell me this rare rides, not ba it's still got the shifter instruction tag on the knob.
In 1970 only 700 of the Shelby five hundreds were made.
Just imagine having a one of a kind. This is particularly rare because it's uh
the color combination is
one of a kind.
So that makes it unusual and it's also a thoroughbred.
There's something pretty cool back in the late eighties, Ford made about 12,000 special service ponies. Uh, Cops used to catch the bad guys in now. Not a lot of power, just a five Oho motor but uh today a pretty powerful collectible.
Meanwhile, here's an interesting comparison for you. You see the Shelby GT five Hundreds. Well, they look like twins, but I gotta tell you there's about $75,000 worth of difference. Now, while this is a beautiful concourse show car, it's got reproduction parts on it. Meanwhile, this was known as a thoroughbred. Everything on this thing is original right off assembly line.
In fact, this original auto light battery
can't touch it for less than two grand.
Needless to say that's one car we didn't see on the drag strip,
but many prize ponies did take a rare gallop down the quarter mile in the first reunion that included racing.
It's unbelievable right now, there's 90 cars that have been racing
and I think there's another 15 or 20 that have come up and said, well, gee can I race too?
You know, it's hard to imagine. The first Mustangs raced off the assembly line nearly 40 years ago,
jump starting the pony car revolution.
But with this kind of excitement for the old and new pony Power. Well, it's easy to imagine another 40 years to come.
Mustang brand is, is the strongest brand that we have at, at Ford
and Mustang in particular has a, a following and a heritage. Second to none. I, I look at it as our obligation to continue on with that
horsepower TV S hot parts. A close up. Look at the latest in high performance hardware.
Hey, don't axle me, no questions and I'll tell you no lies. Now, the truth of the matter is Moroso has just come out with her ultra high strength axles for Hondas and Acuras that are doing battle on the drag strips. Now, they're made from an alloy similar to the one that's used on aircraft landing gear and the best part is they bolt right in, in place of your stock axles. Now, the CV joints are the same ones used on Indie race cars
and they're specially heat treated for durability, resistance to shock and hardness. Of course, the price it's pretty hard to beat for an indestructible axle. About 1800 a piece. Say if you've made that uh crate escape to one of those out of the box engines from GM four to Mopar get a load of this. Barry Grant's got some new carbs that boat ride on
and eliminate the hassles of tuning.
Each one is caliber
for the specific application by testing on the
dyno
flow bench and at the track now they're based on the 650 speed demon and available with either mechanical
or vacuum secondaries.
EGM guys are gonna get yours first. But Ford and Mopar carbs are coming soon with prices starting at about 400. Well, here's what's coming soon on horsepower TV. In fact, uh
next week
it's back to more horsepower basics on Chuck 69 Chevelle swapping headers for the old manifolds and adding a free flowing exhaust system.
We've got some sure fire tricks and tools to help you get the most wheel and rubber under your ride. Plus we'll take a ride to Las Vegas for a look at the hottest mods and models at the annual
SEMA show.
You ever thought about doing any TV?
For information about the products used in today's show and more. Check us out online at Horsepower tv.com
Horsepower TV is an RTM production.
Show Full Transcript
today on horsepower TV.
Our horsepower hauler back for a high tech suspension upgrade.
We'll bulk up an air ride suspension kit to give our duly adjustable attitude
and altitude.
Plus, it's a wild pony ride to remember at the annual
Busang reunion down in the heart of Georgia.
So hang on for horsepower TV.
Hey, welcome to the horsepower shop.
You know, to me, there's nothing cooler than a Mustang with a drop top
unless it's a Mustang with a drop suspension check this out.
All right.
Well, these days you can have the best of both worlds. A normal ride height for when you're on the highway. Then with a flick of a switch, a low profile for when you're cruising or you can even slammer all the way down for when you park. That's right now, having an adjustable suspension like this is in the bag, literally
to show you how everything works. We brought in this rolling chassis that's already been fitted with an air suspension system.
Now, this front bag here replaces the stock spring to keep everything suspended and it gets its air from this little compressor that feeds into this holding tank here.
Now, in simpler systems, they use just front and rear controls. But if you want your car to handle as good as it looks, well, you might want to consider an independent four way set up
today. We're gonna install an airbag system on our horsepower hauler here. And for good reason, now, we could use springs and spindles to lower it and we get the attitude we want,
but we wouldn't have the altitude we need when it's time to haul a load or pull a trailer.
An airbag system is adjustable, of course. So you get the ride height you want regardless of the load.
Well, Charles, my good man, why don't you favor us with a description of this air ride technologies kit we're using? Well, it would be my distinct pleasure, Joseph.
Now each one of their kits is custom made for every application including our duly over there
up front. It's a pretty simple set up. You get a couple of bags and upper and lower mounting plates, but out back is where things start to get a little more complex. Now, we convert the stock leaf spring set up to a four L
using these upper and lower control arms, plus this axle plate that also serves as a mounting spot for our rear bags
and to keep the axle centered under the truck. Well, we have this pattered kit that also is included plus a set of shorter shocks for our lowered stance.
By the way, this air ride kit is pretty much a bolt on deal. There's no welding involved. You will have to drill some new holes to mount brackets.
Now, once I get this thing supported on jack stands, we could pop off the rear wheels and start disassembling the rear suspension
with the rear end evenly supported, removed the shocks.
Then the front and rear spring I boats
next, remove the axle U bolts,
finally rotate the springs to get them out.
The back end is gonna drop about six inches even. So you won't have to see not the frame here. What you will have to do though is trim. The bump stops down about two and a quarter inches like we've already done this one
well, with the old suspension out of the way, we can go ahead and start in on these actual brackets. Now, the top one just nests right here on the original spring pad
and everything's held in place with these 58 diameter grade eight bolts. The lower bracket
just slides in here like this.
All right. Now, we need to lower the gas tank a couple of inches so we can have access to the inside of the truck frame. That way we can bolt up the forward, upper control arm mount. Of course, we gotta have something to support that tank while we're working an extra jack and block of wood here ought to do the trick.
There we go.
Now, after removing the spring overload pad, which we don't need anymore,
I went ahead and bolted up this bracket using these two existing holes and used it as a guide to drill three new ones.
Now, we can install the remaining three bolts
bulked up the upper control arms
and the lower control arms using the new lower bracket and the front spring up.
Well,
now we're ready to install the upper bag mount. Now, the first thing they wanna do though is jack, the rear end up to within four inches of the frame rail,
then you can measure 10.5 inches up from the lower bag mount. Now that's gonna help establish our ride height. Then we can use the upper bag mount.
There we go
as a template to mark and drill our mounting holes. Once the holes are drilled, both the driver side, upper bag mount
and pattered rod bracket to the frame. Then the axle pattered bracket attaches to the differential cover using five bolts from the kit.
Finally install a Panter rod between the new brackets.
Airbags aren't exactly new. They've been used on over the road 18 wheelers for years in larger versions, of course. So reliability is not a problem as long as you keep them away from exhaust heat, rotating objects or anything that might chafe a hole in the back.
Well, I guess we're ready to boot this one here between the brackets.
Matt. We told you earlier that we'd need a shorter shock for our shortened stance here. And these gas units come with a kit, of course, they bolt right up in the stock location using the original hardware.
Now, the final step in the rear set up is this spacer that raises the driveshaft carrier bearing to compensate for our new pinion angle. Of course, it bolts right in the stock location using the factory bolts.
Why don't you bolt away while we take a break? Now, we'll be back to bag the front end of our horsepower hauler right after this.
Hey, welcome back to the shop and the rest of our air suspension upgrade on our dodge duly here. Now, so far, we've got the hard part out of the way
the rear suspension. Now we're ready to start up front where things are a whole lot simpler. First thing we're gonna do is disconnect the A BS sensor,
then we'll disconnect the sway bar,
tie rod ends
and remove the shocks.
The factory bump stops are designed to help limit the amount of suspension travel. Now, when we get rid of them, we're gonna increase the amount of travel and make more room for those airbags which already have the bump stops designed in
the final step in our disassembly process is to knock this upper ball joint loose with a pickle fork. Now, I've already removed the cotter pin here and loosen the nuts. So we're about ready, by the way, for safety's sake, you wanna run a chain or a strap through the spring to retain it
once you take the load off your suspension.
Now, the reason we knocked the upper spindle loose is to let the lower control arms swing down out of the way. So we've got easy access for installing that new air spring, plus it's faster and it's gonna save us a lot of time putting everything back together
before we start bolting up our new parts. We say we take a look at them. Now, this is the bottom
of the air spring assembly and it nests right down in the spring pocket of the lower control arm.
This hole here lines up with the sway bar link hole. Now, back here, there are two bolts that line up with a slot on the frame that we're gonna show you later. Now,
if I'm not wrong, I think Joe is about ready for this thing.
Ok.
Hey, partner, how we doing over here? Great, man. We got lots of room to pop that new air spring in place. Now, in fact, why don't you take my place and get to work? Good idea.
Now, the top of the spring goes in first and I've already inserted the line here into the fitting because this thing is gonna be difficult to get at later on. Now, one more thing you wanna make sure that the tongue of this upper bracket goes in on top of this frame mount here.
After raising the lower control arm and reattaching the upper ball joint,
we align this hole with the one for the sway bar link. Then we can attach the bracket here to the lower control arm using the link itself.
There we go.
Now, that wasn't too bad. But remember, no matter what your application is always torque that ball joint nut to the factory specs and don't forget to use a new counter pin either
good deal. Now, out back as you may recall, we installed new shorter shocks but up front here on our dodge Dooley. Well, the originals were just fine, so I'm gonna stab them back in.
Actually,
they reconnect the A BS sensor
and the Tyrod.
Ok. We've got all the major components installed on the duo
and now it's time to take a look at the rest of the hardware. We need to make everything work. Now, you've already seen a compressor and a holding tank, but check these out,
these are the air valves that actually control the inflation and deflation of the system. And of course, we got two of them, one for the front and one for the rear. Hey, that'll come in handy no matter what kind of load we have with that thing. Now, the rest of the kit includes dot Approved Airlines and fittings and check out how easy. These things are to connect and disconnect. Now, the kit also includes a four way control panel and a wiring harness with weather pack connections. Oh, by the way, this panel comes standard with analog gauges, but you can pop for these digital pressure gauges. Well, like we did, hey, well, the pressure is on to take a little bit of a break right now. But hey, while we keep working, you keep watching, we'll be right back.
Oh,
hi. Welcome back. Well, I told you we would be busy during the break, didn't I? Now I just took some sheet metal and
fed up this mounting plate for our tank compressor and air valves. And, hey, not bad for a couple of minutes work. Right. Well, this thing mounts on the passenger side between the frame and fender. Here we go.
Ok.
Of course, we could have mounted these components anywhere in just about any position, but this way we got to pre assemble everything on the bench and, well, we only had to drill four holes to mount up all these components.
Yeah,
wiring the air ride system in our dealer here couldn't be any easier.
It comes with this wiring harness and, well, this end just plugs right up to the control panel. Yeah, this end goes to the air valves underneath here. Oh, by the way, you will have to furnish your own wire to the compressor to power it and make sure you use at least 10 gauge wire because that compressor pulls at least 20 amps. I tell you what,
I'll get finished up underneath. If you get started on that control panel. Hey, you got a deal. All right.
I checked out my options inside the cab here and we kind of decided that the best place to mount the control panel is right down here by the console. So I fed up these brackets to help us mount it there.
Then I went ahead and bent up this side shield to help keep the driver's feet out of the wiring back here.
Wiring is all handled control panels mounted up front. The only thing left is to hook up the hoses.
Hey, Chuck, I got to tell you, man, after all that work,
I really don't see much difference than earlier today. Well, that's because I've got the system aired all the way up so we could check it for leaks. But trust me on this, we've got a lower tower. Well, you know, I used to live in Missouri, so you gotta show me. All right. Well, check this out.
Well, just look at this hauler now. Well, what do you think? I think we got all the altitude we need for towing and the attitude we need for cruising all of this work. Now, a kit like ours is gonna set you back about three grand, but it's a heavy duty kit that'll let you tow a trailer up to 40 ft long
mustangs. Of course.
Yeah. Kit for your street machine will start at about 1300 bucks. In either case, you need to head to an alignment shop after the installation. Hey, good advice. Now, this thing is gonna ride a little bit stiff at first, but after a couple of 100 miles those bags will break in and then you'll think you're riding on air.
Wait a minute you are. That's right. Anyway, we're gonna take a little ride away from the shop coming up. So you strap in and stick with us
mustangs, huh?
What else?
Horsepower happenings is brought to you by Wyotech? The nation's premier technical training school.
Well, does it get any better than a rouse drop top? I don't know, but I do know that a lot of people think the Mustang was named after the P 51 fighter that fought during World war two.
Well, if that's true, it's appropriate that this gathering of the Mustang Club of America
should be a patriotic and performance picnic celebrating Ford's favorite muscle car,
green gray parachuters filled the skies while the ground level was covered with mustangs. Maybe 1000 of them from year one in 1964 to 2002,
the Mustang Club of America was started 25 years ago by a handful of pony enthusiasts today. There are chapters full of members in every state and many foreign countries, you bet and every one of them a little bit crazy
because they love their car. There's, there, there's something about the camaraderie of, of a Mustanger. That
is almost incredible.
The nice thing about a Mustang is they were sold
with all kinds of options available and you could do to the car, what you want
and the aftermarkets that you can put onto a car just turned them into unbelievable things.
The concourse at commerce was loaded with almost 40 years of Mustang models concepts and options,
vendor skirts on a fast back. Yep, they were available in the mid sixties. This has been my favorite car ever since I knew Mustangs. I bought 302.
This car I always wanted, finally got the chance to buy one about five years ago and
we worked on it for about four years
while the Boss 30 twos are getting scarce. They don't get any more rare than this 69 convertible.
It came stock from the Ford factory with a four speed, a shaker hood and 428 Cobra Jet. They made approximately 45 of the cars. They only made
five red shaker hood scoop, four speed convertibles.
Tell me this rare rides, not ba it's still got the shifter instruction tag on the knob.
In 1970 only 700 of the Shelby five hundreds were made.
Just imagine having a one of a kind. This is particularly rare because it's uh
the color combination is
one of a kind.
So that makes it unusual and it's also a thoroughbred.
There's something pretty cool back in the late eighties, Ford made about 12,000 special service ponies. Uh, Cops used to catch the bad guys in now. Not a lot of power, just a five Oho motor but uh today a pretty powerful collectible.
Meanwhile, here's an interesting comparison for you. You see the Shelby GT five Hundreds. Well, they look like twins, but I gotta tell you there's about $75,000 worth of difference. Now, while this is a beautiful concourse show car, it's got reproduction parts on it. Meanwhile, this was known as a thoroughbred. Everything on this thing is original right off assembly line.
In fact, this original auto light battery
can't touch it for less than two grand.
Needless to say that's one car we didn't see on the drag strip,
but many prize ponies did take a rare gallop down the quarter mile in the first reunion that included racing.
It's unbelievable right now, there's 90 cars that have been racing
and I think there's another 15 or 20 that have come up and said, well, gee can I race too?
You know, it's hard to imagine. The first Mustangs raced off the assembly line nearly 40 years ago,
jump starting the pony car revolution.
But with this kind of excitement for the old and new pony Power. Well, it's easy to imagine another 40 years to come.
Mustang brand is, is the strongest brand that we have at, at Ford
and Mustang in particular has a, a following and a heritage. Second to none. I, I look at it as our obligation to continue on with that
horsepower TV S hot parts. A close up. Look at the latest in high performance hardware.
Hey, don't axle me, no questions and I'll tell you no lies. Now, the truth of the matter is Moroso has just come out with her ultra high strength axles for Hondas and Acuras that are doing battle on the drag strips. Now, they're made from an alloy similar to the one that's used on aircraft landing gear and the best part is they bolt right in, in place of your stock axles. Now, the CV joints are the same ones used on Indie race cars
and they're specially heat treated for durability, resistance to shock and hardness. Of course, the price it's pretty hard to beat for an indestructible axle. About 1800 a piece. Say if you've made that uh crate escape to one of those out of the box engines from GM four to Mopar get a load of this. Barry Grant's got some new carbs that boat ride on
and eliminate the hassles of tuning.
Each one is caliber
for the specific application by testing on the
dyno
flow bench and at the track now they're based on the 650 speed demon and available with either mechanical
or vacuum secondaries.
EGM guys are gonna get yours first. But Ford and Mopar carbs are coming soon with prices starting at about 400. Well, here's what's coming soon on horsepower TV. In fact, uh
next week
it's back to more horsepower basics on Chuck 69 Chevelle swapping headers for the old manifolds and adding a free flowing exhaust system.
We've got some sure fire tricks and tools to help you get the most wheel and rubber under your ride. Plus we'll take a ride to Las Vegas for a look at the hottest mods and models at the annual
SEMA show.
You ever thought about doing any TV?
For information about the products used in today's show and more. Check us out online at Horsepower tv.com
Horsepower TV is an RTM production.