HorsePower Builds
Want more content like this?
Join the PowerNation Email NewsletterVideo Transcript
Hey, vans aren't just for soccer moms anymore. They also make fantastic street machines as you're about to discover
today on Horsepower TV.
The seventies are gone but fans are back. We'll slam a late model Astro with some hot new suspension pieces. Then give it a cool new look with a body panel kit.
Finally, we'll add some eye grabbing graphics with the kit you can use in your driveway. Plus head to Michigan where the top Mustang street machines battle it out.
So hang on for horsepower TV.
Hi, welcome to Horsepower TV.
Oh, I know what you might be thinking. The parts truck just arrived. Right. Well, wrong.
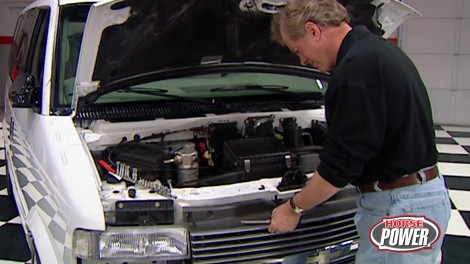
This is the latest project here in the shop. Yep. Vans are back but with a little more high tech twist than you remember in the seventies.
Yeah, you won't find any shag carpet or disco balls in this late model Astro. What you will find? Those are 370 horse LT one backed by an automatic overdrive transmission. Now, how the owner got that whole deal in there though is anybody's guess
the handling has been improved too with a 3.5 inch drop to lower the center of gravity
and it's got wider rubber on a set of billet wheels. Of course, the custom paint is set off by these graphics and hey, we're even gonna show you how to plow your own later on.
Yeah. You know, one of the coolest things about these vans is they're so affordable. If you shop around, you can actually get one for as little as two grand.
Now, the first thing we're gonna do with Old Casper here is slam the suspension. Let me show you what we'll use.
Now up front, we've got a pair of two inch drop spindles that allow us to keep our full suspension travel and stock alignment. Specs
the springs here will give us another inch drop in the front
and for a four inch drop in the rear. Well, we've got the flip kit. Now, what it does is relocate the rear end housing from under the springs to on top of them.
We got this entire suspension kit from Bell Tech
before getting started, make sure that your vehicle is firmly supported by jack stands. Then we can get going by removing the caliper
and disconnecting the outer tie rod end.
Next, remove the shock
and with the lower control arms supported with a floor jack loosen the upper and lower ball joints,
then disconnect the sway bar links.
Now Lamont Astros have a BS. So the next part to come off
is the rotor
and that'll let us get to the A BS sensor and the dust shield,
use a chain to hold the spring in place. Then we can lower the jack.
There we go and remove the spindle and we can get to that spring later.
Hey, man, how's the disassembly going? Great. I'm done here now. I'm just about ready to start on the other side. Great. While you're doing that.
I wanna show you the difference in our stock and replacement spindles.
Now, on our new piece from Bell Tech spindle moves up a couple of inches
while the location of the ball joint and steering knuckle remain the same. Now, that way we get the drop we want without changing the steering or drivability. Oh, it's always a good idea while everything's apart
to repack these bearings and some fresh grease,
the new springs are the first to go in.
Then we installed the new spindles by hanging them on the lower ball joints
and raise the lower control arm with the floor jack to install the upper ball joints,
we'll torque these nuts down to manufacture specs, then install the rest of the assembly. The opposite of the way you saw it come apart with one exception though, we'll install new sway bars later. So we'll leave the end links off for now,
we're gonna highlight that new lower look with a set of niche throttles mounting a set of Goodyear Eagle HP S. Now the wheels are 17 by eight inches wide
and they've got a four and three quarter inch back spacing to help keep everything up inside the wheel. Well, the tires are 2 55 45 seventeens and they've got a tread pattern that actually channels the water towards the outside edges to help prevent hydroplaning.
Now, since you wanna drop the rear springs to install the flip kit, you wanna support the band on its frame, not its suspension.
We're also using the floor jack here to support our rear assembly.
While we remove the U plate hardware,
then with the rear axle assembly lowered,
we can remove the rear axle mounting isolators.
The rear shackle boats are removed next, followed by the forward spring I boats.
Now we go ahead and remove the spring market for orientation
and repeat everything on the other side with one extra step. You have to lower the gas tank to access the front spring mo
boats.
Ok. With the spring out, I've installed these relocation plates and spacers.
Now we can reinstall the forward spring hangar between the plates
have to work with it a little bit. There we go.
There. She is good
when the front fasteners torque to 40 ft pounds, I can replace this old rear shackle
our new one here.
Now you wanna make sure these ears are pointing toward the rear.
Well, now Chuck's raising the rear end assembly again so we can slide the spring under the axle and reattach it
at
the front hanger and rear shackle.
There we go.
I've repositioned this brake line to keep it from getting pinched when we add the U bolts later on. And now we're ready for this new axle saddle
that goes right up in here
to help locate the rear end properly to the spring.
And we're also gonna use this aluminum wedge to help restore the correct pinning angle. Now, the fat end goes towards the rear of the vehicle.
All right, we're ready to lower the rear end down
with the bottom support plate in place, loosely install the bolts and spacer tubes
and the U bolts,
then torque everything down to manufacturers. Specs
one final step here, we have to replace the stock snubs
with these urethane pieces that came in the kit.
Then we can lower the band back down on the ground and torque the spring eye bolts to 74 ft pounds. That's a good idea to recheck the torque on all the fasteners at 10, 100 and 1000 miles. Hey, I think it's a good idea if we take a little break right now. That is a good idea. We'll be back with the shocks and bars for our fantastic project. Next
later in the show, Mustangs head to Michigan for a record breaking weekend of power pony racing
for the latest news on horsepower TV. Check us out online at Horsepower tv.com.
Hey, welcome back to the shop and our project. Fantastic. Now since we slammed the suspension on this thing, we're gonna need some new shocks like these Nitro actives that we got from Bell Tech. Now, not only do they have the shorter travel that we need, but hey, they're also a high pressure gas shock that are valved, especially for that Astro van.
Now, the final len in our suspension upgrade is a match set of sway bars.
The Astro didn't come from the factory with a rear sway bar,
so we'll add this one to complement the front bar here. Now, just check the difference in thickness. We'll mount both of them with new urethane bushings to maximize steering response and minimize body roll.
But now that we got the stance right.
It's about time to add some styling to this Astro,
you bet and to do that, we're gonna bolt on this front air dam and rear balance that we got from a and a specialist. Then we're gonna add this cat eye shell that comes with a billet grill. Now, we got this piece from a PC. Of course, everything came to us in gray primer. So we had our painter Rick Harris, shoot everything to match the van's body color
man, seven screws. And this thing came right out. I hope the new one goes in as easy even easier. But with that old grill out of the way, we're ready for this new air dam,
just loosen the two bolts holding each corner of the bumper
and pull it down.
After test fitting the air dam, remove it.
Here we go and clean all the contact areas with a degreaser,
peel the plastic backing from the two sided tape
position, the air dam, then press the contact area
to secure the tape.
Then tighten up the bolt.
Installing that cat eye grill shell is almost as easy. But first, we need to remove these corner running lights.
Well, now we need to drill a one and an eight inch hole for our new turn signal socket,
then splice the wiring into the existing harness and check everything for proper operation.
Give me the parking lights.
All right. Now, the turn signals
great.
Our new grill shell is held in place with the stock screws and locations. But I'll tell you what, while I'm finishing this up. Let's go check on Joe to see how he's doing out back.
All right,
just got the rear bumper off. And as soon as I remove these corner caps here,
we can test fit that rear balance that should go on much like that front air dam did.
After test vetting, we can go ahead and clean the contact area.
Then of course, you expose the double
sided tape and press it into place.
Now, right here, you're gonna need a couple of sheet metal screws to secure this piece to the wheel. Well, and that'll require jacking up the van to get rid of that wheel for a while
now this will keep her in place.
Hey, hey, great job. You know that body kit really works well with our new stance here, but it needs a little something else. I know what you're thinking. A little touch of, uh, Van Gogh. Well,
you got all the work you're getting out of me for a while. I gotta go cover a race. Well, don't you go anywhere? I'll be back with some eye grabbing graphics right after this.
Welcome back to the shop. Well, now that the Astro is slammed and styled, hey, it really needs some graphics to set it off and I'm gonna show you a technique that you can even do at home. Now, this splash mask is gonna add a splash of color to that old white box back there and it's easy to use too. But first, we need to decide where we wanna put that graphic.
I decided to keep the graphic down low
to take advantage of our vans lines and new stands. Now, before we do anything though, we need to prep the whole area with wax and grease remover.
Next lay down a guide tape to keep the graphic properly aligned,
tape the mask down without removing the backing to check positioning,
then peel the backing off
and squeegee it down to remove air bubbles.
Now remove the transfer paper,
finally remove the cut out portions of the design
to expose those that'll get paint.
Well, speaking of paint what I'm gonna be using is some one shot sign painters enamel and we got this from Eastwood. Now, I've got a little bit of maroon, some gray vermilion and fire red here. Plus I've got a couple of pinstriping brushes and an old phone book to help us load paint on those brushes. Plus I've also got a little bit of reducer here to help thin that paint later on. Now I'm gonna start with some of this fire red.
Now, there's no real trick to properly loading your brush with paint. What you want to do is keep dipping it
and working it back and forth until those bristles are fully saturated with paint.
Now, once you start putting paint on the van, apply it in long smooth strokes,
check this out since I removed all the emblems from our Astro. I included this little bow tie here in our design. Now, what do you say we make it red?
Well, now, how about some maroon? You wanna make sure that you clean your brush between colors very thoroughly to prevent any contamination.
Once all the colors are down, remove the mask before the paint dries completely. That way the edges will stay nice and smooth.
It's amazing what graphics can do for any street machine, including this big white refrigerator on wheels.
Now, here's what we started with at the beginning of the show
and it only took us a weekend to complete our project. Fantastic
of course, it'll only take you a couple of minutes to check this out.
We'll be right back.
Horsepower tv's race of the week is brought to you by Edelbrock,
the leader in automotive performance for nearly 75 years.
You just wait where you're gonna see it coming.
It's gonna be very hot action.
All right. I hope you're ready for some real mustang madness. We've landed at mid Michigan Motorplex for some mmr a style drag racing.
It's a Ford Festival of Power featuring some of the quickest ponies on the planet.
The Baton
Pro 50 Mustang stampeded into qualifying rounds immediately making this the fastest sport event in history.
In fact, records started to fall early in round one when Brian Schweitzer set a new class record with this 7627 run,
but hold on and move on to round two where streetcar whiz Billy Clinton not only pitched in with a mop, he cleaned up on the competition with the 76243 thousands. Better than Bryan.
We've got a different engine and Mickey Thompson's got
a,
um,
a tire that,
that we're experimenting with. Uh, that was actually the first run on it.
But wait, there's more in round three, Joe Da Silva stepped up with this turbo charge 2000 to run a 761 at 190 a new ET and mile an hour record.
And we know he's got to come out here tomorrow and waste one competitor at a time.
Ok. Let's say you don't have the hard cash or hardware it takes to go pro 50, well, the cool thing about this series is there's a hot class for any pony that wants to play
for those who like to make power the natural way and lots of it. There's the Edelbrock hot street class one that attracted Bob Hanlon and his 83 several years ago,
I've always been
a,
a
carbureted naturally aspirated guy.
I got into this a long time ago before the cars were fuel injected and I've had this car new since 83.
Bob runs a 360 SV motor with a Super Victor intake making enough pure power to
him consistently into the nines on 10.5 inch tires. Another fuel class is race cars two ef I Renegade with one power adder allowed, but with restrictions on things like heads cam lift and lifters that cut down on cost and carnage.
It's more of a tuning class and it is uh throwing money at a type class. You know,
it's gonna be the best person who could tune the best, you know, is gonna be able to go the fastest as far as 60 ft and get it down the track straight and stuff like that.
Renegade attracted the only woman running heads up in this series. Fearless Donna Sidor,
a competitor who learned her racing ropes on the streets around Detroit Uh I made a lot of guys mad.
I am still making a lot of guys mad. There's still a lot of people that don't like the women out here doing it, but
I have no say in this in what they have the comments towards me except for the fact, just get in your car and race me.
Uh No, thanks. Donna's got a Vortex supercharged 347 backed by a specialty
four tranny and B and M pro ratchet. She's serious about racing and about winning. We come out here every time with the, with the
will to win and hopefully the
God's with us and we can get this done. And my mom bought me all my good luck bracelets and I got them on and hopefully we can take it to the winner's circle today.
Well, here on a rather overcast Sunday, it's about time for eliminations and time to see which of these fast forwards goes back to the Mustang Corral as a winner.
Seor
survived her first rounds of eliminations before beating top qualifier Mayer who got the red light in the semifinal
streets. Hanlan fought his way through the pack to earn his ticket to the finals.
And in pro five B,
the title changes again
as Clinton goes 757 on his way to the finals. Meanwhile, the Silva hangs in there beating Grebeck to set up
a Da
Silva showdown.
Then after the last of several rain delays and under the lights. It's finally time for finals.
Donna didn't have the power to overtake Claire Stewart who ran a 993
but in hot street Bang and Bob defeated Sam
have to take his second top prize in a row.
Then the ultimate late night shootout,
Clinton versus De Silva for top money and honors and pro 50,
after mechanical failure makes Clinton red light. Joe makes more history with a 742 at 100 94 miles an hour.
I just want to thank God and I want to thank my wife for letting me come to the races. My brother at the shop working hard doing my good motor.
And as they say, the list goes on
just like the never ending quest for quickness in heads up Mustang racing.
Join the horsepower TV crew at the import and compact showdown, December 9th and 10th at Moroso Motorsports Park, Palm Beach Gardens, Florida
and now hot parts brought to you by car parts.com, everything for your car, truck van or SUV.
Hey, do you ever think about breaking tradition? Well, now here's a new way to stop your street machine. It's a set of carbon metallic composite brake pads from Hawk Performance and they're available in two different grades. Each one features a high performance pad material that's not only easy on rotors, but they'll also outlast the originals. Now, pricing starts at under 50 bucks.
Here's something that'll lift your spirits along with your ride, it's a pace post for Jack from Argo manufacturing
and it's got an aluminum frame, a steel lift beam and high speed hydraulics that'll lift your ride about 2.5 inches per stroke. That's also got an extra low lift pad that'll get under the lowest suspensions.
All you gotta do is get into your wallet for about $785.
Of course, you racers can make your suspension work a little bit harder too with these stalker star shocks from hell. Now they're a direct bolt in with adjustable controls for both bump and rebound. The body is made from a forged aluminum extrusion so it's even stronger than billet. Plus it's rebuildable using an optional factory kit. Now, racers claim that they've been able to trim up to 2/10 from their ETS using these shocks and they're gonna trim your budget by about 100 and 40 up. Well. All right, we hope you budget some time for our show next week. Here's a look at
it.
We'll help our pro touring pony keep its cool with a cooling system upgrade
before we shift our attention to its need for an updated means of banging gears.
We'll head west for a crash course on how the experts lay down eye popping graphics
and take you on the front lines of I hr A racing for the profile of ST
and Steve
and remember high performance fun is what this show is all about
for information about the products used in today's show and more. Check us out online at Horsepower tv.com
Horsepower TV is an RTM production.
Show Full Transcript
today on Horsepower TV.
The seventies are gone but fans are back. We'll slam a late model Astro with some hot new suspension pieces. Then give it a cool new look with a body panel kit.
Finally, we'll add some eye grabbing graphics with the kit you can use in your driveway. Plus head to Michigan where the top Mustang street machines battle it out.
So hang on for horsepower TV.
Hi, welcome to Horsepower TV.
Oh, I know what you might be thinking. The parts truck just arrived. Right. Well, wrong.
This is the latest project here in the shop. Yep. Vans are back but with a little more high tech twist than you remember in the seventies.
Yeah, you won't find any shag carpet or disco balls in this late model Astro. What you will find? Those are 370 horse LT one backed by an automatic overdrive transmission. Now, how the owner got that whole deal in there though is anybody's guess
the handling has been improved too with a 3.5 inch drop to lower the center of gravity
and it's got wider rubber on a set of billet wheels. Of course, the custom paint is set off by these graphics and hey, we're even gonna show you how to plow your own later on.
Yeah. You know, one of the coolest things about these vans is they're so affordable. If you shop around, you can actually get one for as little as two grand.
Now, the first thing we're gonna do with Old Casper here is slam the suspension. Let me show you what we'll use.
Now up front, we've got a pair of two inch drop spindles that allow us to keep our full suspension travel and stock alignment. Specs
the springs here will give us another inch drop in the front
and for a four inch drop in the rear. Well, we've got the flip kit. Now, what it does is relocate the rear end housing from under the springs to on top of them.
We got this entire suspension kit from Bell Tech
before getting started, make sure that your vehicle is firmly supported by jack stands. Then we can get going by removing the caliper
and disconnecting the outer tie rod end.
Next, remove the shock
and with the lower control arms supported with a floor jack loosen the upper and lower ball joints,
then disconnect the sway bar links.
Now Lamont Astros have a BS. So the next part to come off
is the rotor
and that'll let us get to the A BS sensor and the dust shield,
use a chain to hold the spring in place. Then we can lower the jack.
There we go and remove the spindle and we can get to that spring later.
Hey, man, how's the disassembly going? Great. I'm done here now. I'm just about ready to start on the other side. Great. While you're doing that.
I wanna show you the difference in our stock and replacement spindles.
Now, on our new piece from Bell Tech spindle moves up a couple of inches
while the location of the ball joint and steering knuckle remain the same. Now, that way we get the drop we want without changing the steering or drivability. Oh, it's always a good idea while everything's apart
to repack these bearings and some fresh grease,
the new springs are the first to go in.
Then we installed the new spindles by hanging them on the lower ball joints
and raise the lower control arm with the floor jack to install the upper ball joints,
we'll torque these nuts down to manufacture specs, then install the rest of the assembly. The opposite of the way you saw it come apart with one exception though, we'll install new sway bars later. So we'll leave the end links off for now,
we're gonna highlight that new lower look with a set of niche throttles mounting a set of Goodyear Eagle HP S. Now the wheels are 17 by eight inches wide
and they've got a four and three quarter inch back spacing to help keep everything up inside the wheel. Well, the tires are 2 55 45 seventeens and they've got a tread pattern that actually channels the water towards the outside edges to help prevent hydroplaning.
Now, since you wanna drop the rear springs to install the flip kit, you wanna support the band on its frame, not its suspension.
We're also using the floor jack here to support our rear assembly.
While we remove the U plate hardware,
then with the rear axle assembly lowered,
we can remove the rear axle mounting isolators.
The rear shackle boats are removed next, followed by the forward spring I boats.
Now we go ahead and remove the spring market for orientation
and repeat everything on the other side with one extra step. You have to lower the gas tank to access the front spring mo
boats.
Ok. With the spring out, I've installed these relocation plates and spacers.
Now we can reinstall the forward spring hangar between the plates
have to work with it a little bit. There we go.
There. She is good
when the front fasteners torque to 40 ft pounds, I can replace this old rear shackle
our new one here.
Now you wanna make sure these ears are pointing toward the rear.
Well, now Chuck's raising the rear end assembly again so we can slide the spring under the axle and reattach it
at
the front hanger and rear shackle.
There we go.
I've repositioned this brake line to keep it from getting pinched when we add the U bolts later on. And now we're ready for this new axle saddle
that goes right up in here
to help locate the rear end properly to the spring.
And we're also gonna use this aluminum wedge to help restore the correct pinning angle. Now, the fat end goes towards the rear of the vehicle.
All right, we're ready to lower the rear end down
with the bottom support plate in place, loosely install the bolts and spacer tubes
and the U bolts,
then torque everything down to manufacturers. Specs
one final step here, we have to replace the stock snubs
with these urethane pieces that came in the kit.
Then we can lower the band back down on the ground and torque the spring eye bolts to 74 ft pounds. That's a good idea to recheck the torque on all the fasteners at 10, 100 and 1000 miles. Hey, I think it's a good idea if we take a little break right now. That is a good idea. We'll be back with the shocks and bars for our fantastic project. Next
later in the show, Mustangs head to Michigan for a record breaking weekend of power pony racing
for the latest news on horsepower TV. Check us out online at Horsepower tv.com.
Hey, welcome back to the shop and our project. Fantastic. Now since we slammed the suspension on this thing, we're gonna need some new shocks like these Nitro actives that we got from Bell Tech. Now, not only do they have the shorter travel that we need, but hey, they're also a high pressure gas shock that are valved, especially for that Astro van.
Now, the final len in our suspension upgrade is a match set of sway bars.
The Astro didn't come from the factory with a rear sway bar,
so we'll add this one to complement the front bar here. Now, just check the difference in thickness. We'll mount both of them with new urethane bushings to maximize steering response and minimize body roll.
But now that we got the stance right.
It's about time to add some styling to this Astro,
you bet and to do that, we're gonna bolt on this front air dam and rear balance that we got from a and a specialist. Then we're gonna add this cat eye shell that comes with a billet grill. Now, we got this piece from a PC. Of course, everything came to us in gray primer. So we had our painter Rick Harris, shoot everything to match the van's body color
man, seven screws. And this thing came right out. I hope the new one goes in as easy even easier. But with that old grill out of the way, we're ready for this new air dam,
just loosen the two bolts holding each corner of the bumper
and pull it down.
After test fitting the air dam, remove it.
Here we go and clean all the contact areas with a degreaser,
peel the plastic backing from the two sided tape
position, the air dam, then press the contact area
to secure the tape.
Then tighten up the bolt.
Installing that cat eye grill shell is almost as easy. But first, we need to remove these corner running lights.
Well, now we need to drill a one and an eight inch hole for our new turn signal socket,
then splice the wiring into the existing harness and check everything for proper operation.
Give me the parking lights.
All right. Now, the turn signals
great.
Our new grill shell is held in place with the stock screws and locations. But I'll tell you what, while I'm finishing this up. Let's go check on Joe to see how he's doing out back.
All right,
just got the rear bumper off. And as soon as I remove these corner caps here,
we can test fit that rear balance that should go on much like that front air dam did.
After test vetting, we can go ahead and clean the contact area.
Then of course, you expose the double
sided tape and press it into place.
Now, right here, you're gonna need a couple of sheet metal screws to secure this piece to the wheel. Well, and that'll require jacking up the van to get rid of that wheel for a while
now this will keep her in place.
Hey, hey, great job. You know that body kit really works well with our new stance here, but it needs a little something else. I know what you're thinking. A little touch of, uh, Van Gogh. Well,
you got all the work you're getting out of me for a while. I gotta go cover a race. Well, don't you go anywhere? I'll be back with some eye grabbing graphics right after this.
Welcome back to the shop. Well, now that the Astro is slammed and styled, hey, it really needs some graphics to set it off and I'm gonna show you a technique that you can even do at home. Now, this splash mask is gonna add a splash of color to that old white box back there and it's easy to use too. But first, we need to decide where we wanna put that graphic.
I decided to keep the graphic down low
to take advantage of our vans lines and new stands. Now, before we do anything though, we need to prep the whole area with wax and grease remover.
Next lay down a guide tape to keep the graphic properly aligned,
tape the mask down without removing the backing to check positioning,
then peel the backing off
and squeegee it down to remove air bubbles.
Now remove the transfer paper,
finally remove the cut out portions of the design
to expose those that'll get paint.
Well, speaking of paint what I'm gonna be using is some one shot sign painters enamel and we got this from Eastwood. Now, I've got a little bit of maroon, some gray vermilion and fire red here. Plus I've got a couple of pinstriping brushes and an old phone book to help us load paint on those brushes. Plus I've also got a little bit of reducer here to help thin that paint later on. Now I'm gonna start with some of this fire red.
Now, there's no real trick to properly loading your brush with paint. What you want to do is keep dipping it
and working it back and forth until those bristles are fully saturated with paint.
Now, once you start putting paint on the van, apply it in long smooth strokes,
check this out since I removed all the emblems from our Astro. I included this little bow tie here in our design. Now, what do you say we make it red?
Well, now, how about some maroon? You wanna make sure that you clean your brush between colors very thoroughly to prevent any contamination.
Once all the colors are down, remove the mask before the paint dries completely. That way the edges will stay nice and smooth.
It's amazing what graphics can do for any street machine, including this big white refrigerator on wheels.
Now, here's what we started with at the beginning of the show
and it only took us a weekend to complete our project. Fantastic
of course, it'll only take you a couple of minutes to check this out.
We'll be right back.
Horsepower tv's race of the week is brought to you by Edelbrock,
the leader in automotive performance for nearly 75 years.
You just wait where you're gonna see it coming.
It's gonna be very hot action.
All right. I hope you're ready for some real mustang madness. We've landed at mid Michigan Motorplex for some mmr a style drag racing.
It's a Ford Festival of Power featuring some of the quickest ponies on the planet.
The Baton
Pro 50 Mustang stampeded into qualifying rounds immediately making this the fastest sport event in history.
In fact, records started to fall early in round one when Brian Schweitzer set a new class record with this 7627 run,
but hold on and move on to round two where streetcar whiz Billy Clinton not only pitched in with a mop, he cleaned up on the competition with the 76243 thousands. Better than Bryan.
We've got a different engine and Mickey Thompson's got
a,
um,
a tire that,
that we're experimenting with. Uh, that was actually the first run on it.
But wait, there's more in round three, Joe Da Silva stepped up with this turbo charge 2000 to run a 761 at 190 a new ET and mile an hour record.
And we know he's got to come out here tomorrow and waste one competitor at a time.
Ok. Let's say you don't have the hard cash or hardware it takes to go pro 50, well, the cool thing about this series is there's a hot class for any pony that wants to play
for those who like to make power the natural way and lots of it. There's the Edelbrock hot street class one that attracted Bob Hanlon and his 83 several years ago,
I've always been
a,
a
carbureted naturally aspirated guy.
I got into this a long time ago before the cars were fuel injected and I've had this car new since 83.
Bob runs a 360 SV motor with a Super Victor intake making enough pure power to
him consistently into the nines on 10.5 inch tires. Another fuel class is race cars two ef I Renegade with one power adder allowed, but with restrictions on things like heads cam lift and lifters that cut down on cost and carnage.
It's more of a tuning class and it is uh throwing money at a type class. You know,
it's gonna be the best person who could tune the best, you know, is gonna be able to go the fastest as far as 60 ft and get it down the track straight and stuff like that.
Renegade attracted the only woman running heads up in this series. Fearless Donna Sidor,
a competitor who learned her racing ropes on the streets around Detroit Uh I made a lot of guys mad.
I am still making a lot of guys mad. There's still a lot of people that don't like the women out here doing it, but
I have no say in this in what they have the comments towards me except for the fact, just get in your car and race me.
Uh No, thanks. Donna's got a Vortex supercharged 347 backed by a specialty
four tranny and B and M pro ratchet. She's serious about racing and about winning. We come out here every time with the, with the
will to win and hopefully the
God's with us and we can get this done. And my mom bought me all my good luck bracelets and I got them on and hopefully we can take it to the winner's circle today.
Well, here on a rather overcast Sunday, it's about time for eliminations and time to see which of these fast forwards goes back to the Mustang Corral as a winner.
Seor
survived her first rounds of eliminations before beating top qualifier Mayer who got the red light in the semifinal
streets. Hanlan fought his way through the pack to earn his ticket to the finals.
And in pro five B,
the title changes again
as Clinton goes 757 on his way to the finals. Meanwhile, the Silva hangs in there beating Grebeck to set up
a Da
Silva showdown.
Then after the last of several rain delays and under the lights. It's finally time for finals.
Donna didn't have the power to overtake Claire Stewart who ran a 993
but in hot street Bang and Bob defeated Sam
have to take his second top prize in a row.
Then the ultimate late night shootout,
Clinton versus De Silva for top money and honors and pro 50,
after mechanical failure makes Clinton red light. Joe makes more history with a 742 at 100 94 miles an hour.
I just want to thank God and I want to thank my wife for letting me come to the races. My brother at the shop working hard doing my good motor.
And as they say, the list goes on
just like the never ending quest for quickness in heads up Mustang racing.
Join the horsepower TV crew at the import and compact showdown, December 9th and 10th at Moroso Motorsports Park, Palm Beach Gardens, Florida
and now hot parts brought to you by car parts.com, everything for your car, truck van or SUV.
Hey, do you ever think about breaking tradition? Well, now here's a new way to stop your street machine. It's a set of carbon metallic composite brake pads from Hawk Performance and they're available in two different grades. Each one features a high performance pad material that's not only easy on rotors, but they'll also outlast the originals. Now, pricing starts at under 50 bucks.
Here's something that'll lift your spirits along with your ride, it's a pace post for Jack from Argo manufacturing
and it's got an aluminum frame, a steel lift beam and high speed hydraulics that'll lift your ride about 2.5 inches per stroke. That's also got an extra low lift pad that'll get under the lowest suspensions.
All you gotta do is get into your wallet for about $785.
Of course, you racers can make your suspension work a little bit harder too with these stalker star shocks from hell. Now they're a direct bolt in with adjustable controls for both bump and rebound. The body is made from a forged aluminum extrusion so it's even stronger than billet. Plus it's rebuildable using an optional factory kit. Now, racers claim that they've been able to trim up to 2/10 from their ETS using these shocks and they're gonna trim your budget by about 100 and 40 up. Well. All right, we hope you budget some time for our show next week. Here's a look at
it.
We'll help our pro touring pony keep its cool with a cooling system upgrade
before we shift our attention to its need for an updated means of banging gears.
We'll head west for a crash course on how the experts lay down eye popping graphics
and take you on the front lines of I hr A racing for the profile of ST
and Steve
and remember high performance fun is what this show is all about
for information about the products used in today's show and more. Check us out online at Horsepower tv.com
Horsepower TV is an RTM production.