HorsePower Builds
Want more content like this?
Join the PowerNation Email NewsletterVideo Transcript
Hey, my new old grocery getter just made 100 and 21 horsepower on the
dyno Jet here.
How much more can we make? Well, stick around and find out
today on horsepower TV.
We'll do a driveway cam swap on Chuck Chevelle wagon. And while we're at it, we'll install a new timing chain, valve train components and carburetor, then we'll test these power pieces on our dyno
check.
We'll start to work on my Mustang project car with a new rack and pinion kit and take you to Ontario for some down and dirty dragster action in our I hr a race of the week.
So hang on for horsepower TV.
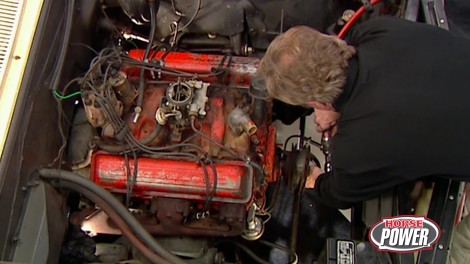
Hey, welcome to the shop where we're just about to slip a new cam shaft in my wagons. Old 283. That is uh if my partner ever decides to show up, uh, speak of the devil. Hey, man,
what do you got there? Well, it's my new old pony 65 fast back GT man. What do you think, man? This thing looks great. How does it drive? Well, it's gonna fairly late model 50 engine and a five speed. So, goes down the road. Great. But I gotta tell you, cornering with this manual steering is a pain in the. Ask me what I got for it though. Don't keep me in suspense. A new rack and pinion set up that I thought you might help me install well deal. But first, why don't you help me finish up my Chevelle over here? Fair enough.
Now you've seen us do plenty of cam swaps here on the show before. The only problem is most of them took place on an engine stand. So today we're gonna do something just a little bit different.
We're gonna get down and dirty under the hood. Like many of you would. Well, while you get dirty, I'll get the new parts for
great idea. Now, this old 283 could sure use a lot of help. As you can see. It's still got the original two barrel carburetor on it.
And a couple of weeks ago when I was adjusting the valves, I noticed a couple of the C
lobes were going flat.
So I've already started the job by disconnecting the battery and draining the radiator.
Well, Chuck's hard at it over there. Let's check out what we're upgrading to.
Our CAM is a 265 dual energy grind. We got from comp CAMS.
It's called that because the exhaust event has more lift and duration than the intake. Now, this compensates for things like inefficient port design
or restrictive stock exhaust manifolds. Now, any time you get a new cam in need to install new lifters as well like these that came with our kit.
Hey, man, aren't you ready for this yet? No, I ain't that fast. But I tell you what
if you give me a hand, it won't be long. Good deal.
We still need to remove the alternator,
set the power steering pump aside,
then get rid of the water pump.
We removed the bottom pulleys,
the balancer,
the distributor comes out,
then the intake
and the valve covers.
Once we get the rocker arms backed off, we can go ahead and remove the push rods
and the lifters.
Sometimes a varnish build up on the bottom of the lifter makes them hard to pull out of the board. But if you keep working them up and down,
eventually
they'll come out.
But now the timing cover comes off. Here's a tip for you.
If you loosen the bolts of the oil pan up front here, enough to let it drop down a bit, comes off a lot easier. And the reason is see this lip here on the timing cover it, it's up snug against the oil pan. So loosening the boats takes off the tension.
Now, before we can go any further, we need to remove the fuel pump here
because it's actuated by a push rod that's driven off the camshaft.
Now we can get to the timing bracket
and move it
and finally the camshaft and look at this if you screw a long bolt into the end of it, well, it gives you a pretty good handle and the leverage you need
to get it out.
Hey, I wanna show you something here we mentioned earlier about lobes going flat on a cam and well, here's what we meant. Some of these were like this one here are almost completely round. Now, this could be caused by a bad heat treat at the factory or improper finish on the lifter face
and dirty oil can be the culprit too that in an improper break in procedure. Now, remember whenever you install a new camshaft, you wanna keep your engine RPM above 1500.
That way it keeps everything splash lubed in there. Oh, and don't forget, use the special break in lube that's included with each kit.
You always wanna install a new timing set with your new cam.
That's because your chain has stretched and well, that retards cam timing. We're gonna use this double roller set. We got from comp cams. But first we're gonna take this puller and remove the old crank sprocket.
Our new cranks sprocket has multiple key ways. We'll install ours straight up using this
mark
after rotating the motor until this dots at the 12 o'clock position.
Go ahead and loosely install the camps sprocket.
Here we are
and rotate it
until these dots line up.
Then reinstall the camp's pocket with the chain
and bolt it down
there
before reinstalling this timing cover, make sure you trim back the edges of this lip here, so it'll slide in easier.
Oh, also install a new front seal
and a seal for the lip itself.
Now,
you also want to put a little dab of silicone at the corners here.
I'll keep it from getting any leaks,
but the lifters are next. So we wanna give them a little bit of oil
to keep them moved up in the lifter bores.
We're installing new push rods and these magnum roller tip rockers. Now, these are investment castings. That'll give us a true 152 rocker ratio. Plus they'll help us maintain proper valve train geometry.
Adjusting the bowels with the intake off is pretty easy. What you want to do is go ahead and bottom out the lifters for the cylinder that you're working on,
then move the push rod up and down while you tighten on the rocker arm, once all the slack is gone, give it another quarter turn
and you're done.
I think it's time for us to cut our sponsor some slack. We'll take a short break and be back with more driveway boltons after this.
After the first time I let the button go, I was, I was at, I was sold later to be a top international model who's also a top drank
competitor in I hr A,
it's our race of the week from Ontario. Stay with us.
The latest news on horsepower TV. Check us out online at Horsepower tv.com.
Hi, welcome back to the shop. Now, while you were on break, we kept on working here. In fact, we've gone ahead and reinstalled the harmonic balancer,
the fuel water and power steering pumps. And now we're just about ready for that new intake manifold. But first we need to get rid of the old gaskets and here's something that's gonna make the job a lot easier and quicker to clean up. We got this Valley tray kit from standard abrasives and this plastic piece just snaps right down here in the Valley
like that,
these white styrofoam pieces will help keep the crud out of the intake ports. Now, it also comes with his abrasive disk and we put it to work right here.
That small block is gonna breathe a lot deeper with a new cam shaft. But you know, using this old two barrel carve set up would be like making a marathon runner breathe through a straw.
So we're gonna upgrade the induction first by bolting on this Edelbrock performer. It's a dual plane aluminum intake good for low end torque but capable of making horsepower up to 5500 RPM. Hey, man, I'm already done with all those gaskets. Good. I'm going to get started on this. Why don't you tell them about the car? Gladly. Now we're gonna be using a 625 CFM road demon car from Grant Performance. Now check this out.
It's got an electric choke here and vacuum secondaries for good street manners and good mileage. Now, here's something I really like. It's got a clear sight glass right here. So you can easily check the fuel level in the bowls and of course, each one of them comes with a chrome, dual fuel line.
Ok. We got our Mr Gasket ultra seals in place and uh be the silicone at each end of the block. We're ready to drop this thing in and great timing there. Hey, I'm always in the right place at the right time, man. That's you,
man. That powder coat looks pretty slick with that car.
Now, all that extra fuel is gonna need some extra spark to light it off and of course, we all know what that means. More power.
So we're gonna be using M SDS. He I billet distributor.
It's a high tech high output replacement for that old point type distributor. And here's one of the things I like best about it. It uses a one wire hook up for the power source. Oh, and speaking of wires, hey, we're gonna put the spark to the plugs with these 8.5 millimeter superconductors,
man with all those new parts and moroso dress up goodies. Rest of the motor looks pretty funky. We better lay down some paint. No man, I'd rather lay down some numbers. What do you say we get on the dyno Jet and see how bad we can beat that baseline. I'll deal with this later,
man. We brought that 283 to life from a 121 baseline to 100 and 83 at the rear wheel. And it only took us, well, less than a grand and less than a day under the hood. Well, man, now I'm excited when you say we go for a ride, undo the straps and jump in. Uh, uh, not so fast. Remember the deal? I help you with the wagon. You helped me with my Mustang's racket Pinion project and we'll steer you toward that right after this.
Hi, welcome back to the shop where it's time to give my classic fast back a turn for the better
this rack and Pinion is a bolt on conversion kit from total control products that replaces the stock set up. Now, it's gonna give us a lot quicker steering ratio and take the slop out of that 35 year old steering gear. Well, I've got your car in there and your 35 year old steering wheel already removed.
Now, this rack and pinion conversion is made just for high performance handling.
Check out the CNC machine pinion housing here and the tig welded brackets that also uses a KRC power steering pump that's got an adjustable flow rate so we can tune this system to suit the driver.
We begin by getting rid of all the original leakage starting with the tie rod ends,
then the centrelink from the pitman arm
and finally the idler arm
with the car back on the ground, you can remove the steering column
and you wanna be sure to keep up with this upper spring and the column bearing,
the steering box can come off next, held in place with three bolts.
Now, the column has to be shortened five and 9, 16 inches for this new shorter shaft that comes with a kit.
Then we'll install it along with this new lower bearing. And finally the firewall support. Once we get ready to go back in with the column,
after removing the inner mounting brackets from the rack assembly, both them to the control arm mounting points,
the outer bracket boats up to the frame,
install the rack assembly loosely to the mounts,
install the intermediate chap to the column and attach it to the rack,
then tighten the rack to the mount.
I've removed the center link from the rack so I can go ahead and install our tie rod ends using the special adapter that's included with the kit.
Now, if your tie rod ends are worn, be sure you replace them first.
Yeah,
the pump here amounts to the engine block using this bracket that comes with our kit.
Then we just add a new belt hook up the hoses. Oh, and
install this reservoir in the engine compartment.
Now, don't forget you're gonna also have to take your Mustang into a front end shop for an alignment.
That way you can take full benefit of this new steering gear
and we hope you'll also benefit from these words from our sponsors. We'll be right back
next. We head to Ontario. It's the I HR A Canadian Nationals and our red hot race of the week. So stay tuned
TV S race of the week is brought to you by Moroso, the leader in the automotive aftermarket performance industry.
Thank you. You got your ticket.
This week we focus on the Mopar
Parts Canadian National.
This is the largest inaugural event in I hr a history. Now there are about 550 cars in it and can't show you all of them. But we do have a tale of two dragsters starting with a model citizen of the sport
as a top international model, Bruno Bassel travels the world posing for fashion ads, catalogs magazines.
Hardly the kind of guy you'd expect to find fighting for a top dragster title
in I hr a sportsman competition. Well, this
year Express Auto parts.com is stepped up in a huge way for us and they've made it possible for me to go and attend the full season, the full schedule and compete for a championship last year we uh finished fourth in the country
and although the Chicago native holds a zone in the pits and on the track being a male model naturally attracts some ribbon. Oh, I get a lot of flack from everybody, but it's all in good fun though. You know, I get the, hey, pretty boy, I get to run pretty boy this round or don't put your hands dirty, all that kind of stuff. But, uh,
it's all fun.
It's all fun.
Bruno's crew chief is his dad who also races and runs a performance parts business.
And for this father and son team working side by side is just as important as winning.
You can't, you can't buy this kind of quality and, and, and camaraderie with your own son. He's like my best friend here. I couldn't do without that. I mean, he's the brains, everything behind all this stuff he sets out of the car up. So all I have to do is basically drive it. You know, I let the button go and uh he does all the other hard work.
Few young guys run on such drastically different career tracks. But for this model racer,
it's a winning combination that works,
which is most fun.
I like the racing. You know, the racing is something I really enjoy. I got a passion for every time I hop in the car, you know, the heart starts beating a little bit.
It's a, it's a rush. Meanwhile, how would you like to be top dog in I hr A's newest dragster class. It's called Throw Out Law. And here you can run big blocks, small blocks, blowers, nitrous, whatever.
Just make sure you got enough if you're running against the lady in this car.
Weekdays, Laurie Canister works as an executive assistant for Smith Cli Beecham in Pittsburgh.
She loves her job. But come weekends this petite polite lady heads for the track
where her main mission is to beat up on the boys.
Good.
You know, it's really the talent that speaks out. You know, it's the talent of your crew, talent of the driver. So when we both, when me and the guys get in our cars, it's strictly driver against driver. It's not man against woman. It really isn't.
But when you take off it's like 3.5 Gs against your body and, uh, pulls like that for about 200 ft or so
and then it just levels off to a quick fly then and it just blast you to the end of the track. It's a lot of fun
this 1999 rookie of the year. Not only holds the glass et record with a 603, she leads the full
outlaw pack in points.
Laurie wins the only be part in the class, a blown alcohol small block
with ace engine builder, Jeff Fowler serving as crew chief. She hasn't lifted, she hasn't, uh, hasn't bobbled a bit. She's driven through everything that we've,
that we've actually put the car through. So we're tickled to death.
We try and take it one race at a time and win each race. But yeah, our goal is to win the championship this year
and down the road, who knows, maybe top fuel.
Meanwhile, Laurie is content to smoke the competition in her Nicorette Nicoderm dragster
while paving the way for other young women who want to get behind the wheel. Hopefully by me being here and doing as well as we are,
it would make it easier for other women to think that they can do it too
well. On eliminations day, Laurie was winning up until round two when she read light.
So she was a little down but still determined
the winner of pro outlaw by the way was Neil Parker and his 48 fiat who ran a 621.
Now, the sportsman winners,
Canadian John
Yens took the stocks,
another Canada guy Gianni Kusi
took the Super Stock win
in Hot Rod. Paul Brown took the money as his opponent. Red lighted
and Gregory won super ride by a margin of 39,000.
It was Kenny Farrell and quick ride and a close one.
Lyon's opponent broke out as he won. Modified
by the way. Bruno also red lighted in eliminations, but Scott Bat yet crossed the line as top Dra
winner.
And finally, it was Ken
Langlois winning top sportsman in the near perfect one on his 727 dialing.
And now hot parts brought to you by car parts.com, everything for your car, truck van or SUV.
When we upgraded the steering on my new fast back today, we overlooked an important item, the steering wheel itself. So we're gonna replace the old one with this grant signature series wheel. It's a 14 inch diameter three spoke design with a carbon fiber. Look now it installs easy with adapters to fit most any application
and it gives your interior a definite high tech twist.
Oh, it'll only uh squeeze about 100 50 out of your budget.
Hey, for you, Chevy guys that believe bigger is better.
You're gonna like this new Iron Merlin two block from world products.
Now it'll handle a bore of up to 4.625 inches with a 4750 arm.
That's gonna give you an amazing 638 cubic inches.
Now, the cylinders and the decks are extra beefy to promote good ceiling and they'll accept most popular GM and aftermarket heads.
Of course, the price is bound to be popular too, starting at under 1700 bucks.
Well, whether you've got a mouse or a rat, you can keep the oil where it belongs with these reusable Perma line valve cover gaskets for moroso.
This soft rubber compound is bonded to a rigid steel frame
to prevent blowouts or leaks and well, to get a pair just leak about $30 from your wallet.
Well, that's hot parts for this week. Here's a look at next week's show,
the seventies are gone, but fans are back. We'll slam a late model Astro with some hot new suspension pieces. Then give it a cool new look with a body panel kit.
Finally, we'll add some eye grabbing graphics with the kit you can use in your driveway.
Plus head to Michigan where the top Mustang street machines battle it out
and remember high performance fun is what this show is all about
for information about the products used in today's show and more. Check us out online at Horsepower tv.com
Horsepower TV is an RTM production.
Show Full Transcript
dyno Jet here.
How much more can we make? Well, stick around and find out
today on horsepower TV.
We'll do a driveway cam swap on Chuck Chevelle wagon. And while we're at it, we'll install a new timing chain, valve train components and carburetor, then we'll test these power pieces on our dyno
check.
We'll start to work on my Mustang project car with a new rack and pinion kit and take you to Ontario for some down and dirty dragster action in our I hr a race of the week.
So hang on for horsepower TV.
Hey, welcome to the shop where we're just about to slip a new cam shaft in my wagons. Old 283. That is uh if my partner ever decides to show up, uh, speak of the devil. Hey, man,
what do you got there? Well, it's my new old pony 65 fast back GT man. What do you think, man? This thing looks great. How does it drive? Well, it's gonna fairly late model 50 engine and a five speed. So, goes down the road. Great. But I gotta tell you, cornering with this manual steering is a pain in the. Ask me what I got for it though. Don't keep me in suspense. A new rack and pinion set up that I thought you might help me install well deal. But first, why don't you help me finish up my Chevelle over here? Fair enough.
Now you've seen us do plenty of cam swaps here on the show before. The only problem is most of them took place on an engine stand. So today we're gonna do something just a little bit different.
We're gonna get down and dirty under the hood. Like many of you would. Well, while you get dirty, I'll get the new parts for
great idea. Now, this old 283 could sure use a lot of help. As you can see. It's still got the original two barrel carburetor on it.
And a couple of weeks ago when I was adjusting the valves, I noticed a couple of the C
lobes were going flat.
So I've already started the job by disconnecting the battery and draining the radiator.
Well, Chuck's hard at it over there. Let's check out what we're upgrading to.
Our CAM is a 265 dual energy grind. We got from comp CAMS.
It's called that because the exhaust event has more lift and duration than the intake. Now, this compensates for things like inefficient port design
or restrictive stock exhaust manifolds. Now, any time you get a new cam in need to install new lifters as well like these that came with our kit.
Hey, man, aren't you ready for this yet? No, I ain't that fast. But I tell you what
if you give me a hand, it won't be long. Good deal.
We still need to remove the alternator,
set the power steering pump aside,
then get rid of the water pump.
We removed the bottom pulleys,
the balancer,
the distributor comes out,
then the intake
and the valve covers.
Once we get the rocker arms backed off, we can go ahead and remove the push rods
and the lifters.
Sometimes a varnish build up on the bottom of the lifter makes them hard to pull out of the board. But if you keep working them up and down,
eventually
they'll come out.
But now the timing cover comes off. Here's a tip for you.
If you loosen the bolts of the oil pan up front here, enough to let it drop down a bit, comes off a lot easier. And the reason is see this lip here on the timing cover it, it's up snug against the oil pan. So loosening the boats takes off the tension.
Now, before we can go any further, we need to remove the fuel pump here
because it's actuated by a push rod that's driven off the camshaft.
Now we can get to the timing bracket
and move it
and finally the camshaft and look at this if you screw a long bolt into the end of it, well, it gives you a pretty good handle and the leverage you need
to get it out.
Hey, I wanna show you something here we mentioned earlier about lobes going flat on a cam and well, here's what we meant. Some of these were like this one here are almost completely round. Now, this could be caused by a bad heat treat at the factory or improper finish on the lifter face
and dirty oil can be the culprit too that in an improper break in procedure. Now, remember whenever you install a new camshaft, you wanna keep your engine RPM above 1500.
That way it keeps everything splash lubed in there. Oh, and don't forget, use the special break in lube that's included with each kit.
You always wanna install a new timing set with your new cam.
That's because your chain has stretched and well, that retards cam timing. We're gonna use this double roller set. We got from comp cams. But first we're gonna take this puller and remove the old crank sprocket.
Our new cranks sprocket has multiple key ways. We'll install ours straight up using this
mark
after rotating the motor until this dots at the 12 o'clock position.
Go ahead and loosely install the camps sprocket.
Here we are
and rotate it
until these dots line up.
Then reinstall the camp's pocket with the chain
and bolt it down
there
before reinstalling this timing cover, make sure you trim back the edges of this lip here, so it'll slide in easier.
Oh, also install a new front seal
and a seal for the lip itself.
Now,
you also want to put a little dab of silicone at the corners here.
I'll keep it from getting any leaks,
but the lifters are next. So we wanna give them a little bit of oil
to keep them moved up in the lifter bores.
We're installing new push rods and these magnum roller tip rockers. Now, these are investment castings. That'll give us a true 152 rocker ratio. Plus they'll help us maintain proper valve train geometry.
Adjusting the bowels with the intake off is pretty easy. What you want to do is go ahead and bottom out the lifters for the cylinder that you're working on,
then move the push rod up and down while you tighten on the rocker arm, once all the slack is gone, give it another quarter turn
and you're done.
I think it's time for us to cut our sponsor some slack. We'll take a short break and be back with more driveway boltons after this.
After the first time I let the button go, I was, I was at, I was sold later to be a top international model who's also a top drank
competitor in I hr A,
it's our race of the week from Ontario. Stay with us.
The latest news on horsepower TV. Check us out online at Horsepower tv.com.
Hi, welcome back to the shop. Now, while you were on break, we kept on working here. In fact, we've gone ahead and reinstalled the harmonic balancer,
the fuel water and power steering pumps. And now we're just about ready for that new intake manifold. But first we need to get rid of the old gaskets and here's something that's gonna make the job a lot easier and quicker to clean up. We got this Valley tray kit from standard abrasives and this plastic piece just snaps right down here in the Valley
like that,
these white styrofoam pieces will help keep the crud out of the intake ports. Now, it also comes with his abrasive disk and we put it to work right here.
That small block is gonna breathe a lot deeper with a new cam shaft. But you know, using this old two barrel carve set up would be like making a marathon runner breathe through a straw.
So we're gonna upgrade the induction first by bolting on this Edelbrock performer. It's a dual plane aluminum intake good for low end torque but capable of making horsepower up to 5500 RPM. Hey, man, I'm already done with all those gaskets. Good. I'm going to get started on this. Why don't you tell them about the car? Gladly. Now we're gonna be using a 625 CFM road demon car from Grant Performance. Now check this out.
It's got an electric choke here and vacuum secondaries for good street manners and good mileage. Now, here's something I really like. It's got a clear sight glass right here. So you can easily check the fuel level in the bowls and of course, each one of them comes with a chrome, dual fuel line.
Ok. We got our Mr Gasket ultra seals in place and uh be the silicone at each end of the block. We're ready to drop this thing in and great timing there. Hey, I'm always in the right place at the right time, man. That's you,
man. That powder coat looks pretty slick with that car.
Now, all that extra fuel is gonna need some extra spark to light it off and of course, we all know what that means. More power.
So we're gonna be using M SDS. He I billet distributor.
It's a high tech high output replacement for that old point type distributor. And here's one of the things I like best about it. It uses a one wire hook up for the power source. Oh, and speaking of wires, hey, we're gonna put the spark to the plugs with these 8.5 millimeter superconductors,
man with all those new parts and moroso dress up goodies. Rest of the motor looks pretty funky. We better lay down some paint. No man, I'd rather lay down some numbers. What do you say we get on the dyno Jet and see how bad we can beat that baseline. I'll deal with this later,
man. We brought that 283 to life from a 121 baseline to 100 and 83 at the rear wheel. And it only took us, well, less than a grand and less than a day under the hood. Well, man, now I'm excited when you say we go for a ride, undo the straps and jump in. Uh, uh, not so fast. Remember the deal? I help you with the wagon. You helped me with my Mustang's racket Pinion project and we'll steer you toward that right after this.
Hi, welcome back to the shop where it's time to give my classic fast back a turn for the better
this rack and Pinion is a bolt on conversion kit from total control products that replaces the stock set up. Now, it's gonna give us a lot quicker steering ratio and take the slop out of that 35 year old steering gear. Well, I've got your car in there and your 35 year old steering wheel already removed.
Now, this rack and pinion conversion is made just for high performance handling.
Check out the CNC machine pinion housing here and the tig welded brackets that also uses a KRC power steering pump that's got an adjustable flow rate so we can tune this system to suit the driver.
We begin by getting rid of all the original leakage starting with the tie rod ends,
then the centrelink from the pitman arm
and finally the idler arm
with the car back on the ground, you can remove the steering column
and you wanna be sure to keep up with this upper spring and the column bearing,
the steering box can come off next, held in place with three bolts.
Now, the column has to be shortened five and 9, 16 inches for this new shorter shaft that comes with a kit.
Then we'll install it along with this new lower bearing. And finally the firewall support. Once we get ready to go back in with the column,
after removing the inner mounting brackets from the rack assembly, both them to the control arm mounting points,
the outer bracket boats up to the frame,
install the rack assembly loosely to the mounts,
install the intermediate chap to the column and attach it to the rack,
then tighten the rack to the mount.
I've removed the center link from the rack so I can go ahead and install our tie rod ends using the special adapter that's included with the kit.
Now, if your tie rod ends are worn, be sure you replace them first.
Yeah,
the pump here amounts to the engine block using this bracket that comes with our kit.
Then we just add a new belt hook up the hoses. Oh, and
install this reservoir in the engine compartment.
Now, don't forget you're gonna also have to take your Mustang into a front end shop for an alignment.
That way you can take full benefit of this new steering gear
and we hope you'll also benefit from these words from our sponsors. We'll be right back
next. We head to Ontario. It's the I HR A Canadian Nationals and our red hot race of the week. So stay tuned
TV S race of the week is brought to you by Moroso, the leader in the automotive aftermarket performance industry.
Thank you. You got your ticket.
This week we focus on the Mopar
Parts Canadian National.
This is the largest inaugural event in I hr a history. Now there are about 550 cars in it and can't show you all of them. But we do have a tale of two dragsters starting with a model citizen of the sport
as a top international model, Bruno Bassel travels the world posing for fashion ads, catalogs magazines.
Hardly the kind of guy you'd expect to find fighting for a top dragster title
in I hr a sportsman competition. Well, this
year Express Auto parts.com is stepped up in a huge way for us and they've made it possible for me to go and attend the full season, the full schedule and compete for a championship last year we uh finished fourth in the country
and although the Chicago native holds a zone in the pits and on the track being a male model naturally attracts some ribbon. Oh, I get a lot of flack from everybody, but it's all in good fun though. You know, I get the, hey, pretty boy, I get to run pretty boy this round or don't put your hands dirty, all that kind of stuff. But, uh,
it's all fun.
It's all fun.
Bruno's crew chief is his dad who also races and runs a performance parts business.
And for this father and son team working side by side is just as important as winning.
You can't, you can't buy this kind of quality and, and, and camaraderie with your own son. He's like my best friend here. I couldn't do without that. I mean, he's the brains, everything behind all this stuff he sets out of the car up. So all I have to do is basically drive it. You know, I let the button go and uh he does all the other hard work.
Few young guys run on such drastically different career tracks. But for this model racer,
it's a winning combination that works,
which is most fun.
I like the racing. You know, the racing is something I really enjoy. I got a passion for every time I hop in the car, you know, the heart starts beating a little bit.
It's a, it's a rush. Meanwhile, how would you like to be top dog in I hr A's newest dragster class. It's called Throw Out Law. And here you can run big blocks, small blocks, blowers, nitrous, whatever.
Just make sure you got enough if you're running against the lady in this car.
Weekdays, Laurie Canister works as an executive assistant for Smith Cli Beecham in Pittsburgh.
She loves her job. But come weekends this petite polite lady heads for the track
where her main mission is to beat up on the boys.
Good.
You know, it's really the talent that speaks out. You know, it's the talent of your crew, talent of the driver. So when we both, when me and the guys get in our cars, it's strictly driver against driver. It's not man against woman. It really isn't.
But when you take off it's like 3.5 Gs against your body and, uh, pulls like that for about 200 ft or so
and then it just levels off to a quick fly then and it just blast you to the end of the track. It's a lot of fun
this 1999 rookie of the year. Not only holds the glass et record with a 603, she leads the full
outlaw pack in points.
Laurie wins the only be part in the class, a blown alcohol small block
with ace engine builder, Jeff Fowler serving as crew chief. She hasn't lifted, she hasn't, uh, hasn't bobbled a bit. She's driven through everything that we've,
that we've actually put the car through. So we're tickled to death.
We try and take it one race at a time and win each race. But yeah, our goal is to win the championship this year
and down the road, who knows, maybe top fuel.
Meanwhile, Laurie is content to smoke the competition in her Nicorette Nicoderm dragster
while paving the way for other young women who want to get behind the wheel. Hopefully by me being here and doing as well as we are,
it would make it easier for other women to think that they can do it too
well. On eliminations day, Laurie was winning up until round two when she read light.
So she was a little down but still determined
the winner of pro outlaw by the way was Neil Parker and his 48 fiat who ran a 621.
Now, the sportsman winners,
Canadian John
Yens took the stocks,
another Canada guy Gianni Kusi
took the Super Stock win
in Hot Rod. Paul Brown took the money as his opponent. Red lighted
and Gregory won super ride by a margin of 39,000.
It was Kenny Farrell and quick ride and a close one.
Lyon's opponent broke out as he won. Modified
by the way. Bruno also red lighted in eliminations, but Scott Bat yet crossed the line as top Dra
winner.
And finally, it was Ken
Langlois winning top sportsman in the near perfect one on his 727 dialing.
And now hot parts brought to you by car parts.com, everything for your car, truck van or SUV.
When we upgraded the steering on my new fast back today, we overlooked an important item, the steering wheel itself. So we're gonna replace the old one with this grant signature series wheel. It's a 14 inch diameter three spoke design with a carbon fiber. Look now it installs easy with adapters to fit most any application
and it gives your interior a definite high tech twist.
Oh, it'll only uh squeeze about 100 50 out of your budget.
Hey, for you, Chevy guys that believe bigger is better.
You're gonna like this new Iron Merlin two block from world products.
Now it'll handle a bore of up to 4.625 inches with a 4750 arm.
That's gonna give you an amazing 638 cubic inches.
Now, the cylinders and the decks are extra beefy to promote good ceiling and they'll accept most popular GM and aftermarket heads.
Of course, the price is bound to be popular too, starting at under 1700 bucks.
Well, whether you've got a mouse or a rat, you can keep the oil where it belongs with these reusable Perma line valve cover gaskets for moroso.
This soft rubber compound is bonded to a rigid steel frame
to prevent blowouts or leaks and well, to get a pair just leak about $30 from your wallet.
Well, that's hot parts for this week. Here's a look at next week's show,
the seventies are gone, but fans are back. We'll slam a late model Astro with some hot new suspension pieces. Then give it a cool new look with a body panel kit.
Finally, we'll add some eye grabbing graphics with the kit you can use in your driveway.
Plus head to Michigan where the top Mustang street machines battle it out
and remember high performance fun is what this show is all about
for information about the products used in today's show and more. Check us out online at Horsepower tv.com
Horsepower TV is an RTM production.