HorsePower Builds

Video Transcript

We'll take the mystery out of a 12 volt build up and put some new sounds in our street Rod. Stay right there

today on horsepower TV.

We'll fill an old swap

me 12 boat beer in with a parcel of new parts, including a ring and pin set and a posse

unit.

We'll show you how to make your own custom door panel, then load our 32 3 window coupe with the cool stealthy sound system.

We'll follow some kings of compact drag racing to Florida for some unbelievable six second quarter mile thrills and chills.

So hang on for horsepower TV.

Hey, welcome to Horsepower TV. Where today we got everything going on from a 12 volt rear end build up to racing and even a new sound system for our new street Rod. And

speaking of new Rods, what do you got here? It's my new grocery getter. Now, check this out. It's a rare

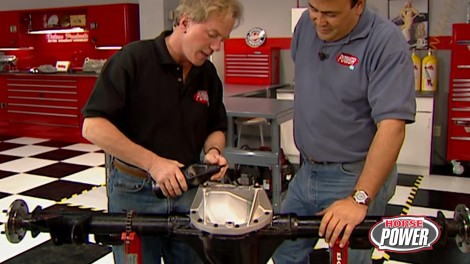
65 Chevelle two door wagon. And you guys are gonna get to see a lot more of this thing because it's got a lot of room for upgrades. Plus it's got a lot of room for cargo too. In fact, I just picked up this 12 boat rear end this weekend with the swap meet,

getting it out of there. That is just what we need.

The 12 volt has been around since 1965

and with its eight and 78 inch ring gear, it's a suitable high performance piece for a lot of GM applications. And since it's so abundant,

well, you ought to be able to pick one up for about 100 bucks like I did. Now, even though this one is set up for a Chevelle, what we're about to show you works equally well on all 12 bolts. Now, how do you spot a 12 volt when you're out shopping? Well, a lot of people think it's as simple as counting the boats on the rear end cover like this. And, well, that is a clue. But the reason they're called 12 boats is the number of boats that attach the ring gear to the carrier.

We have seen some oldsmobiles that had 12 boat covers that actually use 10 boat carriers inside. That's a good tip. Now, when you're shopping for a good usable housing, what you want to check for is any broken welds or spun axle tubes and down here in the center section, make sure you check the races out for any pitting galling or any other signs of wear and on the main caps, we'll just check them out for overheating

and any other obvious damage.

Once you've got your housing. It's time to fill up with some parts.

We're using this 342 DTs ring and pinion set

and we're gonna bolt it to an eating posse unit. A

posse of course, directs power equally to both wheels and

allows you to harness more of that horsepower you're making

for installation. We've got this kit from DTs that has about everything you need, including these trick super shims. Now they're stackable to give you the proper preload and backlash.

There we go.

Now, once your housing is clean, you go ahead and install your new pinion races and here's a little trick for you use your old race to help install the new ones. Now, if you're like us, you probably don't have a press in the shop there. So you'll have to carry your pin down to a local machine shop to get the bearing pressed into place once that's done,

just drop the pin down into the housing

since we bought a bear housing, it didn't come with a pin yoke. So we popped for a new one. Now, if yours is worn right here in the U joint saddle area or you notice a groove right here around the pinon seal. Well, you may wanna consider replacing yours as well

while holding the pin in place,

dropping the front bearing.

Then the Pinion Yoke

washer

and not

since this is only a trial assembly, we're leaving the opinion seal out for now

of course, once the nut is started, you can tighten it with an impact wrench. So you get a light drag when you turn it.

Well, now we can mount this ring gear to the differential. I wanna make sure the mating surfaces are perfectly flat.

So it's a good idea to use a file to remove any birds or other imperfections.

After you mount the ring gear, install your retaining bolts

using red thread lock,

draw them down evenly and torque them down to 45 ft pounds.

The carrier bearings next. And well, here again, you can use one of your old bearings to help drive it home.

Now, I've marked both the housing and the cap to keep their location straight.

And once we get the cap out of the way

we're ready to drop in that differential.

Here we go.

Now, once it's in place, I like to use a screwdriver to help square up those races,

the super shims can be adjusted now to give us eight thousand's backlash, which is really the clearance between the ring gear and the pinion.

Adding shim thickness on the passenger side is gonna increase our backlash and of course, to tighten it up,

you add shims to the driver's side.

The manual calls for a 15 thousands preload on the carrier bearings. Now, that's so that is the bearings wear your backlash doesn't go out of spec. Now, once I get these caps tighten, we can go ahead and run a pattern to check for tooth contact.

Now to do that, we use some of this compound that comes with the kit to mark several of the teeth

on the ring gear.

Yeah.

Now we rotate the ring gear so that it meshes with opinion and leaves the contact pattern.

Now, what you want

is a nice cigar oval shape

right here on the center of the tooth.

It may take you several attempts to get the right contact pattern by adjusting both pin depth and backlash. Now, for that, we use the style indicator.

Now, this is a crucial step for getting the maximum wear and minimum noise out of your new gear set

there that's out.

Now, Joe's already removed the differential and pin for a final assembly.

So I'm gonna go ahead and drop in the opinion bearing.

Then we'll tap the seal into place.

Then we can slide the crushed leave over the pinion stem

and slide it up in the place.

We use an impact wrench to compress the crush, leave and remove all the inlay from the pinion.

Then we want to use a torque wrench

and check the rotational drag for a 20 inch pounds.

We've reinstalled the differential. Now we're talking down the main caps to 60 ft pounds. Now it's also a good time to recheck your backlash.

The axles we're using are Moser engineering pieces that we got from DTs. Now, they're 30% stronger than stock and they use the original

clips. Oh, don't forget. Now is also a good time to install new axle bearings and seals.

We're using this trick aluminum rear end cover that doubles as a girdle now, specially reinforced and these load bolts actually contact the caps on the rear end for extra support. Now, we're gonna go ahead and torque down the retaining bolts to 25 ft pounds.

And by the way, the eating posse we put in this thing uses carbon fiber clutches, so you don't need any extra additives. But remember, DTs recommends using a petroleum based gear loop for a 500 mile break in. Well, that about wraps up our 12 volt build up. Now, you can plan on spending a day in the driveway and about $1000 for everything that we've shown you here. Now, I think it's time for us to get our rear in gear and take a little bit of a break. We'll be right back

next. Imports are hotter than ever and we'll head to a red hot import race and we're also 18

horsepower tv's race of the week is brought to you by Edelbrock,

the leader in automotive performance for nearly 75 years.

Welcome to Moroso Motorsports Park and the millennium matchup among some of the quickest sport cop

acts in the country and love it or not. It's the fastest growing segment of American drag racing

every time we come out to an event, the, the stands, get bigger and bigger and bigger and more, you know, big manufacturers are getting involved. So it's definitely here to stay.

This event is sanctioned by the National Import Racing Association

and the competitors come from all walks of life. Although most are young and grew up with Hondas and Toyotas in their driveways instead of Chevys and Fords.

Well, that is with few exceptions.

I love it.

Take a shot of the engine.

The last one I had was a Mustang and I wanna get people. One of these,

I

get rid of the mustang. I got this

at

Saturday's time trials. Racers in seven classes lay down their numbers, some powered from the front,

others from the rear,

some nudging their sport compacts with nitrous. While for other,

the main power adder of choice is a twin turbo.

Some of the rear wheel racers were hitting eight second each s

like Brandon Alvarez who that night almost hit the wall.

I don't know, Joe. The minute I put second gear just got away on me. Stood on two wheels and luckily nothing happened after that.

Now, one of the most exciting glasses has to be pro front wheel with all the power you can pack into a four

cylinder engine and all the power you can plant

onto those two front slicks.

In fact, some of the country's quickest pro front wheelers are here, all 12th cars and most capable of hitting that elusive nine second Mark,

one of them is Angel Robles who was driving Mustangs recently until he joined the Braven team

who put him behind the wheel of a 94 Turbo powered Civic. It's pretty amazing. It's, it's different from what I'm, what I'm used to driving a rear

drive car. Um, the sensation is completely different.

Um, the car on the top end is just unreal when you hit third gear. It just, it pulls insane.

It's unique feeling for me.

Well, if we're going to see one of these front wheel missiles hit the

Ns today, it won't just be because it makes power.

Many of the four cylinder, dual overhead cam motors can make 600 horses. The challenge is putting that power down.

That's why the booming sport is sprouting all sorts of innovations

in suspension technology

like Chris Reno's

team

who's developed a wheelie bar that actually is a Co2 powered pneumatic traction bar. Instead of having a fixed bar that they set next to the track,

we have made our bars uh active. In other words, our bars are pneumatic.

So after I do my burn out and before right before I pull up the stage,

I have uh a

Co2 tank

and I have an actuator in here, I flip a switch,

the wheelie bars come down

weight, jack, all the weight from the car to the front tires off the rear.

So that when it tries to transfer the weight,

the bars are pushing down real hard and pushing that power down those front tires

in fourth gear, we have a speed sensor set up and a little controller and I can, I can change whatever vehicle speed I want

when it gets to set vehicle speed, the bars come up automatically.

Now, if, for some reason I have a problem or for whatever reason I don't, I want the bars to come down.

I pick them up any time going down the track

and with racers getting more and more power out of these cars, that's an important safety feature

on the way back to the track. We caught a peek at the compact car show and shine.

That wasn't so compact.

Hundreds of bright ideas were on display which reflect the growing aftermarket for cool colorful cosmetics

all over the midway at Moroso. You could hear talk about how this is the future of Streetcar high performance

and with Southern Florida's Hispanic population embracing it so ardently. Well, you hear it in a couple of different languages.

De

La

Carrera de cars,

which in English means import racing rocks or something like that

with the stands and rails full of eager Spectators. Eliminations were well under way for

lingering questions. Still in the air.

Will we get to see that elusive six second quarter mile run?

That's the latest milestone among these pro front wheel warriors.

Thanks to the Breman team. The answer was yes.

Robles ran a 998 and 100 and 44 miles an hour in his Civic on his way to the finals.

His winning time in the finals was a slower 1015 at 100 41.

But enough to beat Steve Thompson in his 92 Civic. I'm really happy

that I hit nines and um

that I was able to, to ultimately win it

next up. Eight second r

sure. It'll happen soon.

Thanks to evolving technology that will further bridge the gap between making more power

and planning

for the latest news on horsepower TV. Check us out online at Horsepower tv.com.

Even though we're building a retro Rod 32. We're gonna give it a high tech sound system today.

After all rocking and rolling are about as classic as tail fins and bobby socks. Now we're gonna install a concealed system consisting of acoustic CD head and their 160 watt amp. Then we're gonna use a couple of crossovers that are hooked to a speaker component system comprised of five and a quarter woofers

and some one inch tweeters.

The first step is to identify the locations for your components. Now, eventually a custom console is gonna conceal our head unit right here between the seats. But since it's not built yet, we're just going to wire it in for right now.

Of course, the AMP needs a lot of air circulation to help keep it cool.

We're gonna bolt it in right here beneath the passenger seat,

of course, to get the most out of our woofers, we're gonna mount them on this panel right here behind the seats. That way the trunk can act as an acoustic chamber. And finally the tweeters are gonna get it mounted right up here on this headliner trim piece.

I've removed the passenger seat to give us a little bit better access. Now, wiring up of the system isn't all that difficult, but for best sound reproduction, you want to make sure you use high quality power and speaker wires. Oh, and make sure that you keep all of them well separated to eliminate any possibility of electrical interference.

Now, I've marked the Twitter location on the panel here and we're cutting it out with a hole saw.

Well, now we're ready for the woofers and I've marked the back of the panel here for the speaker locations. We'll cut those out with a whole saw too.

Well, that just about takes care of our tunes

as you can tell. Buying and installing a high tech stereo is a sound decision that

anybody can make.

Well, I hope you decide to stick around with us. We'll be back right after this.

Hey, you wanna see a door go from this

to this.

Well, we can't make you an expert at upholstery, but we can show you how to make a custom door panel just like this

and save yourself 1000.

0, I got your attention now. Well, listen up because class is in session

upholstery class. That is Wyoming tech instructor Kim Helgeson

is about to take us through the steps of creating a cool two color trim panel. And

what we have here is a graphic design that we're planning on doing on the outside of a 61 Volkswagen bug.

So we're gonna try to come up with a design that look that will complement it on the interior.

Kim first traces the entire panel on a piece of poster board. By the way, he also needs to measure to allow correct spacing for the B pillar.

He likes to use tape to draw the design, but some guys of course, use a pencil.

Then he cuts out the various pieces

before sliding a piece of aluminum to start making a template for a separate colored panel.

After cutting out the template, he drills several hose and drops in tean nuts and glues them into place.

Then on to cut out pieces for the bottom layer pattern.

He drops a sheet of quarter inch foam under the cut out poster board and cuts out a foam insert.

The door panel goes back onto the table where Kim and his helper taped down the insert

before spraying everything with glue.

Now he lays the foam shell. The insert was cut out from onto the sticky panel

and pulls away the insert to reveal the real design. He was after,

after trimming around the edges of the panel itself. He's ready to start marking and cutting away foam pieces for the darker fabric design.

Again, using the aluminum piece as a template.

Next, Kim sprays glue onto the bottom trim panel fabric before hand shaping it around the design.

While he was doing that, I glued the darker fabric to the aluminum template for the second layer.

Pretty cool. Huh.

We'll put some screws in from the backside right in any of those t nuts

tie these two pieces together,

put some clips around the outside edge here and we'll be ready to hang this thing on the car,

man. What a trick touch for this hot rod bug, Kim. But uh

what are those bucket seats gonna be ready? You know, I think they're just about ready, John.

Good.

Stay with us. Hot parts is next

and I can't see over this thing.

Now, horsepower's hot parts brought to you by summit racing equipment. Your source for high performance parts for 30 years.

Hey, you big block Mopar

guys will really appreciate this billet aluminum electric water pump from C SI now it pumps 40 gallons per minute and it only weighs about five pounds. This unique anodized finish is ac si first and it's built to last with a heavy duty impeller on a stainless steel shaft. Now, you can pick one of these up for about 400 bucks.

Well, you can pick up some extra protection for your hands and keep them clean at the same time with these disposable nitro rubber gloves from Ac Delco,

their super thin design lets you feel everything you work on

and these textured fingertips here. Well, they'll give you some extra gripping power. Now, these rip resistant gloves won't rip off your budget. A box of 100 cells for less than seven bucks.

Well, here's something that'll help you get it together. The engine and transmission that is,

it's a transport cradle from moto

feet that allows you to keep the engine

and transmission bolted together for either storage or transport. Now, the powder coated frame accepts these optional casters and they're available for most popular engines. The price is pretty popular too.

How does 55 bucks for a starter sound to you? Hey, I'll buy that and would like to sell you on next week's show. Here's a look.

We'll get our hands dirty hopping up a Harley with a passel of parts designed to drastically pump up the power.

In fact, you'll be astounded at the results we get on the

dyno Jet

in our race of the week. It's the NSC A Southern shootout in Darlington featuring America's fastest street cars where you'll ride inside some of these six

land missiles. This next fast two drives

gonna rock and roll

and remember high performance fun is what this show is all about. I think it's about time you took me for a ride in your new grocery getter. Well, I'll fly if you buy

for information about the products used in today's show and more. Check us out online at Horsepower tv.com

Horsepower TV is an RTM production.
Show Full Transcript