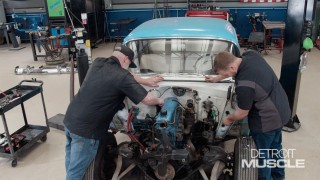
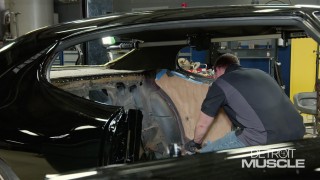
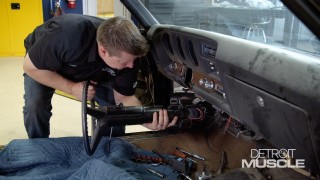
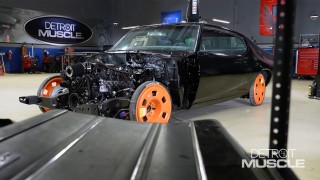
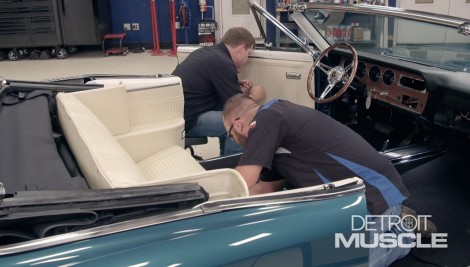
Detroit Muscle Featured Projects

Detroit Muscle Builds

Parts Used In This Episode

Lincoln Electric
Lincoln Electric is the Official Welding Supplier to Detroit Muscle
Matco Tools
MATCO Tools are the Official Tool Supplier to Detroit Muscle
The Industrial Depot
Tools, Hardware, and Shop Supplies

Episode Transcript

(Narrator)>> Today on Detroit Muscle Marc and Tommy tackle the interior of our '66 Pontiac convertible, refurbishing the rear seat and adding all new panels and trim. Plus we hit the road again helping a viewer with their '69 Cutlass.

(Marc)>> Hey everybody welcome to Detroit Muscle. We've got this big bad Pontiac in here. It's got all the shiny stuff, modern powertrain under the hood, but most importantly this drop top, and by the end of the day today that thing's gonna be down and we're gonna have the wind blowing in our hair, but we've got quite a bit of work to do first.

(Tommy)>> Now it's pretty easy to see that with our poncho here well the carpet don't match the drapes. In all reality we don't even have any carpet. So today what we're gonna be doing is addressing all the interior.

(Marc)>> Well the first thing I'm gonna do is I'm gonna tackle upholstering the rear seat. Now this is the seat bottom that came out of the car before it got torn down. It's seen better days. There's puncture holes here, and not to mention we're gonna switch from that black to this beautiful parchment here. We got all this from Original Parts Group. We've been partnering with them on this build and they've sent us everything we need to get that GTO interior put back the way it needs to be. I just need to get this thing torn down.

We'll start by cutting out the old hog rings so that we can remove the old and tattered vinyl off the seat frame. This vinyl definitely doesn't look original but it's seen better days.

(Tommy)>> I can't let Marc have all the fun. While he's been working on that seat I've been installing the carpet. I've just about got it all done. I've got a little bit more trimming to do over here, and then we can put in that fancy little console. I'm trimming out where the kick panel goes. When doing something like this you want to make sure you leave enough material so that the panel will cover it and hold it in place.

Next I'll take some chalk and mark where we need to cut so I can add our seal plate. New interior carpet kits come a bit long so that you can trim them to fit your needs.

Now we can install the seal plate and the new hardware complete with the Body by Fisher logo.

To give this car a bit more of a performance feel we added this console. It's simple to install and really compliments the interior.

(Marc)>> Well while Tommy's been working inside the car I've been busy getting the rear seat recovered. I got the seat bottom all finished up and this thing is ready to go in the car, and I moved on to the seat back. I got the old cover out of the way, threw it in the trash, and I get the new one already on the seat frame but it's not attached yet. I'm gonna show you how to do that, and we're gonna use these little guys right here. These are the new hog rings, and they clamp the vinyl to the frame just like it would have been from the factory. Now with the vinyl being new you'll want to stretch it tight because once it's in the sun a few times it will expand and contract causing it to relax over time.

Next we'll install the back panel of our seat. It just slides into the tabs on the frame, and using the supplied screws we can mount it to the seat. This piece is unique to convertibles because the upper part of the back seat is visible from the rear when the top is down.

Man that thing looks nice. Ready to go in the car. Do you have a need for a parts washer but don't have room for a big one, or do you just need yours to be portable and storable? Well the Benchtop Pro from CRC may be exactly what you need. It may be small but it can tackle the toughest parts cleaning jobs up to 100 pounds. It sits right on top of your work bench, and when you're done well you can carry it away by its handle to be stored safely for next time. It removes oil, carbon, gunk, and grease using a non-toxic degreaser, and it's perfect for the home garage or the small repair shop.

(Narrator)>> Stay with us. Tommy and Marc finish up the interior on our Pontiac. Then we take it out to get some wind in our hair.

(Tommy)>> Hey guys, welcome back to the shop. We're making some pretty good progress here on our Pontiac installing the interior. I've got majority of the side panels installed and you guys have got to check out that one over there on the passenger side. Man is it classy. I've got a little bit more prep work I need to do and then I can finish up installing this one.

(Marc)>> Well I got the rear seat all covered that I was working on earlier with this new upholstery that we got from OPGI. Now I just need to get it snapped into place.

Alright you about done over there?

(Tommy)>> All I lack is finishing up. Now we're ready to install our arm rest and our new interior door handle. Whenever you're putting fresh interior in a ride like we are here you've got to put new bright work in it. It just dolls everything up. The handle just snaps into place with a spring clip that attaches to the back.

Whenever you're installing one of them take a quick glance at your other side and make sure that they're positioned in the same place. Now we can add our new arm rest and screw it into place. Now we could take the original front seats and recover them with new vinyl like we did the rear but Original Parts Group has some other options, like these right here. They've got a bunch of bolstering. They look really stylish but not only that you can get them with the vinyl to match your original interior color. It's pretty cool.

(Tommy)>> You need to get to work man. I've got stuff to do.

(Marc)>> I'm busy man. I'm doing quality control over here. I'm checking this adjustment. Take a nap.

(Tommy)>> These seats require a bracket that allows them to fit into the factory location.

(Marc)>> Got yours in yet?

(Tommy)>> Close. They also come with optional head rests but we decided not to install ours because we thought it looked better without them. This was easy. Can't wait to ride. What about you?

(Marc)>> I'm ready.

(Tommy)>> You know with this Pontiac it's not really what you would call as popular as a Chevelle or something like that. So finding some of the components could be kind of difficult, but luckily with OPGI it was just a call away.

(Marc)>> Exactly, they've got all the parts that we needed to give this car all of those fine details that it needed. It was just kind of a blank canvas with a nice paint job when we got it. Now it's got all the shiny stuff, all the company's stuff.

(Tommy)>> And you've got to have that stuff because otherwise the car just looks naked or like it's missing something.

(Marc)>> Or if you take a car and you do a restoration on it and you do a really nice paint job on it you can't take all the old stuff that you took off and put back on.

(Tommy)>> No cause that just insults all your hard work that you just did.

(Marc)>> Exactly, gotta have all the new stuff to go with it. The jewelry!

(Tommy)>> Absolutely.

(Marc)>> OPGI gave us a great foundation to start with. It has an awesome new powertrain with an LS Three engine that puts out 430 horsepower and that's connected to a Four-L-65-E transmission that OPGI got from GM Performance and Guarantee Chevrolet. It makes cruising in this classic comfortable and carefree. It also has that stunning factory marine turquois paint job that is definitely a head turner and gives this old Pontiac fresh look.

Welding stainless steel usually requires a tig welder and a trained hand, but there is an easier way and Lincoln Electric has the solution. This is the Red Max stainless wire for mig welders. This particular one is a 308 LSI, which provides a soft arc and wide operating voltage range, as well as a clean weld puddle and low spatter. This is ideal for welding 308 stainless but they offer a variety of different compositions and diameters to fit your needs. So you can get out there and weld some stainless.

(Narrator)>> Coming up Marc and Tommy head out to help a viewer get their '69 Oldsmobile one step closer to hitting the road.

(Marc)>> Hey everybody welcome back. Well we're in our Rock Auto Driveway Rescue van, why?

(Tommy)>> We're gonna go save somebody's day I guess. Get some old cool ride back on the road.

(Marc)>> That's right. I've got just the right one.

(Tommy)>> Alright let me hear it.

(Marc)>> Alright 17 year old girl, senior in high school, and she works three jobs.

(Tommy)>> Jeez that's pretty serious.

(Marc)>> To save up money to buy parts for her '69 Cutlass.

(Tommy)>> Oh an A-body, heck yeah.

(Marc)>> So we've got a van full of parts from Rock Auto dot com and we're gonna show up and make this girl's day.

(Tommy)>> Man I can't hardly wait myself. You think she'd let me drive?

(Marc)>> I doubt it.

(Tommy)>> She better not let you drive.

Now I hope you keep a smile on your face a majority of the day Marc because you know we're working on an A-body GM instead of some of that Ford product.

(Marc)>> Oh that's fine. Just about every A-body out there needs a little bit of work, huh?

(Tommy)>> Yeah you're probably right.

(Marc)>> Well you must be Gillian.

(Gillian)>> Yes sir.

(Marc)>> And what is this we have here?

(Gillian)>> It's a '69 Cutlass I bought about six months ago from my dad, and we have a bunch of front end work to do, and we just haven't had time to finish it.

(Marc)>> Well it sounds like you need a bunch of parts to get this thing where it needs to be. What do you wanna bet is in that van right there?

(Gillian)>> I'm hoping some suspension parts.

(Marc)>> Yep, let's go. Help me unload them.

(Gillian)>> Well me and my dad, we've always been working on a bunch of cars, and he likes to collect them, and he had that car originally and I wanted to get one. So about six months ago I bought it from him, and we started working on it for a little bit, and then with me working so much we just haven't had a lot of time, and it kind of put a stop to it.

(Eric)>> I've got a 442 that I built and basically she's always been in love with that car, and bugged me about wanting it, and when I acquired that car that technically made me have two '69's, and she kept bugging me wanting it, and finally one day me and my wife agreed to let her purchase it from us so she could kinda do what she wanted to it and make it her own.

(Tommy)>> Well we're making some pretty good progress. We got the passenger side about 90 percent. The driver's side is all the way apart. The only thing else we lack is a center link and the gearbox and we'll be ready to throw them new parts on. You ready to let this down?

(Eric)>> Give me about two seconds. Alright I got her. You can go ahead and let her down.

(Tommy)>> With the old drums, springs, and control arms out of the way now we can get to pulling the old worn out steering box.

(Marc)>> Alright Gillian while they're working on that steering stuff why don't we go ahead and get some stuff on here. You start with that upper. I'll help you up top. There you go, there go, keep wiggling it. Alright let me get the nuts on there. Alright, so just what is it about this old Cutlass that Gillian loves so much that she puts a big portion of her own money into restoring this automotive antique.

(Gillian)>> I love the style of it, the body. I love bulkiness. I think it just looks better than most of the cars, and I just like having the big version of it, the big muscle.

(Tommy)>> While they're busy getting some work done up front we're gonna reuse our pitman arm because it's a non-wear item. Now once we get this thing on there, we can slap it into place. We're gonna get a few other things done. Y'all come back and see us after the break.

Don't twist me around.

(Narrator)>> Don't go away. We finish helping a viewer with their '69 Cutlass project.

(Tommy)>> Hey guys welcome back. Well we're making some pretty good progress on this ole Cutlass, and you put eight hands on one ride well you know something's abound to happen. I just topped off the power steering reservoir, and here before long we're gonna have this old ride back out on the road stretching its legs.

(Marc)>> And underneath we got all those brand new suspension components installed and got the brakes assembled too. Now we did upgrade to some drilled and slotted rotors. That's one cool thing about Rock Auto dot com is they have all the o-e-m style stuff but they have aftermarket parts as well. Now we do need to get some steering linkage on here before we can get it back on the ground. So Eric and Gillian are in the back getting that stuff assembled now. While they're doing that Tommy and I are going to get these brakes bled.

(Eric)>> I think I got my tie rods put together. What about you?

(Gillian)>> Yeah I just finished mine.

(Eric)>> Alright well let's take them and put them on the car.

(Marc)>> Now you may be wondering how a 17 year old girl came to have a passion for wrenching on and driving old muscle cars. Well it all comes from dear ole dad.

(Gillian)>> Okay it's one.

(Eric)>> Alright, I got you. You can let it go.

(Gillian)>> We've just always hand an interest for them. With us going to car shows we'll cruise around in them, pick some cars, and just go right into anywhere new, and we've always just fell in love with it, and my sister used to drive a Skylark throughout her high school and I wanted to get one too.

(Eric)>> I've got everything tightened up here if you want to bring me that tie rod end.

Alright the grease fitting on the bottom goes on the outside. They've got to grow up in a little bit different world because with me collecting the cars it's kind of a hobby that they've drawn for the same passion of it.

(Tommy)>> Here you guys go, a sway bar. Here's both your brackets.

(Gillian)>> I'm gonna pass it to you.

(Eric)>> They're kind of modest but they help me with all my cars. They help me clean them, detail them. You know they get under and turn wrenches just like I do. So you know they don't have all the knowledge that some mechanics do but they'll do anything I need here to help me, and they get to reap the benefit of it.

(Gillian)>> Bingo! [ drill spinning ]

(Eric)>> It was running but need tune ups, a lot of things upgraded, that kind of thing but we just hadn't never gotten around to the suspension side of it, and that's kind of one of the last pieces of the puzzle before she can actually drive it and be safe.

(Marc)>> Let me know when I'm high enough. I'll pull those jack stands out.

(Gillian)>> You're good.

(Eric)>> Just a little bit more on my side, little bit more.

(Marc)>> Alright these tires are gonna hit the pavement and this thing's gonna be ready to roll. Get that hood closed and check the torque on those lug nuts. I'll tell you what, if you check the torque on the lug nuts I'll go ahead and get in it so I can drive it.

(Gillian)>> I'll be driving it.

(Marc)>> That's what I like to hear.

[ engine fire up and idling ]

(Eric)>> It's awesome, first time ride ain't it?

(Gillian)>> Um, hm.

(Eric)>> So what do you think?

(Gillian)>> I like it a lot.

(Eric)>> This is awesome to get it back on the road for the first time. Man this thing's running good. This thing handles great.

(Gillian)>> It feels good.

(Eric)>> It seems to be a lot easier to drive don't it?

(Marc)>> Not too long ago we talked about precision measuring tools. We took a really close look at a dial indicator as well as dial calipers and digital calipers, and then we briefly mentioned micrometers but we're gonna talk about them more in depth today. This is an affordable set of outside micrometers from Matco Tools. It'll measure anything up to four inches in diameter, but it takes four specific tools to do that. This one here measures everything from zero to one inch in diameter. This one from one to two inches, two to three inches, and of course three to four. I'm gonna show you how these things work with this right here. The reason why you need four of these and that they only have one inch sweep each is because they measure very precisely, down to ten thousandths of an inch. That's .0001 or one tenth of the diameter of a hair on your head. I'll show you how this works. One thing to notice is it's got these plastic pads here, and I'm gonna hold it by that because even your body temperature can raise the temperature of the tool itself, and everybody knows that heat causes things to expand, and since this thing measures down to ten thousandths of an inch well you need to make sure that you don't change how it's gonna measure.

Now if you notice this little piece that I'm measuring here this is the two inch piece and it's in plastic as well because even just holding that to measure it could throw off the calibration because these pieces are actually used to calibrate these tools and they come with the kit. That's the two inch piece. We've got a three incher and a one inch as well. Two things, one this will show you how the tool actually works, but then two we're gonna show you that this tool is actually calibrated properly down to the ten thousandths of an inch. One thing you'll notice when I'm putting tension onto the piece that I'm measuring is I'm gonna use this little ratchet here, and that's gonna give us consistent pressure on the wheel that actually does the measuring here. Now this is your mark that we need to look for and this is the actual measurement, which is zero, and as you can see here if that zero was on the one that would be one ten thousandths of an inch. So that little bit that that mark is off is one tenth of a ten thousandths of an inch. So this thing is calibrated properly. Now on these jaws each is completely flat, but if you need to measure a radius surface like a piece of tubing we've got a tool for that as well. This right here is called a tube micrometer. It's for measuring tubing but it's good for something else as well, and the reason is because it's got this bald end on here for measuring things that are rounded. It's ideal for measuring things like engine bearings because it has a radius surface and you can get all the way down to measure it precisely. Now these are all outside micrometers but they make inside micrometers as well but we don't normally use those in the automotive industry except for maybe if you need to measure a bore a dial bore gauge.

(Tommy)>> Commercial grade paint booths typically are a pain to install and normally are a permanent fixture, but with Mobile Environmental Solutions' portable spray booth you just unpack, inflate, and you're ready to spray in just minutes. This is their most versatile booth at 23 by 15 feet, and you can spray just about any size car right inside here. It has a cross flow design and it's EPA and OSHA compliant. Plus it's made in the USA. So if you're mobile or you just don't want to eat up that valuable work space with a paint booth go to Mobile Environmental Solutions dot com for more info. If you have any questions about what you've seen on today's show go to Powernation TV dot com.
Show Full Transcript