Parts Used In This Episode

[none]
A 4:1 LowMax Gearset, billet rotation plate, input gear, and a 32 spline input/output conversion... that's one heck of a transfer case!!
4 Wheel Parts
X Terrain tires.
Advance Adapters
By using the front half of a gear driven t-case, this Crawler Box gave a 4.0:1 gear ratio.
All-Pro Off-Road
3" Buggy Leaf Springs Front & Rear.
Hendrix Motorsports Tube Chassi
The only fab shop where you can get a Formula Toy Chassis.
Inchworm Gear Box
21 spline manual gear box and adapter plate hooking up to an automatic transmission allowing for a dual case set-up.
LC Engineering
A 120hp Stroker Stage II 22R engine, EFI intake and a throttle body all from the same specialty Toyota performance place.
Poly Performace
4340 Crome Molly Axle Shafts.
Walker Evans Wheels
Beadlocks that cast the bead ring directly into the wheel itself.
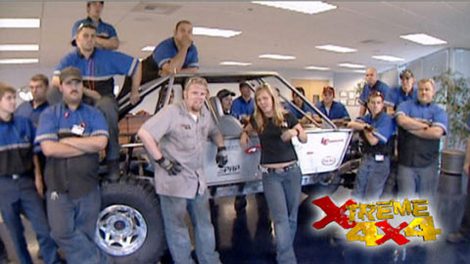
WyoTech
Jessi and Ian use the unlimited WyoTech facilities in Sacramento, CA to help 22+ of it's students build the Formula Toy rockcrawler.

Video Transcript

Welcome to a special edition of Xtreme 4x4 where we've taken the show on the road, so to speak. But in a way, it's kind of like a homecoming for both of us. This week, we're working at Wyotech in Sacramento, California.

Four by four. I attended

Wich where I was trained in custom body and paint, chassis fabrication, high performance engines, all the skills that pay the bills. You look pretty studious there, Jessi, thanks haven't changed. And before I came to build

a raz it, Xtreme 4x4, I was teaching high school auto shop and custom fabrication in a technical high school. So that leads us to what we're doing here today.

We're going to turn this 82 solid axle Toyota long Bed into a competition rock crawler, but we will be the ones building it.

That job goes to this group of soon to be Wyotech graduates. This Sacramento campus is an 80,000 square foot facility offering a wide range of courses in the automotive field and our young builders are hand picked with perfect attendance and are at the top of their class and chassis fabric.

What your guys' job is this week is to build this truck, you have all the options. You and I are just here to help you out. You have the rules which we've just gone over. So, you know what you can and cannot do

the final crawl ratio of this whole thing is 100 and 48 to 1.

And if you do the math off that, when the motors at 3500 RPM, you're doing 2.5

MPH.

Now, let's get at it

free pet. Are

you guys ready to take a look?

This is it guys a formula to

that class rock crawler, but it's not just any that class caller. This is last season's formula to

Champion driven by Lisa Linker

and built and maintained by her husband Eric, better known as Camel.

All right, guys, we talked about it in the classroom and this is it formula toy rock crawling. Now, it's pop quiz time. So who can tell me what the three basic principles of formula toy are?

It's affordability, safety and,

uh,

dependability. Perfect. That's right. That's what it's all based around now. Knowing that what do you got to start with? This is obviously a spec class. So it's got rules. What do we have to start with? What base vehicle

you need a Toyota truck?

What kind of truck,

pickup truck for

runner

FJ?

Basically any Toyota to.

What kind of things do you have to leave in there that have to still be Toyota to compete in this class. Uh the engine, the axles and the frame

have to stay Toyota. What about uh

transmission transfer case

case? Also

we divided the guys into groups and each group will be responsible for a modification on a different area of the truck. Take a look

group, one engine placement, group two will build the axles.

The third group is responsible for the transmission and our dual transfer case set up. This group has got the chassis body panels and seats

and our last group will be in charge of the suspension, tires and wheels. And before any fabrication happens, we got to tear down our donor.

This 1982 solid axle Toyota will be the beginning of our formula toy

ready guy.

All right guys, as you probably learned by now, rock crawling is a sport that comes down to inches and axles. So we're going to take these two front axles and we're going to do something a little bit different with them. We got to strip them down and basically armor plate, the bottom side of them. And we're going to be eliminating this fill plug on the bottom side of both axles. If we rip that out, it's all over. Now,

you guys met Dave from poly performance yesterday.

He was nice enough to deliver this axle right here. Now, this is an axle out of an Ifs truck. It's a newer model and it's three inches wider.

The rules say we can still use that axle because it's originally a Toyota part and we can take all the guts out of this one and put it in that one.

We've got to gut these things down, clean them, up, plate them and then we can start putting some internals in them.

Any questions at all,

see how easy that is. Get to work.

As you can see, the wild

Tu students are well on their way to making that a rolling chassis by the end of the day

and after the break, we'll get to take a look at what's gonna power our tree wild crawler.

We're back on extreme as we come to you from Wyotech Sacramento Campus. Now these students are getting one heck of a final exam, build a truck but not just any truck.

This rig is a formula toy, a full tube competition crawler that is excellent on the trail while providing the ability to run in sanctioned competitions against other formula toys.

And with our donor now stripped to the bare frame, they can begin planning exactly how they're going to make this rig come together.

Alright, guys, you've got it sitting on the chassis. Now,

how you gonna mount it to it?

You don't know yet

you could have welded in.

Of course, we're not gonna let these guys make any mistakes.

Jessi and I are here to teach as well as supervise

and of course

pitch in

all this stuff will be stripped, we'll strip this down to a 100% bear tube housing.

Then

we'll go ahead on this side.

This is a fill plug we were looking at before we'll shave that off.

We'll build armor

up here like this to protect that front

and we'll just take the plate and put it right along the bottom of the disc.

So it rolls over. We'll do all the welding here

with the actual

third member piece bolted in place

to keep the thing from distorting

one.

Alright, with these actual guys. Well, on your way, let's see what Jesse's got planned for the engine.

All right. Now that the chassis taken shape, it's time for us to start big engine placement and motor mounts, right?

So our donor engine is pretty much shot. We want a capable con

we're going to need a little bit better than this. So we went to LC engineering

for a Stroker stage 2, 22 our engine. So this thing di

at over 100 and 20 horse power and 100 and 50 ft pounds of

Michael, lot of power. Well, you've got to look at it this way that Toyota engine has about 80 to 93 horsepower. So we're giving it about a 40% advantage, right. So if you compare it to like a big block with

300 horsepower and we give it 500 horsepower, that's a 40% advantage. Now, just because we're starting with smaller numbers. This is going to be huge when it comes to this engine. How do you get that much power? Do you want to hand me that intake manifold over there?

LC. Engineering spent probably over eight hours porting and polishing these, these manifolds and the head. So we have a port match and it's going to give us beautiful air flows

earlier. Our transmission team tore down the stock set up as well as prepped our top loader gear cases for the Dublin

having an automatic transmission in a rock crawler is obviously a huge advantage, but nobody until now has figured out how to fit the stronger gear drive top shift transfer case behind one of these things. Now, Jim was here from Inchworm Rock walking gear and he has his new system for us. So, what did you guys learn from him?

All right. Well, this is our original four wheel drive automatic transmission

and we learned that it's pretty much the exact same as the automatic from the two wheel drive.

So, what we did is we took our original transport case and gutted that all out

and we took the parking pool and installed it with a shorter rod just like it would be in the two wheel drive. So the transmission is now taken care of. Now, what about what happens next?

Now, we have this adapter P

allows us to put the 21 sply manual drive gearbox to the automatic transmission which is a 23 sp

we do that via this couple here

through this transfer case, we had to modify this output shaft to go through the doubler here into the crawler box

and we're getting the crawler box. What's different about that? Well, this is from advanced adapters

and it's been clearanced in here to fit the larger 4.7 to 1 gear ratio.

And we went ahead and installed the 4.0 to 1

in the back. Now, the cool thing is, is advanced adapters. This is also one of

very first one that's come off the shelf and advanced adapters is going to be able to sell these things in the future with all the rails and rods. So when you go to do a doubler set up like this, you're not going to have to source the secondary transfer case. So you guys have some great one off first ever parts here. You've learned a lot. Now, let's put it together,

stay tuned more Xtreme 4x4. After this brief time out,

22

are working

fely to finish stage one of our formula

to

project.

There are no

manuals

here. These guys get to choose hall. It

will all come together

over on our Hendrix chassis. These guys designed some additional bracing and down tubes to protect our rear passengers, then walked the whole thing down to the street Rod Department where these hand picked characters were assigned the job of Babbin up some body panels with chassis F,

street rod kind of go

hand in hand with each other.

When you think of doing work on a car or building a complete car, you, you hear the term ground up restoration. It is just that you have to start with the ground up and the ground and the car is going to be the chassis, the drive train

and you work your way up to the rest of the car.

The adapter and doubler setup will bolt up directly to the back of the automatic.

The bearings will need to be pressed into the adapter. Then the entire assembly can be bolted together.

This will allow the crawler multiple gearing options and a final crawl ratio of over 100 and 44 to 1.

We just put these down tubes in here

and add some extra strength. We put some gusts.

Well, I decided to make these gusts really cool. So we took some extra large drill bits

and drilled a whole bunch of different size holes went up one size on each drill bit and camp for each hole just to give it some extra cool.

All right. Well, let's see what you got here, man. All right.

All right.

Well, you got a pile of welding on the inside to take care of. But by the time you grind this all down, I'm sure that piece is gonna look great, man. Good job.

All right. So the rear axle armor taken care of and let's take a look at the front, how you guys doing back here? How we're doing? All right.

All right, good stuff. Now, we were here a little while ago and there was a bunch of work already done. You just what happened with that? Uh We didn't like the look of it, so we decided to change our design, take a different approach. All right. That was this thing here. You just cut it off. Yeah.

All right.

That's cool, man. Keep going

right now. Our frames coming together pretty well. We got our front cross member in.

It's all welded together. We got supports going in for strength

right now. Corey is finishing our French spring mounts

and after he's through welding this one,

we're gonna put supports in here all the way down to the center line of the spring mount.

And that's gonna give us extra strength for climbing over those rocks.

Basically. Uh, the trick about lining all this up is you want to, uh, level it out, square it up, measure it out.

You want to make sure all your measurements have been done three or four times.

Oh,

where are we? All right. We're doing well. We've got pretty much all the really hardcore fab done on the chassis. We've got the engine together, the transfer cases together, the transmission together. All it has to do now is all little groups that have been working. They just got to take all those pieces and slam them into one rock crawler.

Let's, um,

start taking your measurements. Make sure this thing is in your center.

Start taking your measurements for your amounts from the frame out

after the break.

An hour's worth of work that needs to be done in 55 minutes go.

Our extreme apprentices hold double duty in order to finish the day with a rolling chassis.

This is what it's like to host over haulin.

All right, you guys are earning the gun and it's almost midnight and you better get it done.

I'll be over here having a Red Bull.

All right, George, you took on this, uh, ring gear install. What do you got going on? Well, this one's ready to go. The backlash is good on it.

We took apart the old one.

We're about to install the superior ring and Pinion

onto our Detroit locker, which is really reliable. Locker for rock crawling.

Here's your third member Brock.

Now, you spent time with Dave from Poly Performance. What did he tell you about all these Toyota axles? All right. Well, the first thing he explained to me is that the s neck down here on the stock Toyota axle is one of the first places that they tend to break. Also,

there's a snapping groove at the bottom. It's the second most common place to break.

So on these 4340 Chrome Ally ones that we got sent from Poly Performance. They eliminated the neck down and they increased the size for the snapper

to sit.

Hi, I'm Kyle and this is Joe and we're going to talk wheels and tires. These are pro comp X trains and are specifically designed for rock crawling.

They've got functional side bitter three ply side walls and the new extreme traction compound will stick to anything.

And for wheels, we have a top of the line bead locks from Walker Evans, most bead locks have a welded outer ring, but Walker casts his outers right into the wheel itself. You just need a little muscle to get them together

with the drive train in between the frame rails. We can check the clearances for the two

chassis. We can make our cross members, we can finish our lease spring mo

basically, this is the moment where things start working a lot faster.

Still get up there.

Yeah,

I feel sorry for the big boys that have to get in here.

It's like the villas,

the front,

bring the front down a little bit to line up in here. You should be all set.

Go.

How does it look guys?

Now? He needs a floor.

Yeah,

you'll come off

in front of the knuckle. We'll

hit your back

that

we are so close to being done. We can taste it.

There we go, man. 22 students, a pile of tools, a formula toy built at Yo

tech.

That's right. These guys work their tails. Off and now they have a competition buggy, they can be proud of and to make their mark. These guys are gonna sign a panel

who have all the work that they did because in a few weeks, we're gonna have a whole different group

that's gonna finish this thing with the plumbing and the wiring,

make this thing run. So for now we're gonna leave this buggy here at the Sacramento campus for everybody to take a look at when they come and visit.

And in all serious this guys, I think you guys need to take a lot of credit for this because, well, number one, you did all the work. And number two, the work that you guys did, honestly, it's phenomenal guys. Like seriously, it's one of the best things I've seen built while outside of our shop.

I'll see you later.
Show Full Transcript