How To Reduce Car Cabin Noise
Jun 4th, 2019
Yeah, Lizard Skin sounds like a medical condition that needs some kind of ointment. If you’re thinking that way, you
are a million miles off base. Lizard Skin is a super high-tech sound and heat control product that can make the cab of your car a cooler and quieter place to be. We’ve all been in hot rods and street machines that sound like a tin can and cook like an Easy-Bake Oven. Not pleasant, and it may keep your significant other out of the passenger seat (good or bad, that’s up to you). Worse, it might just make you think twice about taking that car out.
We like the Lizard Skin product sold by Eastwood Company for two simple reasons; It’s easy and it works. We’ve used it in the past and found it to be an excellent way of controlling sound and heat. In fact, it’s kind of weird to stick your head inside of an otherwise bare car (no glass, interior or headliner) and find that the echo you are used to hearing just isn’t there. We also like it because it cleans up in a snap. So, we’re going to show you just easy this product is to use.
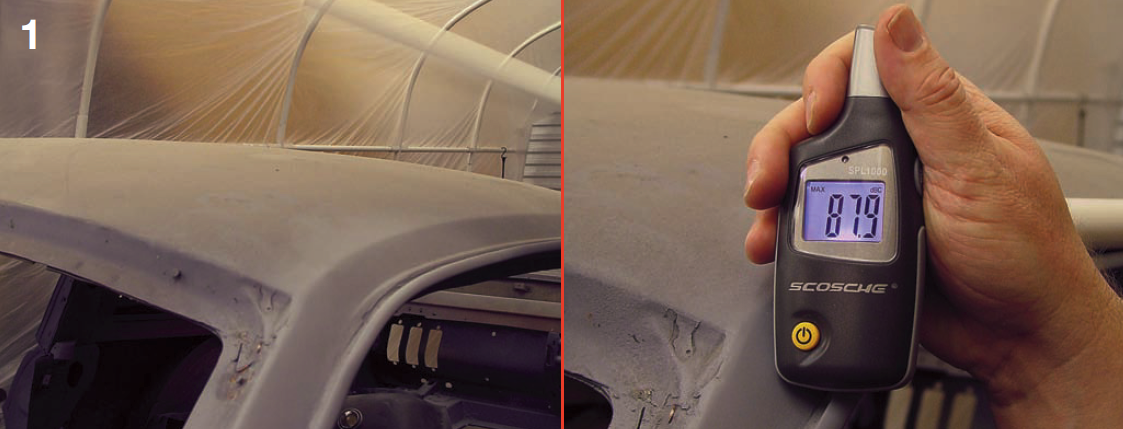
1: A little testing is in order; We took a piece of PVC pipe we had laying around and whacked the roof panel while holding a decibel meter (dB) under the roof. That big old panel rang like a bell. In addition, what the dB meter didn’t tell you is how much “ring” we got out of the roof after the whack.

2: Primer must be applied to steel, as Lizard Skin will not stick to bare steel. You’ll want a clean, dry surface to spray onto as well. We recommend cleaning with a vacuum, some old shop rags, and water as hot as you can stand. The hot water will evaporate quicker on the panel. Acetone works well for eliminating contaminants from bare steel as well.
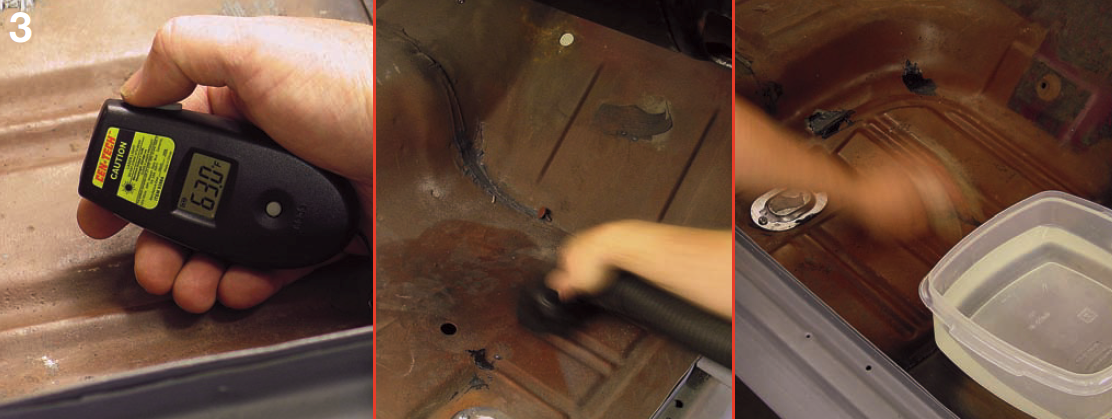
3: We’re just full of high-tech devices on this project! Our Harbor Freight digital temperature gauge shows the panel a cool 63 degrees with no Lizard Skin. We’ll soon change that! We put a heat gun on the underside of the bare floor and in less than three seconds, we got the reading up to 125.2 degrees Fahrenheit.
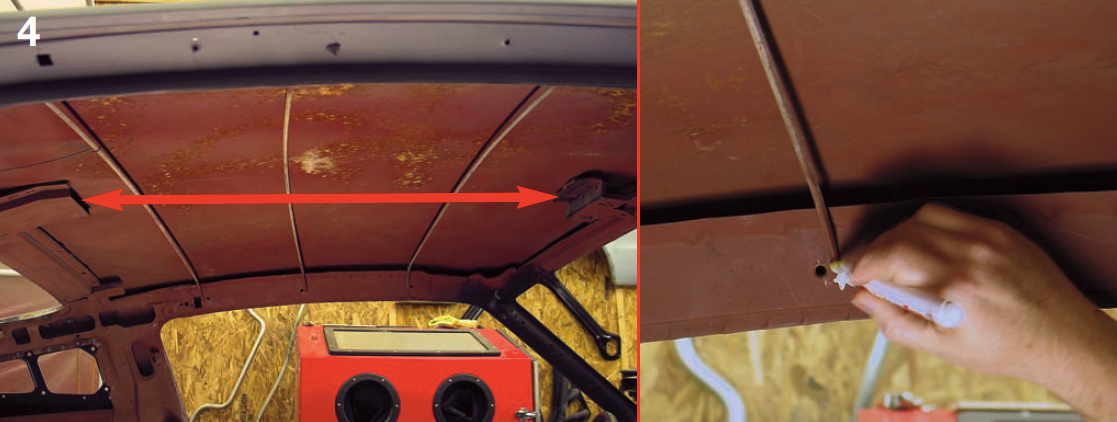
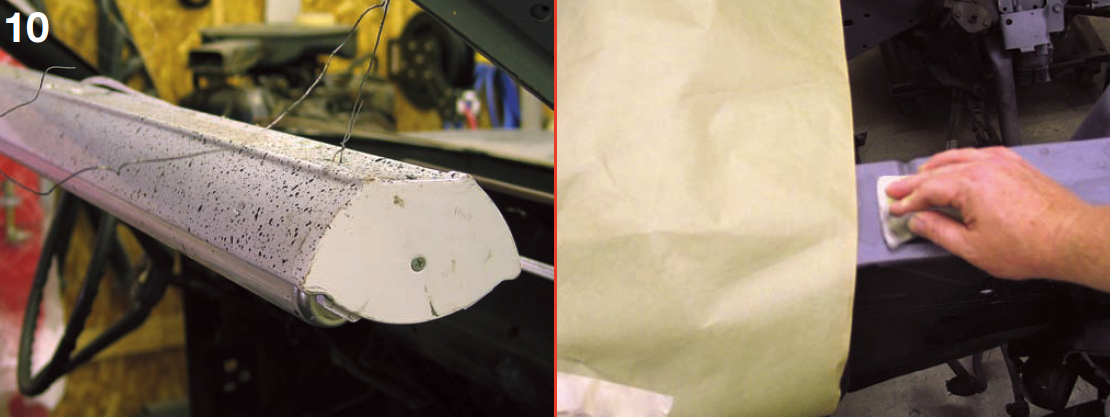
4: All of this will need to be removed for spraying. Note that we color-coded the listing bows. Some cars have specific bows for specific locations. The two brackets at the front and rear of the roof (arrows) are for an overhead console.
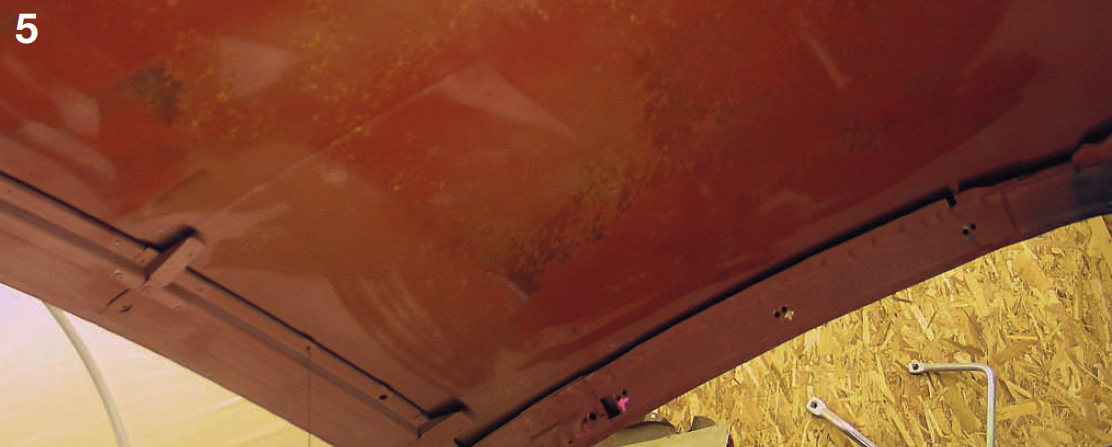
5: Just like the floor, the roof needs to be cleaned as well.
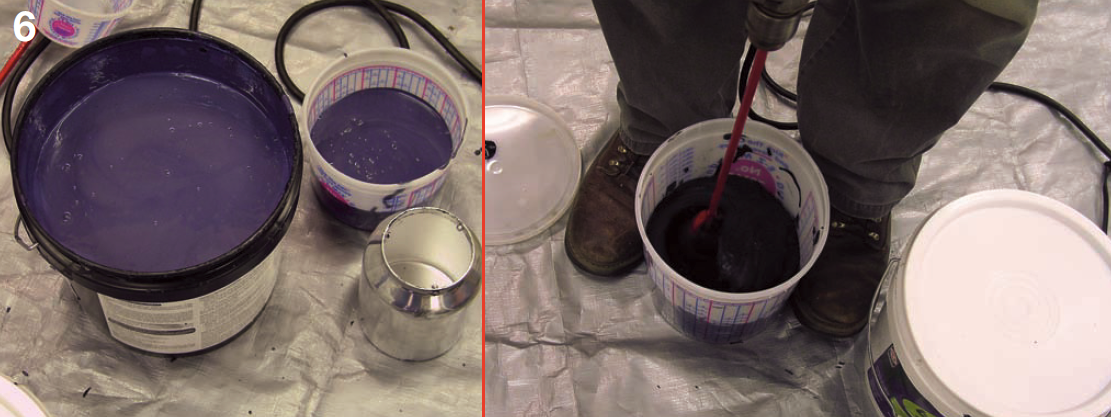
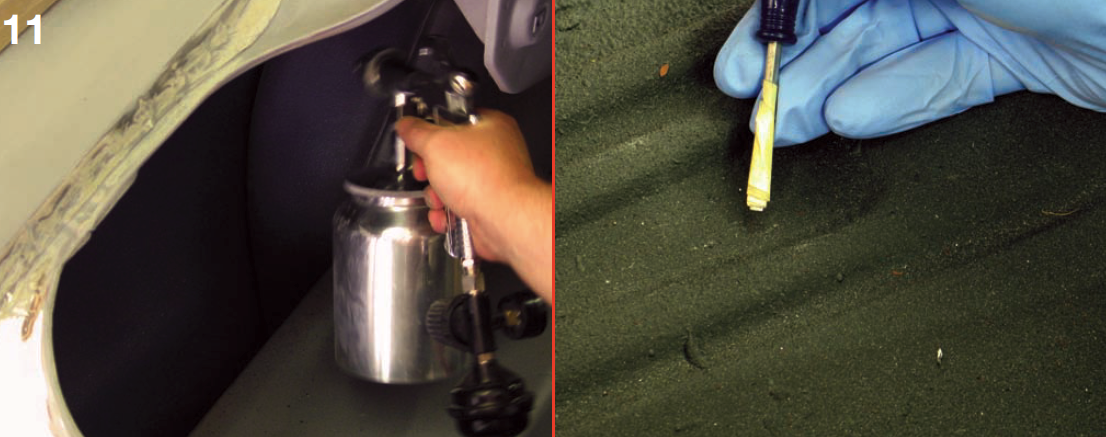
6: The instructions say to apply the Sound Control first for best results. We grabbed the mixing paddle included with the Lizard Skin Super Pro Spray Gun and mixed up a small batch of the Sound Control product for the roof panel. The consistency should be about like cake batter.
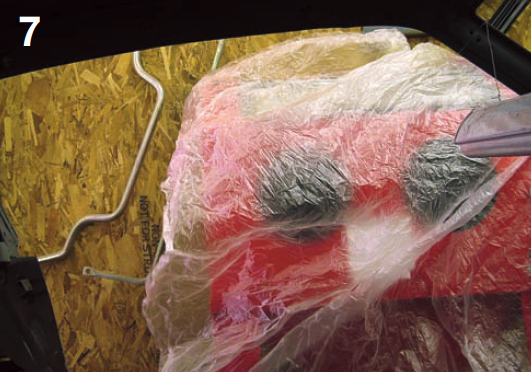
7: After spaying our first .5mm layer of Lizard Skin we realized that you need to cover both the floor and outside areas or the overspray will spatter it. It will clean up with water, but you have to hurry. In warmer climates, it will dry fast.

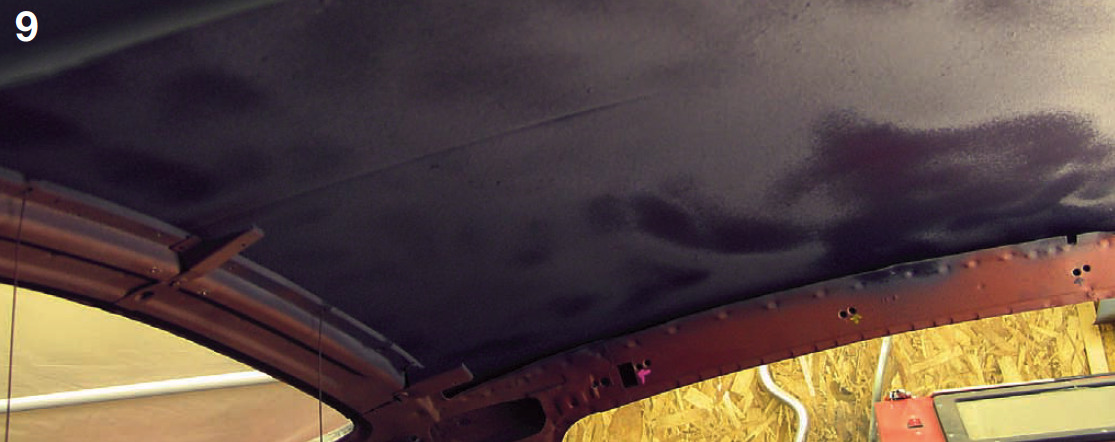
8: The product has a milky gray color and sprays on thick. Try and apply two thin layers about .5 mm thick each for best results. We’re laying down the Heat Control formula here.
9: To be clear, in areas that need both heat and sound control, you’ll want one 1 mm layer of Sound Control and one 1 mm layer of Heat Control. Next up will be testing.
10: We didn’t move our high-tech work light and you can see the “drop out” from our roof spraying. The paper would have been put to better use if we had covered the whole area. Be sure to tape off the holes in the firewall too.
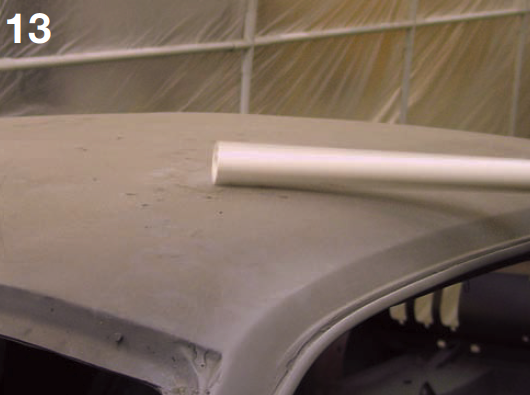
11: In areas like the trunk wall, you’ll need two layers equaling 1mm.We made a measuring device using a mini screwdriver to test single layer depth (.50 mm max).
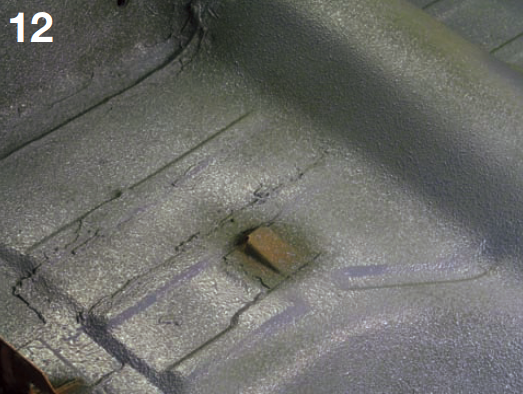
12: You’ll want to spray around areas like this to keep stock clearances. The Lizard Skin product might fill holes in the floor or firewall so be careful in areas where you have items that screw into the steel.
13: Our whack test revealed that the roof panel is now much quieter and dropped about 10 dB. We also noted that the resonance ring that the roof had is now gone.
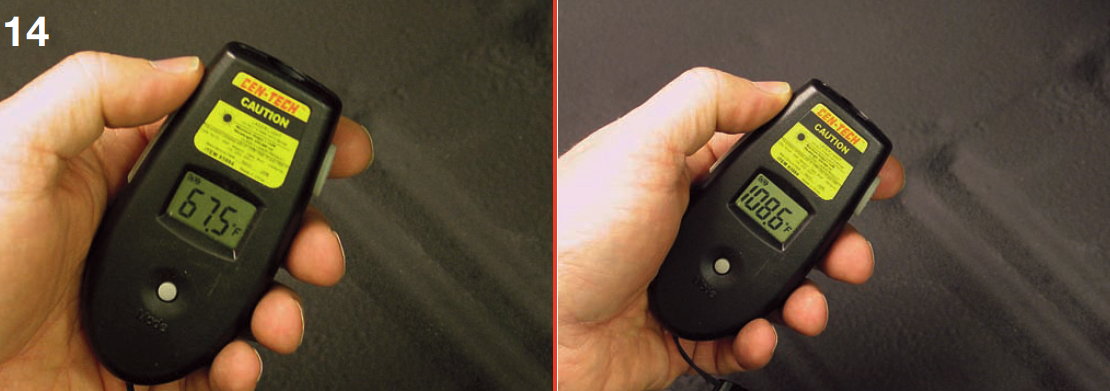
14: We then did our floorpan test on the panel with the Heat Control. Our ambient temperature was 67 degrees (the temps were warmer the day we came back to get our readings). We applied heat with the same heat gun and nearly smoked the under panel. It took longer to get that 108.6 than it did to get to the 125 degrees in our before test.
We like the Lizard Skin product sold by Eastwood Company for two simple reasons; It’s easy and it works. We’ve used it in the past and found it to be an excellent way of controlling sound and heat. In fact, it’s kind of weird to stick your head inside of an otherwise bare car (no glass, interior or headliner) and find that the echo you are used to hearing just isn’t there. We also like it because it cleans up in a snap. So, we’re going to show you just easy this product is to use.
1: A little testing is in order; We took a piece of PVC pipe we had laying around and whacked the roof panel while holding a decibel meter (dB) under the roof. That big old panel rang like a bell. In addition, what the dB meter didn’t tell you is how much “ring” we got out of the roof after the whack.
2: Primer must be applied to steel, as Lizard Skin will not stick to bare steel. You’ll want a clean, dry surface to spray onto as well. We recommend cleaning with a vacuum, some old shop rags, and water as hot as you can stand. The hot water will evaporate quicker on the panel. Acetone works well for eliminating contaminants from bare steel as well.
3: We’re just full of high-tech devices on this project! Our Harbor Freight digital temperature gauge shows the panel a cool 63 degrees with no Lizard Skin. We’ll soon change that! We put a heat gun on the underside of the bare floor and in less than three seconds, we got the reading up to 125.2 degrees Fahrenheit.
4: All of this will need to be removed for spraying. Note that we color-coded the listing bows. Some cars have specific bows for specific locations. The two brackets at the front and rear of the roof (arrows) are for an overhead console.
5: Just like the floor, the roof needs to be cleaned as well.
6: The instructions say to apply the Sound Control first for best results. We grabbed the mixing paddle included with the Lizard Skin Super Pro Spray Gun and mixed up a small batch of the Sound Control product for the roof panel. The consistency should be about like cake batter.
7: After spaying our first .5mm layer of Lizard Skin we realized that you need to cover both the floor and outside areas or the overspray will spatter it. It will clean up with water, but you have to hurry. In warmer climates, it will dry fast.
8: The product has a milky gray color and sprays on thick. Try and apply two thin layers about .5 mm thick each for best results. We’re laying down the Heat Control formula here.
9: To be clear, in areas that need both heat and sound control, you’ll want one 1 mm layer of Sound Control and one 1 mm layer of Heat Control. Next up will be testing.
10: We didn’t move our high-tech work light and you can see the “drop out” from our roof spraying. The paper would have been put to better use if we had covered the whole area. Be sure to tape off the holes in the firewall too.
11: In areas like the trunk wall, you’ll need two layers equaling 1mm.We made a measuring device using a mini screwdriver to test single layer depth (.50 mm max).
12: You’ll want to spray around areas like this to keep stock clearances. The Lizard Skin product might fill holes in the floor or firewall so be careful in areas where you have items that screw into the steel.
13: Our whack test revealed that the roof panel is now much quieter and dropped about 10 dB. We also noted that the resonance ring that the roof had is now gone.
14: We then did our floorpan test on the panel with the Heat Control. Our ambient temperature was 67 degrees (the temps were warmer the day we came back to get our readings). We applied heat with the same heat gun and nearly smoked the under panel. It took longer to get that 108.6 than it did to get to the 125 degrees in our before test.
Want to read more articles like this?
Join the PowerNation Email NewsletterRead More from PowerNation