Classic Trucks! Builds

Video Transcript

Day on trucks. We've got a ZR two S 10 in the shop that's gonna get a pop out rear window bed cap and rack. Then we've got the ultimate work truck from GMC. The professional has everything you'd ever need to get the job done. And then some after that, we'll get project trail boss ready for the paint booth.

That's all today on trucks.

Hello, everybody. Welcome to this week's show

today. We're gonna work on a four wheel drive S 10 that already looks pretty good. Just the way it sets. Problem is stock is never really good enough for Stace. And I, so we're gonna do some upgrades on this Chevy that'll not only give us more cargo space but also make it more user friendly for you. Outdoorsmen.

First thing we're gonna start with is this back window, as you can see, it already has a sliding rear window. But, uh, these things are not much more than a vent once you get down to it.

So we're gonna really open it up with a retractable rear window called the Breezer. Now, to make room for that, I'm gonna get started by popping off some of these interior panels

while Stacey's tearing apart the inside of our S 10, I'm gonna run this masking tape all the way around the outside of the window. Now, what this is gonna do for us is protect the paint when we go to cut out the stock window, whatever you do don't skip this step or you could end up doing some paint touch up later on.

Now, another area where you need to be careful is popping off these interior panels because they're easy to break. Now, if you don't have a manual to help you just take your time, use some common sense and you should be able to figure out how they go.

Now on the S 10,

they pop out at the bottom

and then slide up.

Now you're ready to start cutting out your window. Now, the best way to do this is to take a razor knife

and start cutting in here as close to the pinch. Well as you can.

Now I stay told you before the window we're gonna put in our S 10 is called the Breezer from custom concepts. Now, it comes with a complete frame and you can get it with a standard texture look like ours is or

you can get it with a carbon fiber look. Now, it also has a removable safety glass and this really cool storage bag to keep it from getting scratched when you have it popped out.

Now, it is possible to take this window out using just a utility knife, but do yourself a favor. Go down

and rent one of these cut off tools. It'll make your life a whole lot easier, especially when you cut around these corners.

Now, once you have the glass out, make sure that you come in here and clean off all this old urethane and junk. So you have a nice surface to bond to.

It's also a good time to start taking off this tape.

At this point, we can go ahead and apply the new urethane to the window. Now, keep in mind on the S 10,

you need at least a quarter inch bead all the way around the outer frame.

Once we have that finished up, we can go ahead and install it.

You ready for the frame here. Yep.

Now when you set the window in place, make sure it's centered top to bottom and side to side.

Now, once you have it, how you want it, go ahead and press it in to where the flange meets up against the truck body.

After that, take these special clips that come with the kit

and snap them over the pinch. Well, this will hold everything in place while the urethane sets up

while the urethane sets up. I'll go ahead and show you how the Breezer works. Now with the window in place, if all you want is a vent, just pop it open to here, but if you really wanna open things up, the entire rear window is removable

now that we know that everything's working right. We can start putting the interior back together.

Now, it's real important to make sure

that this urethane is cured before you start driving the truck down the road, or you could end up losing your new rear window.

Also, for your sport truck guys, if you add a sun roof to this set up, you'll have the closest thing to a convertible

that you can get without actually cutting the top off.

Now, grant it, the Breezer definitely has an appeal for the street truck, but it's also gonna give us great access to the business end of our truck, especially when you consider the next upgrade we have in mind for this bow tie. But before we show you what that's gonna be, we need to take a break. Trucks will be back right after this. Hey, man, you really think you can squeeze through this. Look at this. Look at this

boy

better you than me, man.

Later in the show, we've got the ultimate work truck, but before we show you what a construction professional needs, we need to finish up the business end of our S

10.

Welcome back to trucks. Everybody. Now we've already put a retractable window in the rear of our 98 S 10, but that's not all we have planned for it.

Now, since we're gonna be carrying a lot of hunting and fishing gear and we'd like to keep it protected and dry.

We figured the best thing to do is to put a cap on too,

but don't get the wrong idea here. We couldn't put just any old cap on our truck. We had to have something that looks great too.

So we went to a re and picked up one of their Z

series caps

as you can see, it's already been painted to match. But the thing that really grabs you is the nice rounded aerodynamic design that's continued through the windows and door as well as the third brake light.

But before we can set the cap in place, there's a little bit of prep work we need to do. Now, since the cap sits down, flush on the bed, you need to make sure there's nothing that comes between the cap and the bed or it won't seal down properly.

Now, in the case of our bed liner, we're gonna make a cut down along here to get rid of this forward edge that rolls up over the bed.

After that, all you have to do is lay down the foam ceiling strip that comes with the kit.

Now that we have the bed prepped,

it's time to set the cap in place.

One of the coolest things about this cap from a re is once you have it on there, you don't have to drill any holes in order to mount it, it's simply held in place with these aluminum clamps that connect up under the rail so you won't scratch your paint, which is real nice if you ever decide to take your cap off for any reason.

Now, the front of the cap has a rubber water tight seal that matches up perfectly with this freezer window we put in earlier.

The wiring for the third brake light is pretty straightforward. What

we did was drill a hole through here and run the wires down.

Then we'll just slice it into the main brake lights

for the dome light wiring. We're gonna go from a constant power source from the fuse box under the hood.

That way we'll be able to use the light without turning on the key. Now, word of caution here,

anytime you're doing wiring, make sure you're running through a fuse because replacing a blown fuse is a whole lot cheaper than a burned up wiring harness.

Well, there's no doubt our new cap almost makes our truck look like an SUV. But the beauty on this piece is more than skin deep.

Check out the carpet interior

as well as the ceiling rods. You can hang your clothes from.

It also has pop out vent windows and everything sealed away from the elements with an automotive style lock.

Now, everybody knows a cap is great for protecting your stuff, but

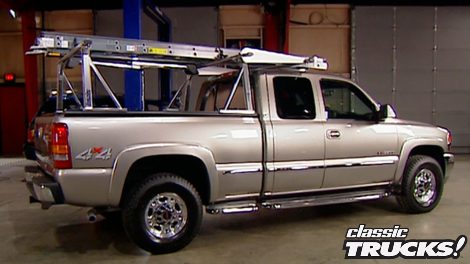
you are limited to how high you can pile it. So to give ourselves some more storage space. We're gonna put on a roof rack and nobody builds those any better than confer products

with all that in mind. The first decision we had to make is what size rack we wanted.

We're gonna go with one that's just under 4 ft wide

and 5 ft long to take full advantage of all the space we have on the roof.

Once you decide what size is best for you. Heck assembling the rack is the easy part. All you have to do is set the end pieces in place, bolt in these side pieces and finally finish it up with the cross member. Now, it's real important to make sure that the rack is level and square before you tighten all this stuff down.

Now, you can use the rack just as it sits, but comfort also offers a floor system that's really money well spent, especially if you want to keep your cap from getting all scratched up. It's made up of square tubing that sits down on the cross bars and is held in place with the supplied clips.

Now, the rack is mounted to the roof by this hinged bracket

that depending on your application, you can mount to the outside

or to the inside of the rack and you notice we've got some tape on there that's to protect the paint when we set everything in place. Also, at this point, all you wanna do is finger tighten these things to the rack so you can adjust it later on.

One of the best things about this rack is you have all kinds of options. You've got a bracket here for a high lift, jack, another for a pick and shovel or basically anything with a handle on it.

And if all of that's not enough, you can get brackets for lights, antennas or basically anything you might need. Now, it looks like we're ready to put this on the truck. Let's do it, man.

Now, setting this thing in place as we're having that tape on there really pays off because you will have to move it around some to get it centered up

and once you have it exactly how you want it, then mark can drill your holes. How's it looking over there? We're dead on over here.

Now, I know you guys are probably thinking our cap's gonna leak because we just drilled through it. But don't worry,

conference supplies these special nuts that pop right down into the hole and expand as you tighten the bolt to seal it up. Now, if you still wanna take some extra caution, you can always drop a little dab of silicone down in there.

Well, not only does our truck look a whole lot better but now it's fully functional for anything we wanna do outdoors, which is exactly where we're heading now.

But don't worry, we'll be back right after this

if you think you need some help on the job site. GMC knows they have the answer for you. The do it all professional is up next.

Welcome back, everybody. We appreciate you hanging out with us.

Well, in spite of the recent popularity, trucks has enjoyed the whole purpose behind a truck in the beginning was to put it to work. GM C's concept truck. The professional brings the 21st century

right on to the construction site. Now, this thing was designed with a contractor in mind and is a perfect example of how you can use the aftermarket to

literally build a workshop on wheels. And the first thing we wanna show you is the high tech office. The GMC designed,

you have a dash mounted touch screen that controls all of your electronics, including a radio.

You've got a personal computer that retracts into the dash

and has internet access.

And finally you have a GPS system

because any self respecting contractor is not gonna stop and ask for directions.

Of

course, you gotta have a cell phone so you can order it more building materials and it's got its own special spot right here in the front of the console. Now, inside the console,

you have a color printer to go with your computer.

And underneath that

you've got a hot or cold electric cooler for those cold mornings or hot afternoons.

Total function didn't stop in the front of the cab. Either you have a battery recharging station for cordless tools that tucks into the side panel out of sight.

On the passenger side, there's a storage bin for blueprints. Well, under that

is a swing out bin that serves as a catch all.

But without a doubt, the neatest feature back here is the removable briefcase that tucks right into the door panel. Now, you might think all this function would cost you some seating space,

but that's not a problem. You can still fit five in comfort when the back seats down.

Now, all the office stuff is great. But the tail end of the professional is where the real work is done.

Now, for loading heavy tools, you have a retractable tailgate ramp that only takes up about four inches of cargo space. Now, that's good because this sucker is loaded with a portable air compressor to run your air tools and a stainless steel tool box that gives security for your hand tools. And it also houses an auxiliary battery

hovering over the business end of the professional is a versatile racking system that can handle up to 1000 pounds of lumber ladders or whatever else you might need to haul to the job site

for pulling loads. You have a receiver hits the telescopes and adjust from side to side

to see those loads. Extending side mirrors are the only way to go

under the hood of this three quarter ton four wheel drive is a generator.

Now, it runs off the motor and produces 5000 watts of 110 and 220 ac power.

Now, the outlets of which are built into the slick little panel on the driver's side for easy access.

Of course, a truck this functional has to have running boards and everybody knows construction sites are notorious for deep sloppy mud.

With this truck. You can go ahead and get knee deep in it though because you've got 9500 pounds of emergency pulling power. Thanks to an electric winch.

The bottom line is we think the GMC Professional concept truck is a great idea.

So you guys need to get on the phone and let GM know it's about time they build one for you too.

Stay with us. We got more trucks to roll at you right after the break.

Just can't get enough of trucks, check us out online at trucks, tv.com.

Thanks for staying with us. Everybody in the past few months, we've shown you quite a bit about the painting process. But up to this point, we haven't dealt with the part that most of you late model truck owners are probably wondering about.

And that is, do you always have to strip the paint to the bare metal before you repaint the vehicle? Fortunately, we have an answer for you, you're definitely gonna wanna hear as a general rule, you can put two paint jobs on a vehicle before the paint becomes too thick and cracking becomes a problem.

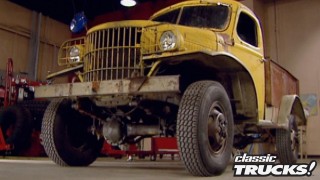
A prime example of what we're talking about is Project Trail Boss that we started on a few weeks ago. Now, the good news is this is the original paint

and even though it's an 82 model, you can see that it's not cracked or blistering, which means there's really no reason to strip it,

but we will have to do some prep work to it

before you can even think about shooting any paint. You've got to get rid of all the exterior trim like these fender flares and rocker cover.

And we know a lot of you guys are gonna be tempted to just tape this stuff off. But if you're looking to do a really quality job,

you need to take the time to pull it off.

Our Jeep does have some vinyl graphics that we need to get rid of and there are some sprays out there like this. We got from clean strip that'll help loosen the adhesive.

But if your graphics have been baking in the sun for a bunch of years, like ours have best way to get them off is with a razor blade.

The trick here is to angle the blade just right to where you lift the graphic, but you don't gouge the paint. Obviously, a sharp blade is a must.

Now keep in mind a few gouges are probably gonna happen,

but the fewer you do, the fewer you'll have to fix later on

some other things you're bound to find are places where the paint's been chipped off and rusty areas like we have right here. Now, don't kid yourself. You do have to sand these areas down to the bare metal,

then hit them with a rust prohibitor afterward to protect the metal.

And once our problem areas are sanded and prepped, it's time for some putty.

Now, CJ didn't necessarily have any dents in it, but it did have a lot of dings and scratches that we can fill with the finishing putty

as opposed to a body filler. Now, for that, we're gonna use this stuff from

yo,

that mixes up just like a body filler.

What's nice about this stuff is it goes on super smooth and thin and it won't shrink on you once it's dry

while Stace finishes up with the putty work. I can start sanding the body. Now, we're using 400 grit sandpaper because it leaves a really good too for the new paint to stick to.

We're also using Eastwood sanding blocks so everything stays nice and flat

once your putty is dry and sanded, make sure you hit it with a good primer. After that, we can start taping everything off. Starting with the glass.

A little tip here. Wet masking tape sticks like glue. So if you get it wet while you're sanding,

make sure you replace it or you'll never get it off once it's dry, we still got a whole lot of work left to do on project trail boss here. But once we finish up with all the steps we've shown you today, it'll be time to find a paint booth.

So,

for you, metal fabricators, there's nothing worse than cutting aluminum and having that soft metal clog up the teeth of the blade. Not only does it make the blade useless for cutting,

but you end up spending the next 10 minutes trying to get the metal out of the teeth.

Well, there is a way to prevent this. Just take some soap

coat the blade and what this does is lubricate the blade and keep the metal from sticking.

The best part is the soap won't rub off with just one pass. It'll stay on there a while. You'll just need to reapply it from time to time as you work.

It's also a good way to keep your blades lasting a long time and cutting really well.

And now truck gear, parts, tools and equipment for pickups and sport utilities,

you know, getting your battery out from under your hood,

not only cleans up the engine compartment, but also allows you to transfer about 40 pounds of weight exactly where you want it.

Another big plus. So the safety benefits that come from not having sparks or explosive fumes. This battery relocated kit from Mr gasket goes for about 40 bucks and not only allows you to change the location of your battery but encloses it in this box for the ultimate in safety.

You history buffs know that Dodge and Plymouth built some of the most famous muscle cars of the late sixties and early seventies and only the meanest of those were capped with the shaker hood.

Well, Pro Glass has brought the past into the new millennium

with a brand new shaker hood built specifically for the Dodge Durango and Dakota.

And these are authentic right down to the out of focus shaker sticker.

The best part is

these things are in perfect proportion with the smaller hood. Get the look from Pro Glass for about 750 bucks.

If you drive a late model truck, it's gonna have a lot of plastic on it and nothing's gonna take more abuse than the bumper coverage. Fortunately, you pull has come out with a plastic repair kit

that allows you to make invisible repairs to your bumpers dash or any plastic parts that might be cracked or broken

and let's face it. If you've ever priced any of that stuff at a dealership, you know, it isn't cheap, which makes the 50 bucks you're gonna spend on this kit. A no brainer that's gonna do it for truck gear. Here's a preview of next week's ship

project. Durango chargers already been lowered three inches all the way around.

Now, the guys will shake up the exterior of their SUV by adding some trim, that'll give it a whole new attitude.

After that. We've got a 98 S 10 that has a little attitude of its own.

Then we'll try to steer you in the right direction with some restoration. How to,

that's all next week on trucks

that's gonna do it for this week's show. We appreciate you hanging out with us. Yeah, we look forward to trucking with you again. Next week.

Trucks is an RT M production.
Show Full Transcript