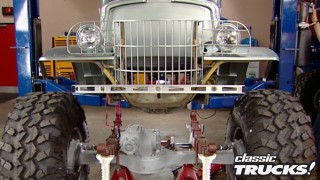
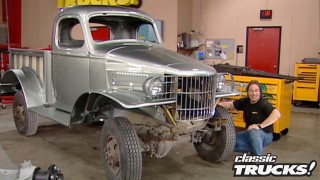
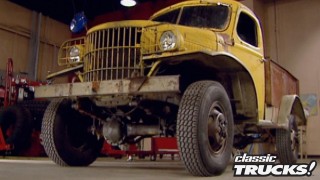
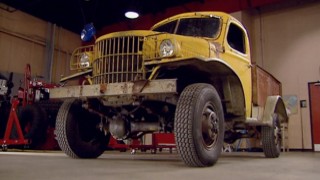
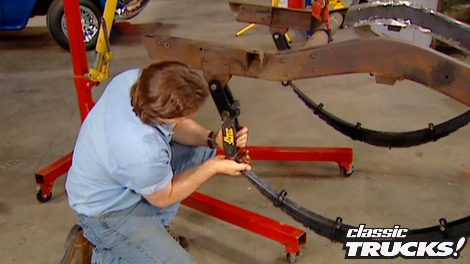
Classic Trucks! Builds

Video Transcript

Today on trucks. Mel and Stacy get the suspension on Wicked Willies ready for the trail in the rear. It'll be a high pinion nine inch board while a Dana 44 leads the way in the front. After that, they'll take a look at a rare bow tie the 57 cameo. Then it's time to show you how to build a sturdy set of sawhorses for your shop. That's all today on trucks.

Hello, everybody. Thanks for being with us. If you weren't with us a few weeks ago and you missed us. Drop a dodge crate motor in a project. Wicked Willies. We also bolted on advanced adapters in the 4505 speed tranny as well as their Atlas two transfer kit. This week, we're gonna fix, finish the frame by fitting our 55 Willie's wagon with custom axles, front and rear. Not to mention a set of springs, it's gonna have a sitting six inches higher.

Now, due to the extra horsepower and weight of this new drive train, we're gonna box the frame for extra strength. Now, there's a few different ways that you can do that.

You can box to the outside of the frame.

The only drawback here is you have to roll the frame upside down to get the bottom

or you can do what's called a step box.

Now, this gives you room to run your break and fuel lines inside the frame rail or you can do what we're gonna do and box flush with the frame for a real clean appearance.

Now, remember any of these techniques done correctly will give you all the strength that you need.

Some of you guys are probably wondering how to measure out your boxing pieces. A slick trick we like to use is to lay a piece of cardboard on the frame rail.

After tapping it down with a hammer, you have a perfect template.

Now that we have the frame box, we can weld in the new pedal assembly that we got from total cost involved or TCI for short.

Now it comes complete with a power booster and the master cylinders for the brakes and the clutch.

Now to get this thing in the right position, come down here

and measure the location of your stock pedals,

then weld the bracket in place with the new petals in the same location.

Of course, whenever you go off road, you have to have clearance. These babies from National Spring are custom made to give us that six inch lift. We're after. Now, most aftermarket springs use three or four really thick leaves to give you your load capacity. Unfortunately, that can limit your articulation and can also make for a much stiffer ride. National Spring uses a greater number of thinner leaves to give you a better ride and better articulation without limiting your load capacity.

We're gonna use this hoist to jack up the back of the frame so we can unbolt the springs and pull out the whole rear end assembly.

That way, we'll have room for the new hardware

for shackles. We're gonna use the hyper shackle that we got from the four by store.

Now, when you're driving down the street, it acts like a normal shackle. But when you get into a situation where you need more articulation,

it extends about six inches, dropping your axle

as you've probably already figured out. There's no way we're gonna stick a stock rear end in project Wicked Willy. In fact, with this high opinion nine inch Ford from Curry Enterprises, we're going to the complete opposite end of the spectrum

and there's no doubt the strength of the nine inch Ford is undeniable, but it has one major drawback for the off Roader with opinion that sits about an inch lower than any other rear end. Now, Curry took care of that problem by totally redesigning the center chunk and lifting the p

about four inches higher than stock. Uh But they don't stop there. They'll also custom make a housing and axles to whatever length you want. Then we had them throw in a Detroit locker and a full disc brake set up. Hey, man, let's find a home for this thing. I know just the

place

we're gonna go with the spring under set up. But for those of you guys that are thinking about doing a spring over, which means running the spring over the axle, a lot of the same installation procedures still apply.

Now, we come to the most important part of setting up a four wheel drive suspension

and that's pinion and drive shaft angles. Now, if you're gonna use a conventional drive shaft with a single U join at either end,

the tail shaft of the transmission has got to be parallel with the pinion yoke of the rear end that prevents vibration.

Now, if you're gonna use a drive shaft that's got a CV joined up at the transmission end,

then the pin yoke of the rear end has got to be in line with the drive shaft.

Here's another thing,

your U joint angles should never exceed 15 degrees for continuous use. If they do, you'll chew up your U joints.

And one last thing,

all these angles need to be set with the vehicle sitting at ride height. So for now, we're just gonna center up the rear end and snug it down.

I know you're dying to see the rubber, we're gonna fill our six inch lift with. And since we're putting a bulletproof drive train on wicked willies, we have to have some serious rubber to put it all in motion. Now, Interco has created quite a buzz with their new SSR radio. So they were the perfect choice for us. This tire will not only handle any level five trail but the new tread and radial design make them great on the interstate as well.

Of course, we're not gonna wrap that kind of rubber around just any old wheel and a classic, like the old 55 heck, it deserves a classic wheel. Now, Hall Libra's been making wheels since about 47 and as you can see by this polished aluminum speedway, what was cool then is definitely cool. Now,

now add to that their unique tri bar knock off and you've got the crowning touch to an awesome set up.

Oh man, stay,

not a whole lot you need to say about that. Is there nothing that we can say on the air? Stay with us. Trucks will be back after the break

later on the show. A rare bow tie makes a cameo appearance in the truck shop. But up first project Wicked Willies takes on that Dana 44.

Welcome back to the shop. Now that we have a high opinion, nine inch Ford and a six inch lift in the rear end of Wicked Willies. We need to address the front by getting things up in the air and upgrading the front axle as well. The first thing we need to do is get rid of about 40 years of wear and tear.

We're gonna start by popping these springs loose.

You can see they have what's called the military double wrap for safety. It's a good thing.

This inner spray on the driver's side is broken.

Remember the parts on these old vehicles are valuable. So don't just chuck them because somebody out there is gonna want them. You'd be amazed how a few ads in the paper can help offset your project cost. By the way, here's another example of Willie's heritage. Check out this open shackle. It was plenty strong enough for the stock set up, but we're gonna need something a little bit stronger for our application.

Now, speaking of shackles, we only need to do a slight modification of this hole here by reaming it out to one inch. So Urethane bushings will fit.

Now, keep in mind the one inch drill bit can cost you some serious money.

So you may want to check your local pawn shops. You never know what you can pick up for a couple of bucks.

We're also gonna use National's custom springs on the front so we can level out our six inch lip, make sure to use new hardware when you put your upgrades in

because saving money here could cost you some major downtime out on the trail somewhere.

Now it's time to check out the fun stuff.

The Dana 44 is pretty much the standard for light truck off road So we had hicks, four by four specialists whip us up a little package to go with a nine inch ford in the rear.

Now, they'll design the housing and axles to whatever length that you might want

and they'll put in whatever gearing or traction device you think you gotta have, then they'll

finish it off with disc brakes and these huge vented rotors and for serious off roading, you have to have manual locking hubs. Now, since one of the first things your spotter is gonna see when you crest the hill is your differential. The spin aluminum cover from off-road, unlimited, not only looks good,

but it's gonna help you run cooler as well.

Now, a lot of people make mistakes in the front thinking, hey, I'll just grab this axle and rotate it like I did in the rear to take care of my drive shaft angles. No, no, no.

When you do that, you throw off your caster angle and that's why some lifted four wheel drives wander all over the road and are dangerous.

Now, the only way to do this correctly is to go to a place like hicks, have them set your pin and castor angles before they weld the end zone.

Keep it coming

there you go

in back here.

All right. Now that we have it sitting right, we can put our drive train back in. Now, I know some of you guys are probably wondering how we did on our side clearance and we'll check that by Bolton in the Sanderson block hugger headers. Now, the biggest reason we're gonna go with these is because we have to clear the drive shaft as well. And as you can see no clearance problems here at all.

We got these polished aluminum pulleys from Mopar performance. Look at this.

We've got just enough room between the cross member and the pulley to get a fan belt through there and that'd be ok.

But I'm gonna go ahead and trim out here like the other side is to allow for some engine movement

while I'm up here, I'm gonna go ahead and put on EGR super pump to handle the power steering.

Believe me, we're gonna need the extra power to turn those big old meats.

Now, the line of the radiator comes to here. So you see, we have plenty of room in the front of the motor.

However, the motor sits so low in the frame that we can't use a stock fan. So we'll go ahead and use an electric fan because they work a lot better. Anyway,

we've already talked about side clearance and front clearance. Now, we need to address hood clearance. Here you go, man. All right,

we got these polished valve covers from

Mopar mix these with a little bit of orange paint and you're definitely making a statement. Now for a car we're gonna use Edelbrock 750 CFM performer, which is basically about as maintenance free as you're gonna get

and to top it all off.

B and M's high tech air cleaner. It has elements on both sides. So you don't have a problem with clearance in the center.

I'll tell you what mel the old Willie is starting to look wicked now. Just the way we like it. I can't wait to get this thing off road. I got some bad news for you. What's that? We gotta take the whole thing apart and paint the frame. I hate that part just like I hate taking breaks, but we gotta pay the bills. Don't go away. We'll be right back.

We're glad you stayed with us because we're about to show you a rare bow tie that consistently takes first place trophies in the modified category for Larry Clayton of Columbia, Tennessee. Now, since Chevrolet only made 2244 of these in 1957

it's always special when a

cameo makes an appearance even in the truck shop. Now, the first cameo was built in 55. And the whole idea behind this GM creation was to combine the style of a truck and a car. What this eventually gave birth to was the El Camino in 59. But hey, that's a whole other story.

The first thing that catches your eye about the front end of this truck is the obvious character. The designers gave it from the hooded headlights to the wide mouth grill and let's face it. You definitely don't see chrome like this anymore

unless of course, you pop the hood to reveal one finely detailed engine compartment.

It's got plenty of shine as well. Now, don't get the wrong idea. The cameo didn't come stock with this 396 big block and the turbo 400 behind it or for that matter, the late model sub frame that has independent front suspension and disc brakes, but if we didn't point it out, you'd never know.

Now the interior on this Chevy will take your breath away.

The dash is painted the same metallic blue as the body

and the handcrafted wood panel inserts get a big thumbs up from us.

The original seat has been covered in a beige vee

as well as the top inserts and the sun visors cool.

Now we get to the part that makes a cameo truly unique. The bedsides which are fiberglass, follow the styling cues of the fifties that include a two tone insert, tail fin and lots of chrome covering the tail lights and bumper that have the unmistakable look of their era.

Of course, the cameo was still intended to be a pickup and since fiberglass won't stand up to a load, the inside of the bed was metal. Then they used the stainless steel strip to hide the seam between the two. Now wood beds were pretty common in the fifties and this one's been redone in wide oak with stainless steel strips and hardware. The tailgate however, is anything but common two levers pop it open and a retracting cable that disappears into the bed keeps it from dragging the ground.

Unfortunately, this truck doesn't see the road too often, but sometimes that's the price you pay to compete at a national level. And since the cameo was only made from 55 to 58 it's just good to know that at least one isn't spending its golden years in the junkyard. Stick around. We still got more trucks for you right after this.

Welcome back, everybody. Now we know you probably thought you'd never see wood working in a truck shop, but the fact is most do it yourselfers when they have to work on a part end up propping it up on cinder blocks or lawn furniture. In other words, you don't have proper saw horses

and going to the hardware store can nail you for about 40 bucks a pop.

So we're gonna show you how to build your own saw horses that'll support an entire body or chassis while you work on it.

Now, the great thing about building your own is you can make them as high or as low as you want. Some of the materials you're gonna need is a one by four, some two by fours, couple two by sixes as well as three inch wood screws.

We're gonna make the top 4 ft long. We're gonna use a two by six and a couple of two by fours,

then we'll screw them together to form an uneven sighted eye. Now, this may look strange, but this is the key to the strength of these saw horses. Now, we're using wood screws because they're a lot stronger than nails. It's also a good idea to drill a pilot hole, especially if you're using a harder wood like oak because it'll want to split on you.

Now it's time for the legs and

like we said before, you can make them any length you want, but we're gonna make ours about 3 ft because that's gonna put the horse at a perfect working height.

Now, another reason this design is superior in strength is because of the two by six on top because when you put your leg on the two by six butts up against the top of the leg, transferring the load directly into the leg.

Now, you're not done yet. You need to stress these legs and the whole thing will collapse on you.

Now, the best way to do this is take a two by four,

put it in place,

make your marks

and cut it out.

Now you'll need one of these for both sides and it should look something like this when you're done.

Now, you may have noticed that mel set the legs in four inches,

the reason he did that.

So this brace will tuck up in there real nice.

Now, the purpose for these braces is to keep these legs from doing the splits on you.

Now, we need to stress the legs the other direction we're doing that by making cross members out of one by fours. Now, make sure when you do this, that you go the opposite direction for maximum strength,

I've been pretty sturdy there. Mel I

think these will do the job

and you can make these look as good as you want by angle cutting the legs here at the top or at the bottom.

But that won't make any difference as far as strength goes. So that's entirely up to you.

If you're wondering how strong these things really are. The body of our old willie should answer that question. But the best part is we built both of them for about 20 bucks.

A lot of people ask, how do I detail parts like

these valve covers?

Well, you can do it the old fashioned way and tediously tape around all these spots then deal with the mess of pulling up the tape, not to mention the frustration factor of missing a spot.

Now, I found a better way to do it

is to take a strip of tape

and tape around the perimeter of where you're gonna paint.

Now, spray on some color,

then take a rag with some solvent and wipe the paint off the area that you want to shine.

Now, when you pull the tape off you have a totally color matched part

that will help you stand out of the car show or on the street.

And now truck gear, parts, tools and equipment for pickups and sport utilities.

Everybody knows billet grills have been quite the rage the past few years, but

not everybody's into that billet look. So street scene came up with this unique design that just screams off road and performance. You can get them for basically any truck out there and installation couldn't be any easier. They mount right over your existing grills. The speed grill starts at under $100 and dealer sport truck can help you chase them down.

Now, for those of you running a carburetor, you need to check out this new street performance. Holly, it's easy to spot with its bright zinc finish

and it's available in a square flange or spread board design for you quadrajet guys

600 or 750 CFM electric or manual choke. Now, a Holley has always been easy to tune. Thanks to its design and the price looks really good too about 220 bucks.

If you own a classic like our 55 Willies and you have to upgrade your gauges, but you don't want to lose the original look. You don't have to look any further than United Speedometer. They converted our stock cluster to 12 volt and put in brand new video movements. Then they applied new artwork and chrome the housing it cost about $600 to have our cluster done. But as you can see it was money very well spent.

That's gonna do it for truck gear. Here's a preview of next week's. Show

me and Stacy have already slammed project sport Sierra.

Next week they'll change the tone and the tunes on their GMC with an exhaust system and stereo upgrade.

After that, they'll hit the trail with a brand new Ford Ranger four by four

before taking you back to the shop to fit a CJ seven with an off road shower.

That's all next week on trucks.

Well, that's gonna do it for this week's show. Thanks for being with us. We look forward to trucking with you again next week.

This thing's ready to come out

here, we

go

the same.

What?

No.

Yeah,

I can scratch it but you can't.

I,

yeah,

trucks is an RTM production.
Show Full Transcript