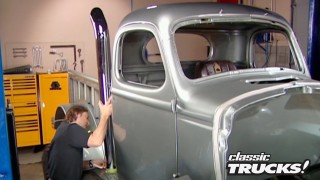
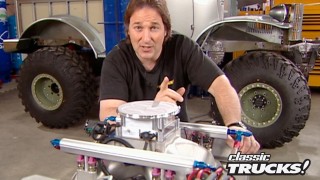
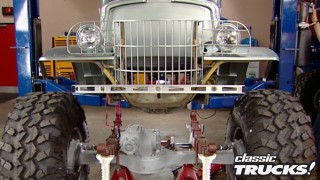
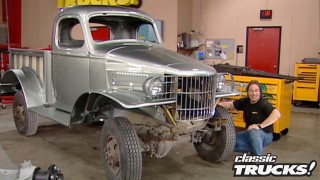
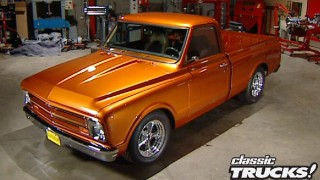
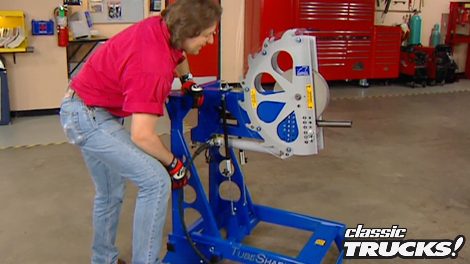
Classic Trucks! Builds

Video Transcript

Today on trucks.

Ok. Gear heads, Stacy's busting to open the toy box and let you play with some of his favorite cool tools. And he's throwing in a little technique on how to use them.

Then we'll reach for New heights as we check out one monster of a Chevy. That's all today on trucks.

Welcome to trucks. As you can see, I have got a killer truck to show you today and later on in the show, I'm gonna take you all over this thing. Show you why it's so trick and why it's worth over 100,000 bucks. But first, I'm gonna show you the one thing that makes any gearhead young or old, male or female. Absolutely drool.

And it's not Baywatch. I'm talking about tools. Yeah,

tools without them. We'd all be back in the dark ages.

The big question is, what kind of tools are out there to build stuff like this? And more importantly, when and how do you use them? Well, today is the day to answer some of those questions for you.

The first thing that everybody needs to have if you're even remotely interested in working on your own vehicle is a quality set of hand tools

and some place to keep them. Now, all my hand tools, my ratchets, my sockets, my wrenches, screwdrivers, et cetera, et cetera.

All come from Mac and I keep them here in my Mac boxes. Now, obviously,

not everybody's gonna have the room

to have a big work

station like the maximizer, but the good news is

Mac's got all kinds of choices, different size boxes.

So you've got something to choose from for your budget and your application. Now,

am I saying that everybody should just run right out and buy Mac tools? Well,

let me put it to you like this. If you spend a lot of time with your tools, you need to invest in a professional quality set of tools.

Now, I know they're not cheap but you get what you pay for. Now, if you only use your tools once in a while,

rarely ever pick them up,

well,

you might be able to get by with some cheap tools. But let me warn you of this.

If you buy some cheap tools and you expect to get some good use out of them, you're gonna end up cussing them and finally throwing them away

and buying something like that anyway, so you might as well get the good stuff to start with.

Next. We're gonna look at some way to get your vehicle up in the air and that means a floor jack.

Now those $69 ones that you pick up at the local factory outlet.

Well, they're ok. As long as you're gonna use the jack once in a while, if you're gonna use it a lot. Well, you need to spend a few 100 bucks

and pick up something nice that's gonna last you a lifetime like this all aluminum zip jack that we got from zipper motors.

And this thing goes to full extension in just nine pumps only weighs 35 pounds, rolls around very easily. And as you can see,

this thing is cool looking,

of course, with the vehicle up in the air. Well, it'd be nice to be able to move it around and that is where a set of dollies is really gonna be nice and you can pick those up just about anywhere. Now, if you want something a little slicker than that, a little more cool. Well, grill's garage has got these things called the go jacks. Now, these combine a jack and a dolly

and they allow you just to jack the vehicle up

and then roll it around

with just one tool.

All right. Now it is time for the big stuff in the one area

where a lot of people get a little lost and that is with welders. Do you need a mig? Do you need a tig mig tig? Which one?

Well, without a doubt, the cheapest and the easiest to learn

is the mig and that should be the first welder that you buy, they're very versatile

and I've shown a lot of tips on how to use these properly in past shows. Now, the tig or heli arching, you

know,

that is a whole different animal, takes a lot of skill, a lot of practice to be able to do this, right. So

today I'm gonna show you how to set up this machine. I'm

gonna show you some tips and techniques on how to do this properly.

Now, tig stands for tungsten inert gas. This gives you the ability to weld aluminum,

magnesium, stainless steel, super thin metal shoot. You name it

pretty much can weld it with the tig welder. So this is how to set up the machine.

You have the torch which you hold in one hand,

then you have the grounding cable that you connect to the work.

Then you have a tungsten that slides down inside the torch.

You have argon shielding gas that flows down through the torch

and not only cools the tip of the tungsten

but also keeps the weld from getting contaminated.

Then in your free hand,

you have a filler rod and

on top of that,

you have a foot controller

that allows you to control the amperage of the machine while you're welding.

So you're using both hands, 1 ft and both eyes to make this thing work properly.

Ok? The first thing you need to do is put the proper tip on the tungsten for the type of material you're gonna be welding. Now, for steel or stainless steel, you need a nice sharp pencil type tip

that you grind lengthwise, starting at the tip going down the body of the tungsten. Now, if you try to do it sideways like this,

you're gonna put marks in that tip and that's gonna cause the arc to scatter.

You don't want that

with the tip of the tungsten taken care of. Now take your torch

slide that tungsten down in there.

The tip should stick out anywhere from an eighth to about 3/16 of an inch.

Then set your AM

for the thickness of steel. You're gonna weld,

turn on your gas,

grab a filler rod and that takes care of the set up of a tig machine. It's also time for a break. But after the break

and we're gonna reveal to you some secrets to the tig welding process

only on tracks

after the break. Stacy's turning up the heat with a few pointers on the subtle art of tig welding

and later scared of big green monsters. Well, don't worry, you won't find this one under your bed.

Welcome back to trucks. We are showing you some cool tools and we are right in the middle of showing you welders, tig welders to be exact. Now, I've already showed you the basic setup of the machine.

So now I'm gonna show you what's involved in the tig process.

Now, it's almost impossible to see what's going on if you don't have a mask on. So

we gonna demonstrate this process with everything cold.

Ok. Hold the torch like a pencil. Bring it down to about 1/8 of an inch from the surface. Now, don't be afraid

to let this nozzle lean against the work because that'll come

a brace you and keep your distance where it needs to be. Now, under no circumstances, do you ever touch that Tungsten to the metal or to the filler rod? Now, if you do that,

well, you're gonna have to take the tungsten back out, take it back over to the grinder and put another tip on it. Everything about tig welding is about cleanliness.

Once you've established the arc, develop the weld puddle and then work your way down the seam, then take a filler rod, dab it in the leading edge of the puddle. Now, you don't wanna get up under the tungsten, it'll just melt and dribble away,

just keep it out on the leading edge

and then slowly fill up the gap

with the, well, now this obviously is where the field comes in because you don't need filler all the time.

Just need to dab it in there as you see, you need to build the weld puddle.

All right. Now that you know, basically what you're supposed to do,

we're gonna show you what it looks like when you do it.

Notice your control comes in your fingers and your wrist, not in your wrist, elbow and shoulder like you do with the meg. Also, right in the middle of all this, you're controlling the temperature of the machine with the foot controller.

But remember the pedal only controls what you got the machine dialed into. So

if you need more heat, well, you're gonna have to turn up the machine.

Obviously, this is a very quick overview of the tig welding process. As you can see, there is a lot of stuff going on,

but this is something you can learn to do if you've got any kind of hand eye coordinations at all. And I know you do,

you just have to be committed to spending some time

learning the skill. This is definitely a skill and the biggest thing you gotta know

is you gotta understand the welding process. You gotta know when you're too hot, you're too cold when you need to add filler. You've got to understand that process. Now

is Tig welding for everybody.

No, if you're just a hobbyist or even if you're doing a hardcore restoration like the old Bronco here,

tig welders are not good for filling gaps or working on old rusty metal. That's not in pristine condition. A mig is better suited for that.

But if you do a lot of fabrication,

welding stainless steel or aluminum and you need real nice, neat precise welds or if you're doing some body work where you need soft welds where you can work them with a body hammer.

A tig is the way to go

when trucks returns. It takes more than Stacy's big old biceps to bend metal tubing. But don't worry, he's got the tool for that too.

That's next. Of course, the tube shark

just can't get enough of trucks. Check us out online at TRUCKS, tv.com.

Welcome back to trucks. We are showing you some cool tools and techniques so you can take your truck project from just a pile of parts

and turn it into something that actually runs and drives and,

well, you're proud of now. One tool that almost every gear had just dreams of owning is a tool tubing bender and you can make bumpers and roll bars and complete tube chassis. Heck, you're limited only by your imagination.

Well, the biggest problem with most tubing benders is they're big. They'll take up half your shop and they're expensive.

Talking 5 to 10 grand or more expensive.

Well, I've got a surprise for you. This is called the Tube shark. It's made by Isco.

This is a portable hydraulic tubing bender.

It'll bend round and square tubing.

It folds up into this little package here so you can

tuck it up against the wall and this is a heck of a deal at around 3000 bucks. Let me show you how this thing works.

Roll the tube shark into position,

drop the legs and pin them in place,

then

raise the bending head

next, connect your hydraulic line.

Follow that with the air supply

and you are ready to bend some tubing.

Now, you can see why they call this thing. The tube shark, it's got all these little dorsal fins that go around it. Now, those are not just for looks, those actually have a purpose. We're gonna show you what they do here in a minute.

But the way this thing works, you have your forming dye here,

then back in the back, you have the feed shoe.

Then up here in front, you've got the forming shoe. Now, all these pieces match.

You can see we are set up to bend 1.5 inch round tubing. So that's what we're gonna stick in there

with the tubing in place, just hit the pedal.

Now, notice how the tubing is pulled over the forming dye

with the forming shoe

and it all feeds through the machine through the feed shoe.

Now, down here, you have the bending gauge. Now, this shows you the degree of bend you're making in the tubing.

And those numbers correspond with these numbers on these dorsal fins. I told you that they had to use. Now each fin gives you 54 degrees of bend. So if you reach the end of the ram

and you still need more bend,

well, retract the ra M

to the next number dorsal fin,

then continue your band using the next set of numbers down on the gauge. See it's that simple.

All right,

of course, you have some options with the tube shark.

You can get dyes and shoes to bend round tubing anywhere from half inch

all the way up to two inches in diameter. But it just doesn't do round tubing,

like I said before. It also does square tubing as you probably know, this stuff does not like to bend.

So the dyes and shoes look a little different for that.

Now, the biggest thing that Isco has done though with the tube shark is take a professional quality tool and make it affordable to the average guy.

Heck, it looks good too. It looks like a little shark. I'll see you after this

when we come back. It's a 96 monster Chevy. That's not so jolly, but it certainly is green and giant

in the world of custom trucks every once in a while. One comes along that you can literally spend hours looking at

and never see all the custom touches.

Well, Brian Taylor decided he was gonna build a truck like that

and since Brian's from Texas and

matters in Texas,

at least when you're talking about your truck, Brian decided he was gonna build a monster style truck, but it had to be functional. So after about 2.5 years of labor and a lot of help from his friend Jeff Keller.

This is what rolled out of the shop.

The first thing that grabs your attention is the full tube chassis that this thing sits on and the massive suspension and axles that holds it all up.

The axles are huge. Dana seventies custom made by dyno Track and they're packed with 456 gears.

Those are held in place with a hand built triangulated four L

set up and you even have special cages to protect the drive shaft.

Of course, the drive shafts themselves are connected to an SGS drop center transfer case

that drops vertical to keep the drive shaft angles down like a monster truck.

Another monster truck item is the huge nitro shocks that hold this thing up in the air

and they work in conjunction with the NASCAR superspeedway sway bars. This all adds up to 14 inches of suspension travel

in the back. The tube chassis continues and holds dual batteries and a fuel tank.

The rear fiberglass fenders are held in place by their own custom framework and supports

and of course they were worked and smoothed to perfection before being shot with flawless green paint.

The cab, believe it or not is a stock steel 96 Chevy cab

with stock opening doors and power windows, but the rest of the interior, well, that's a whole different matter. The floor firewall and dash were all hand formed in metal and then a custom gauge cluster was built for the dash.

The full roll cage is so well built and subtle that you don't even hardly notice it's there.

The racing seats and custom steering column, give you a place to sit

and something to hold on to when you hammer the throttle

that brings us to the engine

and it's no little thing either. Uh, uh, not for Brian,

you have a massive 540 c

big block Chevy punching out over 600 horsepower

and that's almost as big as our 572.

Almost. Of course, everything for this engine was custom made.

All the mounts, the two chassis that holds it. Heck, even the headers were hand built and the amount of hours that went into just making those is mind boggling.

The

best part is when you step down on the pedal, put this thing in motion,

you quickly find this is no trailer point. This whole truck really works well together. Oh, yeah.

Well, like I said earlier, Brian started out 2.5 years ago to build a really big truck, even by Texas standards. What he ended up with was not only a truck big in stature but in detail also in function.

Wow. What a combination,

what a big first step

and now truck, gear, parts, tools and equipment for pickups and sport utilities.

If you're driving a truck with a diesel engine, whether it's the GM

Duramax or the Ford Power Stroke or the Dodge Cummins.

Well, you probably know that opening up the exhaust system is one of the best ways to get some good power out of those engines.

Well, Gail Banks engineering has taken that to the max and what they're calling the monster exhaust systems.

Now, these feature huge four inch prebent stainless steel pipes,

all the hangers are welded right in place. So

these just fit in the stock locations. The muffler is a big flow through design,

so you have a great sound and of course, a great flow

and finishing it all off is a big five inch polished tip to keep every

looking good.

Now, the big surprise here though is not in the size of the components. It's how small the price is. These kits start at around 530 bucks

if you're building a high performance engine, no matter if you're gonna use Nitrous or a super charger, a turbo, heck, whatever. The first thing that you need to invest your money in is in a quality set of heads because without those,

these will never reach their full potential. Well, Jags has decided to help you out with that

with this awesome set of aluminum cylinder heads for the small block Chevy.

Now, these feature huge 205 intake valves, 160 exhaust valves, springs, retainers, screw in studs, guide plates, heck, everything you'd want or need

to actually bolt these things on and go out and start smoking some tires and the price is pretty smoking too set like this fully dressed comes in at just under 1200 bucks

if you drive a truck or an SUV, chances are you have tried to back one of those things up at night and found that you can't see squat.

Well, Cruiser Stainless has got the answer for that problem

in the White Knight auxiliary rear light kit.

Now, this thing slides right into your receiver hitch or mounts below the bumper

and gives you 255 watt high output lights. So you can really see what's going on behind you.

Now, you can also wire this thing up to come on with your backup lights

manually or both. Now, the best part is

this will not put you in the poorhouse Cruiser stainless sells these for around 89 bucks each

next week on trucks. Stacy's got an awesome leather upgrade for your tired old glass seats and believe it or not, it's easy.

And if that's not enough, you'll throw in a kick in entertainment center,

but don't get too comfortable because later Stacy's taking you wheel it in this wild Jeep DJ.

That's all next week on drugs

for a VHS. Copy of today's show call, toll free 1877853 7260. Show videos are just 1295 plus shipping and handling

trucks is an RTM production.
Show Full Transcript