
More Jeep TrashHawk Episodes


Music City Trucks Featured Projects


Music City Trucks Builds


Want more content like this?
Join the PowerNation Email NewsletterParts Used In This Episode
Matco Tools
MATCO Tools are the Official Tool Supplier to PowerNation
The Industrial Depot
Tools, Hardware, Shop Supplies
Episode Transcript
(Marc)>> You're watching Powernation!
(Marc)>> 999, 1,000! Coming up on Music City Trucks we've got a strong show for you, and it's not my muscle going under the hood here. Today we give TrashHawk new life in the front.
(Brandon)>> We beef up the back.
(Marc)>> And then! [ engine revving ]
(Brandon)>> This! [ engine revving ] [ MUSIC ]
(Brandon)>> Dude I can't stop smiling! I legit can't stop smiling! [ MUSIC ] [ engine revving ] [ MUSIC ]
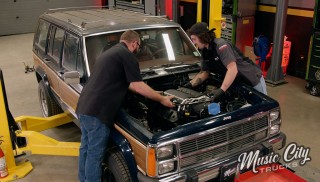
(Marc)>> Welcome to Music City Trucks. We've got this '80's jewel in here complete with the wood grain package but it's not the body that's on the chopping block. It's everything underneath because we're building our vision of a TrackHawk knockoff that we're calling TrashHawk.
(Brandon)>> Now we've already had this LS engine installed into the truck but even after adding a supercharger this one didn't want to run.
(Marc)>> But we do have a real supercharged LS that's gonna go in the truck today along with all the other supporting drivetrain components like the six speed manual that we mocked up last time and both axles. Up front we've already determined we're switching to two wheel drive. So this Dana 30 four wheel drive has to go but we do have a cool brake upgrade we want to show you whether you've got a two wheel or four wheel XJ.
(Brandon)>> And I'm gonna be hitting the junkyard up for a rear axle that's one, gonna fit under the truck, and two it's gonna handle the 700 plus horsepower thrown at it, and while I'm back there I'm gonna adjust some altitude problems.
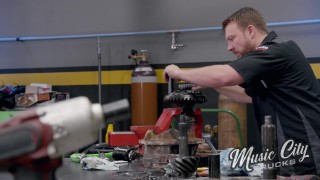
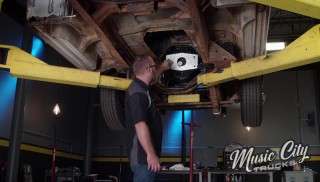
(Marc)>> Let's do this! Well here's the axle that we picked up from a junkyard for a couple hundred bucks. It's out of a 2001 Jeep Cherokee two wheel drive. It's got all the mounting provisions exactly the same as ours except it's two wheel drive. So it doesn't have any of the center section or axles. It's just a blank tube in here. Since it's a coil spring setup, and we are gonna lower this truck, we figured we'd just buy some lowering springs but low and behold we couldn't find any. But as you can imagine there's a ton of four wheel drive stuff available. So that's where we turned. There's a couple of things that we needed when we ordered a coil spring for the front of this vehicle. One we need a static rate, and then also we needed something that's gonna be high enough rate to handle the extra weight we're adding to our XJ here seeing that we're switching from a six cylinder to an eight cylinder, and we can accomplish that with this set of coil springs that we got from Summit Racing. These are for a lifted vehicle. So the only drawback is they're actually taller and they're gonna compress less than the factory springs would, but it's nothing a little cutting won't fix. We'll just cut a couple of coils out of there, but when you're lowering or even lifting a vehicle that has a four link, especially on a steer axle like this, you don't want to affect the castor too much. You need to compensate for that and you can do that with adjustable control arms. We actually got this set from Summit as well. The great thing about these is they're super heavy duty. Probably more heavy duty than we need, but they're easy to adjust and that's gonna help us when we get this thing all dialed in to get our alignment right. So for now all I need to do is get these coils cut. We'll get this front end installed. Notice we're using a cutoff wheel to cut our spring shorter. You never want to use a torch to either heat up and lower the spring or to torch it off because if you heat up the spring too much it's gonna sacrifice the integrity, and that could cause a failure. [ MUSIC ] Well with the control arms in place I can go ahead and get my cut springs in here. We are gonna have to order some shorter shocks later but we'll get to that. I could go ahead and get this thing installed but you remember I mentioned that brake upgrade earlier? I want to go ahead and show you how to do that now while I've got this axle sitting here on the stand. [ MUSIC ] We'll start by removing the caliper... [ MUSIC ] ...and then the rotor. [ drill humming ]
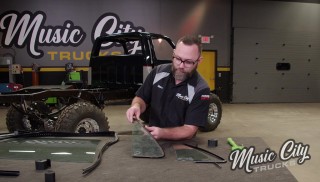
(Marc)>> Steering can be next. Then we can remove the spindle by unfastening the ball joints. [ MUSIC ] Well with that all torn down let's talk about our upgrade. I'm very excited about this because we're saving some money. Instead of going with an expensive big brake kit we're using all o-e-m style components that we got from RockAuto dot com. That's what you see here on the table. Let's start with the rotor. This is an 11 inch. This is standard on all XJ's. We're gonna switch to this 12 inch rotor. It has the same lug pattern, the five on four and a half, but this is from a 2002 Explorer SportTrac. Now as far as the caliper goes it's the single piston calipers that come on all XJ's. They're pretty puny, you can see here, compared to this dual piston caliper from a '99 to '04 Jeep Grand Cherokee, or a WJ Jeep. It's quite a bit upgrade but in order to get that stuff to work we need the spindles, or the knuckles from that WJ, and that's what this is here. We got these from a junkyard, couple hundred bucks. You could even buy the whole axle for that cheap, but that's not just gonna attach right to our XJ axle. We actually have to upgrade the ball joints a little bit. Get those pressed out, get the new ones in, and we can get all this stuff bolted on. [ drill humming ]
(Marc)>> We're gonna replace both the upper and lower ball joints. The uppers will get replaced with factory XJ joints while the lowers get replaced with longer WJ joint to match the knuckle. Now it's time to assemble the hubs. We're using XJ hub assemblies with a quarter inch spacer that we had made by Jimmy down in Carcass. The purpose of the spacer is to make sure the rotor and caliper are aligned properly. [ MUSIC ] And then we're home free to install the bracket... [ MUSIC ] ...pads... [ MUSIC ] ...and caliper. [ MUSIC ] Now we've got us a d-i-y big brake kit. Very nice! [ MUSIC ] Well we've got our brake upgrade all done except for the hose, but that's easy enough, and we've got our axle installed. It's hanging from the original shocks, which we'll need to order some shorter ones later but we have to get it set at ride height, and we can't do that until we get the engine and transmission in along with that rear end swap, and all that is coming up.
(Brandon)>> Coming up next, a new life for a junkyard axle.
(Brandon)>> Well I made it to Butler's and this is pretty much a truck guy's dream. They've got frames everywhere, bodies, tons of axles to choose from. So let's see if we can find what we need. Greg's got this yard pretty organized. So it wasn't too hard to find the Ford 8.8 axle that we wanted. It's the right width. It's got disc brakes, limited slip, 3.73 gears, and the best part it's the same bolt pattern as the front axle. So let's stop playing around, get this loaded up, and take it back to the shop. So with just a little research beforehand you usually could save a ton of money when upgrading your project. [ MUSIC ] That's why I love junkyards. Alright I'm pretty eager to get this Ford 8.8 under TrashHawk, but before we could do that I've got to take all the old suspension out, and that's gonna start with these old shocks. By the looks of it the underside has seen a lot more salt than we originally thought. Some of these components are pretty crusty. [ MUSIC ] There we go! Since we're swapping the axle I'm just gonna cut the U-bolts. Alright I want to give you a little perspective on how over torqued those U-bolts were. That's the top plate. It should not look like a banana, and this is the bolt. It is literally bent in another direction. That is over torqued. [ mechanical humming ]
(Brandon)>> And you can see how corroded and smashed the center is. It's actually lost thickness, and these are separating. There's no way that this is gonna hold 700 plus horsepower. [ drill humming ]
(Brandon)>> I'm gonna go ahead and take off the old shocks and the original sway bar to make room for our 8.8. [ MUSIC ] [ drill humming ] [ MUSIC ]
(Brandon)>> I ordered up all new components. So we're retiring these well cycled old leaves. Alright the first step in getting this 8.8 into the Jeep Cherokee is take these brakes loose and get these perches cut off. [ torch hissing ] [ MUSIC ]
(Brandon)>> Now the Ford 8.8 is the most common swap into any Jeep, and they make a bunch of kits. We got this one from Summit Racing. It comes with everything we need. We got the perches, the U-bolts, the backing plates. It even has the shock mounts. Now these kits are built with off road in mind, and they bolt up on the bottom side of the leaf. Now we're gonna repurpose this kit for a flip kit and put it on the top of the leaf like that, and that's gonna give us the six inch drop that we want. It's gonna have that mean look with a strong axle and we don't have to re-invent the wheel while doing it. [ MUSIC ] [ mechanical humming ] [ MUSIC ] [ drill humming ]
(Brandon)>> That's a pretty good angle to start with right there. Until we get the drivetrain and the truck at ride height we're not gonna weld in anything. That way we can adjust pinion angle and get it correct.
(Marc)>> It's really happening. Coming up next.
(Brandon)>> This is an exciting day.
(Marc)>> This thing seems like a little bit of overkill.
(Marc)>> Welcome back to Music City Trucks. [ engine revving ]
(Marc)>> That's our awesome TrashHawk engine on the dyno in Engine Power.
(Brandon)>> And you can find the full engine build episode on Powernation. It's pretty cool to have our own engine shop just down the hall.
(Marc)>> Well it's off the dyno and in our hands.
(Brandon)>> Now since we're building a TrackHawk knockoff we had to have at least 707 horsepower, and the guys at Engine Power blew it away with 785 horsepower, which is massive.
(Marc)>> That's huge number, and there's nothing wrong with a little extra horsepower right? Now all we need to do is get this thing in TrashHawk.
(Brandon)>> This is an exciting day.
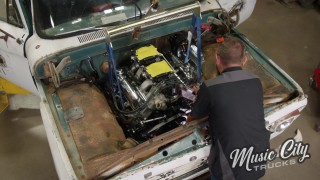
(Marc)>> This thing seems like a little bit of overkill. You good?
(Brandon)>> Yep. [ MUSIC ] Right there, perfect. I'm all the way in. [ MUSIC ] Did you ever envision saying back in the day, someone might stick an almost 800 horsepower engine in this thing?
(Marc)>> They definitely did not intend for that. They'd be proud though. [ MUSIC ] I'm gonna come down. [ MUSIC ] It's a little heavier than the other one was. [ MUSIC ]
(Brandon)>> Are we hitting on anything? It's sitting where it wants to. [ MUSIC ] This makes me happy.
(Marc)>> It should. All kinds of room. You want to drop the radiator in and see if it clears? Looks like there's gonna be plenty of room. We probably could have mounted it in front of the radiator support.
(Brandon)>> Well you'll still have an interference with the intake.
(Marc)>> It's okay. [ ratchet clicking ]
(Marc)>> One word.
(Brandon)>> One word, groundbreaking.
(Marc)>> My word is money. [ mechanical humming ]
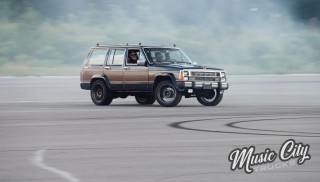
(Brandon)>> Dude I can't stop smiling. I legit can't stop smiling. [ MUSIC ] That's what we're gonna be doing on the track. [ MUSIC ]
(Marc)>> Now it's gonna be like this. You know when this project was just a sketch on a napkin we didn't expect the bigger pieces to fall together quite so easily.
(Brandon)>> We thought we had to at least pull the dash and the carpet and modify the firewall.
(Marc)>> But hey, we'll take it.
(Brandon)>> Adjust it?
(Marc)>> Adjust it a little bit. That's probably pretty good right there.
(Brandon)>> It's super close.
(Marc)>> Going up, angle look good too?
(Brandon)>> It could go down in the back or up in the front.
(Marc)>> Down in the back. Oh that's perfect. Ah look at that.
(Brandon)>> Like a glove. Alright you want to reset?
(Marc)>> Yeah.
(Brandon)>> Alright now that we've got the transmission in here let's slap that cross member in. [ MUSIC ] Whoa! [ drill humming ]
(Brandon)>> Now the only thing we had to do to the original trans cross member is make this pedestal for the transmission to sit on, and that's gonna give us enough room for the exhaust to go on both sides. [ air hissing ] [ MUSIC ]
(Marc)>> Another major component you need to figure out when you're doing an engine swap like this is the exhaust manifolds. Now we were gonna use headers that were for an S-10 with an LS swap but they didn't fit. So we ended up going with these cast iron manifolds from Hooker. They're actually for a Jeep Wrangler with an LS swap. Plenty of room in here. Another thing you'll notice that we've been using a lot are these ARP fasteners, and whether you pick their black oxide or the stainless steel like we're using they're super strong. They're even stronger than grade eight, but especially these stainless steel ones, they look nice as well. You can also get 6 point or 12 point heads. They offer kits whether it be head bolt or head stud kits, but also accessory kits and that's what we're using here. If you get one of those accessory kits it comes with everything for your belt drive. It comes with intake manifold bolts, valve cover bolts, oil pan, and even these for the manifold. A couple of things to keep in mind. When you are using these you've got to use the proper assembly lube that ARP provides and then torque them to spec. Another thing too, if they don't already offer what you're looking for they have a special order option and they'll make it for you. We just need to get these tightened up and then we're gonna move on to addressing this ride height. Coming up, it's a whole new suspension for TrashHawk.
(Brandon)>> And the ride height gets dialed in.
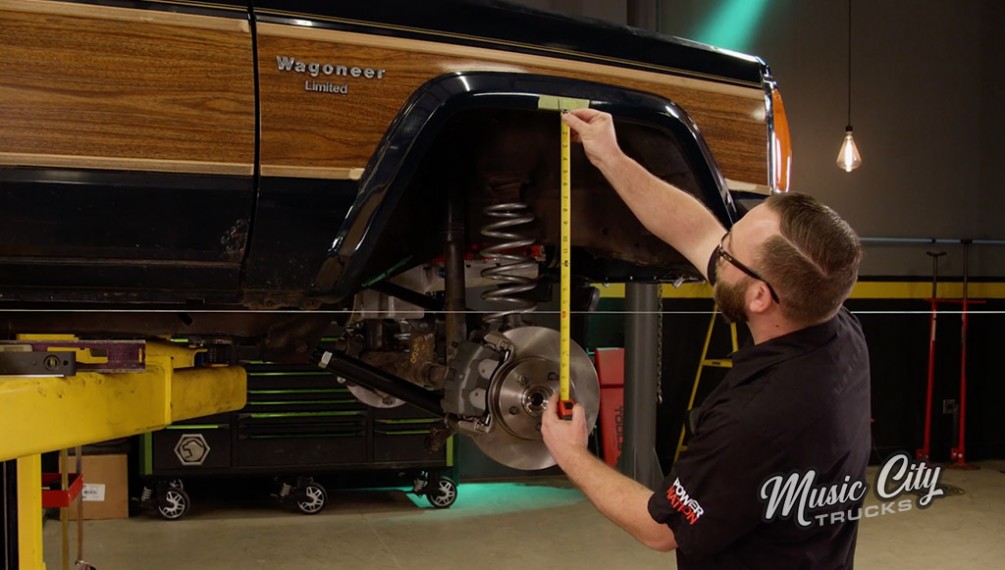
(Marc)>> We're making some great headway on TrashHawk today. We've got the engine and transmission installed permanently. I did an axle swap on the front from four wheel drive to two, and even upgraded the brakes. Back here Brandon swapped in this disc brake 8.8 out of an Explorer, and he even did a flip on it while he was at it which effectively lowered the rear suspension of our Jeep about six inches. Now that is where it's gonna be. We've actually got it compressed here and sitting at ride height. What's great now is that we get to use that as a starting point to set our ride height in the front. That way we can get this thing sitting on all fours, which I want to get to today. Now the way we're gonna do that to eliminate any variables is we're gonna use the string, which is setup at the center line of the rear axle at full compression. Now with this thing being level and the vehicle sitting at the rake we want it at at ride height. It's got a little bit of rake built in there. Let's double check and make sure this thing's level, and it is. Then we can determine where the center line of our front axle needs to be in relation to the wheel opening. What we're gonna do is measure that, which is 16 inches. Now that we know that number we can go ahead and strike the string, unload the rear suspension, compress the front suspension, see where we're at. [ MUSIC ] Now we've got the front suspension at full compression. Now we can get a measurement. That is 19 and three quarters. So we need to check a couple of other things before we determine what we need to do to make up that three and three quarters of an inch. We've got four and a half inches between the oil pan and the axle tube, which is plenty, and then between the upper control arm and the engine mount we've got exactly 3.5 inches. So that's a probably. If we raise the axle three and three quarters of inch like we need to to get to our measurement the control arm will just be sitting on the engine mount. So we can't do that. Plus we need a little extra room for up travel of the suspension, we'll say about an inch. So in order to get our coil cut we need to figure out how much of it we need to cut. So if we're gonna go two and a half inches we need to know how much height is in one single coil, and that is two inches. So we need to cutout one and a quarter coils. I just need to unload the suspension, pull the coils out, cut them, and we'll put them back in and compress it and try it. [ MUSIC ] [ saw buzzing ] [ MUSIC ]
(Marc)>> Okay moment of truth. We've got with our current setup the front as low as it's gonna go. It looks like it's not as low as the rear yet. Give it shake just to make sure and so now at this point we have to either lift the rear, which we can totally do, or figure out another way to lower the front, and we've already said the upper control arm is gonna hit the engine mount here. So that's the next point of contact. So I think you know which way I want to go, and that's gonna be get the cutoff wheel out and force this front to go down. [ MUSIC ] [ saw buzzing ]
(Marc)>> So what we're gonna do is cut the upper trailing arm pedestals and lower them to gain us some clearance. This is gonna change our geometry a bit but that's what the adjustable control arms are for. [ MUSIC ] Alright from the center of the bolt to the bottom of the axle tube is six and three quarters and that one's four and a quarter now. So that gained us two and a half inches. Well that was kind of a dirty way to get there but we've got plenty of travel and we've got a little extra room if we want to lower the front a little more. We're about an inch away from my goal here but before we do that I want to go ahead and raise the rear up just a little bit. We can always cut more out of those coils later.
(Brandon)>> And now we're gonna be lifting the rears with an add a leaf. This is a leaf that goes inside the pack you already have, and it's gonna increase the spring rate which increases the height by one and a half to two inches depending on your application. So let's get these in there. [ saw buzzing ] [ MUSIC ]
(Brandon)>> I think we were a little ambitious thinking we could lower the truck six inches all the way around with that stock straight axle, but with the add a leaf it's easy enough to raise the rear to match the front, which we kinda suspected we were gonna have to do anyway, but hey that's part of building hot rods.
(Marc)>> Well this project's getting real. We've got an almost 800 horsepower supercharged LS under the hood now, six speed manual gear box. We did a swap on the rear with a flip, and we even put a two wheel drive front axle here with bigger brakes.
(Brandon)>> We also lowered the truck about four inches after correcting the rear ride height.
(Marc)>> We've got some wheels and tires on order. So it's even gonna get lower once we get those on there. Can't wait to show you it on the ground on those.
(Brandon)>> So the next time you see TrashHawk it's gonna get a fuel system, exhaust, finish up all the wiring, and then go do burnouts.
(Marc)>> And doughnuts.
(Brandon)>> And burnouts.
(Marc)>> Mostly burnouts and doughnuts.
(Brandon)>> We need to order two more tires for the burnouts.
(Marc)>> Just pretty much anything that's gonna burn the tires off.
Show Full Transcript
(Marc)>> 999, 1,000! Coming up on Music City Trucks we've got a strong show for you, and it's not my muscle going under the hood here. Today we give TrashHawk new life in the front.
(Brandon)>> We beef up the back.
(Marc)>> And then! [ engine revving ]
(Brandon)>> This! [ engine revving ] [ MUSIC ]
(Brandon)>> Dude I can't stop smiling! I legit can't stop smiling! [ MUSIC ] [ engine revving ] [ MUSIC ]
(Marc)>> Welcome to Music City Trucks. We've got this '80's jewel in here complete with the wood grain package but it's not the body that's on the chopping block. It's everything underneath because we're building our vision of a TrackHawk knockoff that we're calling TrashHawk.
(Brandon)>> Now we've already had this LS engine installed into the truck but even after adding a supercharger this one didn't want to run.
(Marc)>> But we do have a real supercharged LS that's gonna go in the truck today along with all the other supporting drivetrain components like the six speed manual that we mocked up last time and both axles. Up front we've already determined we're switching to two wheel drive. So this Dana 30 four wheel drive has to go but we do have a cool brake upgrade we want to show you whether you've got a two wheel or four wheel XJ.
(Brandon)>> And I'm gonna be hitting the junkyard up for a rear axle that's one, gonna fit under the truck, and two it's gonna handle the 700 plus horsepower thrown at it, and while I'm back there I'm gonna adjust some altitude problems.
(Marc)>> Let's do this! Well here's the axle that we picked up from a junkyard for a couple hundred bucks. It's out of a 2001 Jeep Cherokee two wheel drive. It's got all the mounting provisions exactly the same as ours except it's two wheel drive. So it doesn't have any of the center section or axles. It's just a blank tube in here. Since it's a coil spring setup, and we are gonna lower this truck, we figured we'd just buy some lowering springs but low and behold we couldn't find any. But as you can imagine there's a ton of four wheel drive stuff available. So that's where we turned. There's a couple of things that we needed when we ordered a coil spring for the front of this vehicle. One we need a static rate, and then also we needed something that's gonna be high enough rate to handle the extra weight we're adding to our XJ here seeing that we're switching from a six cylinder to an eight cylinder, and we can accomplish that with this set of coil springs that we got from Summit Racing. These are for a lifted vehicle. So the only drawback is they're actually taller and they're gonna compress less than the factory springs would, but it's nothing a little cutting won't fix. We'll just cut a couple of coils out of there, but when you're lowering or even lifting a vehicle that has a four link, especially on a steer axle like this, you don't want to affect the castor too much. You need to compensate for that and you can do that with adjustable control arms. We actually got this set from Summit as well. The great thing about these is they're super heavy duty. Probably more heavy duty than we need, but they're easy to adjust and that's gonna help us when we get this thing all dialed in to get our alignment right. So for now all I need to do is get these coils cut. We'll get this front end installed. Notice we're using a cutoff wheel to cut our spring shorter. You never want to use a torch to either heat up and lower the spring or to torch it off because if you heat up the spring too much it's gonna sacrifice the integrity, and that could cause a failure. [ MUSIC ] Well with the control arms in place I can go ahead and get my cut springs in here. We are gonna have to order some shorter shocks later but we'll get to that. I could go ahead and get this thing installed but you remember I mentioned that brake upgrade earlier? I want to go ahead and show you how to do that now while I've got this axle sitting here on the stand. [ MUSIC ] We'll start by removing the caliper... [ MUSIC ] ...and then the rotor. [ drill humming ]
(Marc)>> Steering can be next. Then we can remove the spindle by unfastening the ball joints. [ MUSIC ] Well with that all torn down let's talk about our upgrade. I'm very excited about this because we're saving some money. Instead of going with an expensive big brake kit we're using all o-e-m style components that we got from RockAuto dot com. That's what you see here on the table. Let's start with the rotor. This is an 11 inch. This is standard on all XJ's. We're gonna switch to this 12 inch rotor. It has the same lug pattern, the five on four and a half, but this is from a 2002 Explorer SportTrac. Now as far as the caliper goes it's the single piston calipers that come on all XJ's. They're pretty puny, you can see here, compared to this dual piston caliper from a '99 to '04 Jeep Grand Cherokee, or a WJ Jeep. It's quite a bit upgrade but in order to get that stuff to work we need the spindles, or the knuckles from that WJ, and that's what this is here. We got these from a junkyard, couple hundred bucks. You could even buy the whole axle for that cheap, but that's not just gonna attach right to our XJ axle. We actually have to upgrade the ball joints a little bit. Get those pressed out, get the new ones in, and we can get all this stuff bolted on. [ drill humming ]
(Marc)>> We're gonna replace both the upper and lower ball joints. The uppers will get replaced with factory XJ joints while the lowers get replaced with longer WJ joint to match the knuckle. Now it's time to assemble the hubs. We're using XJ hub assemblies with a quarter inch spacer that we had made by Jimmy down in Carcass. The purpose of the spacer is to make sure the rotor and caliper are aligned properly. [ MUSIC ] And then we're home free to install the bracket... [ MUSIC ] ...pads... [ MUSIC ] ...and caliper. [ MUSIC ] Now we've got us a d-i-y big brake kit. Very nice! [ MUSIC ] Well we've got our brake upgrade all done except for the hose, but that's easy enough, and we've got our axle installed. It's hanging from the original shocks, which we'll need to order some shorter ones later but we have to get it set at ride height, and we can't do that until we get the engine and transmission in along with that rear end swap, and all that is coming up.
(Brandon)>> Coming up next, a new life for a junkyard axle.
(Brandon)>> Well I made it to Butler's and this is pretty much a truck guy's dream. They've got frames everywhere, bodies, tons of axles to choose from. So let's see if we can find what we need. Greg's got this yard pretty organized. So it wasn't too hard to find the Ford 8.8 axle that we wanted. It's the right width. It's got disc brakes, limited slip, 3.73 gears, and the best part it's the same bolt pattern as the front axle. So let's stop playing around, get this loaded up, and take it back to the shop. So with just a little research beforehand you usually could save a ton of money when upgrading your project. [ MUSIC ] That's why I love junkyards. Alright I'm pretty eager to get this Ford 8.8 under TrashHawk, but before we could do that I've got to take all the old suspension out, and that's gonna start with these old shocks. By the looks of it the underside has seen a lot more salt than we originally thought. Some of these components are pretty crusty. [ MUSIC ] There we go! Since we're swapping the axle I'm just gonna cut the U-bolts. Alright I want to give you a little perspective on how over torqued those U-bolts were. That's the top plate. It should not look like a banana, and this is the bolt. It is literally bent in another direction. That is over torqued. [ mechanical humming ]
(Brandon)>> And you can see how corroded and smashed the center is. It's actually lost thickness, and these are separating. There's no way that this is gonna hold 700 plus horsepower. [ drill humming ]
(Brandon)>> I'm gonna go ahead and take off the old shocks and the original sway bar to make room for our 8.8. [ MUSIC ] [ drill humming ] [ MUSIC ]
(Brandon)>> I ordered up all new components. So we're retiring these well cycled old leaves. Alright the first step in getting this 8.8 into the Jeep Cherokee is take these brakes loose and get these perches cut off. [ torch hissing ] [ MUSIC ]
(Brandon)>> Now the Ford 8.8 is the most common swap into any Jeep, and they make a bunch of kits. We got this one from Summit Racing. It comes with everything we need. We got the perches, the U-bolts, the backing plates. It even has the shock mounts. Now these kits are built with off road in mind, and they bolt up on the bottom side of the leaf. Now we're gonna repurpose this kit for a flip kit and put it on the top of the leaf like that, and that's gonna give us the six inch drop that we want. It's gonna have that mean look with a strong axle and we don't have to re-invent the wheel while doing it. [ MUSIC ] [ mechanical humming ] [ MUSIC ] [ drill humming ]
(Brandon)>> That's a pretty good angle to start with right there. Until we get the drivetrain and the truck at ride height we're not gonna weld in anything. That way we can adjust pinion angle and get it correct.
(Marc)>> It's really happening. Coming up next.
(Brandon)>> This is an exciting day.
(Marc)>> This thing seems like a little bit of overkill.
(Marc)>> Welcome back to Music City Trucks. [ engine revving ]
(Marc)>> That's our awesome TrashHawk engine on the dyno in Engine Power.
(Brandon)>> And you can find the full engine build episode on Powernation. It's pretty cool to have our own engine shop just down the hall.
(Marc)>> Well it's off the dyno and in our hands.
(Brandon)>> Now since we're building a TrackHawk knockoff we had to have at least 707 horsepower, and the guys at Engine Power blew it away with 785 horsepower, which is massive.
(Marc)>> That's huge number, and there's nothing wrong with a little extra horsepower right? Now all we need to do is get this thing in TrashHawk.
(Brandon)>> This is an exciting day.
(Marc)>> This thing seems like a little bit of overkill. You good?
(Brandon)>> Yep. [ MUSIC ] Right there, perfect. I'm all the way in. [ MUSIC ] Did you ever envision saying back in the day, someone might stick an almost 800 horsepower engine in this thing?
(Marc)>> They definitely did not intend for that. They'd be proud though. [ MUSIC ] I'm gonna come down. [ MUSIC ] It's a little heavier than the other one was. [ MUSIC ]
(Brandon)>> Are we hitting on anything? It's sitting where it wants to. [ MUSIC ] This makes me happy.
(Marc)>> It should. All kinds of room. You want to drop the radiator in and see if it clears? Looks like there's gonna be plenty of room. We probably could have mounted it in front of the radiator support.
(Brandon)>> Well you'll still have an interference with the intake.
(Marc)>> It's okay. [ ratchet clicking ]
(Marc)>> One word.
(Brandon)>> One word, groundbreaking.
(Marc)>> My word is money. [ mechanical humming ]
(Brandon)>> Dude I can't stop smiling. I legit can't stop smiling. [ MUSIC ] That's what we're gonna be doing on the track. [ MUSIC ]
(Marc)>> Now it's gonna be like this. You know when this project was just a sketch on a napkin we didn't expect the bigger pieces to fall together quite so easily.
(Brandon)>> We thought we had to at least pull the dash and the carpet and modify the firewall.
(Marc)>> But hey, we'll take it.
(Brandon)>> Adjust it?
(Marc)>> Adjust it a little bit. That's probably pretty good right there.
(Brandon)>> It's super close.
(Marc)>> Going up, angle look good too?
(Brandon)>> It could go down in the back or up in the front.
(Marc)>> Down in the back. Oh that's perfect. Ah look at that.
(Brandon)>> Like a glove. Alright you want to reset?
(Marc)>> Yeah.
(Brandon)>> Alright now that we've got the transmission in here let's slap that cross member in. [ MUSIC ] Whoa! [ drill humming ]
(Brandon)>> Now the only thing we had to do to the original trans cross member is make this pedestal for the transmission to sit on, and that's gonna give us enough room for the exhaust to go on both sides. [ air hissing ] [ MUSIC ]
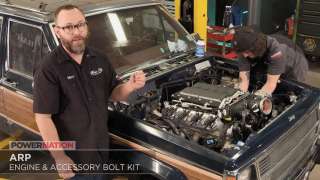
(Marc)>> Another major component you need to figure out when you're doing an engine swap like this is the exhaust manifolds. Now we were gonna use headers that were for an S-10 with an LS swap but they didn't fit. So we ended up going with these cast iron manifolds from Hooker. They're actually for a Jeep Wrangler with an LS swap. Plenty of room in here. Another thing you'll notice that we've been using a lot are these ARP fasteners, and whether you pick their black oxide or the stainless steel like we're using they're super strong. They're even stronger than grade eight, but especially these stainless steel ones, they look nice as well. You can also get 6 point or 12 point heads. They offer kits whether it be head bolt or head stud kits, but also accessory kits and that's what we're using here. If you get one of those accessory kits it comes with everything for your belt drive. It comes with intake manifold bolts, valve cover bolts, oil pan, and even these for the manifold. A couple of things to keep in mind. When you are using these you've got to use the proper assembly lube that ARP provides and then torque them to spec. Another thing too, if they don't already offer what you're looking for they have a special order option and they'll make it for you. We just need to get these tightened up and then we're gonna move on to addressing this ride height. Coming up, it's a whole new suspension for TrashHawk.
(Brandon)>> And the ride height gets dialed in.
(Marc)>> We're making some great headway on TrashHawk today. We've got the engine and transmission installed permanently. I did an axle swap on the front from four wheel drive to two, and even upgraded the brakes. Back here Brandon swapped in this disc brake 8.8 out of an Explorer, and he even did a flip on it while he was at it which effectively lowered the rear suspension of our Jeep about six inches. Now that is where it's gonna be. We've actually got it compressed here and sitting at ride height. What's great now is that we get to use that as a starting point to set our ride height in the front. That way we can get this thing sitting on all fours, which I want to get to today. Now the way we're gonna do that to eliminate any variables is we're gonna use the string, which is setup at the center line of the rear axle at full compression. Now with this thing being level and the vehicle sitting at the rake we want it at at ride height. It's got a little bit of rake built in there. Let's double check and make sure this thing's level, and it is. Then we can determine where the center line of our front axle needs to be in relation to the wheel opening. What we're gonna do is measure that, which is 16 inches. Now that we know that number we can go ahead and strike the string, unload the rear suspension, compress the front suspension, see where we're at. [ MUSIC ] Now we've got the front suspension at full compression. Now we can get a measurement. That is 19 and three quarters. So we need to check a couple of other things before we determine what we need to do to make up that three and three quarters of an inch. We've got four and a half inches between the oil pan and the axle tube, which is plenty, and then between the upper control arm and the engine mount we've got exactly 3.5 inches. So that's a probably. If we raise the axle three and three quarters of inch like we need to to get to our measurement the control arm will just be sitting on the engine mount. So we can't do that. Plus we need a little extra room for up travel of the suspension, we'll say about an inch. So in order to get our coil cut we need to figure out how much of it we need to cut. So if we're gonna go two and a half inches we need to know how much height is in one single coil, and that is two inches. So we need to cutout one and a quarter coils. I just need to unload the suspension, pull the coils out, cut them, and we'll put them back in and compress it and try it. [ MUSIC ] [ saw buzzing ] [ MUSIC ]
(Marc)>> Okay moment of truth. We've got with our current setup the front as low as it's gonna go. It looks like it's not as low as the rear yet. Give it shake just to make sure and so now at this point we have to either lift the rear, which we can totally do, or figure out another way to lower the front, and we've already said the upper control arm is gonna hit the engine mount here. So that's the next point of contact. So I think you know which way I want to go, and that's gonna be get the cutoff wheel out and force this front to go down. [ MUSIC ] [ saw buzzing ]
(Marc)>> So what we're gonna do is cut the upper trailing arm pedestals and lower them to gain us some clearance. This is gonna change our geometry a bit but that's what the adjustable control arms are for. [ MUSIC ] Alright from the center of the bolt to the bottom of the axle tube is six and three quarters and that one's four and a quarter now. So that gained us two and a half inches. Well that was kind of a dirty way to get there but we've got plenty of travel and we've got a little extra room if we want to lower the front a little more. We're about an inch away from my goal here but before we do that I want to go ahead and raise the rear up just a little bit. We can always cut more out of those coils later.
(Brandon)>> And now we're gonna be lifting the rears with an add a leaf. This is a leaf that goes inside the pack you already have, and it's gonna increase the spring rate which increases the height by one and a half to two inches depending on your application. So let's get these in there. [ saw buzzing ] [ MUSIC ]
(Brandon)>> I think we were a little ambitious thinking we could lower the truck six inches all the way around with that stock straight axle, but with the add a leaf it's easy enough to raise the rear to match the front, which we kinda suspected we were gonna have to do anyway, but hey that's part of building hot rods.
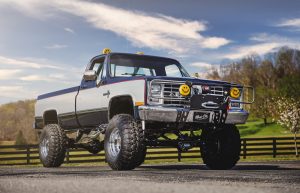
(Marc)>> Well this project's getting real. We've got an almost 800 horsepower supercharged LS under the hood now, six speed manual gear box. We did a swap on the rear with a flip, and we even put a two wheel drive front axle here with bigger brakes.
(Brandon)>> We also lowered the truck about four inches after correcting the rear ride height.
(Marc)>> We've got some wheels and tires on order. So it's even gonna get lower once we get those on there. Can't wait to show you it on the ground on those.
(Brandon)>> So the next time you see TrashHawk it's gonna get a fuel system, exhaust, finish up all the wiring, and then go do burnouts.
(Marc)>> And doughnuts.
(Brandon)>> And burnouts.
(Marc)>> Mostly burnouts and doughnuts.
(Brandon)>> We need to order two more tires for the burnouts.
(Marc)>> Just pretty much anything that's gonna burn the tires off.