
Engine Power Featured Projects


Engine Power Builds


Want more content like this?
Join the PowerNation Email Newsletter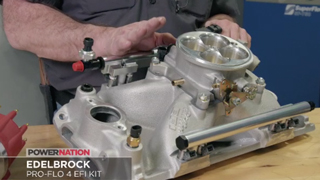
Episode Transcript
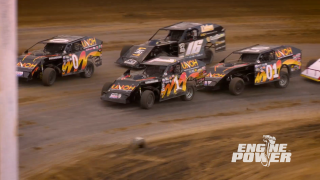
(Narrator)>> BMR Racing has the skill and experience to win endurance races, but their engine could use a little work. Today on Engine Power we meet the team competing with a fox body Mustang in a field full of exotics. And then we get started on a power plant to provide almost three times the horsepower of their current bullet. ♪ ♪
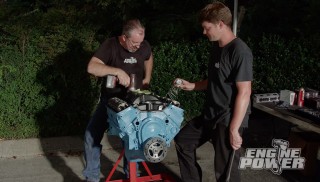
(Pat)>> Welcome to Engine Power. Today we have some very special guests in house because we're involved with a project that we're very excited about. We have the guys here from BMR Racing, and teaming up with Summit we are going to do something pretty special.
(Mike)>> Now last year we were afforded the opportunity to build a UMP open wheel modified. Now this is all based off of grassroots racings, and this time we're teaming up with the endurance team to build an engine that has to have good parts and be built right to be bulletproof. Tell us a little bit about how the original startup of the car went as far as parts and your goals for the car.
(Bill)>> Okay the original car was built for drag racing. I mean somebody took a stock 302, put a cam in it, and we had a time crunch. And it was the best fox body Mustang that we could find in our area. We left the stock, well stock plus cam engine in it. We upgraded the suspension some. Better wheels, tires obviously, better springs, sway bars and we went out and raced it cause that's all the time we had for it. The engine last about five hours into a 24 hour race and it just completely gave up its guts on the track. At that point we found a stock engine. It was actually a Ford remanufactured five-zero stock engine, and the reason why we kept going with the stock engines is because it was reliable.
(Mike)>> Now how many laps do you guys usually run this car a year?
(Bill)>> One race is eight to nine hours.
(Scott)>> 500 miles in one race weekend.
(Mike)>> Now there's five different classes that run in this endurance series. What class is this car slated in?
(Bill)>> Right now it's in class three, but the classes are based off of your lap time. There's a qualification day and they just separate everybody that way. We're aiming for class five, which is the fastest class.
(Pat)>> Okay so now fast forward to what was the inspiration to start on a different bullet for this thing and upgrade the car? You want to run in the class fives? That's the motivation?
(Bill)>> Yes.
(Max)>> And like we were saying before, we're racing car. I mean we're all super competitive, and when you're running mid pack it's a good time but all of us want to be up front.
(Pat)>> When you're mashing the pedal down and you're denting the floor because the car won't go any faster, that's what's going on right now.
(Max)>> And in a series kinda overrun by European cars it's nice to stand out with that American muscle, you know what I'm saying.
(Pat)>> I agree. Is there any other American cars in this? I mean do any other run?
(Scott)>> Occasionally one other fox body will show up but for the most part it's all European sport cars.
(Tommy)>> These guys have been working on the cars over the years and we've been getting faster and faster every year. You know a second here, a second there, but we're finishing lower and lower because they're coming out with BMW's and Porsches, and we're kinda in the wrong class. And it is a lot of fun but we'd still like to be up at the front. It's not a lot of fun in October if you've got no chance at winning. That's why this project is very important for us because you guys are gonna put us back winning again.
(Scott)>> Right now what's holding us back is the power. I mean we've run the neck out of this car as much as we possibly can. I mean we're driving this thing to death. We're killing the car just over compensating for the lack of power.
(Mike)>> What kind of power are you guys looking for?
(Bill)>> We're looking for between 550 and 600 horsepower. With our weight that's what we need.
(Pat)>> What you want is achievable and I think with the parts that we've got, we've got a lot of great parts from Summit, and I think we are gonna be a player. I say we like I'm gonna be there driving the damn thing, but that's you guys. You know what I'm saying?
(Tommy)>> You can drive if you want.
(Pat)>> Oh no, you don't want me driving. What we've decided between everyone, this is gonna be a 363 inch deal. The block is a Dart Iron Eagle. The thing's four and an eight bore. The big appeal with this engine is every part of it's available through Summit, and this is gonna be a bolt together deal. It's gonna make some great power. So at 363 inches we have a set of Trick Flow 11-R heads. They flow a ton of air. The valvetrain in them, we're having a more endurance based valvetrain with Jesel stuff. Very rigid, very accurate. Forged rotating assembly with Lunati crank and some Eagle rods. DSS made us a nice set of pistons for this thing. This thing is still gonna be a pump gas engine. We've got a bunch of parts that are gonna compliment everything that's you, and we're gonna build you an anvil is what we're gonna do.
(Bill)>> We're excited.
(Pat)>> Very excited to be a part of this, and we're flattered and honored that we're gonna help you out with this.
(Tommy)>> No we're flattered that you guys are gonna do it for us. I just can't wait for the payoff.
(Scott)>> And we'd like to thank you guys and Summit for being part of this and helping us with this project. I know it's in good hands with you guys.
(Pat)>> Thank you very much. It's gonna be fun!
(Narrator)>> Up next, when you're building an endurance engine attention to detail is critical.
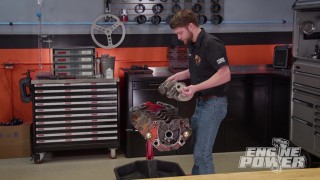
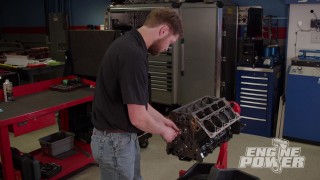
(Mike)>> This build has to start somewhere. So we decided to prep the foundation to get it ready for all the slick parts it's about to receive. Now that's a Dart Iron Eagle small block Ford block that's designed for hardcore racing. Endurance races are just that. Due to the long run times and big r-p-m swings that this engine's going to see.
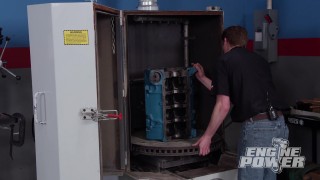
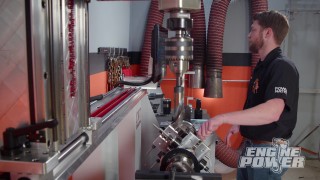
(Pat)>> Dart has addressed all the weaknesses of the factory castings by improving the cylinder wall thickness and decks, and beefing up the main webbing while adding four bolt steel main caps. The three center caps have splayed outer bolts for additional strength. The oiling system is a low restriction priority main oiling design that also has an inlet in the rear for an external oil pump feed. The head bolt holes are blind tapped to eliminate any water leakage, and the entire operation is cast out of premium high strength cast iron. It was shipping with a four-115 bore. So we have to put our Sunnen SV 15 hone to work. The final bore will be four-125. So we have to remove 10 thousandths of material from the cylinders. To properly hone a block a torque plate is a must. So is a gasket with the same bore diameter. We also have to make sure that the bolt length is the same. That will make sure the bore distortion when torqueing the bolt is the same as when the cylinder head is torqued to the block.
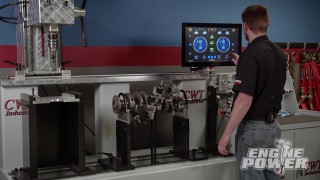
(Mike)>> We've went ahead and roughed the block out before the plate was installed. So with the dial bore gauge set to our final bore size we have five thousandths left to hone.
(Pat)>> Now the hone is positioned over the first cylinder that will be enlarged. Then it's carefully guided into the bore and the flexible hose for the honing oil is positioned over that. The hone is turned on and the material removal has begun. When you see the up and down motion stop while the hone is still spinning that is called dwell. The machine detects a tight spot and will focus on that area to get everything even before it continues the cycle. We're using a 220 grit diamond abrasive to size the cylinder within a half thousandths of final dimension. Once the first cylinder is finished there are no more adjustments needed for the machine until we switch stones for final bore sizing. Absolutely gorgeous!
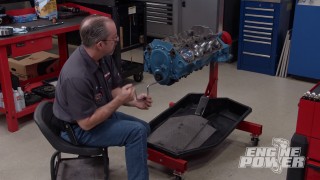
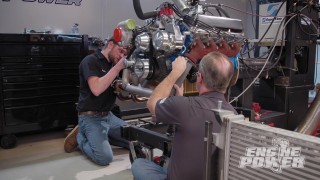
(Mike)>> And for final sizing we are switching out to an 800 diamond abrasive. This will allow us to precisely remove the last half thousandths to achieve a plateau hone finish and the final bore size of four-125. This is not the only machining needed. We are going to remove the main caps and give everything a quick wash to remove the honing oil. After that a mock up is necessary to determine how much the decks need to be cut for where we want the piston's position in the bore at t-d-c. With a clean block mounted to our engine stand we can begin that mock up phase of this 363 cubic inch endurance engine build.
(Pat)>> It involves installing the new crankshaft along with the rod and piston assemblies, but they will not have any spiral locks or piston rings on them. That allows us to rotate every piston up to t-d-c and measure to determine how much deck has to come off this thing to achieve our proper deck clearance. Now we're not worried about checking bearing clearances at this time, and we're gonna be using a set of mock up bearings to get the job done.
(Mike)>> We use regular engine oil on the bearings for this, and we don't have to torque anything. Now the crank is laid in place and the main caps positioned in their assigned locations. The main bolts are snugged down, so the caps are aligned. The piston and rod assembly is installed and the cap is snugged. A bridge and dial indicator is placed on the deck and zeroed out.
(Pat)>> Now the piston is positioned at top dead center using the indicator. It's placed over the top half of the piston and rocked back and forth. It measures 10.5 thousandths. The same procedure is done to the bottom half of the piston. This reading is 11 thousandths. We will check this block at all four corners, which will let us know how accurate the decks are. They were within one thousandths corner to corner. So we won't have to have the deck cut because at 11 thousandths in the hole we can get what we want for deck clearance with the proper head gasket.
(Narrator)>> Coming up the small block Ford gets some color, and a crank.
[ drill spinning ]
(Mike)>> The next phase of this build is more prep work. Engine blocks can always use some love in the deburring department. Deburring is simple removing sharp edges from the block to make it safer to handle and also remove stress risers, which are associated with the start of cracks in the casting. This process is very simple. A die grinder and carbide burr allow you to remove all the sharp edges. Don't let the burr gouge the block. Use extreme light pressure so just the 90 degree sharp edge is removed.
(Pat)>> Pretty much every edge you can get to safely will benefit from this procedure. After you've hit the last area use a cartridge roll to finish it off. [ grinder buzzing ]
(Pat)>> The cylinders also need to be chamfered. A drill and a cylinder chamfering cone is what you'll need. The reason for this is to aid in ring installation. A minimal amount of material is removed. Too much taken out and compression could be sacrificed. ♪ ♪
(Mike)>> After deburring and chamfering a thorough wash is necessary. We're using our JRI heated block washer but if you are doing this at home a good degreaser and soap mix will get the job done. A pressure washer or water hose will finish it off. With the block out of the washer and mated back to the stand it's time to add some color. The BMR race team specifically requested Ford blue. Dupli-Color will allow us to meet their request with their engine enamel with ceramic in the famous blue oval Ford blue color. You can use it on blocks, intake manifolds, oil pans, valve covers, and any other engine accessory. It's resistant to oil and fluids, and withstands heat up to 500 degrees intermittent.
(Pat)>> Before we stick in anything permanent in the block, like the plugs or the cam bearings, we are gonna set our main bearing clearance, and the reason is if we have to have the block align honed we'll have to clean it again and that will put grit behind our cam bearing and be tough to get out.
(Mike)>> We will check the clearances with a standard set of bearings first. If our clearance is tight for the application there are some options to correct it. Our crankshaft journal measures two point two-four-eight-three. Now we can setup the dial bore gauge and make sure it's zeroed out.
(Pat)>> With a standard set of bearings the clearance between the main bearing and the crankshaft journal is 15 ten thousandths, which is insufficient for our application. To get it in range a set of XBearings are necessary. The "X" stands for an additional one thousandths of bearing clearance. Remember the rule of thumb for proper clearance is one thousandths per inch of shaft diameter in a race application like this. For most popular engine platforms both one thousandths additional and one thousandths less clearance are available. Now the XBearings are installed. The bore gauge is already setup. So all we have to do is measure the i-d of these. We have 25 ten thousandths of clearance, which is really good. The minimum would be 24 ten thousandths due to the shaft diameter.
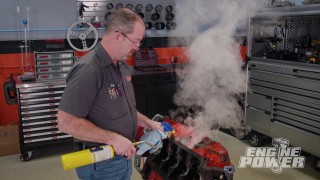
(Mike)>> If your vehicle has a vacuum leak it won't run well. So to find vacuum leaks easy use the new Matco Tools' Smoke Leak Locator. It's the smallest and lightest fully featured machine available, and it detects leaks as small as ten thousandths of an inch. In addition the Smoke Leak Locator performs air leak decay tests. The cerama-heat technology produces thick dense smoke, and the machine runs on either baby oil or mineral oil. Now it also comes with this nice plastic case to house all the accessories. You can find out more information about it at Matco Tools dot com.
(Pat)>> If you have a 1986 or older small block Chevy and want the benefits of a self-learning electronic fuel injection system then the Edelbrock Pro Flow Four EFI Kit is what you need. It comes with a traditional satin finish single plane intake manifold, a 41-50 style 1,000 c-f-m throttle body, and is equipped with 29 pound per hour injectors capable of 450 horsepower at 58 p-s-i of fuel pressure. A plug and play single connection distributor that is specifically designed to work with the Pro Flow Four is included too. The new e-c-u has a faster processor. So the self-learning curve is super fast, and an easy setup wizard will get you going once the system is installed. The optional android tablet will allow you to download the ETuner Four App for free or use your smart phone to control the system to see all of your engine's vitals. To find out more and purchase an Edelbrock Pro Flow Four go to Edelbrock dot com.
(Narrator)>> Up next, for any engine to go the distance a balanced rotating assembly is a must.
(Mike)>> During the break we installed the cam bearings. Here's a quick look at one of them. They are supplied from Dart and are specific to the block. A PTFE rear main seal is placed on the crankshaft. This type of seal does not get lubricated when installed. For reference it was ordered for a '92 fox body Mustang with a five liter.
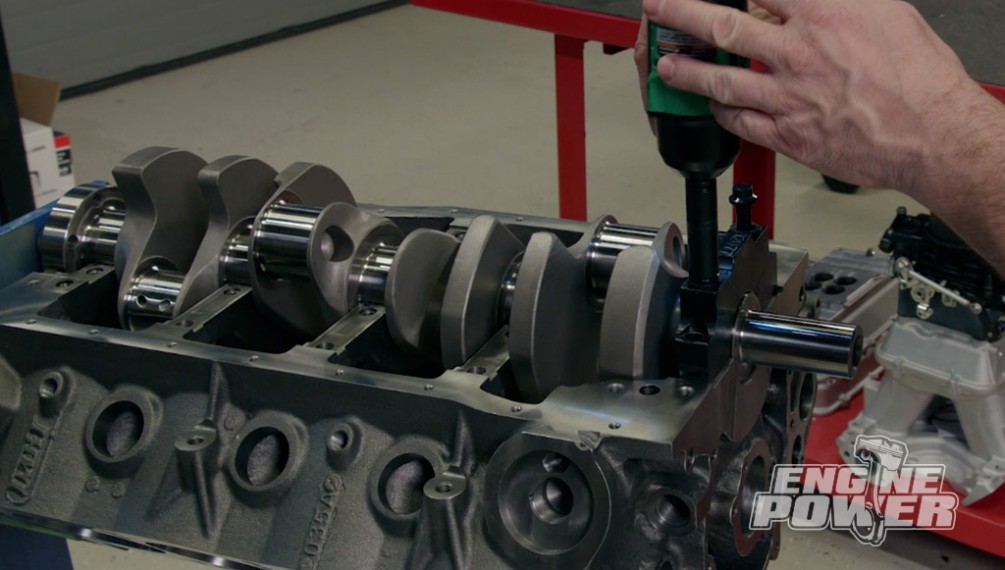
(Pat)>> This is a Lunati Voodoo 43-40 non-twist forged crankshaft. It has a three-400 stroke, two-250 main journals, and two-100 rod journals, and must be used with narrowed or chamfered rod and main bearings. Lightening holes in the rod journals reduce crankshaft inertia for increase engine acceleration. It has micro polished journals and has been nitride heat treated.
(Mike)>> With the XBearings in place Permatex Ultra Slick assembly lube will protect the bearings and journals from any damage during initial startup. ♪ ♪ [ drill spinning ] [ torque wrench beeping ] ♪ ♪
(Mike)>> We had the rotating assembly balanced at Shacklett Auto Machine in Nashville, Tennessee. They are a full service machine shop that deals with everything from stock rebuilds to high end race engines of all types. Because we used individual components instead of a complete kit we are responsible for getting it balance. Now we're going to determine what the bob weight total is by weighing the components here. That includes the piston, rings, bearings, and connecting rod.
(Pat)>> It requires a rod balancing fixture and an accurate scale. Both of these came from Goodson. The first thing we do is weigh for the reciprocating weight. It includes the pistons, pins, locks, rings, and small end of the connecting rod. It is all recorded in grams. Next we will weight for the rotating weight, which is a set of bearings and the big end of the connecting rod. This weight is multiplied by two since there are two assemblies on each journal. Our bob weight total is 1,747 grams.
(Mike)>> Billy Trask used our bob weight card to make up bob weights for the balancing process. After the weights are attached to the crank journals the crank is spun up to see how much material has to be removed from the counterweights. This is done repeated until the crank is within spec for our application. After balancing the crankshaft will be polished, cleaned, then ready to install.
(Pat)>> The crank only needed 13 grams off on the front and eight grams off on the back to get it within spec for our application. To remove the weight materials is drilled from the counterweight side where the Hines Balancer references the location. When we return to the Summit 363 build we'll begin assembly. Until then for more information on anything you've seen today visit Powernation TV dot com. ♪ ♪
(Pat)>> There are more intake manifolds on the market today than you can shake a stick at. There are ones for single, double, and even triple carburetors, and there's also a bunch for fuel injection, like stack injection, multi-point, or even throttle body. Plus different types of manifolds from dual plane, single plane, and even tunnel rams.
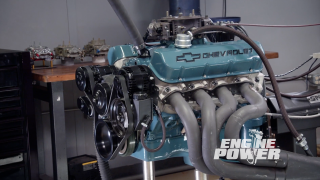
(Mike)>> The purpose of manifold talk today is for a specific engine we recently dynoed. We saw significant gains between a dual plane and a single plane version. Now there are several reasons why we see changes in air flow characteristics, r-p-m ranges, fuel delivery, and of course power.
(Pat)>> A dual plane separates the manifold into two different plenum sections. Each one along with its separate set of runners to connect every other cylinder in the firing order. This allows a dual plane to see induction pulses every 180 degrees of crankshaft rotation. That allows them to do a better job of balancing the air and fuel mixture from cylinder to cylinder throughout the r-p-m range. Although these manifolds are great at fuel distribution they are quite restrictive in a high performance application due to their small cross sectional area in the plenum. They are designed for good drivability and low to mid r-p-m ranges, but that doesn't mean that they won't make power. We have had several of these that'll make over 500 horsepower. A single plane intake manifold has a single open plenum that sees all eight cylinders. A larger cross sectional area and a deeper plenum allow these manifolds to flow a lot more air than a dual plane. They are designed for more mid to high r-p-m applications.
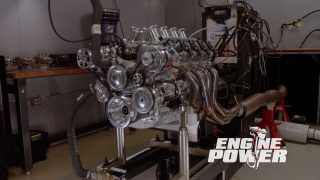
(Mike)>> If hood clearance is not an issue a tunnel ram is a great choice for performance in a wide r-p-m range. Now it's still a single plane design but its advantage is a straight runner with a clear eye shot from the carburetor all the way down to the intake valve. Depending on the runner length and plenum volume they can be designed to make power virtually anywhere in the r-p-m range. As low as 4,000 and as high as 10,000 r-p-m. The difference in dual plane and single plane power was displayed in excellent fashion with our "Old Gray Mare" 408 inch stroker. We ran both a dual plane and single plane manifold, and here are the results. [ engine revving ]
[ engine revving ]
(Mike)>> Now that you've seen that you know the advantages of a single plane manifold. The same goes for a tunnel ram. If you have a daily driver that's pretty mild the dual plane is the way to go, but if you've got a car that you take to the strip and drive on the street definitely lean towards a single plane.
Show Full Transcript
(Pat)>> Welcome to Engine Power. Today we have some very special guests in house because we're involved with a project that we're very excited about. We have the guys here from BMR Racing, and teaming up with Summit we are going to do something pretty special.
(Mike)>> Now last year we were afforded the opportunity to build a UMP open wheel modified. Now this is all based off of grassroots racings, and this time we're teaming up with the endurance team to build an engine that has to have good parts and be built right to be bulletproof. Tell us a little bit about how the original startup of the car went as far as parts and your goals for the car.
(Bill)>> Okay the original car was built for drag racing. I mean somebody took a stock 302, put a cam in it, and we had a time crunch. And it was the best fox body Mustang that we could find in our area. We left the stock, well stock plus cam engine in it. We upgraded the suspension some. Better wheels, tires obviously, better springs, sway bars and we went out and raced it cause that's all the time we had for it. The engine last about five hours into a 24 hour race and it just completely gave up its guts on the track. At that point we found a stock engine. It was actually a Ford remanufactured five-zero stock engine, and the reason why we kept going with the stock engines is because it was reliable.
(Mike)>> Now how many laps do you guys usually run this car a year?
(Bill)>> One race is eight to nine hours.
(Scott)>> 500 miles in one race weekend.
(Mike)>> Now there's five different classes that run in this endurance series. What class is this car slated in?
(Bill)>> Right now it's in class three, but the classes are based off of your lap time. There's a qualification day and they just separate everybody that way. We're aiming for class five, which is the fastest class.
(Pat)>> Okay so now fast forward to what was the inspiration to start on a different bullet for this thing and upgrade the car? You want to run in the class fives? That's the motivation?
(Bill)>> Yes.
(Max)>> And like we were saying before, we're racing car. I mean we're all super competitive, and when you're running mid pack it's a good time but all of us want to be up front.
(Pat)>> When you're mashing the pedal down and you're denting the floor because the car won't go any faster, that's what's going on right now.
(Max)>> And in a series kinda overrun by European cars it's nice to stand out with that American muscle, you know what I'm saying.
(Pat)>> I agree. Is there any other American cars in this? I mean do any other run?
(Scott)>> Occasionally one other fox body will show up but for the most part it's all European sport cars.
(Tommy)>> These guys have been working on the cars over the years and we've been getting faster and faster every year. You know a second here, a second there, but we're finishing lower and lower because they're coming out with BMW's and Porsches, and we're kinda in the wrong class. And it is a lot of fun but we'd still like to be up at the front. It's not a lot of fun in October if you've got no chance at winning. That's why this project is very important for us because you guys are gonna put us back winning again.
(Scott)>> Right now what's holding us back is the power. I mean we've run the neck out of this car as much as we possibly can. I mean we're driving this thing to death. We're killing the car just over compensating for the lack of power.
(Mike)>> What kind of power are you guys looking for?
(Bill)>> We're looking for between 550 and 600 horsepower. With our weight that's what we need.
(Pat)>> What you want is achievable and I think with the parts that we've got, we've got a lot of great parts from Summit, and I think we are gonna be a player. I say we like I'm gonna be there driving the damn thing, but that's you guys. You know what I'm saying?
(Tommy)>> You can drive if you want.
(Pat)>> Oh no, you don't want me driving. What we've decided between everyone, this is gonna be a 363 inch deal. The block is a Dart Iron Eagle. The thing's four and an eight bore. The big appeal with this engine is every part of it's available through Summit, and this is gonna be a bolt together deal. It's gonna make some great power. So at 363 inches we have a set of Trick Flow 11-R heads. They flow a ton of air. The valvetrain in them, we're having a more endurance based valvetrain with Jesel stuff. Very rigid, very accurate. Forged rotating assembly with Lunati crank and some Eagle rods. DSS made us a nice set of pistons for this thing. This thing is still gonna be a pump gas engine. We've got a bunch of parts that are gonna compliment everything that's you, and we're gonna build you an anvil is what we're gonna do.
(Bill)>> We're excited.
(Pat)>> Very excited to be a part of this, and we're flattered and honored that we're gonna help you out with this.
(Tommy)>> No we're flattered that you guys are gonna do it for us. I just can't wait for the payoff.
(Scott)>> And we'd like to thank you guys and Summit for being part of this and helping us with this project. I know it's in good hands with you guys.
(Pat)>> Thank you very much. It's gonna be fun!
(Narrator)>> Up next, when you're building an endurance engine attention to detail is critical.
(Mike)>> This build has to start somewhere. So we decided to prep the foundation to get it ready for all the slick parts it's about to receive. Now that's a Dart Iron Eagle small block Ford block that's designed for hardcore racing. Endurance races are just that. Due to the long run times and big r-p-m swings that this engine's going to see.
(Pat)>> Dart has addressed all the weaknesses of the factory castings by improving the cylinder wall thickness and decks, and beefing up the main webbing while adding four bolt steel main caps. The three center caps have splayed outer bolts for additional strength. The oiling system is a low restriction priority main oiling design that also has an inlet in the rear for an external oil pump feed. The head bolt holes are blind tapped to eliminate any water leakage, and the entire operation is cast out of premium high strength cast iron. It was shipping with a four-115 bore. So we have to put our Sunnen SV 15 hone to work. The final bore will be four-125. So we have to remove 10 thousandths of material from the cylinders. To properly hone a block a torque plate is a must. So is a gasket with the same bore diameter. We also have to make sure that the bolt length is the same. That will make sure the bore distortion when torqueing the bolt is the same as when the cylinder head is torqued to the block.
(Mike)>> We've went ahead and roughed the block out before the plate was installed. So with the dial bore gauge set to our final bore size we have five thousandths left to hone.
(Pat)>> Now the hone is positioned over the first cylinder that will be enlarged. Then it's carefully guided into the bore and the flexible hose for the honing oil is positioned over that. The hone is turned on and the material removal has begun. When you see the up and down motion stop while the hone is still spinning that is called dwell. The machine detects a tight spot and will focus on that area to get everything even before it continues the cycle. We're using a 220 grit diamond abrasive to size the cylinder within a half thousandths of final dimension. Once the first cylinder is finished there are no more adjustments needed for the machine until we switch stones for final bore sizing. Absolutely gorgeous!
(Mike)>> And for final sizing we are switching out to an 800 diamond abrasive. This will allow us to precisely remove the last half thousandths to achieve a plateau hone finish and the final bore size of four-125. This is not the only machining needed. We are going to remove the main caps and give everything a quick wash to remove the honing oil. After that a mock up is necessary to determine how much the decks need to be cut for where we want the piston's position in the bore at t-d-c. With a clean block mounted to our engine stand we can begin that mock up phase of this 363 cubic inch endurance engine build.
(Pat)>> It involves installing the new crankshaft along with the rod and piston assemblies, but they will not have any spiral locks or piston rings on them. That allows us to rotate every piston up to t-d-c and measure to determine how much deck has to come off this thing to achieve our proper deck clearance. Now we're not worried about checking bearing clearances at this time, and we're gonna be using a set of mock up bearings to get the job done.
(Mike)>> We use regular engine oil on the bearings for this, and we don't have to torque anything. Now the crank is laid in place and the main caps positioned in their assigned locations. The main bolts are snugged down, so the caps are aligned. The piston and rod assembly is installed and the cap is snugged. A bridge and dial indicator is placed on the deck and zeroed out.
(Pat)>> Now the piston is positioned at top dead center using the indicator. It's placed over the top half of the piston and rocked back and forth. It measures 10.5 thousandths. The same procedure is done to the bottom half of the piston. This reading is 11 thousandths. We will check this block at all four corners, which will let us know how accurate the decks are. They were within one thousandths corner to corner. So we won't have to have the deck cut because at 11 thousandths in the hole we can get what we want for deck clearance with the proper head gasket.
(Narrator)>> Coming up the small block Ford gets some color, and a crank.
[ drill spinning ]
(Mike)>> The next phase of this build is more prep work. Engine blocks can always use some love in the deburring department. Deburring is simple removing sharp edges from the block to make it safer to handle and also remove stress risers, which are associated with the start of cracks in the casting. This process is very simple. A die grinder and carbide burr allow you to remove all the sharp edges. Don't let the burr gouge the block. Use extreme light pressure so just the 90 degree sharp edge is removed.
(Pat)>> Pretty much every edge you can get to safely will benefit from this procedure. After you've hit the last area use a cartridge roll to finish it off. [ grinder buzzing ]
(Pat)>> The cylinders also need to be chamfered. A drill and a cylinder chamfering cone is what you'll need. The reason for this is to aid in ring installation. A minimal amount of material is removed. Too much taken out and compression could be sacrificed. ♪ ♪
(Mike)>> After deburring and chamfering a thorough wash is necessary. We're using our JRI heated block washer but if you are doing this at home a good degreaser and soap mix will get the job done. A pressure washer or water hose will finish it off. With the block out of the washer and mated back to the stand it's time to add some color. The BMR race team specifically requested Ford blue. Dupli-Color will allow us to meet their request with their engine enamel with ceramic in the famous blue oval Ford blue color. You can use it on blocks, intake manifolds, oil pans, valve covers, and any other engine accessory. It's resistant to oil and fluids, and withstands heat up to 500 degrees intermittent.
(Pat)>> Before we stick in anything permanent in the block, like the plugs or the cam bearings, we are gonna set our main bearing clearance, and the reason is if we have to have the block align honed we'll have to clean it again and that will put grit behind our cam bearing and be tough to get out.
(Mike)>> We will check the clearances with a standard set of bearings first. If our clearance is tight for the application there are some options to correct it. Our crankshaft journal measures two point two-four-eight-three. Now we can setup the dial bore gauge and make sure it's zeroed out.
(Pat)>> With a standard set of bearings the clearance between the main bearing and the crankshaft journal is 15 ten thousandths, which is insufficient for our application. To get it in range a set of XBearings are necessary. The "X" stands for an additional one thousandths of bearing clearance. Remember the rule of thumb for proper clearance is one thousandths per inch of shaft diameter in a race application like this. For most popular engine platforms both one thousandths additional and one thousandths less clearance are available. Now the XBearings are installed. The bore gauge is already setup. So all we have to do is measure the i-d of these. We have 25 ten thousandths of clearance, which is really good. The minimum would be 24 ten thousandths due to the shaft diameter.
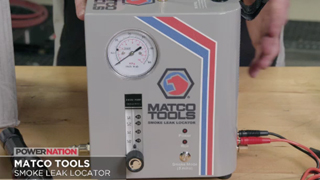
(Mike)>> If your vehicle has a vacuum leak it won't run well. So to find vacuum leaks easy use the new Matco Tools' Smoke Leak Locator. It's the smallest and lightest fully featured machine available, and it detects leaks as small as ten thousandths of an inch. In addition the Smoke Leak Locator performs air leak decay tests. The cerama-heat technology produces thick dense smoke, and the machine runs on either baby oil or mineral oil. Now it also comes with this nice plastic case to house all the accessories. You can find out more information about it at Matco Tools dot com.
(Pat)>> If you have a 1986 or older small block Chevy and want the benefits of a self-learning electronic fuel injection system then the Edelbrock Pro Flow Four EFI Kit is what you need. It comes with a traditional satin finish single plane intake manifold, a 41-50 style 1,000 c-f-m throttle body, and is equipped with 29 pound per hour injectors capable of 450 horsepower at 58 p-s-i of fuel pressure. A plug and play single connection distributor that is specifically designed to work with the Pro Flow Four is included too. The new e-c-u has a faster processor. So the self-learning curve is super fast, and an easy setup wizard will get you going once the system is installed. The optional android tablet will allow you to download the ETuner Four App for free or use your smart phone to control the system to see all of your engine's vitals. To find out more and purchase an Edelbrock Pro Flow Four go to Edelbrock dot com.
(Narrator)>> Up next, for any engine to go the distance a balanced rotating assembly is a must.
(Mike)>> During the break we installed the cam bearings. Here's a quick look at one of them. They are supplied from Dart and are specific to the block. A PTFE rear main seal is placed on the crankshaft. This type of seal does not get lubricated when installed. For reference it was ordered for a '92 fox body Mustang with a five liter.
(Pat)>> This is a Lunati Voodoo 43-40 non-twist forged crankshaft. It has a three-400 stroke, two-250 main journals, and two-100 rod journals, and must be used with narrowed or chamfered rod and main bearings. Lightening holes in the rod journals reduce crankshaft inertia for increase engine acceleration. It has micro polished journals and has been nitride heat treated.
(Mike)>> With the XBearings in place Permatex Ultra Slick assembly lube will protect the bearings and journals from any damage during initial startup. ♪ ♪ [ drill spinning ] [ torque wrench beeping ] ♪ ♪
(Mike)>> We had the rotating assembly balanced at Shacklett Auto Machine in Nashville, Tennessee. They are a full service machine shop that deals with everything from stock rebuilds to high end race engines of all types. Because we used individual components instead of a complete kit we are responsible for getting it balance. Now we're going to determine what the bob weight total is by weighing the components here. That includes the piston, rings, bearings, and connecting rod.
(Pat)>> It requires a rod balancing fixture and an accurate scale. Both of these came from Goodson. The first thing we do is weigh for the reciprocating weight. It includes the pistons, pins, locks, rings, and small end of the connecting rod. It is all recorded in grams. Next we will weight for the rotating weight, which is a set of bearings and the big end of the connecting rod. This weight is multiplied by two since there are two assemblies on each journal. Our bob weight total is 1,747 grams.
(Mike)>> Billy Trask used our bob weight card to make up bob weights for the balancing process. After the weights are attached to the crank journals the crank is spun up to see how much material has to be removed from the counterweights. This is done repeated until the crank is within spec for our application. After balancing the crankshaft will be polished, cleaned, then ready to install.
(Pat)>> The crank only needed 13 grams off on the front and eight grams off on the back to get it within spec for our application. To remove the weight materials is drilled from the counterweight side where the Hines Balancer references the location. When we return to the Summit 363 build we'll begin assembly. Until then for more information on anything you've seen today visit Powernation TV dot com. ♪ ♪
(Pat)>> There are more intake manifolds on the market today than you can shake a stick at. There are ones for single, double, and even triple carburetors, and there's also a bunch for fuel injection, like stack injection, multi-point, or even throttle body. Plus different types of manifolds from dual plane, single plane, and even tunnel rams.
(Mike)>> The purpose of manifold talk today is for a specific engine we recently dynoed. We saw significant gains between a dual plane and a single plane version. Now there are several reasons why we see changes in air flow characteristics, r-p-m ranges, fuel delivery, and of course power.
(Pat)>> A dual plane separates the manifold into two different plenum sections. Each one along with its separate set of runners to connect every other cylinder in the firing order. This allows a dual plane to see induction pulses every 180 degrees of crankshaft rotation. That allows them to do a better job of balancing the air and fuel mixture from cylinder to cylinder throughout the r-p-m range. Although these manifolds are great at fuel distribution they are quite restrictive in a high performance application due to their small cross sectional area in the plenum. They are designed for good drivability and low to mid r-p-m ranges, but that doesn't mean that they won't make power. We have had several of these that'll make over 500 horsepower. A single plane intake manifold has a single open plenum that sees all eight cylinders. A larger cross sectional area and a deeper plenum allow these manifolds to flow a lot more air than a dual plane. They are designed for more mid to high r-p-m applications.
(Mike)>> If hood clearance is not an issue a tunnel ram is a great choice for performance in a wide r-p-m range. Now it's still a single plane design but its advantage is a straight runner with a clear eye shot from the carburetor all the way down to the intake valve. Depending on the runner length and plenum volume they can be designed to make power virtually anywhere in the r-p-m range. As low as 4,000 and as high as 10,000 r-p-m. The difference in dual plane and single plane power was displayed in excellent fashion with our "Old Gray Mare" 408 inch stroker. We ran both a dual plane and single plane manifold, and here are the results. [ engine revving ]
[ engine revving ]
(Mike)>> Now that you've seen that you know the advantages of a single plane manifold. The same goes for a tunnel ram. If you have a daily driver that's pretty mild the dual plane is the way to go, but if you've got a car that you take to the strip and drive on the street definitely lean towards a single plane.