Carcass Featured Projects


Carcass Builds


Want more content like this?
Join the PowerNation Email NewsletterParts Used In This Episode

Nitto Tire
Nitto Tires
The Industrial Depot
Tools, Hardware, Shop Supplies
Episode Transcript
(Jeremy)>> You're watching Powernation!
(Jeremy)>> Today on Carcass our Crown Vic is screaming to the finish line, but first we need to straighten out some dents and address some cracked fiberglass.
(Jimmy)>> Then we head into the paint booth for a patriotic paint job. Plus, we'll add some new wheels and tires before stretching the old cop cruiser out on the racecourse. [ Music ] [ engine revving ] [ Music ]
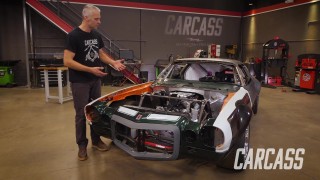
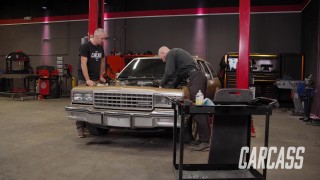
(Jeremy)>> Well what do you think? You ready to get started on this thing? Turn this thing into a race car now. Hey guys, welcome to Carcass. Well, we have the Crown Vic, which is our Spec Panther, down here in the prep booth and it's about time to turn this thing into a race car, and that usually comes with kind of a color change.
(Jimmy)>> Yeah and we're just gonna keep it really basic here. We'll use some Scotchbrite to prep the areas we're gonna paint. Jeremy's got a spot on the front. He'll do a little fiberglass repair, and I have a dent over here I'll take care of. So, nothing too crazy but we do want to make it look different.
(Jeremy)>> So we might as well get right into it.
Like Jimmy said, I do have some fiberglass repairs to do up here. It looks like somebody tried to cover up this crack or whatever's going on. This actually looks like chewed up bubble gum. It's actually really soft and just kinda peels off there. So, we're gonna go ahead and get rid of that, see what's underneath it so we can figure out how to make the repair. [ grinder buzzing ] [ Music ]
(Jeremy)>> So I did a couple of things to make this repair. One of those is I V'ed out really good where the crack is on the top and on the bottom, and I also prepped a large area on the top and I prepped a very large area on the bottom. We're gonna end up making most of our repair from the bottom. That's where our strength is gonna come from, and from the top we'll just put a small layer of fiberglass on here cause we're gonna have to come back and do some body work later. What I did is I went to a local auto parts store and I picked up this fiberglass repair kit. It comes with the hardener and the resin. It also comes with some of this fiberglass mat. So, the easiest way for me to do this is to just spread it out, and then we'll cut out our sections, and then we'll mix everything up. [ Music ]
With a bunch of pieces of fiberglass cut up, I'll mix some resin and start applying that to the underside of the panel. [ Music ]
Then I'll do the same for the top making sure the mat is completely covered. [ Music ] Okay so I've got three coats of the fiberglass on the crack here and we're gonna have to let this set up really well because I am gonna have to do a little bit of shaping, and then we'll do body work over the top of that. So, from here I think Jimmy's gonna tackle the dent on the fender.
(Jimmy)>> For this dent right here we're gonna be using the paintless dent repair method, which is something we have done before. We'll try to get it out the best we can, and at the end if we're not too happy with it we'll just go back and body work it a little bit and make it nice and smooth. [ Music ] We'll trying to pull on this guy a little bit. Actually, I think it came out pretty easily. Maybe all the way. We'll see here. That actually got almost all the dent out with one tiny little pull. That's pretty awesome. I'll take this off and see where we're at. [ Music ] Alright so I don't know if you can see this but there is still a little bit of a dent there. So, we'll come back and body work this later, but we'll get a little bit farther in our prep before we do that.
(Jeremy)>> Alright, now that the resin has had a chance to set up we'll go ahead, cut off the extra fiberglass here, and we'll start getting this thing into shape. [ grinder buzzing ]
(Jeremy)>> That should work, and from here we'll just grab some sandpaper, finish scuffing that down, and we'll smear it with a little bit of body filler. [ Music ] [ scuff pad scratching ]
(Jeremy)>> Once our body filler has had a chance to set up, we'll straighten that out and move on to prepping the rest of the car. [ Music ] To make this go a little bit quicker we'll be using both the d/a and some red scuff pads. [ d/a buzzing ] [ Music ]
(Jeremy)>> The body is straight and sanded, but now we head into the booth for a quick color change.
(Jeremy)>> This works out really good when you've got a nice, straight car to start with, right?
(Jimmy)>> It makes the process a little easier, a little faster.
(Jeremy)>> So from here what we're gonna do is wipe the entire car down with some wax and grease remover and get all of the stuff off from us doing the body work. Then we're gonna lay down a couple of coats of sealer, and then we'll move on to colors. We're actually laying two colors down, one on the front and one on the back. So, let's get this thing wiped down. [ Music ] [ spray gun hissing ] [ Music ] [ spray gun hissing ]
(Jimmy)>> Alright so we've got our primer-sealer laid down on the Crown Vic and we're on to our first color, which is Summit Racing's Viper Red. This is just some extra paint we had leftover from a previous project. So, we'll get this mixed up and start shooting. [ Music ] [ spray gun hissing ] [ Music ] [ spray gun hissing ] [ Music ]
(Jeremy)>> So for the back we're gonna be spraying Summit Racing's Blue Sky Metallic. It's mixed two to one just like the red that we put on the front. So, from here I'm gonna lay down three wet coats, and then we'll move on to clear.
(Jeremy)>> With both the red and the blue we're spraying with a 50 percent overlap. Both of these colors will really pop on the racetrack. [ spray gun hissing ] [ Music ] [ spray gun hissing ] [ Music ]
(Jeremy)>> Okay we've given the paint enough time to flash. We've got our clear mixed up. We're gonna get it in the gun. We'll go get in the booth. [ Music ] [ spray gun hissing ]
(Jeremy)>> For our clear we'll be doing two coats using a 75 percent overlap. [ spray gun hissing ] [ Music ]
(Jimmy)>> I think we did a pretty decent job.
(Jeremy)>> I think it looks like one of those popsicles you ate when you were a kid, like red, white, and blue.
(Jimmy)>> Fourth of July style!
(Jeremy)>> I think it turned out okay but let's get this unmasked. We'll get it back into our studio. We've got a couple more things we've got to do, and then we'll take it for a rip! Before we hit the track, we'll add some new rubber and safety equipment.
(Jeremy)>> Well what do you think? Crown Vic's got a fresh coat of paint on it. I think it looks pretty good.
(Jimmy)>> We have a few more things to do like wheels and tires to finish up the outside, and then a couple of things on the inside in terms of safety. So, once we get that done, we'll be ripping in no time.
(Jeremy)>> I think we'll put a couple of stickers on it to make it look like a real race car as well. I'm gonna get the wheels and tires off of this if you want to go grab the new ones.
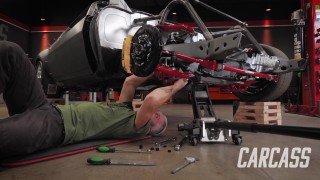
(Jimmy)>> And for our wheels and tires we're going with a set of TSWs wrapped in Nitto NT-05's. Per the Spec Panther rules, the wheels are open. You can run any diameter, any width, but the tires you have to meet two criteria. You can't be wider than a 275 and your tread wear has to be 200 or higher. So, this setup falls within those rules. They look way better, and they should give us a lot of grip. [ Music ] [ drill humming ]
(Jeremy)>> Man those things look sweet! I can't wait to see this thing on the ground.
(Jimmy)>> It's gonna look awesome.
(Jeremy)>> I've got one more thing that I've got to do. I'm gonna throw this cold air intake on cause it is allowed in the rules, and then we should be all set under here and we'll get this thing on the ground.
(Jimmy)>> I'll torque the wheels once we get it down. [ drill humming ]
(Jeremy)>> Get this out of here. Get the rest of the air box out of here too. [ Music ] Get the box in here and throw a couple of bolts in it quick. [ Music ] [ drill humming ]
(Jeremy)>> Okay so this kit comes with its own air intake tube, but you have to reuse your stock mass air flow sensor. So don't forget to install that before you put this on. [ Music ] Alright, well that wraps up everything under the hood. Now let's throw on some decals. [ Music ] Right about there, I think. [ Music ] So, the Hawk Performance decal on the back, that was pretty easy, but for this Sea Foam Motor Treatment decal it's a little more difficult because of the sheer size of this thing. To get this put on the car, believe it or not, that all starts with water. [ Music ] Alright so I've got the hood sprayed down. Before I actually put the decal on I've got to peel the backing off because we're actually gonna spray the back of the decal as well. It's just gonna help everything kinda sit on there and kinda slide around if we need it to. Holy cow! [ Music ] Get this thing set on. [ Music ] That's why we put water on it, so you can move it if you have to. Easiest way to do this is to start in the middle and then slowly work your way to the outside. [ Music ] Okay, well it's all on there. Now it's time for the fun and the scary part. Peel it back and see how you do. This can be a little nerve wracking sometimes. As long as you did it right it should stick on there. Perfect! [ Music ] For the other two decals we'll do the exact same thing. [ Music ]
(Jimmy)>> The last thing we've got to do, per the rules, is install this fire extinguisher. I'm just gonna make a couple of holes down here, mark them with a marker, and drill them out. [ Music ] [ drill humming ] [ Music ]
(Jimmy)>> Alright, final piece, and now we are ready for the track. [ Music ]
(Jeremy)>> Here she comes down the front stretch. Our Spec Panther hits the track, and we have a blast putting our driving skills to the test.
(Jeremy)>> Hey guys, sun is shining. We are at the Nashville Super Speedway and we're here to test out the Crown Vic. We get to run this thing on their infield course, and we actually do get to take it out on the Speedway a little bit.
(Jimmy)>> Yep, we've done some modifications to this. If you guys have been following along you've seen all of that, and I think the biggest difference will just be these 200 tread wear tires are a little bit more sticky. We've done some suspension mods, but overall it's a pretty basic build. So, we'll just have some fun with it.
(Jeremy)>> It's gonna be a great day. Let's hop in and let's go. [ Music ] Holy cow!
(Jimmy)>> It stuck. You can go even faster if you want.
(Jeremy)>> I could but this is like one of the early laps.
(Jimmy)>> Are you two footing it?
(Jeremy)>> No!
(Jimmy)>> You gotta!
(Jeremy)>> That's scary though.
(Jimmy)>> You can get the car around better. You kinda trail brake it in there, and get the nose to dive, and get the rear end to spin around a little bit.
(Jeremy)>> That'll let the car open up. Now I know where I'm going. Oh yeah, I remember how to do this.
(Jeremy)>> You can actually see on the track where people are doing lines. Out here not so much, but this is pretty crazy. Now the transition between the flat here and technically turn four, that's an interesting transition. I suppose you hang it out a little longer and you transition further into the corner.
(Jimmy)>> Try to make it a little bit smoother.
(Jeremy)>> We've got good brakes. So, we should be able to really have some fun with it, and really sticky tires if you can get it to hold.
(Jimmy)>> Nicely done!
(Jeremy)>> I kinda forgot about that whole two foot, one on the gas one on the brake, thing. That saves you so much time.
(Jimmy)>> You can really control the car with it once we get more experience. Just kinda control the attitude of the car a bit better. Make it do what you want.
(Jeremy)>> This is unbelievable how well this car actually handles, and this thing's got all sorts of power.
(Jimmy)>> It really stops.
(Jeremy)>> It really slows down. It picks up speed. There's body roll in it but not a lot of body roll. It's definitely fun.
(Jimmy)>> What's nice too though is since this is kind of a wide open track body roll's okay cause it's a really long time between those transitions. So, the car can settle versus if you were on a really tight auto cross type thing body roll kinda kills you cause it takes so long for the car to take a set. Trying to change direction too quickly just makes it really tough.
(Jeremy)>> I'll tell you what man, it's a lot of fun that's for sure.
(Jimmy)>> I need to take a drive.
(Jeremy)>> You could probably handle this. You're a better, more experienced driver than I am.
(Jimmy)>> If you say so.
(Jeremy)>> Don't kill me, and I'm probably gonna get car sick. So, this may not last long. [ engine revving ]
(Jimmy)>> Alright, let's give her a shot.
(Jeremy)>> Strapped in tight. I'm gonna hold on to my seatbelt, the door.
(Jimmy)>> Oh yeah!
(Jeremy)>> You like those brakes don't you? They're right there. That's fun! Nothing like getting used to a car that you've never driven before, on a racetrack. Get used to the car on the racetrack. Now if you spin out you gotta buy me lunch. So, you've got to keep total control the whole time. So, like you said, you've been out here before. You've actually been on this speedway doing real laps in a race car. What do you think of the car, the speedway, the track?
(Jimmy)>> The car, it's super sticky. [ tires squealing ]
(Jimmy)>> Oh yeah, get her going there!
(Jeremy)>> That held really well. There you go, rumbles!
(Jimmy)>> Use all the track there. I think people underestimate how grippy 200 tread wear tires can be.
(Jeremy)>> Or even the fact this Panther chassis, it's got a full frame underneath it. It's got body roll but it's not so bad because the course is so big out here. Body roll's okay cause you can straighten yourself back out.
(Jimmy)>> The car feels pretty balanced too. I'm not getting any crazy oversteer or understeer. I think naturally it still understeers like a stock car would. That's how all o-e applications are. It makes it a little safer for people driving. We cut the spring, so it's a little bit more stiff in the front.
(Jeremy)>> Upgraded some springs in the back for what we could do. We got good brakes in it now from Hawk. It comes down to the guy sitting behind the driver's seat, or in the driver's seat.
(Jimmy)>> The brakes are super touchy.
(Jeremy)>> And all in all what are we, $5,000 into this thing?
(Jimmy)>> If that.
(Jeremy)>> $5,000 bucks and we are running on a speedway but we're having a blast.
(Jimmy)>> For the money this is about as much fun as you can have.
(Jeremy)>> A street car that is now a race car with little work really. The transmission shifts great. It all kinda came together.
(Jimmy)>> It's a durable car. It'll last even if you're beating on it every weekend.
(Jeremy)>> They have larger cooling systems stock. They've got a stock trans cooler. They've got good suspension underneath them. GoPros fall off. Let me see if I can find that. I'm like totally jammed in there. There it is! I'm gonna do the in-cab action shot from the GoPro. There it is! This is what it's like to drive. This is what it's really like!
(Jimmy)>> A little off roading there, okay.
(Jeremy)>> Everything's okay.
(Jimmy)>> I think this is the most fun turn right here.
(Jeremy)>> So coming off, like this, and just grabbing the wheel. [ tires squealing ]
(Jeremy)>> He's gonna lose it! Don't lose it! [ engine revving ]
(Jeremy)>> There you go.
(Jimmy)>> Nice and easy up onto the bank and we're good.
(Jeremy)>> Dude that's just good ole fashion fun right there. So that's what the super speedway feels like in a Spec Panther. That's just a whole lot of fun.
(Jimmy)>> I hope we get to do this again.
(Jeremy)>> If you like anything you've seen on the show today check Powernation TV.
Show Full Transcript
(Jeremy)>> Today on Carcass our Crown Vic is screaming to the finish line, but first we need to straighten out some dents and address some cracked fiberglass.
(Jimmy)>> Then we head into the paint booth for a patriotic paint job. Plus, we'll add some new wheels and tires before stretching the old cop cruiser out on the racecourse. [ Music ] [ engine revving ] [ Music ]
(Jeremy)>> Well what do you think? You ready to get started on this thing? Turn this thing into a race car now. Hey guys, welcome to Carcass. Well, we have the Crown Vic, which is our Spec Panther, down here in the prep booth and it's about time to turn this thing into a race car, and that usually comes with kind of a color change.
(Jimmy)>> Yeah and we're just gonna keep it really basic here. We'll use some Scotchbrite to prep the areas we're gonna paint. Jeremy's got a spot on the front. He'll do a little fiberglass repair, and I have a dent over here I'll take care of. So, nothing too crazy but we do want to make it look different.
(Jeremy)>> So we might as well get right into it.
Like Jimmy said, I do have some fiberglass repairs to do up here. It looks like somebody tried to cover up this crack or whatever's going on. This actually looks like chewed up bubble gum. It's actually really soft and just kinda peels off there. So, we're gonna go ahead and get rid of that, see what's underneath it so we can figure out how to make the repair. [ grinder buzzing ] [ Music ]
(Jeremy)>> So I did a couple of things to make this repair. One of those is I V'ed out really good where the crack is on the top and on the bottom, and I also prepped a large area on the top and I prepped a very large area on the bottom. We're gonna end up making most of our repair from the bottom. That's where our strength is gonna come from, and from the top we'll just put a small layer of fiberglass on here cause we're gonna have to come back and do some body work later. What I did is I went to a local auto parts store and I picked up this fiberglass repair kit. It comes with the hardener and the resin. It also comes with some of this fiberglass mat. So, the easiest way for me to do this is to just spread it out, and then we'll cut out our sections, and then we'll mix everything up. [ Music ]
With a bunch of pieces of fiberglass cut up, I'll mix some resin and start applying that to the underside of the panel. [ Music ]
Then I'll do the same for the top making sure the mat is completely covered. [ Music ] Okay so I've got three coats of the fiberglass on the crack here and we're gonna have to let this set up really well because I am gonna have to do a little bit of shaping, and then we'll do body work over the top of that. So, from here I think Jimmy's gonna tackle the dent on the fender.
(Jimmy)>> For this dent right here we're gonna be using the paintless dent repair method, which is something we have done before. We'll try to get it out the best we can, and at the end if we're not too happy with it we'll just go back and body work it a little bit and make it nice and smooth. [ Music ] We'll trying to pull on this guy a little bit. Actually, I think it came out pretty easily. Maybe all the way. We'll see here. That actually got almost all the dent out with one tiny little pull. That's pretty awesome. I'll take this off and see where we're at. [ Music ] Alright so I don't know if you can see this but there is still a little bit of a dent there. So, we'll come back and body work this later, but we'll get a little bit farther in our prep before we do that.
(Jeremy)>> Alright, now that the resin has had a chance to set up we'll go ahead, cut off the extra fiberglass here, and we'll start getting this thing into shape. [ grinder buzzing ]
(Jeremy)>> That should work, and from here we'll just grab some sandpaper, finish scuffing that down, and we'll smear it with a little bit of body filler. [ Music ] [ scuff pad scratching ]
(Jeremy)>> Once our body filler has had a chance to set up, we'll straighten that out and move on to prepping the rest of the car. [ Music ] To make this go a little bit quicker we'll be using both the d/a and some red scuff pads. [ d/a buzzing ] [ Music ]
(Jeremy)>> The body is straight and sanded, but now we head into the booth for a quick color change.
(Jeremy)>> This works out really good when you've got a nice, straight car to start with, right?
(Jimmy)>> It makes the process a little easier, a little faster.
(Jeremy)>> So from here what we're gonna do is wipe the entire car down with some wax and grease remover and get all of the stuff off from us doing the body work. Then we're gonna lay down a couple of coats of sealer, and then we'll move on to colors. We're actually laying two colors down, one on the front and one on the back. So, let's get this thing wiped down. [ Music ] [ spray gun hissing ] [ Music ] [ spray gun hissing ]
(Jimmy)>> Alright so we've got our primer-sealer laid down on the Crown Vic and we're on to our first color, which is Summit Racing's Viper Red. This is just some extra paint we had leftover from a previous project. So, we'll get this mixed up and start shooting. [ Music ] [ spray gun hissing ] [ Music ] [ spray gun hissing ] [ Music ]
(Jeremy)>> So for the back we're gonna be spraying Summit Racing's Blue Sky Metallic. It's mixed two to one just like the red that we put on the front. So, from here I'm gonna lay down three wet coats, and then we'll move on to clear.
(Jeremy)>> With both the red and the blue we're spraying with a 50 percent overlap. Both of these colors will really pop on the racetrack. [ spray gun hissing ] [ Music ] [ spray gun hissing ] [ Music ]
(Jeremy)>> Okay we've given the paint enough time to flash. We've got our clear mixed up. We're gonna get it in the gun. We'll go get in the booth. [ Music ] [ spray gun hissing ]
(Jeremy)>> For our clear we'll be doing two coats using a 75 percent overlap. [ spray gun hissing ] [ Music ]
(Jimmy)>> I think we did a pretty decent job.
(Jeremy)>> I think it looks like one of those popsicles you ate when you were a kid, like red, white, and blue.
(Jimmy)>> Fourth of July style!
(Jeremy)>> I think it turned out okay but let's get this unmasked. We'll get it back into our studio. We've got a couple more things we've got to do, and then we'll take it for a rip! Before we hit the track, we'll add some new rubber and safety equipment.
(Jeremy)>> Well what do you think? Crown Vic's got a fresh coat of paint on it. I think it looks pretty good.
(Jimmy)>> We have a few more things to do like wheels and tires to finish up the outside, and then a couple of things on the inside in terms of safety. So, once we get that done, we'll be ripping in no time.
(Jeremy)>> I think we'll put a couple of stickers on it to make it look like a real race car as well. I'm gonna get the wheels and tires off of this if you want to go grab the new ones.
(Jimmy)>> And for our wheels and tires we're going with a set of TSWs wrapped in Nitto NT-05's. Per the Spec Panther rules, the wheels are open. You can run any diameter, any width, but the tires you have to meet two criteria. You can't be wider than a 275 and your tread wear has to be 200 or higher. So, this setup falls within those rules. They look way better, and they should give us a lot of grip. [ Music ] [ drill humming ]
(Jeremy)>> Man those things look sweet! I can't wait to see this thing on the ground.
(Jimmy)>> It's gonna look awesome.
(Jeremy)>> I've got one more thing that I've got to do. I'm gonna throw this cold air intake on cause it is allowed in the rules, and then we should be all set under here and we'll get this thing on the ground.
(Jimmy)>> I'll torque the wheels once we get it down. [ drill humming ]
(Jeremy)>> Get this out of here. Get the rest of the air box out of here too. [ Music ] Get the box in here and throw a couple of bolts in it quick. [ Music ] [ drill humming ]
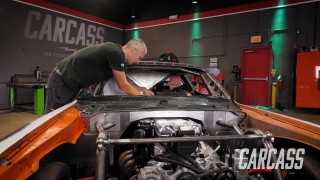
(Jeremy)>> Okay so this kit comes with its own air intake tube, but you have to reuse your stock mass air flow sensor. So don't forget to install that before you put this on. [ Music ] Alright, well that wraps up everything under the hood. Now let's throw on some decals. [ Music ] Right about there, I think. [ Music ] So, the Hawk Performance decal on the back, that was pretty easy, but for this Sea Foam Motor Treatment decal it's a little more difficult because of the sheer size of this thing. To get this put on the car, believe it or not, that all starts with water. [ Music ] Alright so I've got the hood sprayed down. Before I actually put the decal on I've got to peel the backing off because we're actually gonna spray the back of the decal as well. It's just gonna help everything kinda sit on there and kinda slide around if we need it to. Holy cow! [ Music ] Get this thing set on. [ Music ] That's why we put water on it, so you can move it if you have to. Easiest way to do this is to start in the middle and then slowly work your way to the outside. [ Music ] Okay, well it's all on there. Now it's time for the fun and the scary part. Peel it back and see how you do. This can be a little nerve wracking sometimes. As long as you did it right it should stick on there. Perfect! [ Music ] For the other two decals we'll do the exact same thing. [ Music ]
(Jimmy)>> The last thing we've got to do, per the rules, is install this fire extinguisher. I'm just gonna make a couple of holes down here, mark them with a marker, and drill them out. [ Music ] [ drill humming ] [ Music ]
(Jimmy)>> Alright, final piece, and now we are ready for the track. [ Music ]
(Jeremy)>> Here she comes down the front stretch. Our Spec Panther hits the track, and we have a blast putting our driving skills to the test.
(Jeremy)>> Hey guys, sun is shining. We are at the Nashville Super Speedway and we're here to test out the Crown Vic. We get to run this thing on their infield course, and we actually do get to take it out on the Speedway a little bit.
(Jimmy)>> Yep, we've done some modifications to this. If you guys have been following along you've seen all of that, and I think the biggest difference will just be these 200 tread wear tires are a little bit more sticky. We've done some suspension mods, but overall it's a pretty basic build. So, we'll just have some fun with it.
(Jeremy)>> It's gonna be a great day. Let's hop in and let's go. [ Music ] Holy cow!
(Jimmy)>> It stuck. You can go even faster if you want.
(Jeremy)>> I could but this is like one of the early laps.
(Jimmy)>> Are you two footing it?
(Jeremy)>> No!
(Jimmy)>> You gotta!
(Jeremy)>> That's scary though.
(Jimmy)>> You can get the car around better. You kinda trail brake it in there, and get the nose to dive, and get the rear end to spin around a little bit.
(Jeremy)>> That'll let the car open up. Now I know where I'm going. Oh yeah, I remember how to do this.
(Jeremy)>> You can actually see on the track where people are doing lines. Out here not so much, but this is pretty crazy. Now the transition between the flat here and technically turn four, that's an interesting transition. I suppose you hang it out a little longer and you transition further into the corner.
(Jimmy)>> Try to make it a little bit smoother.
(Jeremy)>> We've got good brakes. So, we should be able to really have some fun with it, and really sticky tires if you can get it to hold.
(Jimmy)>> Nicely done!
(Jeremy)>> I kinda forgot about that whole two foot, one on the gas one on the brake, thing. That saves you so much time.
(Jimmy)>> You can really control the car with it once we get more experience. Just kinda control the attitude of the car a bit better. Make it do what you want.
(Jeremy)>> This is unbelievable how well this car actually handles, and this thing's got all sorts of power.
(Jimmy)>> It really stops.
(Jeremy)>> It really slows down. It picks up speed. There's body roll in it but not a lot of body roll. It's definitely fun.
(Jimmy)>> What's nice too though is since this is kind of a wide open track body roll's okay cause it's a really long time between those transitions. So, the car can settle versus if you were on a really tight auto cross type thing body roll kinda kills you cause it takes so long for the car to take a set. Trying to change direction too quickly just makes it really tough.
(Jeremy)>> I'll tell you what man, it's a lot of fun that's for sure.
(Jimmy)>> I need to take a drive.
(Jeremy)>> You could probably handle this. You're a better, more experienced driver than I am.
(Jimmy)>> If you say so.
(Jeremy)>> Don't kill me, and I'm probably gonna get car sick. So, this may not last long. [ engine revving ]
(Jimmy)>> Alright, let's give her a shot.
(Jeremy)>> Strapped in tight. I'm gonna hold on to my seatbelt, the door.
(Jimmy)>> Oh yeah!
(Jeremy)>> You like those brakes don't you? They're right there. That's fun! Nothing like getting used to a car that you've never driven before, on a racetrack. Get used to the car on the racetrack. Now if you spin out you gotta buy me lunch. So, you've got to keep total control the whole time. So, like you said, you've been out here before. You've actually been on this speedway doing real laps in a race car. What do you think of the car, the speedway, the track?
(Jimmy)>> The car, it's super sticky. [ tires squealing ]
(Jimmy)>> Oh yeah, get her going there!
(Jeremy)>> That held really well. There you go, rumbles!
(Jimmy)>> Use all the track there. I think people underestimate how grippy 200 tread wear tires can be.
(Jeremy)>> Or even the fact this Panther chassis, it's got a full frame underneath it. It's got body roll but it's not so bad because the course is so big out here. Body roll's okay cause you can straighten yourself back out.
(Jimmy)>> The car feels pretty balanced too. I'm not getting any crazy oversteer or understeer. I think naturally it still understeers like a stock car would. That's how all o-e applications are. It makes it a little safer for people driving. We cut the spring, so it's a little bit more stiff in the front.
(Jeremy)>> Upgraded some springs in the back for what we could do. We got good brakes in it now from Hawk. It comes down to the guy sitting behind the driver's seat, or in the driver's seat.
(Jimmy)>> The brakes are super touchy.
(Jeremy)>> And all in all what are we, $5,000 into this thing?
(Jimmy)>> If that.
(Jeremy)>> $5,000 bucks and we are running on a speedway but we're having a blast.
(Jimmy)>> For the money this is about as much fun as you can have.
(Jeremy)>> A street car that is now a race car with little work really. The transmission shifts great. It all kinda came together.
(Jimmy)>> It's a durable car. It'll last even if you're beating on it every weekend.
(Jeremy)>> They have larger cooling systems stock. They've got a stock trans cooler. They've got good suspension underneath them. GoPros fall off. Let me see if I can find that. I'm like totally jammed in there. There it is! I'm gonna do the in-cab action shot from the GoPro. There it is! This is what it's like to drive. This is what it's really like!
(Jimmy)>> A little off roading there, okay.
(Jeremy)>> Everything's okay.
(Jimmy)>> I think this is the most fun turn right here.
(Jeremy)>> So coming off, like this, and just grabbing the wheel. [ tires squealing ]
(Jeremy)>> He's gonna lose it! Don't lose it! [ engine revving ]
(Jeremy)>> There you go.
(Jimmy)>> Nice and easy up onto the bank and we're good.
(Jeremy)>> Dude that's just good ole fashion fun right there. So that's what the super speedway feels like in a Spec Panther. That's just a whole lot of fun.
(Jimmy)>> I hope we get to do this again.
(Jeremy)>> If you like anything you've seen on the show today check Powernation TV.