
Carcass Featured Projects


Carcass Builds


Want more content like this?
Join the PowerNation Email NewsletterParts Used In This Episode
Continental Tire
Extreme Contact Sport Tires
Holley
Quick Fuel Carburetor
Holley
Quick Fuel Fuel Pump
Matco Tools
MATCO Tools are the Official Tool Supplier to PowerNation
The Industrial Depot
Tools, Hardware, Shop Supplies
Episode Transcript
(Jimmy)>> You're watching Powernation!
(Jeremy)>> Today on Carcass.
(Jimmy)>> This thing runs like absolute junk.
(Jeremy)>> We take a 25th anniversary Camaro auto crossing. [ tires squealing ]
(Jimmy)>> And there's a lot to improve on.
(Jeremy)>> This thing pretty much handled like a bulldozer. [ MUSIC ]
(Narrator)>> When you want to build something different you turn to Carcass. They transform cars and trucks into one of a kind builds. From street to mud if you dream it they can build it. This is Carcass, a non-traditional speed shop. [ MUSIC ]
(Jimmy)>> This is our 1992 Chevy Camaro but this isn't any ordinary Camaro. This is the 25th anniversary edition with 16 inch alloy aluminum wheels and a whopping 170 horses under the hood. Now our third gen Camaro sports the F-body platform, which has more room under the hood and it had quite a few engine options. Ours has a 5.0 liter V-8 backed by a four speed automatic transmission which made this puppy reach a top speed of 129 miles and a slow 16.5 seconds in the quarter mile. We're back at NCM Motorsports Park here in Bowling Green, Kentucky, and they have an awesome road course where someone can have a once in a lifetime experience and take a ride in a Corvette, but that's not why we're here. We're here to utilize the paddock area to test out our stock Camaro on an auto cross course. Ready?
(Jeremy)>> Yes sir.
(Jimmy)>> Set, go! [ tires squealing ] [ MUSIC ] [ tires squealing ] [ MUSIC ]
(Jimmy)>> Nice job buddy. [ MUSIC ]
(Jeremy)>> Alright how fast was I?
(Jimmy)>> 49:59.
(Jeremy)>> Well this thing pretty much handled like a bulldozer. Tires are terrible.
(Jimmy)>> Makes sense.
(Jeremy)>> One last thing, I'm pretty sure it runs on 7 cylinders half the time. I wish you the best of luck. We'll see how well you do. Ready, set, go! [ engine revving ] [ MUSIC ]
(Jeremy)>> 32, 33, 34, he's actually not doing terrible. [ tires squealing ] [ MUSIC ]
(Jeremy)>> Wow, got a little race going on here. Son of a...
(Jimmy)>> What's my time?
(Jeremy)>> 47:78.
(Jimmy)>> Winner, winner chicken dinner! This thing runs like absolute junk and I still beat you.
(Jeremy)>> I can't understand it because I don't know how many cylinders you ran on.
(Jimmy)>> I think it's like an ignition issue or something because throughout the whole track it kept going in and out. And like I'd pick up speed, lose speed, but like you said the suspension just needs to go away.
(Jeremy)>> I think so, and now that we have an issue underneath the hood I think everything under here needs to go away too.
(Jimmy)>> And now we can pick up every single one of these cones and go home cause it's hot.
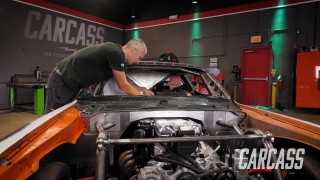
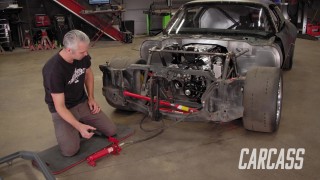
(Jeremy)>> I don't want to. Here's the grand idea for this build. We're gonna take our '92 25th anniversary Camaro and turn it into an auto cross car. We're gonna get rid of the 170 ponies, go all the way up to 406 ponies. We're gonna back that up with a turbo 400 transmission specifically built for auto crossing. Then we're gonna move underneath the car, ditch all of that old tired suspension, and replace it with a bunch of good parts that's gonna make this car hug and handle on the course. We're gonna wrap a wide set of wheels with a wide set of tires, and then put some fender flares on the side of the car to give it a nasty stance. When we're done with that Jimmy and I are gonna design our own mild aero package but we're gonna do all of that right here in house. We're not the first guys to put an LS inside of a Camaro, and there's some people out there that are helping out with this. This is bracket we got from Holley Performance. Now what we're gonna do is take the stock clam shell off of the crossmember where the 5.0 liter used to sit. The upside to this is that these four bolts holes are actually gonna go into four holes that are already on the crossmember, and then the flip side of that is we're gonna take a stock clam shell for a newer series LS and we're gonna bolt this directly to our LS. [ drill buzzing ] [ MUSIC ]
(Jeremy)>> Alright go ahead and go down. [ MUSIC ] Man it's like this thing fits in here, keep going.
(Jimmy)>> Our engine fits easily into our motor mounts, and a couple of taps of the hammer get the bolts all the way through. Coming up it's more drivetrain and some serious suspension upgrades.
[ MUSIC ]
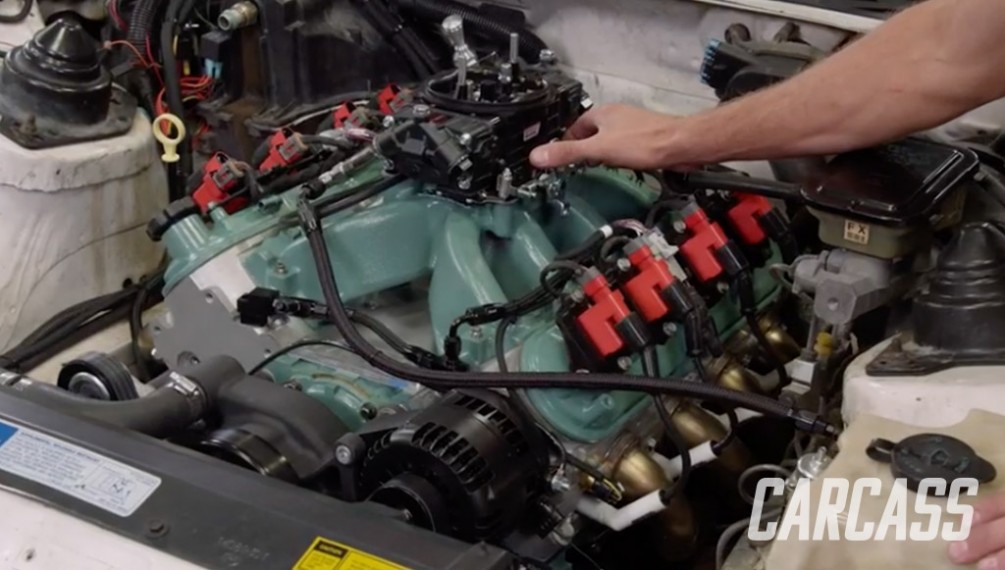
(Jeremy)>> We had a lot to do to finish up the engine install on our Camaro, and a carburetor's gonna be our choice for fuel delivery cause that's what the guys down in Engine Power set this engine up for. Now our stock fuel pump's gonna deliver way too much pressure for our carburetor. So we're gonna switch that out with a fuel pump that's gonna deliver 7 to 10 p-s-i to run our Quick Fuel carb. During the break we went ahead and took care of a couple of things on the Camaro. We finished up the fuel system. We threw the headers in cause we knew that was gonna be a bear. Jimmy put the radiator underneath the hood, and we're getting ready to finish up the install on the drivetrain. Let me give you a hand with this thing.
(Jimmy)>> So a little trick to this. Since we have the headers in and it's a really tight squeeze, we actually loosen the header bolts so that the engine can tilt back a little bit more so it'll clear the ears on this bell housing. [ MUSIC ]
(Jeremy)>> So what I'm looking for is a solid engagement with the converter and to make sure that the face of the converter is behind the face of the bell housing. I just need to get this lined up. [ MUSIC ] [ ratchet clicking ]
(Jimmy)>> Before we connect the flex plate to the torque converter we need to install the cross member. The turbo 400 cross member comes with an additional mounting hole, which we will drill a hole for and add an additional bolt.
(Jeremy)>> Finally we can marry our engine and our transmission together. To do that we'll have to work in a really tight space using three bolts to connect the flex plate to the torque converter. [ MUSIC ] [ engine starting & revving ]
(Jeremy)>> This thing started right up. Easiest swap we've done all year.
(Jimmy)>> It sounds super good too! Rev it up a couple more times. [ engine revving ]
(Jeremy)>> With the interior of our Camaro all buttoned up it's time to move our thoughts underneath the car.
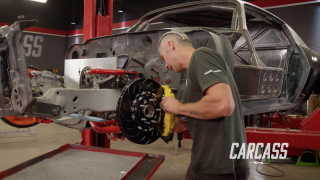
(Jimmy)>> So we got all these parts to throw on our Camaro, like adjustable castor and camber plates to give our car a better alignment for track purposes, and we also got stiffer springs and sway bars to keep the handling tight when we're on course.
(Jeremy)>> And in the rear we're gonna ditch the stock coil spring and shock setup and move up to a coil over shock setup. Plus we're gonna get rid of the tires old rear end that's got 190,000 miles on it and replace it with a remanufactured one that's got 3.73 gears and a limited slip differential.
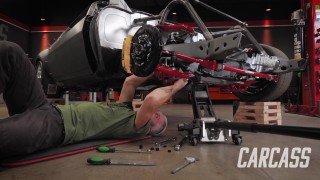
(Jimmy)>> The first part of our rear suspension install is gonna be these coil overs, but they install a little bit differently than the stock shocks. As you can see the stock shock uses a stud with a nut to hold it in place. On our coil over we have rod end type end with a special bracket that goes on top, and then this stud goes in the original shock location. [ MUSIC ] [ drill humming ]
(Jimmy)>> With our shocks in place we can install the rest of the suspension kit we picked up from Summit Racing. With the axle in position we can lower the Camaro down to it. This allows us to line up the lower control arm with the mount on the axle. Then we'll tap the bolt all the way in.
(Jeremy)>> Next we'll line up the coil over with the new mount we installed on the axle. This gets bolted in as well.
(Jimmy)>> The panhard bar goes in next. This is probably the easiest suspension piece to install but it's super important. It locates the axle laterally with the car, preventing it from moving left and right.
(Jeremy)>> With the lateral movement taken care of we need to add the torque arm. It attaches to the differential housing and prevents the axle from rotating under load.
(Jimmy)>> The last part of this kit for the rear is the sway bar. The new one is thicker than the original and will help reduce body roll, especially when we transition from one turn to another.
(Jeremy)>> That takes care of the rear. Now let's move on to the front. We'll start with the control arms. The kit we got from Summit Racing works with our 1992 Camaro with all the holes lining up in the stock mounts. With the car lowered so we can access the engine bay we can start installing the coil overs.
(Jimmy)>> The new castor/camber plates include a back plate that uses the o-e slots in the shock tower. All we have to do is add the remaining plates and get them bolted in. We're making sure not to drive these home knowing that we'll have to make adjustments later.
(Jeremy)>> Before we can go any further we need to marry the spindle to the coil over. This will just make assembly easier going forward. With it all in one piece we'll slide it through the castor/camber plate and add a nut, leaving it loose for now.
(Jimmy)>> Down below we'll raise the control arm and connect it to the spindle. We'll add the castle nut, firmly tightening it down. Then we'll just add a cotter pin for safety.
(Jeremy)>> With everything installed we'll go back to the engine bay and tighten the nut on the top of our coil over.
(Jimmy)>> To finish up our front suspension install we'll throw in the front sway bar. This is a simple bolt in using the stiffening plates provided in the kit. We'll use the factory bolts and stock mounting locations for the middle sections, and then the provided bolts and bushings for the ends that connect to the control arms. [ drill humming ]
(Jeremy)>> Up next our unique body mods and how we're gonna stick our Camaro to the ground.
(Jimmy)>> The Weld wheels we got from Summit Racing look great with the Continental tires wrapped around them, but the stance of our Camaro looks a little bit funky.
(Jeremy)>> Jimmy ordered these wheels specifically with this back spacing cause that gives us that wide track width, and that's gonna help decrease lateral load transfer, which can help in auto cross and in road racing.
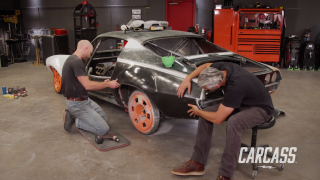
(Jimmy)>> So to fix our stance we ordered these really big fender flares to give it an aggressive cool look.
(Jeremy)>> We can now prep the fender to go on the Camaro. We'll start by drilling out the holes for our fastener. Then at the Camaro we'll set the fender exactly where we want it and mark out each hole on the body.
(Jimmy)>> All there's left to do is carefully drill out each hole location with a nineteen-sixty-fourths drill bit. It's a rinse and repeat process drilling all 10 holes. [ drill humming ]
(Jimmy)>> A rivet nut goes in next. This is one of those tools that you may not use often but you're glad to have it when you need it.
(Jeremy)>> With all our rivet nuts in place we'll slap on the included rubber seal and bring in our fender flare adding all the supplied hardware. This is a repetitive process and there's really no kind of technique to this. Just get it good and tight.
(Jimmy)>> Clean install. To go along with the fender flares we installed on our '92 Camaro we're gonna make a front and rear aero package to match, and up here we're gonna make a splitter to help with front downforce and we're gonna make it out of materials you might not have thought you could make a splitter from. The first thing to come off is that cheesy spoiler.
(Jeremy)>> The spoiler is held on with a couple of easy to find nuts and some that are hidden under some plastic plugs. And what was waiting for us when we pulled off this 28 year old spoiler was well. Oh that's nasty!
(Jimmy)>> To make this job easier we're gonna separate the deck lid from the back glass. After removing the plastic trim from under the deck lid, we unbolted the nuts that hold on the bracket with the window struts, and that sandwiched the lid and glass together.
(Jeremy)>> Applying a little pressure to the deck lid releases the butyl tape that seals the lid and glass together. Sticky!
(Jimmy)>> And a razor blade helps clean the excess tape off the rear glass.
(Jeremy)>> With the deck lid off we'll trace it out on a sheet of 90 thousandths aluminum. Then we'll cut out the shape with a jig saw making sure we follow our line as close as possible.
(Jimmy)>> To mount the first piece of our spoiler to our deck lid we'll have to drill some holes in a very specific location.
(Jeremy)>> Do about three and fifteen-sixteenths. We'll transfer the holes from our cover onto the deck lid with a marker. Then we'll just drill them out. We'll use light pressure to make sure that we don't distort or dent the top sheet metal of the lid. With our cover in place we'll add some hardware and then just snug it up for now.
(Jimmy)>> For the rest of the mounting holes we'll utilize most of the original holes from the stock spoiler, adding two additional holes on the edge of the deck lid. [ drill buzzing ]
(Jimmy)>> We'll follow that up with some hardware to keep it all together. Over at the shear we'll mark out our spoiler using the same 90 thousandths aluminum. We're making our mark at 7 inches. This allows for a one inch overhang on the bottom of our newly installed deck lid cover. [ MUSIC ] [ metal clanging ]
(Jeremy)>> And now we're ready to add the aluminum spoiler we've been working on. We're going with a 20 degree angle with a one inch overhang, which looks like less near the edge due to the curved nature of the deck lid.
(Jimmy)>> With Jeremy holding the spoiler in position we're ready to weld the aluminum pieces using the a/c setting on the tig machine. We'll start with a tack on one end and use an angle finder to ensure we are at the correct angle, tacking on the opposite end to hold everything in place. We're gonna add a few more tacks to ensure our spoiler isn't gonna move on us. Then we can expand those tacks laying down a three inch long bead to permanently affix the spoiler. [ welder crackling ]
(Jeremy)>> To finish off our spoiler we're gonna add some turnbuckle supports to help prevent our aluminum from bending out of alignment. [ drill buzzing ]
(Jimmy)>> With all the base holes spaced out we need to install one end of the support and locate where we'll drill the hole for the top. We can then drill that out... [ drill buzzing ]
(Jimmy)>> ...and chamfer the back side to accommodate the bolt heads.
(Jimmy)>> From here it's just rinse and repeat. [ MUSIC ] [ drill buzzing ]
(Jimmy)>> It's time for the final aero plan and a track payoff worth the wait!
[ MUSIC ]
(Jimmy)>> To make our splitter we're using a three quarter inch piece of plywood.
(Jeremy)>> With the plywood under the car we're using a plumb bob to transfer the shape of our bumper.
(Jimmy)>> With the shape of the bumper mapped out we'll move the plywood over to a table top to make the rest of this process easier. We'll add six inches so the splitter extends outward from our bumper. Then cut it out with a jig saw and clean up the edge with a grinder. Then with some brackets we fabbed up in the break... [ MUSIC ] ...we'll drill some holes through the plywood and thread in the bolts. [ MUSIC ]
(Jeremy)>> Now this won't work unless we close the air gap between the splitter and the bumper. We opted for some no dig edging.
(Jimmy)>> With the tab installed on the splitter we can install it again on the Camaro, adding the remainder of the edging, screwing the bottom to the first layer of edging, and the top to the bumper. [ aerosol can hissing ] [ MUSIC ]
(Jimmy)>> We're back here at NCM Motorsports Park with our Autocross Camaro and the last time we were here with this vehicle we tested it out bone stock on a course made up of a few hundred cones.
(Jeremy)>> Now last time Jimmy and I each ran a couple of laps with our best time being about 48 seconds. Well we're here today to best that time with 408 horsepower, a completely overhauled suspension, wider tires to grip the pavement, and a sleek aero package that should provide some downforce when we're hammering it through the corners. Now instead of running this course cold turkey Jimmy and I are both gonna run the course twice, and then our producer is gonna reveal the results at the end of the day. [ engine revving ]
(Jimmy)>> It's a lot faster than it was before, alright! [ engine revving ]
(Jimmy)>> This thing feels stuck to the ground. I feel like I'm carrying a lot more speed too. Now the first time out here I was still having fun in a third gen but I can tell you this is a lot more fun. [ engine revving ]
(Jeremy)>> How was it?
(Jimmy)>> It was way better than last time I'll say that. I'm ready for a second run.
(Jeremy)>> You're killing it out there. Go for it man. [ engine revving ]
(Jimmy)>> Compared to our old stock tires these 295 series Continental Extreme Contact sport tires probably made the biggest difference for me on this course. [ engine revving ]
(Jimmy)>> You want to talk about having fun in a third gen this is the car. This is so fantastic.
(Jeremy)>> Speaking of having fun get out of there. It's my turn to take it for a spin. [ MUSIC ] [ engine revving ]
(Jeremy)>> This thing is absolutely stuck to the pavement. The suspension is unbelievable right now. It's just absolutely hammering it. Wow! It's a completely different car. This is 100 percent a completely different car. One lap down one to go. [ engine revving ]
(Jeremy)>> Oh man this thing is just running out like a million bucks. [ engine revving ] [ MUSIC ]
(Jeremy)>> Alright man the results are and there's no way you're gonna believe this. I ran a 41:78 and Jimmy, he wrote it down right here, Jimmy ran a 42:25.
(Jimmy)>> That's sad.
(Jeremy)>> I actually beat him in something. First time this year I beat you in something.
(Jimmy)>> I'm really happy for you actually but that's all I have to say about that. Moving onto the car I'm amazed that this thing got as fast as it did with the upgrades we did to it.
(Jeremy)>> From the upgraded horsepower, I mean 408, 410 horse. We've got way different suspension, really wide tires, and the aero package had to do something because we are way quicker than we were before.
(Jimmy)>> I wouldn't change a thing. I think this car is just bananas.
(Jeremy)>> If you guys like anything we've done with the build or want to see anything more with the build why don't you go check out Powernation TV dot com, and as always.
(Jimmy)>> You're watching Carcass! [ MUSIC ]
Show Full Transcript
(Jeremy)>> Today on Carcass.
(Jimmy)>> This thing runs like absolute junk.
(Jeremy)>> We take a 25th anniversary Camaro auto crossing. [ tires squealing ]
(Jimmy)>> And there's a lot to improve on.
(Jeremy)>> This thing pretty much handled like a bulldozer. [ MUSIC ]
(Narrator)>> When you want to build something different you turn to Carcass. They transform cars and trucks into one of a kind builds. From street to mud if you dream it they can build it. This is Carcass, a non-traditional speed shop. [ MUSIC ]
(Jimmy)>> This is our 1992 Chevy Camaro but this isn't any ordinary Camaro. This is the 25th anniversary edition with 16 inch alloy aluminum wheels and a whopping 170 horses under the hood. Now our third gen Camaro sports the F-body platform, which has more room under the hood and it had quite a few engine options. Ours has a 5.0 liter V-8 backed by a four speed automatic transmission which made this puppy reach a top speed of 129 miles and a slow 16.5 seconds in the quarter mile. We're back at NCM Motorsports Park here in Bowling Green, Kentucky, and they have an awesome road course where someone can have a once in a lifetime experience and take a ride in a Corvette, but that's not why we're here. We're here to utilize the paddock area to test out our stock Camaro on an auto cross course. Ready?
(Jeremy)>> Yes sir.
(Jimmy)>> Set, go! [ tires squealing ] [ MUSIC ] [ tires squealing ] [ MUSIC ]
(Jimmy)>> Nice job buddy. [ MUSIC ]
(Jeremy)>> Alright how fast was I?
(Jimmy)>> 49:59.
(Jeremy)>> Well this thing pretty much handled like a bulldozer. Tires are terrible.
(Jimmy)>> Makes sense.
(Jeremy)>> One last thing, I'm pretty sure it runs on 7 cylinders half the time. I wish you the best of luck. We'll see how well you do. Ready, set, go! [ engine revving ] [ MUSIC ]
(Jeremy)>> 32, 33, 34, he's actually not doing terrible. [ tires squealing ] [ MUSIC ]
(Jeremy)>> Wow, got a little race going on here. Son of a...
(Jimmy)>> What's my time?
(Jeremy)>> 47:78.
(Jimmy)>> Winner, winner chicken dinner! This thing runs like absolute junk and I still beat you.
(Jeremy)>> I can't understand it because I don't know how many cylinders you ran on.
(Jimmy)>> I think it's like an ignition issue or something because throughout the whole track it kept going in and out. And like I'd pick up speed, lose speed, but like you said the suspension just needs to go away.
(Jeremy)>> I think so, and now that we have an issue underneath the hood I think everything under here needs to go away too.
(Jimmy)>> And now we can pick up every single one of these cones and go home cause it's hot.
(Jeremy)>> I don't want to. Here's the grand idea for this build. We're gonna take our '92 25th anniversary Camaro and turn it into an auto cross car. We're gonna get rid of the 170 ponies, go all the way up to 406 ponies. We're gonna back that up with a turbo 400 transmission specifically built for auto crossing. Then we're gonna move underneath the car, ditch all of that old tired suspension, and replace it with a bunch of good parts that's gonna make this car hug and handle on the course. We're gonna wrap a wide set of wheels with a wide set of tires, and then put some fender flares on the side of the car to give it a nasty stance. When we're done with that Jimmy and I are gonna design our own mild aero package but we're gonna do all of that right here in house. We're not the first guys to put an LS inside of a Camaro, and there's some people out there that are helping out with this. This is bracket we got from Holley Performance. Now what we're gonna do is take the stock clam shell off of the crossmember where the 5.0 liter used to sit. The upside to this is that these four bolts holes are actually gonna go into four holes that are already on the crossmember, and then the flip side of that is we're gonna take a stock clam shell for a newer series LS and we're gonna bolt this directly to our LS. [ drill buzzing ] [ MUSIC ]
(Jeremy)>> Alright go ahead and go down. [ MUSIC ] Man it's like this thing fits in here, keep going.
(Jimmy)>> Our engine fits easily into our motor mounts, and a couple of taps of the hammer get the bolts all the way through. Coming up it's more drivetrain and some serious suspension upgrades.
[ MUSIC ]
(Jeremy)>> We had a lot to do to finish up the engine install on our Camaro, and a carburetor's gonna be our choice for fuel delivery cause that's what the guys down in Engine Power set this engine up for. Now our stock fuel pump's gonna deliver way too much pressure for our carburetor. So we're gonna switch that out with a fuel pump that's gonna deliver 7 to 10 p-s-i to run our Quick Fuel carb. During the break we went ahead and took care of a couple of things on the Camaro. We finished up the fuel system. We threw the headers in cause we knew that was gonna be a bear. Jimmy put the radiator underneath the hood, and we're getting ready to finish up the install on the drivetrain. Let me give you a hand with this thing.
(Jimmy)>> So a little trick to this. Since we have the headers in and it's a really tight squeeze, we actually loosen the header bolts so that the engine can tilt back a little bit more so it'll clear the ears on this bell housing. [ MUSIC ]
(Jeremy)>> So what I'm looking for is a solid engagement with the converter and to make sure that the face of the converter is behind the face of the bell housing. I just need to get this lined up. [ MUSIC ] [ ratchet clicking ]
(Jimmy)>> Before we connect the flex plate to the torque converter we need to install the cross member. The turbo 400 cross member comes with an additional mounting hole, which we will drill a hole for and add an additional bolt.
(Jeremy)>> Finally we can marry our engine and our transmission together. To do that we'll have to work in a really tight space using three bolts to connect the flex plate to the torque converter. [ MUSIC ] [ engine starting & revving ]
(Jeremy)>> This thing started right up. Easiest swap we've done all year.
(Jimmy)>> It sounds super good too! Rev it up a couple more times. [ engine revving ]
(Jeremy)>> With the interior of our Camaro all buttoned up it's time to move our thoughts underneath the car.
(Jimmy)>> So we got all these parts to throw on our Camaro, like adjustable castor and camber plates to give our car a better alignment for track purposes, and we also got stiffer springs and sway bars to keep the handling tight when we're on course.
(Jeremy)>> And in the rear we're gonna ditch the stock coil spring and shock setup and move up to a coil over shock setup. Plus we're gonna get rid of the tires old rear end that's got 190,000 miles on it and replace it with a remanufactured one that's got 3.73 gears and a limited slip differential.
(Jimmy)>> The first part of our rear suspension install is gonna be these coil overs, but they install a little bit differently than the stock shocks. As you can see the stock shock uses a stud with a nut to hold it in place. On our coil over we have rod end type end with a special bracket that goes on top, and then this stud goes in the original shock location. [ MUSIC ] [ drill humming ]
(Jimmy)>> With our shocks in place we can install the rest of the suspension kit we picked up from Summit Racing. With the axle in position we can lower the Camaro down to it. This allows us to line up the lower control arm with the mount on the axle. Then we'll tap the bolt all the way in.
(Jeremy)>> Next we'll line up the coil over with the new mount we installed on the axle. This gets bolted in as well.
(Jimmy)>> The panhard bar goes in next. This is probably the easiest suspension piece to install but it's super important. It locates the axle laterally with the car, preventing it from moving left and right.
(Jeremy)>> With the lateral movement taken care of we need to add the torque arm. It attaches to the differential housing and prevents the axle from rotating under load.
(Jimmy)>> The last part of this kit for the rear is the sway bar. The new one is thicker than the original and will help reduce body roll, especially when we transition from one turn to another.
(Jeremy)>> That takes care of the rear. Now let's move on to the front. We'll start with the control arms. The kit we got from Summit Racing works with our 1992 Camaro with all the holes lining up in the stock mounts. With the car lowered so we can access the engine bay we can start installing the coil overs.
(Jimmy)>> The new castor/camber plates include a back plate that uses the o-e slots in the shock tower. All we have to do is add the remaining plates and get them bolted in. We're making sure not to drive these home knowing that we'll have to make adjustments later.
(Jeremy)>> Before we can go any further we need to marry the spindle to the coil over. This will just make assembly easier going forward. With it all in one piece we'll slide it through the castor/camber plate and add a nut, leaving it loose for now.
(Jimmy)>> Down below we'll raise the control arm and connect it to the spindle. We'll add the castle nut, firmly tightening it down. Then we'll just add a cotter pin for safety.
(Jeremy)>> With everything installed we'll go back to the engine bay and tighten the nut on the top of our coil over.
(Jimmy)>> To finish up our front suspension install we'll throw in the front sway bar. This is a simple bolt in using the stiffening plates provided in the kit. We'll use the factory bolts and stock mounting locations for the middle sections, and then the provided bolts and bushings for the ends that connect to the control arms. [ drill humming ]
(Jeremy)>> Up next our unique body mods and how we're gonna stick our Camaro to the ground.
(Jimmy)>> The Weld wheels we got from Summit Racing look great with the Continental tires wrapped around them, but the stance of our Camaro looks a little bit funky.
(Jeremy)>> Jimmy ordered these wheels specifically with this back spacing cause that gives us that wide track width, and that's gonna help decrease lateral load transfer, which can help in auto cross and in road racing.
(Jimmy)>> So to fix our stance we ordered these really big fender flares to give it an aggressive cool look.
(Jeremy)>> We can now prep the fender to go on the Camaro. We'll start by drilling out the holes for our fastener. Then at the Camaro we'll set the fender exactly where we want it and mark out each hole on the body.
(Jimmy)>> All there's left to do is carefully drill out each hole location with a nineteen-sixty-fourths drill bit. It's a rinse and repeat process drilling all 10 holes. [ drill humming ]
(Jimmy)>> A rivet nut goes in next. This is one of those tools that you may not use often but you're glad to have it when you need it.
(Jeremy)>> With all our rivet nuts in place we'll slap on the included rubber seal and bring in our fender flare adding all the supplied hardware. This is a repetitive process and there's really no kind of technique to this. Just get it good and tight.
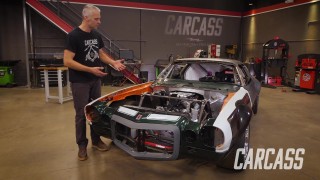
(Jimmy)>> Clean install. To go along with the fender flares we installed on our '92 Camaro we're gonna make a front and rear aero package to match, and up here we're gonna make a splitter to help with front downforce and we're gonna make it out of materials you might not have thought you could make a splitter from. The first thing to come off is that cheesy spoiler.
(Jeremy)>> The spoiler is held on with a couple of easy to find nuts and some that are hidden under some plastic plugs. And what was waiting for us when we pulled off this 28 year old spoiler was well. Oh that's nasty!
(Jimmy)>> To make this job easier we're gonna separate the deck lid from the back glass. After removing the plastic trim from under the deck lid, we unbolted the nuts that hold on the bracket with the window struts, and that sandwiched the lid and glass together.
(Jeremy)>> Applying a little pressure to the deck lid releases the butyl tape that seals the lid and glass together. Sticky!
(Jimmy)>> And a razor blade helps clean the excess tape off the rear glass.
(Jeremy)>> With the deck lid off we'll trace it out on a sheet of 90 thousandths aluminum. Then we'll cut out the shape with a jig saw making sure we follow our line as close as possible.
(Jimmy)>> To mount the first piece of our spoiler to our deck lid we'll have to drill some holes in a very specific location.
(Jeremy)>> Do about three and fifteen-sixteenths. We'll transfer the holes from our cover onto the deck lid with a marker. Then we'll just drill them out. We'll use light pressure to make sure that we don't distort or dent the top sheet metal of the lid. With our cover in place we'll add some hardware and then just snug it up for now.
(Jimmy)>> For the rest of the mounting holes we'll utilize most of the original holes from the stock spoiler, adding two additional holes on the edge of the deck lid. [ drill buzzing ]
(Jimmy)>> We'll follow that up with some hardware to keep it all together. Over at the shear we'll mark out our spoiler using the same 90 thousandths aluminum. We're making our mark at 7 inches. This allows for a one inch overhang on the bottom of our newly installed deck lid cover. [ MUSIC ] [ metal clanging ]
(Jeremy)>> And now we're ready to add the aluminum spoiler we've been working on. We're going with a 20 degree angle with a one inch overhang, which looks like less near the edge due to the curved nature of the deck lid.
(Jimmy)>> With Jeremy holding the spoiler in position we're ready to weld the aluminum pieces using the a/c setting on the tig machine. We'll start with a tack on one end and use an angle finder to ensure we are at the correct angle, tacking on the opposite end to hold everything in place. We're gonna add a few more tacks to ensure our spoiler isn't gonna move on us. Then we can expand those tacks laying down a three inch long bead to permanently affix the spoiler. [ welder crackling ]
(Jeremy)>> To finish off our spoiler we're gonna add some turnbuckle supports to help prevent our aluminum from bending out of alignment. [ drill buzzing ]
(Jimmy)>> With all the base holes spaced out we need to install one end of the support and locate where we'll drill the hole for the top. We can then drill that out... [ drill buzzing ]
(Jimmy)>> ...and chamfer the back side to accommodate the bolt heads.
(Jimmy)>> From here it's just rinse and repeat. [ MUSIC ] [ drill buzzing ]
(Jimmy)>> It's time for the final aero plan and a track payoff worth the wait!
[ MUSIC ]
(Jimmy)>> To make our splitter we're using a three quarter inch piece of plywood.
(Jeremy)>> With the plywood under the car we're using a plumb bob to transfer the shape of our bumper.
(Jimmy)>> With the shape of the bumper mapped out we'll move the plywood over to a table top to make the rest of this process easier. We'll add six inches so the splitter extends outward from our bumper. Then cut it out with a jig saw and clean up the edge with a grinder. Then with some brackets we fabbed up in the break... [ MUSIC ] ...we'll drill some holes through the plywood and thread in the bolts. [ MUSIC ]
(Jeremy)>> Now this won't work unless we close the air gap between the splitter and the bumper. We opted for some no dig edging.
(Jimmy)>> With the tab installed on the splitter we can install it again on the Camaro, adding the remainder of the edging, screwing the bottom to the first layer of edging, and the top to the bumper. [ aerosol can hissing ] [ MUSIC ]
(Jimmy)>> We're back here at NCM Motorsports Park with our Autocross Camaro and the last time we were here with this vehicle we tested it out bone stock on a course made up of a few hundred cones.
(Jeremy)>> Now last time Jimmy and I each ran a couple of laps with our best time being about 48 seconds. Well we're here today to best that time with 408 horsepower, a completely overhauled suspension, wider tires to grip the pavement, and a sleek aero package that should provide some downforce when we're hammering it through the corners. Now instead of running this course cold turkey Jimmy and I are both gonna run the course twice, and then our producer is gonna reveal the results at the end of the day. [ engine revving ]
(Jimmy)>> It's a lot faster than it was before, alright! [ engine revving ]
(Jimmy)>> This thing feels stuck to the ground. I feel like I'm carrying a lot more speed too. Now the first time out here I was still having fun in a third gen but I can tell you this is a lot more fun. [ engine revving ]
(Jeremy)>> How was it?
(Jimmy)>> It was way better than last time I'll say that. I'm ready for a second run.
(Jeremy)>> You're killing it out there. Go for it man. [ engine revving ]
(Jimmy)>> Compared to our old stock tires these 295 series Continental Extreme Contact sport tires probably made the biggest difference for me on this course. [ engine revving ]
(Jimmy)>> You want to talk about having fun in a third gen this is the car. This is so fantastic.
(Jeremy)>> Speaking of having fun get out of there. It's my turn to take it for a spin. [ MUSIC ] [ engine revving ]
(Jeremy)>> This thing is absolutely stuck to the pavement. The suspension is unbelievable right now. It's just absolutely hammering it. Wow! It's a completely different car. This is 100 percent a completely different car. One lap down one to go. [ engine revving ]
(Jeremy)>> Oh man this thing is just running out like a million bucks. [ engine revving ] [ MUSIC ]
(Jeremy)>> Alright man the results are and there's no way you're gonna believe this. I ran a 41:78 and Jimmy, he wrote it down right here, Jimmy ran a 42:25.
(Jimmy)>> That's sad.
(Jeremy)>> I actually beat him in something. First time this year I beat you in something.
(Jimmy)>> I'm really happy for you actually but that's all I have to say about that. Moving onto the car I'm amazed that this thing got as fast as it did with the upgrades we did to it.
(Jeremy)>> From the upgraded horsepower, I mean 408, 410 horse. We've got way different suspension, really wide tires, and the aero package had to do something because we are way quicker than we were before.
(Jimmy)>> I wouldn't change a thing. I think this car is just bananas.
(Jeremy)>> If you guys like anything we've done with the build or want to see anything more with the build why don't you go check out Powernation TV dot com, and as always.
(Jimmy)>> You're watching Carcass! [ MUSIC ]


