
Carcass Featured Projects


Carcass Builds


Want more content like this?
Join the PowerNation Email NewsletterParts Used In This Episode
Lincoln Electric
Lincoln Electric PowerMig 260
Matco Tools
MATCO Tools are the Official Tool Supplier to PowerNation
The Industrial Depot
Tools, Hardware, Shop Supplies
Episode Transcript
(Jeremy)>> Today on Carcass we introduce a ridiculously huge project vehicle.
(Jimmy)>> And before we even touch it we're taking it off road.
(Jeremy)>> You're watching Carcass. [ Music ]
(Narrator)>> When you want to build something different you turn to these guys, Jeremy Weckman and Jimmy King. Jeremy was raised in Minnesota building street rods. He's a builder, fabricator, and welder. Jimmy grew up in Nevada working in his dad's garage building cars. He's a mechanical engineer, builder, and fabricator. They take left for dead rides and transform them into one of a kind builds. If you can dream it they can build it. This is Carcass, a non-traditional speed shop. [ Music ]
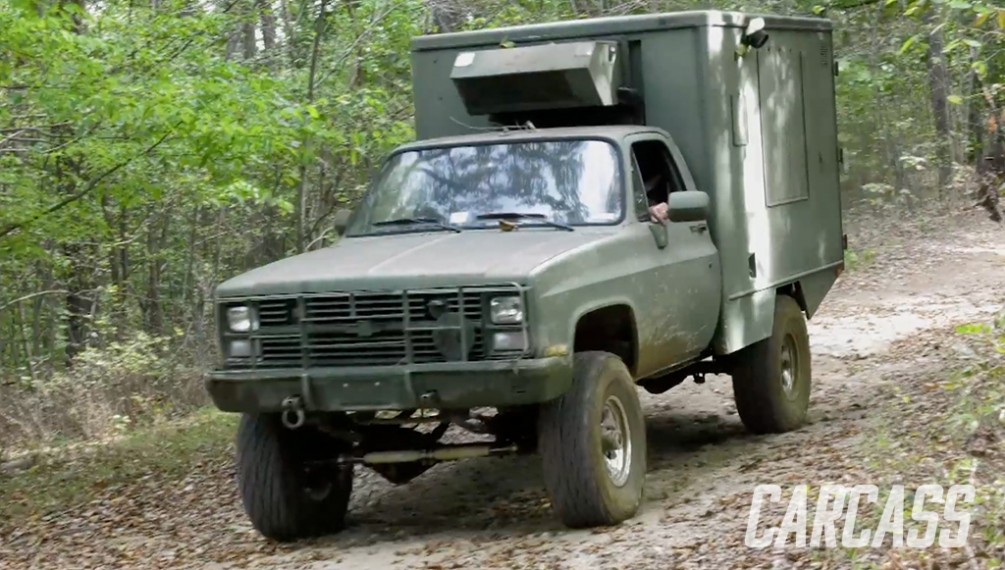
(Jimmy)>> This behind me is our 1984 Chevy M1010 ex-military truck. Now this thing was used as an ambulance for the US Coast Guard. This is actually one and a quarter ton, almost 7,500 pound truck, and that means that there's a lot of good parts under it. [ Music ]
(Jeremy)>> Woo it's a little stuck.
(Tommy)>> That's a pretty big looking r-v thing. When I first walked in the door I had no idea what would be in here, and with a name like what's on the wall who knows. Now you're not gonna make some kind of crazy ice cream truck something cause that same look, and sometimes y'all both are a little creepy.
(Jimmy)>> It might be a taco truck. We haven't decided yet.
(Marc)>> Oh man, seriously?
(Jeremy)>> Yeah what'd you think you'd see when you walked in here?
(Marc)>> Not that.
(Jeremy)>> What do you think? It's very fitting isn't it?
(Marc)>> Why did you get something like that? It's ready to go just as is. I mean seriously these things are great.
(Jeremy)>> We've got some really really good bones to start with. So the bones are the truck are really what we're the most interested in. It's got a Corporate 14 underneath the rear. It's got a Dana 60 on the front of it, which is the kingpin style that everybody's looking for. It's got an old, tired clapped out 6.2 diesel underneath the hood, which is definitely gonna go, but it's got a big turbo 400 and a 208 transfer case, and that is gonna be the best platform we can get to build, well something really really crazy. [ Music ]
(Pat)>> Look at that.
(Jeremy)>> What do you think of this thing?
(Pat)>> Coming in the door initially I didn't know what to expect because it could literally be anything because of what's going on down here.
(Mike)>> It smells like diesel.
(Pat)>> What year is this thing?
(Jimmy)>> '84.
(Jeremy)>> 1984.
(Pat)>> That's a good year for trucks and Van Halen.
(Mike)>> That's more cool than a black panther riding a unicorn through the woods.
(Jeremy)>> Isn't that awesome.
(Mike)>> I guess my imagination started running and the first thing I saw was the big box in the back, and obviously it's some type of ambulance vehicle.
(Pat)>> Dude what's with the creepy doll?
(Jeremy)>> It came with the truck.
(Mike)>> Check it out. Two fold down cots, side to side. You could do a little kitchenette. I'm in love with it. I think it's a brilliant idea for a project.
(Pat)>> That doll is like freaking me out. I don't know what's the deal with that but I ain't gonna touch it. Get that thing away from me.
(Jimmy)>> We found this truck in Louisville, Kentucky. The previous owner didn't really want to sell it because he wanted to turn this truck into a camper, but after he found out what we were gonna do with it he decided to let it go. So we loaded up the truck and brought it back to our shop. [ Music ]
(LT)>> Alright I heard y'all got a new truck but oh my goodness I was not expecting this. So when I first walked through the door I saw this big giant green behemoth. I can't really say I knew what to think.
(Austin)>> I'm in mid conversation with this guy and he leaves me.
(LT)>> I heard there was a new truck to check out.
(Jeremy)>> It got you down here didn't it?
(Austin)>> I like it baby! OD Green! I walk in looking for LT and I see why he strayed away. They got this rig sitting in the studio, and it is wildly different from anything I've seen being built around here. [ Music ]
(Tommy)>> I mean the options are endless. You could put a pool in it.
(Marc)>> I would make this thing one of those Icelandic excursion cruisers. Huge tires, able to withstand the cold, camper in the box, and just go out and have a great time with it.
(Pat)>> I would probably make it a tracked vehicle if it were me. Put big tracks on it, raise it up.
(Mike)>> I think it's the ultimate off road camper.
(Tommy)>> You could entertain out of it.
(Austin)>> Bachelorette party bus! I would drive this thing around. Maybe put a little hot tub in the back, some good music. I would have to d-j it of course. LT could drive.
(LT)>> You could make a food truck. You could make all kinds of different things.
(Tommy)>> You could haul your parts around if you was going somewhere. If you were building a race car, that type of thing.
(Jeremy)>> The previous owner had a really cool plan for it. He was gonna turn it into an off road kinda camping truck because of the big thing on the back, but we have a little bit different plans for it and you guys will find that out a little bit later.
(Jimmy)>> Coming up we take our top heavy monsters to hit the trails at Wooly's Off Road Park.
(Jeremy)>> You're watching Carcass.
[ Music ]
(Jeremy)>> Well Jimmy what do you think? Take this thing off road?
(Jimmy)>> I think so. It's very underpowered, extremely overweight, and has an astronomically high center of gravity. So what could go wrong? This is our M1010 ex-military truck. It's a 1984 Chevy, actually one and a quarter ton, that weighs almost 7,500 pounds.
(Jeremy)>> So these civilian style vehicles were used in the US military to haul troops, and cargo, and like our case they were also retrofitted to be an ambulance. Now they replaced the Jeep in the mid '70's and they have really good bones underneath it, and that's all we're really interested in is what makes the truck underneath this big green shell. So what we're gonna do is take this thing out, go run it down a whole bunch of trails, and see how it actually performs.
(Jimmy)>> Off roading with this truck, it's really heavy and it's really tall. I don't know how well we're gonna navigate the trails but before we take it apart we've got to do something with it. [ Music ]
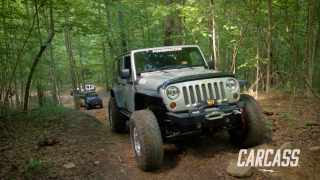
(Jeremy)>> Well here we are. One of my favorite spots, Wooly's Off Road Park. Wooly's is a great place to take any vehicle out on a trail ride. They have tons of trails and we know exactly where we're going. So we can run some of the more open stuff that can accommodate our vehicle. [ Music ]
(Jimmy)>> So tell me something Jeremy. How are we gonna go off roading with these almost bald tires?
(Jeremy)>> Well I've got a little surprise for you right in the back.
(Jimmy)>> Alright man!
(Jeremy)>> These are 37's. This should get us where we need to go.
(Jimmy)>> Sweet dude! You got lug nuts and everything?
(Jeremy)>> Yep and I brought all the tools. We're gonna do that right here.
(Jimmy)>> Right on dude.
(Jeremy)>> We're bumping our tires up from 32 inches all the way up to 37. Normally you would do a gear swap for tires this size but these trucks come with 4.56 gears, which is a good match for this set. Here you're younger. You take that. I'll take the tire cause that's easy. Throw it over there. [ Music ] That is more my style.
(Jimmy)>> It's bigger and better.
(Jeremy)>> Let's go drive it. [ Music ] [ engine starting ] [ engine revving ]
(Jeremy)>> The truck's been doing absolutely outstanding. You really can't ask for a better base platform to start with. And it's locked already.
(Jimmy)>> What else do you want I guess?
(Jeremy)>> We upgraded, we threw some tires on it.
(Jimmy)>> Threw some tires on it, necessary.
(Jeremy)>> Necessary upgrade.
(Jimmy)>> The skinny 235's weren't gonna do us much good in the mud holes but these 37's, they got it. So how might someone attain a truck like this? Well it's not as hard as you might think. On the internet, Craigslist, things like that. That's where we found ours, and why might you want one of these? Well you've got a Dana 60 in the front and 14 bolt in the back, a 208 transfer case, and a turbo 400, all for $5,000 bucks, and that's very within reach of a lot of people. So for not a lot of money you can get an off road capable vehicle without doing any work to it, and that's why this is a great start to our project. We're having a blast driving our new project vehicle around at Wooly's Off Road Park.
(Jimmy)>> And since it recently rained we're having a whole lot more fun.
(Jeremy)>> So when you round the corner and you see a puddle all you can think about is putting that pedal as far down to the floor board as you can get it, holding on to the wheel, and hitting that baby dead center to see what you can throw as far as a wake.
(Jimmy)>> I'm thinking the same as he is. Smash the pedal and see what happens.
(Jeremy)>> With our daylight quickly fading we decided to end our day of fun.
(Jimmy)>> We had a great day of wheeling and all we have to do now is get our truck back to the shop and start our project.
(Jeremy)>> This right here is the kind of build we do on Carcass. What's next for our big behemoth? We reveal our frame stripping plan next on Carcass.
[ Music ]
(Jimmy)>> Oh this was a genius idea.
(Jeremy)>> Man I don't know about you but I am super excited about this combo.
(Jimmy)>> Me too but it's a lot of work until we get to see the final product. We have huge plans for this truck and it all revolves around our 1953 Willys body and the chassis of our 1984 CUCV, and to top it all off we're gonna throw a blown small block Chevy at it.
(Jeremy)>> To do all that we're gonna have to drastically change the way our CUCV looks to accommodate the Willys body, and that means we're gonna have to shorten the chassis, but before we can even think about doing that we're gonna have to get rid of the cab and that big 2,000 pound box that's on the back.
(Jimmy)>> Alright let's see what we're working with here.
(Jeremy)>> Well it's just like a regular truck bed ain't it?
(Jimmy)>> It looks like there's brackets welded to the chassis and then bolted to the box.
(Jeremy)>> Alright so should we use the torch or try the impact?
(Jimmy)>> I think a combo of both would be fine.
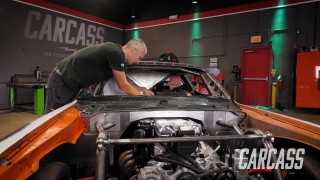
(Jeremy)>> Alrighty, well now's a good time to start. [ Music ] To get our hands on the bolts that hold this ambo box in place we're gonna first have to get rid of some lights and some bracketry that's in our way.
(Jimmy)>> There it goes! Broken bolts! [ drill humming ]
(Jeremy)>> It won't let go. Like legit, it's stuck in there. How's that happen? It reminds me of the mid-west, everything's rusty.
(Jimmy)>> Rusty tractors.
(Jeremy)>> Man I'm surprised the bolts are actually coming off. Well most of them anyway. After fighting a whole bunch of corrosion out back we're gonna make quick work of the spare tire carrier with the good ole torch.
(Jimmy)>> This will give us room to flex our muscles removing 30 year old bolts and body mounts.
(Jeremy)>> All in all we got rid of 10 of these stubborn mules from the chassis.
(Jimmy)>> The final and most important thing we need to do is to disconnect the diesel filler neck from the body. [ Music ] Alright man how do you think we're gonna pick this up?
(Jeremy)>> Well I think the front corner should be plenty strong right here.
(Jimmy)>> Yeah it's pretty thick. I think that'll work.
(Jeremy)>> And then I think we'll pick right off the back kinda the same spot.
(Jimmy)>> Okay, I'm down with that.
(Jeremy)>> Alrighty, no time like the present. [ Music ] [ mechanical humming ]
(Jeremy)>> We'll have to clip some wires quick. Okay I think we're good. We can roll out of here.
(Jimmy)>> Alright let's push it.
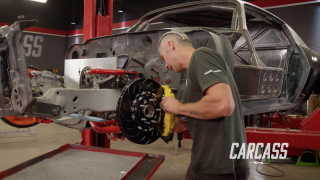
(Jeremy)>> With the front end of the truck out of the way we'll use a cart to get rid of the box. That will make room for us to get started on our front end because we're gonna need the lift to help disrobe this beefy chassis.
(Jimmy)>> But before we can do that there are a few things we need to button up. We'll need to dismount the master cylinder from our brakes, disconnect any wiring, and disengage the steering.
(Jeremy)>> With everything taken care of under the hood we can tackle the body mounts. Oh man we are so close to putting the Willys body on that thing but before we can even think about shortening the chassis there's a bunch of stuff we've got to get rid of.
(Jimmy)>> We have to get rid of the entire powertrain, that junky old exhaust that we can't use anyways, and drain and remove the old fuel tank, which I'm not really looking forward to.
(Jeremy)>> Yeah me neither. Well that's enough sitting around.
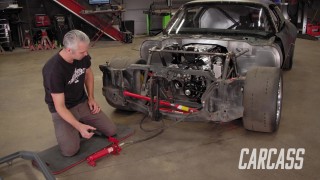
(Jimmy)>> Break time is over. We're gonna attack all these items simultaneously and removing the grille guard will help us do just that.
(Jeremy)>> That's heavy duty. Draining the fuel will allow us to snip the lines right next to the gas tank, and then we can start the process of removing that old thing. [ drill humming ]
(Jeremy)>> To finish the fuel system we're gonna remove all the old fuel lines because none of that's gonna work with the plans we have for our Willys.
(Jimmy)>> We'll hop on the exhaust next. There's really no point in keeping it around because we're shortening the frame and we're going with a different engine. With all the clamps removed we'll loosen up the headers side and slide it out the back in one piece.
(Jeremy)>> There's a few more points we need to disconnect before we can get to the heavy lifting. The front driveshaft needs to come loose, and then we'll just heat up the rear bolts so we can get that loose as well. Finally the engine mounts can be loosened up and the transmission can be broken free.
(Jimmy)>> With the help of our forklift we're now able to lift the 700 plus pound powertrain from our chassis.
(Jeremy)>> Well we're done.
(Jimmy)>> Wait a minute. We're done with this but the chassis' really filthy. I think we should clean it before we move forward.
(Jeremy)>> You want to take that outside and pressure wash it? Alright I'll help you push. It's way lighter without the engine.
(Jimmy)>> It sure is.
(Jeremy)>> After a quick wash we slice and dice our frame to accept our Willys body next on Carcass.
(Jeremy)>> Man that pressure washer worked great. This thing's squeaky clean.
(Jimmy)>> Now we've got to figure out how to get that onto this chassis.
(Jeremy)>> I think the best spot to make the cut is right here in the middle because it's nice and straight, and it's the length we need. So I think this right here, that's the ticket.
(Jimmy)>> We should definitely add a boxing plate on the inside and a fish plate on the outside to make sure this thing is stiff and strong.
(Jeremy)>> The wheel base of our CUCV is 132 inches. Now the wheel base of our Willys is 104 inches. Now to marry those two together we're gonna have to cut a section out of the frame of the CUCV. When we're done with that we're just gonna bring the two halves together. Then we'll grab our Willys body and set it right on top.
(Jimmy)>> To get this cutting party started we opted to use cutoff wheels. The cutting disc makes it pretty easy to follow a straight line.
(Jeremy)>> To knock this out fairly quickly Jimmy and I are both gonna be cutting each side of the frame. We're gonna cut the front side loose first, but this isn't gonna be just any old straight cut.
(Jimmy)>> That's right. At the bottom of our frame we left a little tab, and this will help realign the chassis later on.
(Jeremy)>> With our final cut releasing some stress in the frame we'll separate the two halves.
(Jimmy)>> Half way done. Half the truck, get it? Yeah! With the front half out of the way we'll get started shortening the chassis. In this scenario we're starting at the bottom. We'll follow that up with cutting up the side of the chassis, and finally we'll make the last cut safely from the top, allowing the 25 pound chunk of metal to fall to the ground.
(Jeremy)>> Lastly we'll sneak up on our lines with a grinder. Then we'll prep the two sections to be welded back together. This is a good time to wear your respirator with all that metal and rust that's in the air. [ Music ] Wow, that's a whole lot lighter than I expected it to be.
(Jimmy)>> I'm hoping this fits up but I'm expecting we'll have to do a little bit of trimming before we can tack it up.
(Jeremy)>> It kinda looks like the chassis widened when we cut it apart.
(Jimmy)>> We can take a ratchet strap, loop it around, and then see if we can't get it back in alignment.
(Jeremy)>> Yeah we'll pull them together before we tack it.
(Jimmy)>> Good idea! [ Music ] [ ratchet clicking ]
(Jimmy)>> With the gap closed up we'll pull out our Lincoln Electric PowerMig 260. This welder has the ready, set, weld feature which allows us to dial in the three-sixteenths chassis material. [ welder crackling ]
(Jeremy)>> Alright my side's tacked and you're tacked too right?
(Jimmy)>> Yeah but the bottom of the frame rail is still kicked out about a sixteenth on my side.
(Jeremy)>> I'm out like three-sixteenths on my side.
(Jimmy)>> So I think we keep tightening the ratchet strap until my side comes in. I'll tack it, tighten it more, tack your side.
(Jeremy)>> That's a fantastic plan. Let's do that.
(Jimmy)>> That's good.
(Jeremy)>> We're making sure to add some beefy tacks because we're adding a lot of stress with the ratchet strap. Each click of the strap adds more force to the chassis. A small tack could easily crack and cause a dangerous situation. [ Music ]
(Jimmy)>> All tacked up?
(Jeremy)>> All tacked up over here.
(Jimmy)>> Alright let's get this thing welded in.
(Jeremy)>> Sounds good. [ welder crackling ]
(Jimmy)>> And to make sure that we have good weld penetration we added a bevel to each side of the frame rail, resulting in a strong weld.
(Jeremy)>> We have the chassis welded now but to make sure it's strong enough we're gonna add some reinforcement in what's called a fish plate.
(Jimmy)>> A fish plate is just a fancy name for a plate that bridges the weld seam in the chassis. This gives us another layer of reinforcement and ultimately adds more strength. We're making our fish plate out of eighth inch steel. Installing this sturdy plate is fairly easy. A couple of tacks to hold it in place. Then all you do is burn it in. [ welder crackling ]
(Jeremy)>> But we're not gonna stop here. A common way to reinforce the frame is to box it in. Boxing the frame increases its rigidity and adds yet another layer of reinforcement that will brace the seam. When doing work like this my first step is to always make a template. A sharp utility knife allows me to make crisp edges that follow the profile of our frame. Then the template will be traced out of eighth inch plate steel, and we'll make short work of cutting it with our Lincoln Electric Tomahawk 1,000 Plasma Cutter. [ torch hissing ]
(Jeremy)>> We'll follow that up with a grinder and a sanding flap disc to smooth out the edges. [ Music ]
(Jimmy)>> While Jeremy cut out the boxing plates for the frame I got to work prepping the sections of the chassis that will receive these reinforcements. [ grinder buzzing ]
(Jeremy)>> With a quick test fit, perfect, and a couple of tacks... [ welder crackling ]
(Jeremy)>> ...we can both get to work welding these in. Now we're not gonna weld these in solid in one shot. We're gonna end up moving around to help disperse the heat that we pile into the chassis. This will mitigate any weld distortion and keep our frame true and as close to stock strength as possible.
(Jimmy)>> We're minutes away from putting our Willys body on our CUCV chassis. Our M1010 has made quite the transformation from its ambulance body totaling 228 inches in length to its now bare chassis totaling 16 feet. You can follow us along as we hit the next milestone for this truck at Powernation TV dot com, but that's gonna have to wait until tomorrow.
Show Full Transcript
(Jimmy)>> And before we even touch it we're taking it off road.
(Jeremy)>> You're watching Carcass. [ Music ]
(Narrator)>> When you want to build something different you turn to these guys, Jeremy Weckman and Jimmy King. Jeremy was raised in Minnesota building street rods. He's a builder, fabricator, and welder. Jimmy grew up in Nevada working in his dad's garage building cars. He's a mechanical engineer, builder, and fabricator. They take left for dead rides and transform them into one of a kind builds. If you can dream it they can build it. This is Carcass, a non-traditional speed shop. [ Music ]
(Jimmy)>> This behind me is our 1984 Chevy M1010 ex-military truck. Now this thing was used as an ambulance for the US Coast Guard. This is actually one and a quarter ton, almost 7,500 pound truck, and that means that there's a lot of good parts under it. [ Music ]
(Jeremy)>> Woo it's a little stuck.
(Tommy)>> That's a pretty big looking r-v thing. When I first walked in the door I had no idea what would be in here, and with a name like what's on the wall who knows. Now you're not gonna make some kind of crazy ice cream truck something cause that same look, and sometimes y'all both are a little creepy.
(Jimmy)>> It might be a taco truck. We haven't decided yet.
(Marc)>> Oh man, seriously?
(Jeremy)>> Yeah what'd you think you'd see when you walked in here?
(Marc)>> Not that.
(Jeremy)>> What do you think? It's very fitting isn't it?
(Marc)>> Why did you get something like that? It's ready to go just as is. I mean seriously these things are great.
(Jeremy)>> We've got some really really good bones to start with. So the bones are the truck are really what we're the most interested in. It's got a Corporate 14 underneath the rear. It's got a Dana 60 on the front of it, which is the kingpin style that everybody's looking for. It's got an old, tired clapped out 6.2 diesel underneath the hood, which is definitely gonna go, but it's got a big turbo 400 and a 208 transfer case, and that is gonna be the best platform we can get to build, well something really really crazy. [ Music ]
(Pat)>> Look at that.
(Jeremy)>> What do you think of this thing?
(Pat)>> Coming in the door initially I didn't know what to expect because it could literally be anything because of what's going on down here.
(Mike)>> It smells like diesel.
(Pat)>> What year is this thing?
(Jimmy)>> '84.
(Jeremy)>> 1984.
(Pat)>> That's a good year for trucks and Van Halen.
(Mike)>> That's more cool than a black panther riding a unicorn through the woods.
(Jeremy)>> Isn't that awesome.
(Mike)>> I guess my imagination started running and the first thing I saw was the big box in the back, and obviously it's some type of ambulance vehicle.
(Pat)>> Dude what's with the creepy doll?
(Jeremy)>> It came with the truck.
(Mike)>> Check it out. Two fold down cots, side to side. You could do a little kitchenette. I'm in love with it. I think it's a brilliant idea for a project.
(Pat)>> That doll is like freaking me out. I don't know what's the deal with that but I ain't gonna touch it. Get that thing away from me.
(Jimmy)>> We found this truck in Louisville, Kentucky. The previous owner didn't really want to sell it because he wanted to turn this truck into a camper, but after he found out what we were gonna do with it he decided to let it go. So we loaded up the truck and brought it back to our shop. [ Music ]
(LT)>> Alright I heard y'all got a new truck but oh my goodness I was not expecting this. So when I first walked through the door I saw this big giant green behemoth. I can't really say I knew what to think.
(Austin)>> I'm in mid conversation with this guy and he leaves me.
(LT)>> I heard there was a new truck to check out.
(Jeremy)>> It got you down here didn't it?
(Austin)>> I like it baby! OD Green! I walk in looking for LT and I see why he strayed away. They got this rig sitting in the studio, and it is wildly different from anything I've seen being built around here. [ Music ]
(Tommy)>> I mean the options are endless. You could put a pool in it.
(Marc)>> I would make this thing one of those Icelandic excursion cruisers. Huge tires, able to withstand the cold, camper in the box, and just go out and have a great time with it.
(Pat)>> I would probably make it a tracked vehicle if it were me. Put big tracks on it, raise it up.
(Mike)>> I think it's the ultimate off road camper.
(Tommy)>> You could entertain out of it.
(Austin)>> Bachelorette party bus! I would drive this thing around. Maybe put a little hot tub in the back, some good music. I would have to d-j it of course. LT could drive.
(LT)>> You could make a food truck. You could make all kinds of different things.
(Tommy)>> You could haul your parts around if you was going somewhere. If you were building a race car, that type of thing.
(Jeremy)>> The previous owner had a really cool plan for it. He was gonna turn it into an off road kinda camping truck because of the big thing on the back, but we have a little bit different plans for it and you guys will find that out a little bit later.
(Jimmy)>> Coming up we take our top heavy monsters to hit the trails at Wooly's Off Road Park.
(Jeremy)>> You're watching Carcass.
[ Music ]
(Jeremy)>> Well Jimmy what do you think? Take this thing off road?
(Jimmy)>> I think so. It's very underpowered, extremely overweight, and has an astronomically high center of gravity. So what could go wrong? This is our M1010 ex-military truck. It's a 1984 Chevy, actually one and a quarter ton, that weighs almost 7,500 pounds.
(Jeremy)>> So these civilian style vehicles were used in the US military to haul troops, and cargo, and like our case they were also retrofitted to be an ambulance. Now they replaced the Jeep in the mid '70's and they have really good bones underneath it, and that's all we're really interested in is what makes the truck underneath this big green shell. So what we're gonna do is take this thing out, go run it down a whole bunch of trails, and see how it actually performs.
(Jimmy)>> Off roading with this truck, it's really heavy and it's really tall. I don't know how well we're gonna navigate the trails but before we take it apart we've got to do something with it. [ Music ]
(Jeremy)>> Well here we are. One of my favorite spots, Wooly's Off Road Park. Wooly's is a great place to take any vehicle out on a trail ride. They have tons of trails and we know exactly where we're going. So we can run some of the more open stuff that can accommodate our vehicle. [ Music ]
(Jimmy)>> So tell me something Jeremy. How are we gonna go off roading with these almost bald tires?
(Jeremy)>> Well I've got a little surprise for you right in the back.
(Jimmy)>> Alright man!
(Jeremy)>> These are 37's. This should get us where we need to go.
(Jimmy)>> Sweet dude! You got lug nuts and everything?
(Jeremy)>> Yep and I brought all the tools. We're gonna do that right here.
(Jimmy)>> Right on dude.
(Jeremy)>> We're bumping our tires up from 32 inches all the way up to 37. Normally you would do a gear swap for tires this size but these trucks come with 4.56 gears, which is a good match for this set. Here you're younger. You take that. I'll take the tire cause that's easy. Throw it over there. [ Music ] That is more my style.
(Jimmy)>> It's bigger and better.
(Jeremy)>> Let's go drive it. [ Music ] [ engine starting ] [ engine revving ]
(Jeremy)>> The truck's been doing absolutely outstanding. You really can't ask for a better base platform to start with. And it's locked already.
(Jimmy)>> What else do you want I guess?
(Jeremy)>> We upgraded, we threw some tires on it.
(Jimmy)>> Threw some tires on it, necessary.
(Jeremy)>> Necessary upgrade.
(Jimmy)>> The skinny 235's weren't gonna do us much good in the mud holes but these 37's, they got it. So how might someone attain a truck like this? Well it's not as hard as you might think. On the internet, Craigslist, things like that. That's where we found ours, and why might you want one of these? Well you've got a Dana 60 in the front and 14 bolt in the back, a 208 transfer case, and a turbo 400, all for $5,000 bucks, and that's very within reach of a lot of people. So for not a lot of money you can get an off road capable vehicle without doing any work to it, and that's why this is a great start to our project. We're having a blast driving our new project vehicle around at Wooly's Off Road Park.
(Jimmy)>> And since it recently rained we're having a whole lot more fun.
(Jeremy)>> So when you round the corner and you see a puddle all you can think about is putting that pedal as far down to the floor board as you can get it, holding on to the wheel, and hitting that baby dead center to see what you can throw as far as a wake.
(Jimmy)>> I'm thinking the same as he is. Smash the pedal and see what happens.
(Jeremy)>> With our daylight quickly fading we decided to end our day of fun.
(Jimmy)>> We had a great day of wheeling and all we have to do now is get our truck back to the shop and start our project.
(Jeremy)>> This right here is the kind of build we do on Carcass. What's next for our big behemoth? We reveal our frame stripping plan next on Carcass.
[ Music ]
(Jimmy)>> Oh this was a genius idea.
(Jeremy)>> Man I don't know about you but I am super excited about this combo.
(Jimmy)>> Me too but it's a lot of work until we get to see the final product. We have huge plans for this truck and it all revolves around our 1953 Willys body and the chassis of our 1984 CUCV, and to top it all off we're gonna throw a blown small block Chevy at it.
(Jeremy)>> To do all that we're gonna have to drastically change the way our CUCV looks to accommodate the Willys body, and that means we're gonna have to shorten the chassis, but before we can even think about doing that we're gonna have to get rid of the cab and that big 2,000 pound box that's on the back.
(Jimmy)>> Alright let's see what we're working with here.
(Jeremy)>> Well it's just like a regular truck bed ain't it?
(Jimmy)>> It looks like there's brackets welded to the chassis and then bolted to the box.
(Jeremy)>> Alright so should we use the torch or try the impact?
(Jimmy)>> I think a combo of both would be fine.
(Jeremy)>> Alrighty, well now's a good time to start. [ Music ] To get our hands on the bolts that hold this ambo box in place we're gonna first have to get rid of some lights and some bracketry that's in our way.
(Jimmy)>> There it goes! Broken bolts! [ drill humming ]
(Jeremy)>> It won't let go. Like legit, it's stuck in there. How's that happen? It reminds me of the mid-west, everything's rusty.
(Jimmy)>> Rusty tractors.
(Jeremy)>> Man I'm surprised the bolts are actually coming off. Well most of them anyway. After fighting a whole bunch of corrosion out back we're gonna make quick work of the spare tire carrier with the good ole torch.
(Jimmy)>> This will give us room to flex our muscles removing 30 year old bolts and body mounts.
(Jeremy)>> All in all we got rid of 10 of these stubborn mules from the chassis.
(Jimmy)>> The final and most important thing we need to do is to disconnect the diesel filler neck from the body. [ Music ] Alright man how do you think we're gonna pick this up?
(Jeremy)>> Well I think the front corner should be plenty strong right here.
(Jimmy)>> Yeah it's pretty thick. I think that'll work.
(Jeremy)>> And then I think we'll pick right off the back kinda the same spot.
(Jimmy)>> Okay, I'm down with that.
(Jeremy)>> Alrighty, no time like the present. [ Music ] [ mechanical humming ]
(Jeremy)>> We'll have to clip some wires quick. Okay I think we're good. We can roll out of here.
(Jimmy)>> Alright let's push it.
(Jeremy)>> With the front end of the truck out of the way we'll use a cart to get rid of the box. That will make room for us to get started on our front end because we're gonna need the lift to help disrobe this beefy chassis.
(Jimmy)>> But before we can do that there are a few things we need to button up. We'll need to dismount the master cylinder from our brakes, disconnect any wiring, and disengage the steering.
(Jeremy)>> With everything taken care of under the hood we can tackle the body mounts. Oh man we are so close to putting the Willys body on that thing but before we can even think about shortening the chassis there's a bunch of stuff we've got to get rid of.
(Jimmy)>> We have to get rid of the entire powertrain, that junky old exhaust that we can't use anyways, and drain and remove the old fuel tank, which I'm not really looking forward to.
(Jeremy)>> Yeah me neither. Well that's enough sitting around.
(Jimmy)>> Break time is over. We're gonna attack all these items simultaneously and removing the grille guard will help us do just that.
(Jeremy)>> That's heavy duty. Draining the fuel will allow us to snip the lines right next to the gas tank, and then we can start the process of removing that old thing. [ drill humming ]
(Jeremy)>> To finish the fuel system we're gonna remove all the old fuel lines because none of that's gonna work with the plans we have for our Willys.
(Jimmy)>> We'll hop on the exhaust next. There's really no point in keeping it around because we're shortening the frame and we're going with a different engine. With all the clamps removed we'll loosen up the headers side and slide it out the back in one piece.
(Jeremy)>> There's a few more points we need to disconnect before we can get to the heavy lifting. The front driveshaft needs to come loose, and then we'll just heat up the rear bolts so we can get that loose as well. Finally the engine mounts can be loosened up and the transmission can be broken free.
(Jimmy)>> With the help of our forklift we're now able to lift the 700 plus pound powertrain from our chassis.
(Jeremy)>> Well we're done.
(Jimmy)>> Wait a minute. We're done with this but the chassis' really filthy. I think we should clean it before we move forward.
(Jeremy)>> You want to take that outside and pressure wash it? Alright I'll help you push. It's way lighter without the engine.
(Jimmy)>> It sure is.
(Jeremy)>> After a quick wash we slice and dice our frame to accept our Willys body next on Carcass.
(Jeremy)>> Man that pressure washer worked great. This thing's squeaky clean.
(Jimmy)>> Now we've got to figure out how to get that onto this chassis.
(Jeremy)>> I think the best spot to make the cut is right here in the middle because it's nice and straight, and it's the length we need. So I think this right here, that's the ticket.
(Jimmy)>> We should definitely add a boxing plate on the inside and a fish plate on the outside to make sure this thing is stiff and strong.
(Jeremy)>> The wheel base of our CUCV is 132 inches. Now the wheel base of our Willys is 104 inches. Now to marry those two together we're gonna have to cut a section out of the frame of the CUCV. When we're done with that we're just gonna bring the two halves together. Then we'll grab our Willys body and set it right on top.
(Jimmy)>> To get this cutting party started we opted to use cutoff wheels. The cutting disc makes it pretty easy to follow a straight line.
(Jeremy)>> To knock this out fairly quickly Jimmy and I are both gonna be cutting each side of the frame. We're gonna cut the front side loose first, but this isn't gonna be just any old straight cut.
(Jimmy)>> That's right. At the bottom of our frame we left a little tab, and this will help realign the chassis later on.
(Jeremy)>> With our final cut releasing some stress in the frame we'll separate the two halves.
(Jimmy)>> Half way done. Half the truck, get it? Yeah! With the front half out of the way we'll get started shortening the chassis. In this scenario we're starting at the bottom. We'll follow that up with cutting up the side of the chassis, and finally we'll make the last cut safely from the top, allowing the 25 pound chunk of metal to fall to the ground.
(Jeremy)>> Lastly we'll sneak up on our lines with a grinder. Then we'll prep the two sections to be welded back together. This is a good time to wear your respirator with all that metal and rust that's in the air. [ Music ] Wow, that's a whole lot lighter than I expected it to be.
(Jimmy)>> I'm hoping this fits up but I'm expecting we'll have to do a little bit of trimming before we can tack it up.
(Jeremy)>> It kinda looks like the chassis widened when we cut it apart.
(Jimmy)>> We can take a ratchet strap, loop it around, and then see if we can't get it back in alignment.
(Jeremy)>> Yeah we'll pull them together before we tack it.
(Jimmy)>> Good idea! [ Music ] [ ratchet clicking ]
(Jimmy)>> With the gap closed up we'll pull out our Lincoln Electric PowerMig 260. This welder has the ready, set, weld feature which allows us to dial in the three-sixteenths chassis material. [ welder crackling ]
(Jeremy)>> Alright my side's tacked and you're tacked too right?
(Jimmy)>> Yeah but the bottom of the frame rail is still kicked out about a sixteenth on my side.
(Jeremy)>> I'm out like three-sixteenths on my side.
(Jimmy)>> So I think we keep tightening the ratchet strap until my side comes in. I'll tack it, tighten it more, tack your side.
(Jeremy)>> That's a fantastic plan. Let's do that.
(Jimmy)>> That's good.
(Jeremy)>> We're making sure to add some beefy tacks because we're adding a lot of stress with the ratchet strap. Each click of the strap adds more force to the chassis. A small tack could easily crack and cause a dangerous situation. [ Music ]
(Jimmy)>> All tacked up?
(Jeremy)>> All tacked up over here.
(Jimmy)>> Alright let's get this thing welded in.
(Jeremy)>> Sounds good. [ welder crackling ]
(Jimmy)>> And to make sure that we have good weld penetration we added a bevel to each side of the frame rail, resulting in a strong weld.
(Jeremy)>> We have the chassis welded now but to make sure it's strong enough we're gonna add some reinforcement in what's called a fish plate.
(Jimmy)>> A fish plate is just a fancy name for a plate that bridges the weld seam in the chassis. This gives us another layer of reinforcement and ultimately adds more strength. We're making our fish plate out of eighth inch steel. Installing this sturdy plate is fairly easy. A couple of tacks to hold it in place. Then all you do is burn it in. [ welder crackling ]
(Jeremy)>> But we're not gonna stop here. A common way to reinforce the frame is to box it in. Boxing the frame increases its rigidity and adds yet another layer of reinforcement that will brace the seam. When doing work like this my first step is to always make a template. A sharp utility knife allows me to make crisp edges that follow the profile of our frame. Then the template will be traced out of eighth inch plate steel, and we'll make short work of cutting it with our Lincoln Electric Tomahawk 1,000 Plasma Cutter. [ torch hissing ]
(Jeremy)>> We'll follow that up with a grinder and a sanding flap disc to smooth out the edges. [ Music ]
(Jimmy)>> While Jeremy cut out the boxing plates for the frame I got to work prepping the sections of the chassis that will receive these reinforcements. [ grinder buzzing ]
(Jeremy)>> With a quick test fit, perfect, and a couple of tacks... [ welder crackling ]
(Jeremy)>> ...we can both get to work welding these in. Now we're not gonna weld these in solid in one shot. We're gonna end up moving around to help disperse the heat that we pile into the chassis. This will mitigate any weld distortion and keep our frame true and as close to stock strength as possible.
(Jimmy)>> We're minutes away from putting our Willys body on our CUCV chassis. Our M1010 has made quite the transformation from its ambulance body totaling 228 inches in length to its now bare chassis totaling 16 feet. You can follow us along as we hit the next milestone for this truck at Powernation TV dot com, but that's gonna have to wait until tomorrow.


