
Engine Power Featured Projects


Engine Power Builds


Want more content like this?
Join the PowerNation Email NewsletterParts Used In This Episode

ARP
ARP is the Official Bolt Supplier to Engine Power
Matco Tools
MATCO Tools are the Official Tool Supplier to Engine Power
Episode Transcript
(Narrator)>> We're celebrating Procharger's 25th anniversary with style. Today on Engine Power we supercharge a brand new Mustang GT, looking for hundreds of extra ponies on the dyno roller. [ engine revving ] Plus the test sled gets essential safety gear.
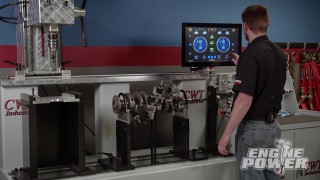
(Pat)>> Welcome to Engine Power's mission control center. Our engine is fired up and we are going through our pre-flight checklist. Engine r-p-m, check. Speedometer, check. We are all systems go on the launch vehicle and our pilot is ready for lift off. Launch in three, two, one! [ engine revving ]
(Pat)>> And here's what we got for results on our box stock pony car at the tire. 400.68 at 6,800 and 365 pound feet of torque at 4,600.
(Mike)>> What you are about to witness is a marvel of technology that shows how precisely engineered parts, the dedication to development, and the ease of installation can turn a high performance factory muscle car into a nine second quarter mile rocket ship and still have wonderful street manners, and even be a daily driver without second though.
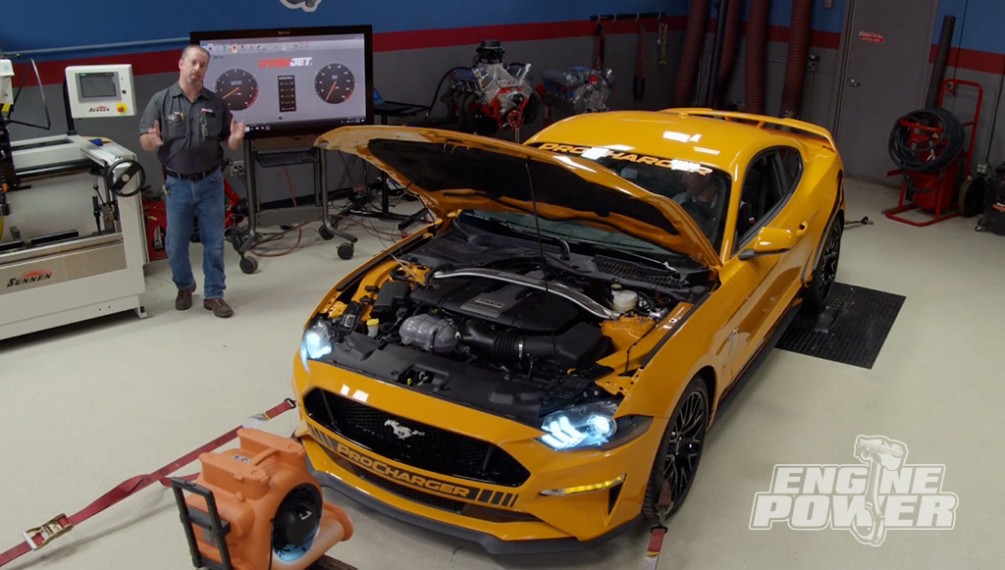
(Pat)>> On the launch pad today is a brand new 2019 Mustang GT that is here to celebrate Procharger's 25 years of success. They were the first to have a supercharged 2018 Mustang click off a nine second run in the quarter mile. Today you are going to see why Procharger is the leader in supercharging technology.
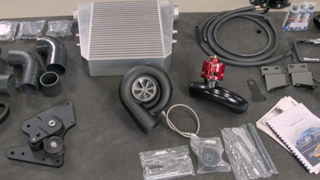
(Mike)>> When Pat and I heard about their accomplishments with the 2018 and '19 Mustang platform we had to get one here in the shop. Luckily for us it was just a phone call away, and that Fury orange colored Mustang and a couple of large boxes showed up in our parking lot.
(Pat)>> So if you own a Mustang, and I mean any Mustang from 1964 all the way up to a current 2019, they have a kit for you. And if you drive something else chances are they still have you covered. So whatever you drive stick around because you are going to be super impressed.
(Mike)>> If I said you can bolt on over 300 horsepower without any cutting or other modifications that won't allow you to put the car back to 100 percent stock form you'd say I'm full of it. Today Pat and I will be proving it can be done.
(Pat)>> In order to get to that point we have to get to work. Like usual teardown is necessary to make way for all of the Procharger goodies. Components like the strut tower brace, engine cover, and air box are removed, which clears out a lot of room. From underneath the splash shield is removed, the coolant is drained, and the front tires are removed. We can take out several fasteners that retain the front fascia. With them all out it's removed and set very carefully to the side of the work area.
(Mike)>> Now two shrouds are removed, one on each side of the radiator. There are also two narrow pieces that are removed from the condenser's tanks. A new thermostat housing has to be installed. With the original one out this supplied aluminum one finds its new home. The coolant reservoir is getting evicted as well. There are two different ways to purchase this system depending on what your goals are. The HO and the Stage Two. We are installing the stage two kit that uses a dedicated belt drive versus the h-o, that has a shared belt with the rest of the accessories. The stage two also has a larger intercooler and a higher boost level to make more power. Here's a huge benefit for you guys that are looking for a system that is 50 state legal for emissions purposes. Procharger also offers HO in stage two kits that make the same amount of power, just use a factory air box.
(Pat)>> We opted for the optional POne-X supercharger over the standard POne-SCOne. It has a different shaped housing and a higher efficiency impeller, which produces cooler charge temps, and also reduces parasitic engine loading. Another option we wanted was the helical gear set for quieter, or should I say stealthier, operation at idle and low r-p-m. The POne-X is capable of over 875 horsepower and comes in satin, polished, or a black finish.
(Narrator)>> Up next we get this system installed and get it on the dyno.
(Mike)>> Like we mentioned earlier, the stage two kit uses a dedicated pulley to turn the supercharger, not the factory accessory belt. Now we already installed one since it's so far down in the engine bay and it's hard to get a camera shot. Here's what it looks like. It's an eight rib design that has special standoffs that locate in the factory harmonic balancer. Once the pulley is rotated counterclockwise it locks in place and a supplied balancer bolt is torqued to factory spec.
(Pat)>> In order to install the sub-bracket we have to remove these two timing cover bolts, along with the nut on the alternator stud. Using two supplied fasteners the sub-bracket is installed on the timing cover. A couple more fasteners are pulled out. One is the top timing cover fastener and the other is the top thermostat housing bolt. Now the radiator brackets are pulled off and will not be reused. They are replaced with these new brackets that move the radiator forward to give us the needed clearance for the blower and other components.
(Mike)>> The steel idler pulley was flipped backwards and an idler shaft is installed. It locates the supplied idler pulley and is secured with a longer bolt. Procharger's main bracket can go on now. It uses spacers and the hex standoff to locate. This bracket is super strong and will not flex or distort. It also houses the blower belt tensioner. Once the head unit is filled with six ounces of Procharger oil it's mounted to the bracket.
(Pat)>> Procharger offers superchargers for everything, from power sports all the way up to the massive FThree-X used in pro mod drag racing. This is the FOne-A-94 and this is the DOne-X. Now like the POne-X that's on the car they all share a nine inch housing, which means they all share the same bracketry. Depending on what power level you are looking for or just want to upgrade all you have to do is change the blower. Go to Procharger dot com to find your options and find a dealer near you.
(Mike)>> The A-rib belt is routed from the crank pulley to the supercharger pulley. A half inch drive ratchet is used to rotate the tensioner and make the belt feel at home. With the main wiring harness laid on top of the bumper we are ready to install the intercooler. This is the intercooler that's supplied in the HO kits. It's rated to handle up to 750 horsepower. This much larger intercooler is supplied in the stage two systems and it can handle up to 1,200 horsepower. Now both of these intercoolers are super-efficient in their intended applications. Now in case you want to move up from the HO to the stage two later, or you have a transplant project that you want to use either one of these in, they are both sold separately. Two brackets are used to mount the intercooler. The bracket slides over the bumper to frame bolts on the back side of the bumper and is secured with the nuts from the kit. Before tightening make sure the intercooler is as high and as far forward as possible. The factory mass air flow sensor is placed in the boss of tube number 430 and is tightened down with supplied screws. At this point we are ready to connect the outlet of the blower to the inlet side of the intercooler. A 90 degree elbow is attached to the blower, followed by the tube that houses the race bypass valve. A final coupler attaches it to the intercooler. On the passenger side we have a 90 degree elbow that connects to the intercooler outlet. The next tube is the one we install the mass air meter in. With another 90 degree elbow the connection from it to the throttle body is completed. With the tube removed from the factory vacuum tree we can install the Procharger vacuum manifold. The quarter inch nylon hose runs from the vacuum manifold to the push lock fitting on the race valve.
(Pat)>> Five-eighths inch hose is supplied to route the p-c-v system from the valve covers to the Procharger inlet tube. A plastic inlet tube is installed on the inlet side of the supercharger. It runs through the fender well and a large conical air filter is attached. A supplied coolant reservoir tank is installed in the original one's location on the fan shroud. Once all the hoses are attached fresh coolant refills the system. With it topped off the Procharger tune was loaded into the car and it's heading to the roller for some pulls.
(Narrator)>> Up next the moment of truth for the Mustang. [ engine revving ]
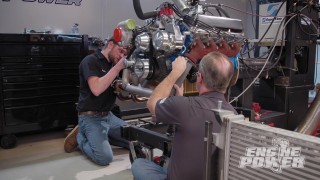
(Pat)>> We are finally to our favorite part of this operation, making some dyno pulls. Our stage two kit has an upgraded POne-X head unit and a larger intercooler. We'll be making some runs to 7,600 still utilizing the Mustang's stock fuel system. So let's see what it does. [ engine revving ]
(Pat)>> How's that for an impressive start. 657 horsepower at 7,400, 493 pound feet at 6,400. Now if you remember our baseline was 400 horse at the wheel. So that's a 257 horse gain at the tire, but more importantly that means the engine is making over 700 horse at the crank. Now that's on eight p-s-i, stock fuel system. That's really good but you can't believe what we have in store for this thing.
[ drill spinning ]
(Mike)>> A smaller pulley will turn the blower faster. That means more boost is produced and directed into the engine. The swap is done by simply removing the belt, unbolting the pulley, and pulling it off the blower shaft. The new pulley is installed the same way the original one was removed.
(Pat)>> For this hit we have really turned up the wick. We have installed a smaller pulley, which will essentially double our boost number from eight p-s-i to 16 p-s-i, but with that we have upgraded the fuel system to twin pumps and return style fuel system with bigger injectors and running real race fuel. So with the tune adjusted we are gonna make a hit to 7,600 and see what happens. [ engine revving ]
(Pat)>> That is absolutely incredible! 938 horsepower at 7,500, 674 pound feet. Now how incredible is it that stock componentry without even taking any bolts out of it and taking any internal components out makes that kind of power?
(Mike)>> Ring gaps, everything.
(Pat)>> Ring gaps, pistons, rods, crankshaft, everything that comes stock from the factory on these things. It makes great power, will hold up at that kind of power level, and probably more.
(Mike)>> It's super impressive, and you've got to think not just the engine but the transmission, the rear axle, the half shafts and everything. Even though we're on the dyno and there's not really a load on the dyno.
(Pat)>> I cannot believe how incredible that is.
(Mike)>> And there's no hick ups. On the dyno the drivability feels awesome. So I can't wait to see what it feels like on the street.
(Pat)>> And even someone with my capabilities can put this on in about five hours.
(Mike)>> Win!
(Narrator)>> Up next the test sled keeps cool and keeps safe with some key components.
(Mike)>> Pat this little car is actually pretty comfortable.
(Pat)>> I am very impressed with it, yes.
(Mike)>> Hey everybody we're back and still in a little bit of shock from the amount of power that Mustang put down back on the dynojet, but now it's time to change direction and move on to a different project. One that Pat and I have been working on for the last couple of months.
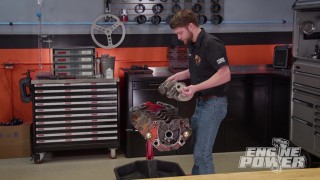
(Pat)>> This is our wild and crazy test sled. Now most of the hard parts are either in for good or mocked for fit, and we still have a bunch of wiring to do but we're not gonna bore you with that. In case you haven't seen the majority of this build here's how we got it to this point.
(Mike)>> Our comrades from Factory Five Racing delivered our new Type 65 Coupe-R chassis right off the race car hauler. It was brought into the shop and we all pitched in to get it assembled. This included the front suspension, steering, rear suspension, and a plethora of panels that make up the driver and passenger seating areas. Wrapping up this part of the build was a front end alignment.
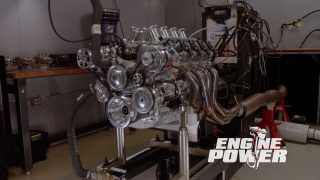
(Pat)>> The next chapter included installing a mock up block and a trick fuel system from Holley. A brushless pump was dropped in to the Mustang tank that is used in these chassis. A trans cooler was bolted in, a digital dash was installed in the center console panel, and the exhaust was custom built by Magnaflow's Richard Waitas. The first engine that is being installed is a 427 cubic inch LME LS Race Crate Extreme. Mike and I got it hooked up on the dyno and bolted up a Precision 86 millimeter gen two turbo and all the piping to and from the engine.
(Mike)>> Turbo guru Kenny Dutweiller joined us for the dyno pulls. On 17 pounds of boost and an intercooler rated to 1,200 horsepower it cranked out 1,210 and 993 pound feet of torque. It was dropped in and a new much larger intercooler from No Corners Cut was installed along with all new hot and cold side piping.
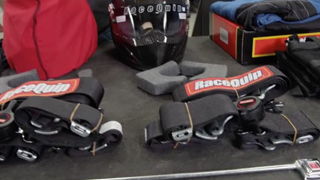
(Pat)>> Today we're gonna install some safety equipment, and that will range from five point harnesses to some roll bar padding. Even DEI heat shielding because that's a must in a project like this. We will also be protecting ourselves with equipment sent from RaceQuip. They sent us some Chevron Five nomax suits, helmets, gloves, shoes, and neck collars, and we will talk more about them when we got to the track, but for now we are going to install their five point camel lock harnesses in the passenger and driver's side of the car. RaceQuip supplies a detailed instruction sheet that shows the correct way to lace the belts. It is extremely critical to follow them, not only for passing tech but one day they could save your life.
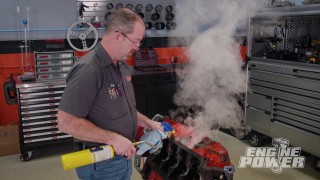
(Mike)>> This is DEI's Reflect-AGold. It's a space age polymer that can withstand direct temperatures up to 850 degrees. It's super lightweight and has an adhesive backing.
Pull up the adhesive backing as you go. Press the shield with the squeegee to ensure good adhesion, and use a razor to cut any excess material.
(Pat)>> Any time that you can maintain a consistent temperature in your turbo's turbine housing you will increase its efficiency and decrease turbo lag, and to do that you'll need one of these DEI turbo shields. This is a custom fit turbo blanket that uses a combination of heat resistant textiles for the ultimate thermal barrier. Strong riveted anchors and safety wire are used to secure the shield. This one is from their Onyx series but is available in titanium and ultra 47 series as well.
(Mike)>> Hitting your head, elbows, or any other part of your body on roll bar tubing does not feel good, and that's whether you're getting in or out of the car. So we picked up some Jazz roll bar padding from Summit Racing. We're gonna put it on the areas of the driver and passenger side that we would hit climbing in or out. It comes with double sided Velcro and zip ties to secure it. Just stick it in place where you want it and tighten down a few zip ties. That's it.
(Pat)>> The last major component to go into this ride is this turbo specific STX series nine and a half inch racing converter from FTI. It's designed for both street and track use. It is available in both weld up and bolt together versions. The STX converter comes with a c-n-c machined billet stator and a mechanical diode one way clutch. It is fully balloon plated as well as furnace braised with heliarc welded fins and extreme duty bearings. FTI offers specifically built converters for all applications like nitrous, blowers, turbos, and obviously naturally aspirated applications in engine, nine, nine and a half, 10, and 10.5 inch versions. If you need any more information on anything you've seen on today's show visit Powernation TV dot com.
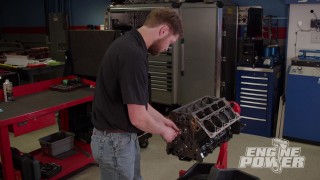
(Mike)>> Today we're going to cover some tech that you'll find at your local circle track. Most classes try to keep a level playing field by setting rules for the amount of cubic inches your engine can have as well as the amount of cranking compression. Basically we're gonna show you how the tech team can measure your engine's cubic inches if you ever end up in the winner's circle or the tech barn for a teardown.
(Pat)>> Rules that specify a cubic inch limit are usually paired with a weight limit as well. Smaller cubes get to take off weight while larger cube engines have to add weight, and typically this is checked after a race. Now instead of having to pull the engine apart and physically measure the bore and stroke, which is hard on a grassroots racer's budget, there is an easier alternative.
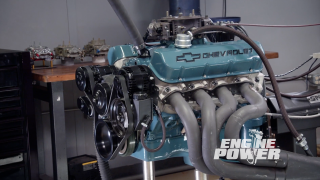
(Mike)>> Appropriately enough it's called a cubic inch tester, and several companies offer them. It comes with an incremented tube, a couple of pistons, a pushrod assembly, a rubber marking ring, a thermometer, a few adapters, and a rubber hose. Now its job is to measure the amount of cylinder volume in a single cylinder as the engine is being cranked over. We're gonna use our trusty little 383 cubic inch small block Chevy.
(Pat)>> The first step is remove one valve cover. Now loosen the intake and exhaust rocker arms on one cylinder.
Then pull the pushrods out along with the spark plug. The reason those components have to be removed for this test is because both valves need to be closed while the engine is turning over. The supplied adapter threads into the spark plug hole. Make sure the O-ring seals on the seat. Now the hose is connected to it. The results of this test are most accurate when the engine is at ambient temperature. Now the engine can still be tested when it's hot but a correction factor must be used depending on the engine's temperature when testing. This kit even comes with a different piston marked with an "X", and this is used during hot weather when the normal piston might stick due to thermal expansion. With the piston all the way down lube the rubber marker ring with light oil and slide it down on top of the piston making sure it's straight. Attach the tester to the hose that is attached to the spark plug adapter.
(Mike)>> With the ignition off we're gonna go ahead and turn the engine over about 10 revolutions. This will cause the piston to move up and down in the actual tube. You ready?
(Pat)>> Go for it! [ engine cranking ]
(Pat)>> Now the number at the bottom of the marker ring indicates the cubic inch displacement of one cylinder, and it reads 47.5. Multiply that number by eight and you get 380 cubic inches, which is three cubic inches short of our actual displacement.
Show Full Transcript
(Pat)>> Welcome to Engine Power's mission control center. Our engine is fired up and we are going through our pre-flight checklist. Engine r-p-m, check. Speedometer, check. We are all systems go on the launch vehicle and our pilot is ready for lift off. Launch in three, two, one! [ engine revving ]
(Pat)>> And here's what we got for results on our box stock pony car at the tire. 400.68 at 6,800 and 365 pound feet of torque at 4,600.
(Mike)>> What you are about to witness is a marvel of technology that shows how precisely engineered parts, the dedication to development, and the ease of installation can turn a high performance factory muscle car into a nine second quarter mile rocket ship and still have wonderful street manners, and even be a daily driver without second though.
(Pat)>> On the launch pad today is a brand new 2019 Mustang GT that is here to celebrate Procharger's 25 years of success. They were the first to have a supercharged 2018 Mustang click off a nine second run in the quarter mile. Today you are going to see why Procharger is the leader in supercharging technology.
(Mike)>> When Pat and I heard about their accomplishments with the 2018 and '19 Mustang platform we had to get one here in the shop. Luckily for us it was just a phone call away, and that Fury orange colored Mustang and a couple of large boxes showed up in our parking lot.
(Pat)>> So if you own a Mustang, and I mean any Mustang from 1964 all the way up to a current 2019, they have a kit for you. And if you drive something else chances are they still have you covered. So whatever you drive stick around because you are going to be super impressed.
(Mike)>> If I said you can bolt on over 300 horsepower without any cutting or other modifications that won't allow you to put the car back to 100 percent stock form you'd say I'm full of it. Today Pat and I will be proving it can be done.
(Pat)>> In order to get to that point we have to get to work. Like usual teardown is necessary to make way for all of the Procharger goodies. Components like the strut tower brace, engine cover, and air box are removed, which clears out a lot of room. From underneath the splash shield is removed, the coolant is drained, and the front tires are removed. We can take out several fasteners that retain the front fascia. With them all out it's removed and set very carefully to the side of the work area.
(Mike)>> Now two shrouds are removed, one on each side of the radiator. There are also two narrow pieces that are removed from the condenser's tanks. A new thermostat housing has to be installed. With the original one out this supplied aluminum one finds its new home. The coolant reservoir is getting evicted as well. There are two different ways to purchase this system depending on what your goals are. The HO and the Stage Two. We are installing the stage two kit that uses a dedicated belt drive versus the h-o, that has a shared belt with the rest of the accessories. The stage two also has a larger intercooler and a higher boost level to make more power. Here's a huge benefit for you guys that are looking for a system that is 50 state legal for emissions purposes. Procharger also offers HO in stage two kits that make the same amount of power, just use a factory air box.
(Pat)>> We opted for the optional POne-X supercharger over the standard POne-SCOne. It has a different shaped housing and a higher efficiency impeller, which produces cooler charge temps, and also reduces parasitic engine loading. Another option we wanted was the helical gear set for quieter, or should I say stealthier, operation at idle and low r-p-m. The POne-X is capable of over 875 horsepower and comes in satin, polished, or a black finish.
(Narrator)>> Up next we get this system installed and get it on the dyno.
(Mike)>> Like we mentioned earlier, the stage two kit uses a dedicated pulley to turn the supercharger, not the factory accessory belt. Now we already installed one since it's so far down in the engine bay and it's hard to get a camera shot. Here's what it looks like. It's an eight rib design that has special standoffs that locate in the factory harmonic balancer. Once the pulley is rotated counterclockwise it locks in place and a supplied balancer bolt is torqued to factory spec.
(Pat)>> In order to install the sub-bracket we have to remove these two timing cover bolts, along with the nut on the alternator stud. Using two supplied fasteners the sub-bracket is installed on the timing cover. A couple more fasteners are pulled out. One is the top timing cover fastener and the other is the top thermostat housing bolt. Now the radiator brackets are pulled off and will not be reused. They are replaced with these new brackets that move the radiator forward to give us the needed clearance for the blower and other components.
(Mike)>> The steel idler pulley was flipped backwards and an idler shaft is installed. It locates the supplied idler pulley and is secured with a longer bolt. Procharger's main bracket can go on now. It uses spacers and the hex standoff to locate. This bracket is super strong and will not flex or distort. It also houses the blower belt tensioner. Once the head unit is filled with six ounces of Procharger oil it's mounted to the bracket.
(Pat)>> Procharger offers superchargers for everything, from power sports all the way up to the massive FThree-X used in pro mod drag racing. This is the FOne-A-94 and this is the DOne-X. Now like the POne-X that's on the car they all share a nine inch housing, which means they all share the same bracketry. Depending on what power level you are looking for or just want to upgrade all you have to do is change the blower. Go to Procharger dot com to find your options and find a dealer near you.
(Mike)>> The A-rib belt is routed from the crank pulley to the supercharger pulley. A half inch drive ratchet is used to rotate the tensioner and make the belt feel at home. With the main wiring harness laid on top of the bumper we are ready to install the intercooler. This is the intercooler that's supplied in the HO kits. It's rated to handle up to 750 horsepower. This much larger intercooler is supplied in the stage two systems and it can handle up to 1,200 horsepower. Now both of these intercoolers are super-efficient in their intended applications. Now in case you want to move up from the HO to the stage two later, or you have a transplant project that you want to use either one of these in, they are both sold separately. Two brackets are used to mount the intercooler. The bracket slides over the bumper to frame bolts on the back side of the bumper and is secured with the nuts from the kit. Before tightening make sure the intercooler is as high and as far forward as possible. The factory mass air flow sensor is placed in the boss of tube number 430 and is tightened down with supplied screws. At this point we are ready to connect the outlet of the blower to the inlet side of the intercooler. A 90 degree elbow is attached to the blower, followed by the tube that houses the race bypass valve. A final coupler attaches it to the intercooler. On the passenger side we have a 90 degree elbow that connects to the intercooler outlet. The next tube is the one we install the mass air meter in. With another 90 degree elbow the connection from it to the throttle body is completed. With the tube removed from the factory vacuum tree we can install the Procharger vacuum manifold. The quarter inch nylon hose runs from the vacuum manifold to the push lock fitting on the race valve.
(Pat)>> Five-eighths inch hose is supplied to route the p-c-v system from the valve covers to the Procharger inlet tube. A plastic inlet tube is installed on the inlet side of the supercharger. It runs through the fender well and a large conical air filter is attached. A supplied coolant reservoir tank is installed in the original one's location on the fan shroud. Once all the hoses are attached fresh coolant refills the system. With it topped off the Procharger tune was loaded into the car and it's heading to the roller for some pulls.
(Narrator)>> Up next the moment of truth for the Mustang. [ engine revving ]
(Pat)>> We are finally to our favorite part of this operation, making some dyno pulls. Our stage two kit has an upgraded POne-X head unit and a larger intercooler. We'll be making some runs to 7,600 still utilizing the Mustang's stock fuel system. So let's see what it does. [ engine revving ]
(Pat)>> How's that for an impressive start. 657 horsepower at 7,400, 493 pound feet at 6,400. Now if you remember our baseline was 400 horse at the wheel. So that's a 257 horse gain at the tire, but more importantly that means the engine is making over 700 horse at the crank. Now that's on eight p-s-i, stock fuel system. That's really good but you can't believe what we have in store for this thing.
[ drill spinning ]
(Mike)>> A smaller pulley will turn the blower faster. That means more boost is produced and directed into the engine. The swap is done by simply removing the belt, unbolting the pulley, and pulling it off the blower shaft. The new pulley is installed the same way the original one was removed.
(Pat)>> For this hit we have really turned up the wick. We have installed a smaller pulley, which will essentially double our boost number from eight p-s-i to 16 p-s-i, but with that we have upgraded the fuel system to twin pumps and return style fuel system with bigger injectors and running real race fuel. So with the tune adjusted we are gonna make a hit to 7,600 and see what happens. [ engine revving ]
(Pat)>> That is absolutely incredible! 938 horsepower at 7,500, 674 pound feet. Now how incredible is it that stock componentry without even taking any bolts out of it and taking any internal components out makes that kind of power?
(Mike)>> Ring gaps, everything.
(Pat)>> Ring gaps, pistons, rods, crankshaft, everything that comes stock from the factory on these things. It makes great power, will hold up at that kind of power level, and probably more.
(Mike)>> It's super impressive, and you've got to think not just the engine but the transmission, the rear axle, the half shafts and everything. Even though we're on the dyno and there's not really a load on the dyno.
(Pat)>> I cannot believe how incredible that is.
(Mike)>> And there's no hick ups. On the dyno the drivability feels awesome. So I can't wait to see what it feels like on the street.
(Pat)>> And even someone with my capabilities can put this on in about five hours.
(Mike)>> Win!
(Narrator)>> Up next the test sled keeps cool and keeps safe with some key components.
(Mike)>> Pat this little car is actually pretty comfortable.
(Pat)>> I am very impressed with it, yes.
(Mike)>> Hey everybody we're back and still in a little bit of shock from the amount of power that Mustang put down back on the dynojet, but now it's time to change direction and move on to a different project. One that Pat and I have been working on for the last couple of months.
(Pat)>> This is our wild and crazy test sled. Now most of the hard parts are either in for good or mocked for fit, and we still have a bunch of wiring to do but we're not gonna bore you with that. In case you haven't seen the majority of this build here's how we got it to this point.
(Mike)>> Our comrades from Factory Five Racing delivered our new Type 65 Coupe-R chassis right off the race car hauler. It was brought into the shop and we all pitched in to get it assembled. This included the front suspension, steering, rear suspension, and a plethora of panels that make up the driver and passenger seating areas. Wrapping up this part of the build was a front end alignment.
(Pat)>> The next chapter included installing a mock up block and a trick fuel system from Holley. A brushless pump was dropped in to the Mustang tank that is used in these chassis. A trans cooler was bolted in, a digital dash was installed in the center console panel, and the exhaust was custom built by Magnaflow's Richard Waitas. The first engine that is being installed is a 427 cubic inch LME LS Race Crate Extreme. Mike and I got it hooked up on the dyno and bolted up a Precision 86 millimeter gen two turbo and all the piping to and from the engine.
(Mike)>> Turbo guru Kenny Dutweiller joined us for the dyno pulls. On 17 pounds of boost and an intercooler rated to 1,200 horsepower it cranked out 1,210 and 993 pound feet of torque. It was dropped in and a new much larger intercooler from No Corners Cut was installed along with all new hot and cold side piping.
(Pat)>> Today we're gonna install some safety equipment, and that will range from five point harnesses to some roll bar padding. Even DEI heat shielding because that's a must in a project like this. We will also be protecting ourselves with equipment sent from RaceQuip. They sent us some Chevron Five nomax suits, helmets, gloves, shoes, and neck collars, and we will talk more about them when we got to the track, but for now we are going to install their five point camel lock harnesses in the passenger and driver's side of the car. RaceQuip supplies a detailed instruction sheet that shows the correct way to lace the belts. It is extremely critical to follow them, not only for passing tech but one day they could save your life.
(Mike)>> This is DEI's Reflect-AGold. It's a space age polymer that can withstand direct temperatures up to 850 degrees. It's super lightweight and has an adhesive backing.
Pull up the adhesive backing as you go. Press the shield with the squeegee to ensure good adhesion, and use a razor to cut any excess material.
(Pat)>> Any time that you can maintain a consistent temperature in your turbo's turbine housing you will increase its efficiency and decrease turbo lag, and to do that you'll need one of these DEI turbo shields. This is a custom fit turbo blanket that uses a combination of heat resistant textiles for the ultimate thermal barrier. Strong riveted anchors and safety wire are used to secure the shield. This one is from their Onyx series but is available in titanium and ultra 47 series as well.
(Mike)>> Hitting your head, elbows, or any other part of your body on roll bar tubing does not feel good, and that's whether you're getting in or out of the car. So we picked up some Jazz roll bar padding from Summit Racing. We're gonna put it on the areas of the driver and passenger side that we would hit climbing in or out. It comes with double sided Velcro and zip ties to secure it. Just stick it in place where you want it and tighten down a few zip ties. That's it.
(Pat)>> The last major component to go into this ride is this turbo specific STX series nine and a half inch racing converter from FTI. It's designed for both street and track use. It is available in both weld up and bolt together versions. The STX converter comes with a c-n-c machined billet stator and a mechanical diode one way clutch. It is fully balloon plated as well as furnace braised with heliarc welded fins and extreme duty bearings. FTI offers specifically built converters for all applications like nitrous, blowers, turbos, and obviously naturally aspirated applications in engine, nine, nine and a half, 10, and 10.5 inch versions. If you need any more information on anything you've seen on today's show visit Powernation TV dot com.
(Mike)>> Today we're going to cover some tech that you'll find at your local circle track. Most classes try to keep a level playing field by setting rules for the amount of cubic inches your engine can have as well as the amount of cranking compression. Basically we're gonna show you how the tech team can measure your engine's cubic inches if you ever end up in the winner's circle or the tech barn for a teardown.
(Pat)>> Rules that specify a cubic inch limit are usually paired with a weight limit as well. Smaller cubes get to take off weight while larger cube engines have to add weight, and typically this is checked after a race. Now instead of having to pull the engine apart and physically measure the bore and stroke, which is hard on a grassroots racer's budget, there is an easier alternative.
(Mike)>> Appropriately enough it's called a cubic inch tester, and several companies offer them. It comes with an incremented tube, a couple of pistons, a pushrod assembly, a rubber marking ring, a thermometer, a few adapters, and a rubber hose. Now its job is to measure the amount of cylinder volume in a single cylinder as the engine is being cranked over. We're gonna use our trusty little 383 cubic inch small block Chevy.
(Pat)>> The first step is remove one valve cover. Now loosen the intake and exhaust rocker arms on one cylinder.
Then pull the pushrods out along with the spark plug. The reason those components have to be removed for this test is because both valves need to be closed while the engine is turning over. The supplied adapter threads into the spark plug hole. Make sure the O-ring seals on the seat. Now the hose is connected to it. The results of this test are most accurate when the engine is at ambient temperature. Now the engine can still be tested when it's hot but a correction factor must be used depending on the engine's temperature when testing. This kit even comes with a different piston marked with an "X", and this is used during hot weather when the normal piston might stick due to thermal expansion. With the piston all the way down lube the rubber marker ring with light oil and slide it down on top of the piston making sure it's straight. Attach the tester to the hose that is attached to the spark plug adapter.
(Mike)>> With the ignition off we're gonna go ahead and turn the engine over about 10 revolutions. This will cause the piston to move up and down in the actual tube. You ready?
(Pat)>> Go for it! [ engine cranking ]
(Pat)>> Now the number at the bottom of the marker ring indicates the cubic inch displacement of one cylinder, and it reads 47.5. Multiply that number by eight and you get 380 cubic inches, which is three cubic inches short of our actual displacement.